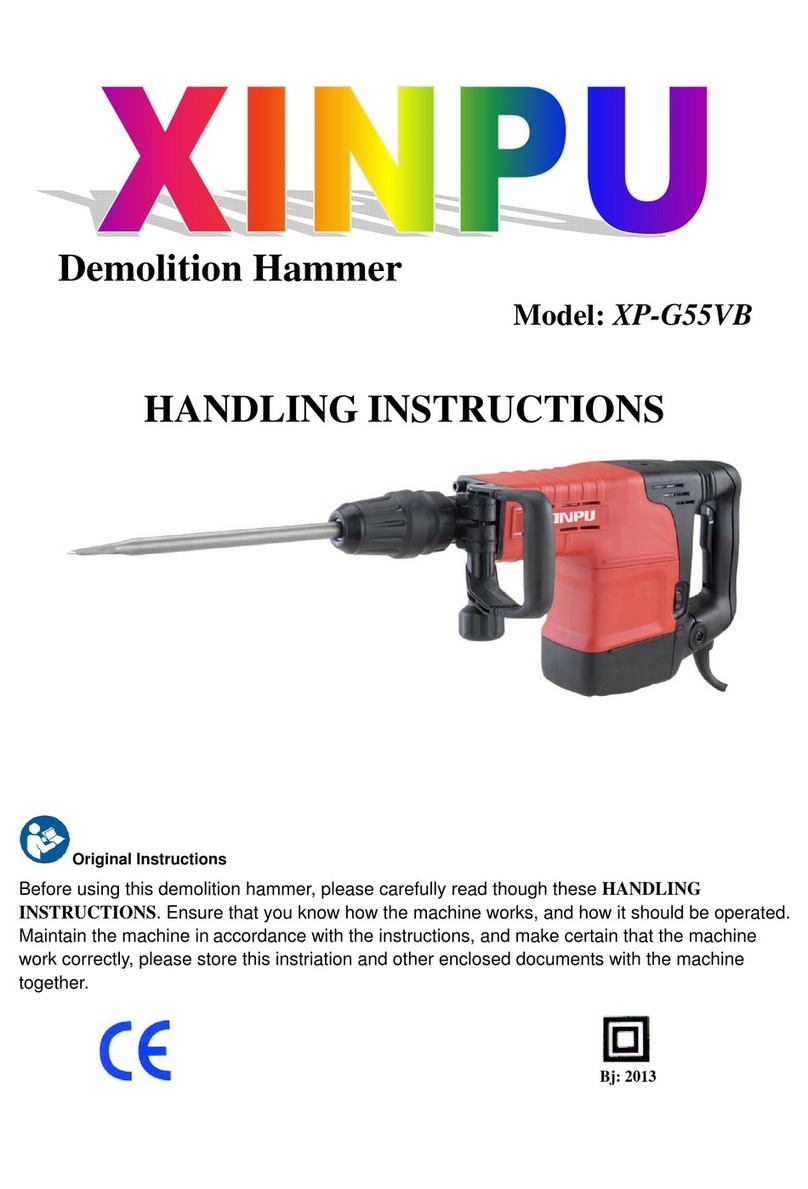
Xinpu XP-G55A User manual

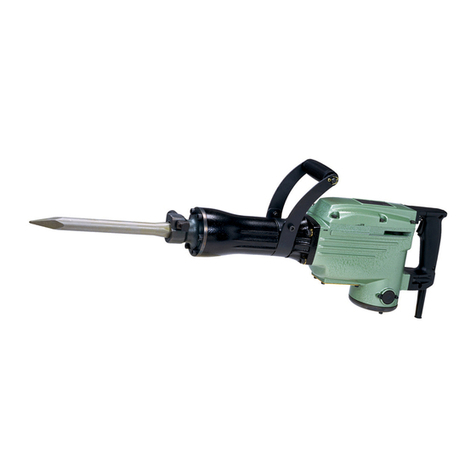
Hammer
Model:XP-G55A
HANDLING INSTRUCTIONS
Before using this XINPU demolition hammer, please carefully read
though these HANDLING INSTRUCTIONS. Ensure that you know how the machine works, and
how it should be operated. Maintain the machine inaccordance with the instructions, and make
certain that the machine work correctly, please store this instriation and other enclosed
documents with the machine together.
Bj: 2013
Zhejiang Xinpu Industrial & Commercial Co., Ltd.
106, No. 330 National Road, Huajie Industrial Zone, Yongkang City, Zhejiang 321300, P. R. China

GENERAL SAFETY RULES
WARNING:
Read all instructions. Failure to follow all instructions listed below, may result in electric shock, fire
and/or serious injury.
The term “power tool” in all of the warnings listed below refers to your mains operated (corded)
power tool or battery operated (cordless) power tool.
SAVE THESE INSTRUCTIONS
1) Work Area Safety
a)Keep work area clean and well lit. Cluttered and dark areas invite accidents.
b)Do not operate power tools in explosive atmospheres, such as in the presence of flammable
liquids, gases or dust. Power tools create sparks which may ignite the dust or fumes.
c) Keep children and bystanders away while operating a power tool. Distractions can cause
you to lose control.
2) Electrical safety
a) Power tool plugs must match the outlet. Never modify the plug in any way. Do not use any
adapter plugs with earthed (grounded) power tools. Unmodified plugs and matching outlets
will reduce risk of electric shock.
b) Avoid body contact with earthed or grounded surfaces such as pipes, radiators, ranges and
refrigerators. There is an increased risk of electric shock if your body is earthed or grounded.
c) Do not expose power tools to rain or wet conditions. Water entering a power tool will increase
the risk of electric shock.
d) Do not abuse the cord. Never use the cord for carrying, pulling or unplugging the power
tool. Keep cord away from heat, oil, sharp edges or moving parts. Damaged or entangled
cords increase the risk of electric shock.
e) When operating a power tool outdoors, use an extension cord suitable for outdoor use. Use
of a cord suitable for outdoor use reduces the risk of electric shock.
3) Personal safety
a) Stay alert, watch what you are doing and use common sense when operating a power tool.
Do not use a power tool while you are tired or under the influence of drugs, alcohol or
medication. A moment of inattention while operating power tools may result in serious personal
injury.

b) Use safety equipment. Always wear eye protection. Safety equipment such as dust mask,
non-skid safety shoes, hard hat, or hearing protection used for appropriate conditions will
reduce personal injuries.
c) Avoid accidental starting. Ensure the switch is in the off position before plugging in.
Carrying power tools with your finger on the switch or plugging in power tools that have the
switch on invites accidents.
d) Remove any adjusting key or wrench before turning the power tool on. A wrench or a key
left attached to a rotating part of the power tool may result in personal injury.
e) Do not overreach. Keep proper footing and balance at all times. This enables better control
of the power tool in unexpected situations.
f) Dress properly. Do not wear loose clothing or jewelry. Keep your hair, clothing and gloves
away from moving parts. Loose clothes, jewelry or long hair can be caught in moving parts.
g) If devices are provided for the connection of dust extraction and collection facilities, ensure
these are connected and properly used. Use of these devices can reduce dust related ha2ards.
4) Power tool use and care
a) Do not force the power tool. Use the correct power tool for your application. The correct power
tool will do the job better and safer at the rate for which it was designed.
b) Do not use the power tool if the switch does not turn it on and off. Any power tool that cannot
be controlled with the switch is dangerous and must be repaired.
c) Disconnect the plug from the power source before making any adjustments, changing
accessories, or storing power tools. Such preventive safety measures reduce the risk of starting the
power tool accidentally.
d) Store idle power tools out of the reach of children and do not allow persons unfamiliar with
the power tool or these instructions to operate the power tool. Power tools are dangerous in the
hands of untrained users.
e) Maintain power tools. Check for misalignment or binding of moving parts, breakage of parts
and any other condition that may affect the power tools operation. If damaged, have the
power tool repaired before use. Many accidents are caused by poorly maintained power tools.
f) Keep cutting tools sharp and clean. Properly maintained cutting tools with sharp cutting edges
are less likely to bind and are easier to control;
g) Use the power tool, accessories and tool bits etc., in accordance with these instructions and in
the manner intended for the particular type of power tool, taking into account the working
conditions and the work to be performed. Use of the power tool for operations different from
intended could result in a hazardous situation.


5) Service
a) Have your power tool serviced by a qualified repair person using only identical replacement
parts. This will ensure that the safety of the power tool is maintained.
Power Tool-specific Safety Rules
When working with the power tool, always hold it firmly with both hands and provide foe a
secure stance. The power tool is guided more secure with both hands.
Secure the workpiece. A workpiece clamped with clamping devices or in a vice is held more
secure than by hand.
Do not work materials containing asbestos. Asbestos is considered carcinogenic.
Take protective measures when dust can develop during working that is harmful to one’s
health, combustible or explosive. Example: Some dusts are regarded as carcinogenic. Wear a
dust mask and work with dust/chip extraction when connectable.
Always wait until the power tool has come to a complete stop before placing it down. The tool
insert can jam and lead to loss of control over the power tool.
Do not use the power tool with a damaged cord. Do not touch the damaged cord and pill the
plug from the outlet when the cord is damaged while working. Damaged cords increase the
risk of an electric shock.
Connect power tools that are used in the open via a Ground Fault Circuit Interrupter
(GFCL).
Ear hearing protection. Exposure to noise can cause hearing loss.
Use the auxiliary handle supplied with the power tool. Loss of control over the power tool can
cause personal injury.
Use suitable detectors to determine of utility lines are hidden in the work area or call the local
utility company for assistance. Contact with electric lines can lead to fire and electric shock.
Damaging a gas line can lead to explosion. Penetrating a water line causes property damage or
may cause an electric shock.
Hold the power tool only by the insulated gripping surfaces when performing an operation
where the cutting tool may contact hidden wiring or its own power cord. Contact with a “live”
wire will also make exposed metal parts of the power tool “live” and shock the operator.

Functional Description
Read all safety warnings and all instructions. Failure to follow the warnings and instructions
may result in electric shock, fire and/or serious injury.
Intended Use
The power tool id intended for chiseling work in concrete, brick, masonry and asphalt as well as for
driving in and compacting, when using the respective accessories.
SPECIFICATIONS
Technical Data
Demolition Hammer XP-G55A
Voltage 220-240V
Frequency 50Hz
Rated power input 1500W
Impact rate bpm
Impact energy per stroke 6-25J
Chisel positions 12
Chiselling capacity in concrete of medium
hardness 490kg/h
Tool holder SDS-max
Lubrication Central permanent
lubrication
Weight 10.4kg
Sound pressure values (in accordance with
2000/14/EC) 101.58dB(A)
Guaranteed Sound power values
(in accordance with 2000/14/EC) 105dB(A)
Vibration Main handle: ah,Cheq :16.978 m/s2 k=1.5m/s2
Auxiliaryhandle:ah,Cheq: 15.940m/s2k=1.5m/s2
Protection class Ⅱ
The values given are valid for nominal voltages [U] of 220-240V. For lower voltages and models for
specific countries, these values can vary.
Hinweis: Die Schall- und Vibrationswerte wurden gemessen gemäß EN 60745-1 und EN 60745-2-6.
Hinweis: Der angegebene Vibrationswert ist nach einem genormten Prüfverfahren ermittelt worden und kann
verwendet werden, um verschiedene Elektrowerkzeuge miteinander zu vergleichen. Zudem eignet sich dieser Wert,
um Belastungen für den Benutzer, die durch Vibrationen entstehen, im Vorhinein einschätzen zu können.
Warnung! Abhängig davon, wie Sie das Elektrowerkzeug einsetzen, können die tatsächlichen
Vibrationswerte von dem angegebenen abweichen.
Ergreifen Sie Maßnahmen, um sich gegen Vibrationsbelastungen zu schützen. Berücksichtigen Sie
dabei den gesamten Arbeitsablauf, also auch Zeitpunkte, zu denen das Elektrowerkzeug ohne Last
arbeitet oder ausgeschaltet ist.

Geeignete Maßnahmen umfassen unter anderem eine regelmäßige Wartung und Pflege des
Elektrowerkzeuges und der Werkzeugaufsätze, Warmhalten der Hände, regelmäßige Pausen sowie
eine gute Planung derArbeitsabläufe.
Standard accessories
Hexagon bar wrench 10mm 1 piece
Amphibious screwdriver 1 piece
One bottle of grease 60g
Bull point chisel(18×400mm) 1 piece
flat chisel(18×400mm) 1 piece
Carbon brush((6.5×17×26)mm) 1 couple
OPTIONALACCESSORIES (sold separately)
1. Tine Chisel : 18*400mm(SDS max )
2. Flat Chisel :18*400mm (SDS max )
3. Big Flat Chisel :18*400mm (SDS max )
4. Goose Chisel :18*400mm (SDS max )
5. Surface Roughing (Hammering)
(1)BushingTool (2)Shank

6. Tamping (Hammering)
(1) Rammer (2) Shank (150 x 150 mm)
Optional accessories are subject to change without notice.
Name of the parts
1. Hammer rod protector
2. Protective lining
3. Move limited sleeve
4. Switch
5. Speed Adjuster Function Knob
6. Indicator
7. Side Handle
8. Function Knob
Assembly
Auxiliary Handle
Operate your power tool only with the Side Handle7.
The Side Handle 7can be set to any position for a secure and low-fatigue working posture.
Loosen the Function Knob 8, rotate the Side Handle 7around the axis of the power tool to the required
position and tighten the Function Knob 8again.
The Side Handle7can be mounted to a different position. For this, completely unscrew the Function Knob
8 and then pull out the hexagon bolt upward. Pull off the Side Handle 7to the side and turn around the
remaining clamping element by 180。Mount the Side Handle 7in reverse order.
Changing the tool
Before any work on the power tool itself, pull the mains plug.
With the SDS-max tool holder. Simpler and easier tool changing is possible without additional aids.
The Hammer rod protector 1 largely prevents the entry of drilling dust into the tool holder during
operation. When inserting the tool, take care that the Hammer rod protector 1 is not damaged.
A damaged Hammer rod protector should be changed immediately. We recommend having this carried
out by an after-sales service.

Inserting(see figure A)
Clean and lightly grease the shank end
of the tool.
Insert the tool in a twisting manner into
the tool holder until it latches itself.
Check the latching by pilling the tool.
Removing (see figure B)
Push back the Protective lining 2and remove
the tool.
Operation
Starting Operation
Observe correct mains voltage! The voltage of the power source must agree with the voltage specified
on the type plate of the power tool.
Switch ON: Push to the top as arrow 1 direction; Push back to max. as
arrow 2 direction(power source on),then push as arrow
1 direction to max.(lock switch).
Switch OFF: When press the switch button again, switch is to off positon.
For low temperatures, the power tool reaches the full impact rate only after a certain
time.This start-up time can be shortened by striking the chisel in the power tool
against the floor one time.
Setting the Impact Rate
The electronic control enables stepless speed press-lection in accordance with the material to be worked.
The constant electronic control keeps the preselected impact rate nearly constant between no-load and
load conditions.
impact rate nearly constant between no-load and load conditions.
Select the impact rate with the Speed Adjuster Function Knob 5according to the material.
The data in the following table are recommended val-use
Dial Control Position 5 Impact Rate (bpm)
1 1030
2 1180
3 1360
4 1540
5 1720
6 1900

Changing the Chiselling Position (Vario-lock)
The chisel can be locked in 12 positions. In this manner, the optimum working position can be set for each
application.
Insert the chisel into the tool holder.
Push the Move limited sleeve 3 forward and turn the chisel to the required position with the Move limited
sleeve 3.
Release the Move limited sleeve 3 and turn the chisel until it latches.
Maintenance and Service
Maintenance and cleaning
Before any work on the power tool itself, pull the mains plug.
For safe and proper working, always keep the power tool and the ventilation slots clean.
A damaged dust protection cap should be changed immediately. We recommend having this carried
out by an after-sales service.
Indicator 6
When the carbon brushes are worn out, the power tool switches itself off. This is indicated approx. 8hours
beforehand by the lighting or blinking of the indicator 6. The power tool must then be sent to an after-sales
service agent. Addresses are listed in the Section “Service and Customer Assistance”.
If the power tool should fail despite the care taken in manufacturing and testing procedures, repair should
be carried out by an after-sales service center for XINPU power tools.
In all correspondence and spare parts orders, please always include the 8-digit article number given on the
type plate of the power tool.


Table of contents
Other Xinpu Power Hammer manuals

Xinpu
Xinpu XP-45HC User manual

Xinpu
Xinpu XP-G65BC User manual

Xinpu
Xinpu XP-G55VA User manual

Xinpu
Xinpu XP-G50VB User manual

Xinpu
Xinpu XP-G65BC-1 User manual

Xinpu
Xinpu XP-G55B User manual

Xinpu
Xinpu XP-G50VA User manual

Xinpu
Xinpu XP-65RA User manual

Xinpu
Xinpu XP-G90B User manual

Xinpu
Xinpu XP-G65BH-1 User manual

Xinpu
Xinpu XP-G55VC User manual

Xinpu
Xinpu XP-65AS User manual

Xinpu
Xinpu XP-45HS User manual

Xinpu
Xinpu XP-65RA-1 User manual

Xinpu
Xinpu XP-45HD User manual

Xinpu
Xinpu XP-65ASB-1 User manual

Xinpu
Xinpu XP-G80BE User manual

Xinpu
Xinpu XP-45HD-1 User manual

Xinpu
Xinpu XP-70AS User manual

Xinpu
Xinpu XP-G80BD User manual