Xinpu XP-G90B User manual

DemolitionHammer
Model: XP-G90B
HANDLING INSTRUCTIONS
Original Instructions
Before using this XINPU demolition hammer, please carefully read though these HANDLING
INSTRUCTIONS. Ensure that you know how the machine works, and how it should be
operated. Maintain the machine in accordance with the instructions, and make certain that the
machine work correctly, please store this instriation and other enclosed documents with the
machine together

2
Application
This hammer should be applied to breaking concrete, chipping off concrete, grooving, bar cutting, and
driving piles in installation of piping and wiring, unitary facility installation, machinery installation water
supply, and drainage work, interior jobs, harbor facilities and other civil engineering work etc..
Contents
1. Machine information
2. Safety instruction
3. Assembly
4. Operation
5. Maintenance
6. Warranty
7. Environment
Technical specifications
Machine Type XP-G90B
Rated Voltage AC 220-240V
Frequency 50Hz
Rated input 2200W
Impact rate 950/min
Weight 32kg
Standard accessories
Hexagon bar wrench 12mm(for M14) 1 piece
Hexagon bar wrench 8mm(for M10) 1 piece
Hexagon bar wrench 6mm(for M8) 1 piece
Hexagon bar wrench 5mm(for M6)
1 piece
Oil tank cover wrench
1 piece
One bottle of grease 60g
Bull point chisel(28*530mm)
1 piece
flat chisel(28*530mm)
1 piece
Carbon brush(6.5*17*18mm) 1 couple
Trolly cart 1 couple
1.
Machine information

3
Optional accessories
(
sold separately
)
Notice: Optional accessories (sold separately) are recommended
only for XINPU tool for
specified purpose in manual, any otherbrand accessories or attachments used may present risk of injury.
1. Bull point Hexagon size28*530 length (Unit:mm)
2. Flat chisel Hexagon size28*530 length (Unit:mm)
3. Cutter Hexagon size28*530 length (Unit:mm)
4. Scoop Hexagon size28*530 length (Unit:mm)
5 .Lubricate oil one bottle(60g)

4
In this operator's manual/or machine’s labels following symbols are used:
Read the manual carefully
Accordance with essential applicable safety of European directives
Double insulation
Denote risk of personal injury, loss of life or damage to the tool in case of nonobservance of the instruction in
this manual.
Indicate electrical shock hazard.
Immediately unplug the plug from the main electricity in the case that the cord gets damage and
during maintenance.
Wear ear and eye protection.
Faulty and /or discarded electrical or electronic apparatus have to be collected at the appropriate
recycling location.
General Power Tool Safety Warnings
WARNING:
Read all safety warnings and all instructions. Failure to follow all warnings and instructions may result
in electric shock, fire and/or serious injury.
Save all warnings and instructions for future reference.
The term “power tool” in the warnings refer to your mains operated (corded) power tool or battery operated
(cordless) power tool.
1) Work area
a)Keep work area clean and well lit. Cluttered and dark areas invite accidents.
b) Do not operate power tools in explosive atmospheres, such as in the presence of flammable
liquids, gases or dust. Power tools create sparks which may ignite the dust or fumes.
c) Keep children and bystanders away while operating a power tool. Distractions can cause you
to lose control.
2. Safety instructions

5
2) Electrical safety
a) Power tool plugs must match the outlet. Never modify the plug in any way. Do not use any
adapter plugs with earthed (grounded) power tools. Unmodified plugs and matching outlets
will reduce risk of electric shock.
b) Avoid body contact with earthed or grounded surfaces such as pipes, radiators, ranges and
refrigerators. There is an increased risk of electric shock if your body is earthed or grounded.
c) Do not expose power tools to rain or wet conditions. Water entering a power tool will increase
the risk of electric shock.
d) Do not abuse the cord. Never use the cord for carrying, pulling or unplugging the power tool.
Keep cord away from heat, oil, sharp edges or moving parts. Damaged or entangled cords
increase the risk of electric shock.
e) When operating a power tool outdoors, use an extension cord suitable for outdoor use. Use
of a cord suitable for outdoor use reduces the risk of electric shock.
f) If operating a power tools in a damp location is unavoidable, use a residual current device
(RCD) protected supply. Use of an RCD reduces the risk of electric shock.
3) Personal safety
a) Stay alert, watch what you are doing and use common sense when operating a power tool.
Do not use a power tool while you are tired or under the influence of drugs, alcohol or
medication. A moment of inattention while operating power tools may result in serious personal
injury.
b) Use safety equipment. Always wear eye protection. Safety equipment such as dust mask,
non-skid safety shoes, hard hat, or hearing protection used for appropriate conditions will reduce
personal injuries.
c) Avoid accidental starting. Ensure the switch is in the off position before plugging in.
Carrying power tools with your finger on the switch or plugging in power tools that have the
switch on invites accidents.
d) Remove any adjusting key or wrench before turning the power tool on. A wrench or a key left
attached to a rotating part of the power tool may result in personal injury.
e) Do not overreach. Keep proper footing and balance at all times. This enables better control of
the power tool in unexpected situations.
f) Dress properly. Do not wear loose clothing or jewellery. Keep your hair, clothing and gloves
away from moving parts. Loose clothes, jewellery or long hair can be caught in moving parts.
g) If devices are provided for the connection of dust extraction and collection facilities, ensure

6
these are connected and properly used. Use of these devices can reduce dust related ha2ards.
4) Power tool use and care
a) Do not force the power tool. Use the correct power tool for your application. The correct power
tool will do the job better and safer at the rate for which it was designed.
b) Do not(use the power tool if the switch does not turn it on and off. Any power tool that cannot be
controlled with the switch is dangerous and must be repaired.
c) Disconnect the plug from the power source before making any adjustments, changing
accessories, or storing power tools. Such preventive safety measures reduce the risk of starting the
power tool accidentally.
d) Store idle power tools out of the reach of children and do not allow persons unfamiliar with
the power tool or these instructions to operate the power tool. Power tools are dangerous in the
hands of untrained users.
e) Maintain power tools. Check for misalignment or binding of moving parts, breakage of parts
and any other condition that may affect the power tools operation. If damaged, have the
power tool repaired before use. Many accidents are caused by poorly maintained power tools.
f) Keep cutting tools sharp and clean. Properly maintained cutting tools with sharp cutting edges
are less likely to bind and are easier to control;
g) Use the power tool, accessories and tool bits etc., in accordance with these instructions and in
the manner intended for the particular type of power tool, taking into account the working
conditions and the work to be performed. Use of the power tool for operations different from
intended could result in a hazardous situation.
5) Service
a) Have your power tool serviced by a qualified repair person using only identical replacement
parts. This will ensure that the safety of the power tool is maintained.
Special Warning for Electric hammer
• Wear ear protection. Exposure to noise can cause hearing loss.
• Use auxiliary handle with the tool. Loss of control can cause personal injury.
• Hold Power tool by insulated gripping surfaces, when performing an operation where the cutting
accessory may contact hidden wiring or its own cord. Cutting accessory contacting a “live” wire
may make exposed metal parts of the power tool “live” and could give the operator an electric shock.
• Wear a dust mask.
Additional safety rules:

7
1. Wear a hard hat (safety helmet), safety glasses and /or face shield. It is also highly recommended that you
wear a dust mask, ear protectors and thickly padded gloves.
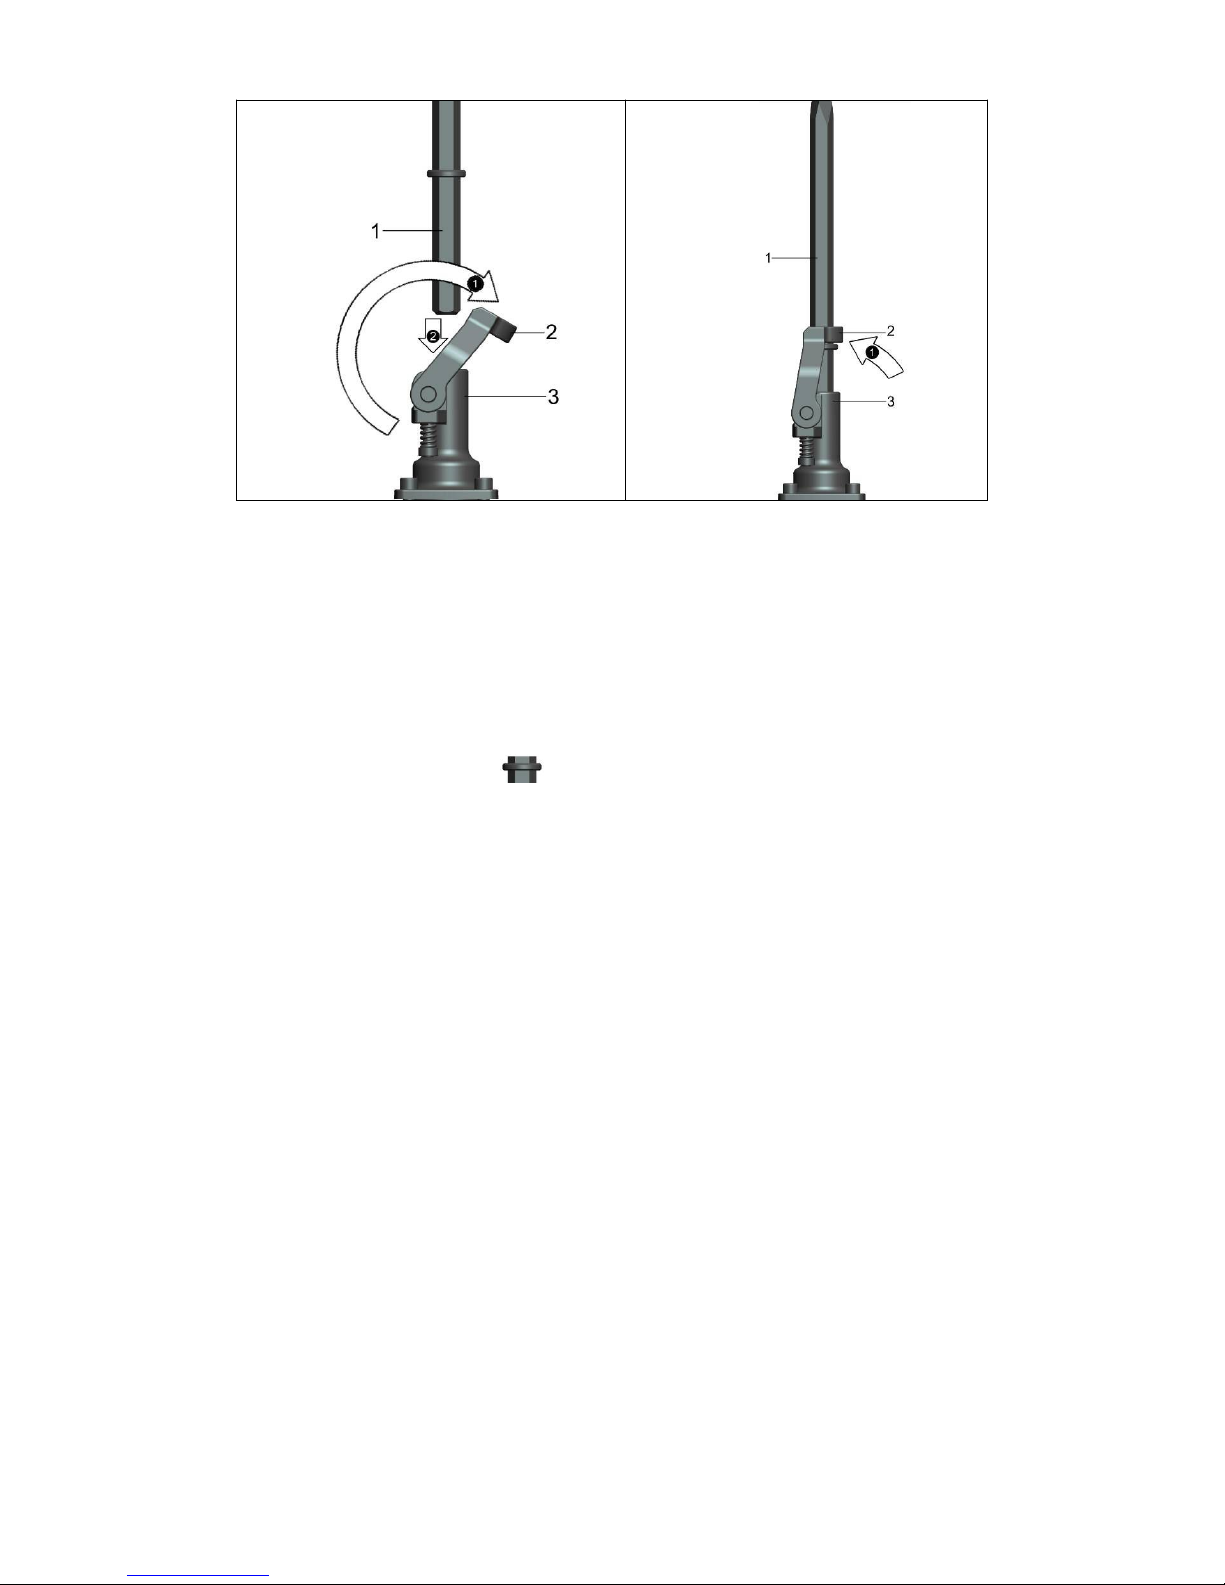
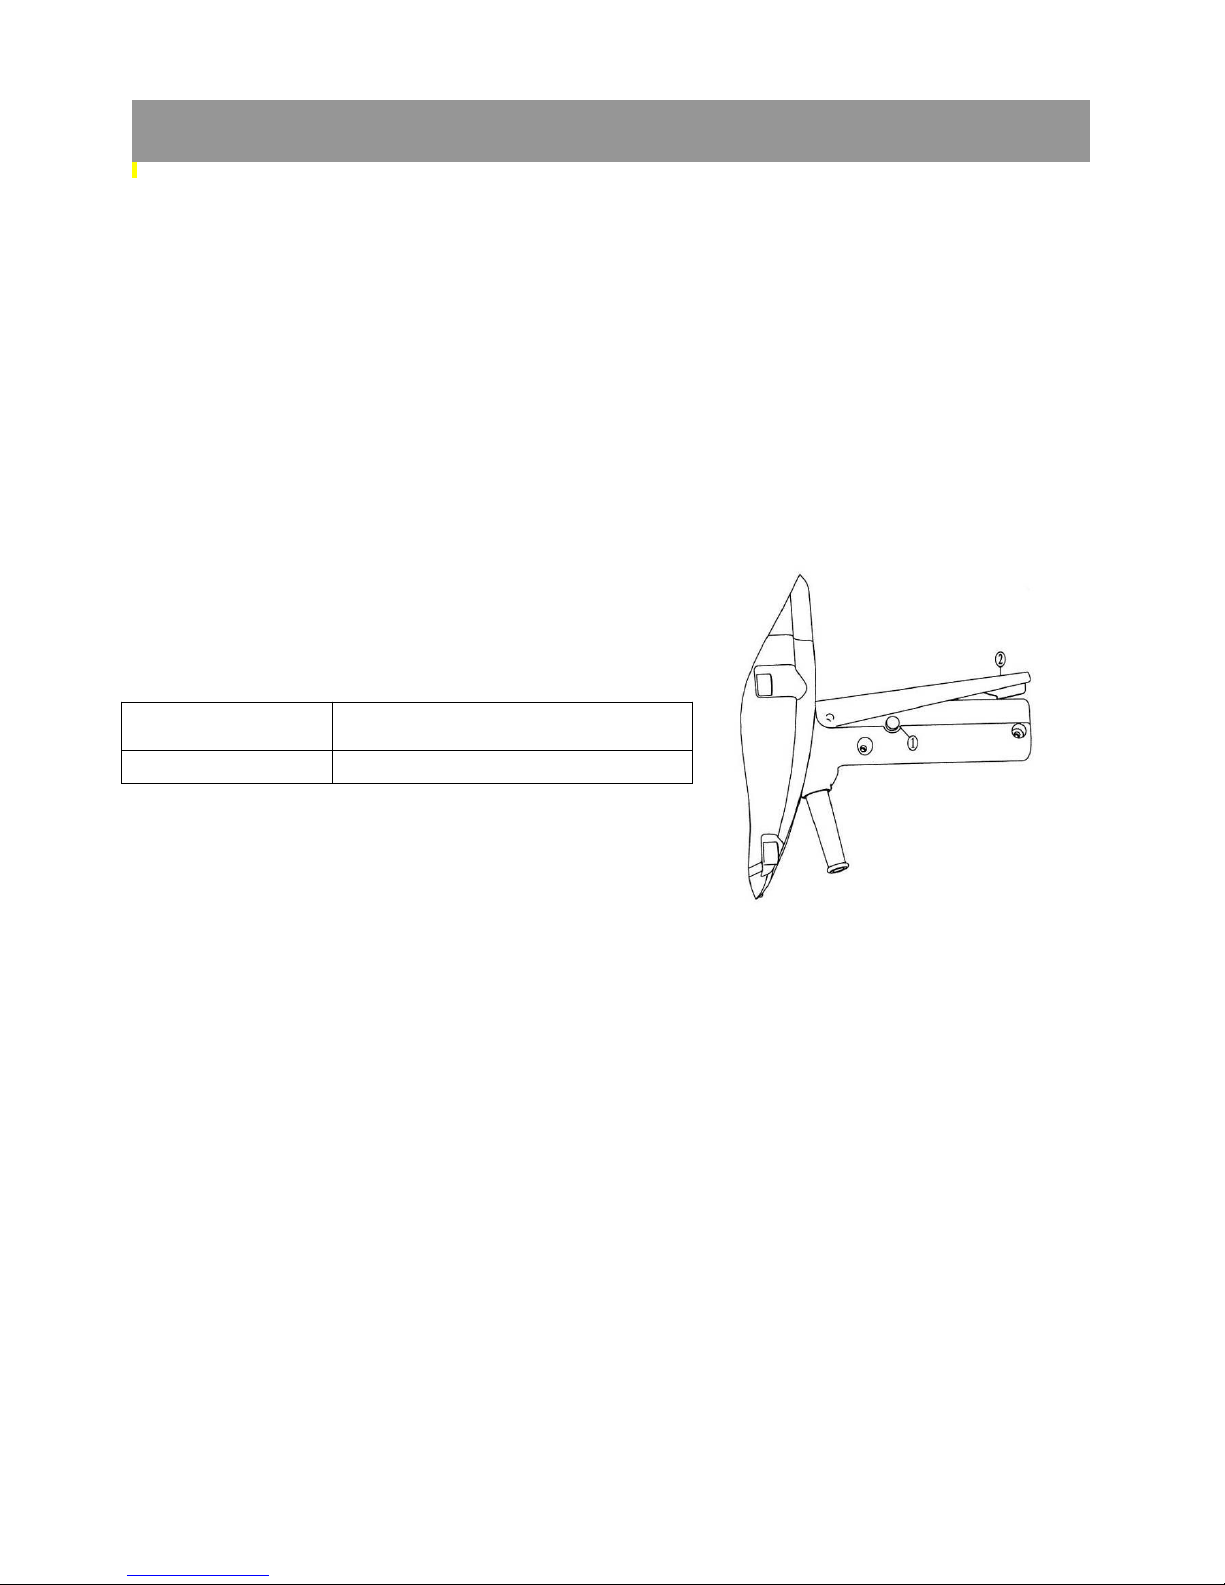
2、Be sure the bit is secured in place before operation.
3. Under normal operation, the machine is designed to produce vibration, the screws and bolts can come
loose, causing a breakdown and accidents. Check tightness of them carefully before running.
4、In cold weather or a long time tool not be used, please keep the tool running without load a few minutes
to warm up the grease inside, otherwise hammering function is difficult to get.
5、Be sure you stand stably and no one is below when you using tool is in high location.
6、Hold the tool firmly with two hands.
7、Don't touch any moving parts.
8、Don't leave the tool running itself, operate tool only when hand-held.
9、Don't point the tool to anybody for the bit could fly out in case.
10、When chipping into walls, floors or wherever "live" electrical wire may be encountered,
DON'T TOUCH ANY METAL PARTS OF THE TOOL! Hold the tool by the insulated grasping
surface to prevent electric shock if you chip into a "live" wire.
11、
Don't touch the BIT OR PARTS CLOSE TO THE BIT immediately after operation, they may extremely
hot and could burn your skin.
12、Any damage and abnormal happen, please stop to use immediately and disconnect it, ask authorized
serve center to check and repair.
13. Parts replace: Only original XINPU's parts can be used to replace by authorized service center.
14. Right use accessories and parts: Don't use other parts and accessories which not mentioned in the
manual otherwise may cause injuries!
15. Special attention to voltage: Before connect the power tool, please make sure the rated voltage on the
tool can match the power supply, otherwise the power tool may be damaged and cause injuries.
16. Don't wipe plastic part with solvent: Solvent such as gasoline, thinner, alcohol etc. these kind of
chemical material, are not allowed to use, water or soap are recommended!
17. In case of damages the replacement of the plug or the supply cord shall always be carried out by the
manufacturer of the tool or his service organization
Residual risks
Even when the power tool is used as prescribed it is not possible to eliminate all residual risk factors.
The following hazards may arise in connection with the power tool’s construction and design:
a) Injuries and damage to property to due to broken accessories that are suddenly dashed.
b) Health defects resulting from vibration emission if the power tool is being used over longer period of
time or not adequately managed and properly maintained.
c) Lung damage if don’t use dusk mask.
d) Hearing damage if don’t use ear protection.
Warning! This power tool produces an electromagnetic field during operation. This field
may under some circumstances interfere with active or passive medical implants. To reduce
the risk of serious or fatal injury, we recommend persons with medical implants to consult
their physician and the medical implant manufacturer before operating this power tool.
3. Assembly

8
Name of the parts
1Bit
2lock
3holder
4Aluminum encloser
5Housing
6Handle
7Switch trigger
8Fan cover
9Side handel
Mounting tool bits
Warning: before do it, make sure unplug the machine!
Fig1
Fig2

9
Clean the shank of bit and put some grease
The assembly of bit without the shoulder(with groove) (see Fig 1 & Fig 2)
Operate the lock part 2to 150 Degree position, insert the bit 1into the holder 3.
Operate the lock part 2 back, pull the bit 1to check if it was locked.
When disassembling, repeat operating lock part 2to 150 Degree as Fig 1, then pull out the bit
from holder 3.
The assembly if bit with shoulder ( see Fig 3 & Fig 4)
The shank length can be 160mm(6 3/8 inch) (Length from shank end to the shoulder)
Operate the lock part 2to 210 Degree position, insert the bit 1into the holder 3.
Operate the lock part 2to180 degree position, can lock the bit. Attention: The shoulder position
should be between lock part 2and holder 3.
Operate the lock part 2 back, pull the bit 1to check if it was locked.
When disassembling, repeat operating lock part 2to 210 Degree as Fig 3, then pull out the bit
from holder 3.
Remarking: When you removing the accessory, such as a bull point, a cutter etc.., follow above
procedure in reverse order.
Fig3
Fig4

10
Prior to operation
1. Power source
Ensure that the power source to be utilized conforms to the power requirements which
specified on the name plate of the hammer.
2. Power switch
Ensure that the power switch is in the position of OFF. If the plug is connected to power
receptacle while the power switch is in ON position, the demolition hammer will start operation
immediately, which can cause serious accident!
3. Side handle
Loosen the Function Knob, rotate the Side Handle around the axis of the power tool to the
required position and tighten the Function Knob again.
Switch operating
Operation
1. Pull the trigger switch after applying the tip of the bit to crushing position. In some cases, it's
necessary to punch the tip of the bit against the crushing position forcibly in order to begin the
striking stroke. This is not due to malfunction of the power tool. It means that the safe guard
mechanism against no-load striking is working.
2. Operate this demolition hammer by utilizing its own weight. The performance will not be better
if it is pressed or thrust forcibly against the work surface. Hold with a force just sufficient to
counteract the reaction.
Note:
Sometimes the power tool does not begin the striking the stroke even the motor keep running,
because oil inside become thick. If the power tool is used at a low temperature, or it is used after
a long idle time, this demolition hammer should be kept running for above 5 minutes to warm up.
Switch on
Press the side-button 1, then press
the Switch trigger 2downward
Switch off Release the Switch trigger 2
4. Operation

11
Warning! Pull plug from power before any operations.
Demolition hammer mechanical part is easy to get worn and lose impact energy if without
enough lubrication, recommend filling grease and oil after 6 months usage. The steps as
follows:
Fig 1 Fig 2 Fig 3
Fig 4 Fig 5 Fig 6
Fig 7 Fig 8
1. Loosen the 4 screws between aluminum head and gear box by 12mm HEX head wrench.(See
Fig1)
2. Disassemble the aluminum head, cylinder and piston.(See Fig2)
3. Clean the inside of aluminum head, must be free of metal chip and granular dust (See Fig3)
4. Clean the piston and cylinder.(See Fig4)
a) Clean the cylinder both inside and outside, especially clean the inside of cylinder, must be
free of metal chip and granular dust. If the conditional, recommend washing by gasoline.
b) Clean the surface of piston. 。
If the conditional, recommend disassembling the O-ring and
washing the piston by gasoline.
c) At the same time, check the wearing condition of O-ring. If the Outside Diameter (O.D.) of
5.
Maintenance

12
O-ring is less than the piston O.D., please replace the O-ring to get proper
performance.(Please contact with our authorized dealer to purchase, the part No 56).
5. Fill the grease into the aluminum head, please make sure cleaned inside before filling.
a) Recommend the grease from manufacturer site, there is a tube of 60g grease included
the case. (Please contact with our authorized dealer to purchase, the part No 108).
Notice:
There are 4 grooves in the aluminum head, Please fill the grease in all these 4 grooves by
15g in each, and total 60g grease. (See Fig 5 and Fig 6)
6. Fill the 15 g oil in the cylinder; please make sure it is clean before filling. (See Fig 7)
7. Assemble back(See Fig 8)
a) Assemble the piston into cylinder, please make sure if the O-ring has been assembled.
b) Assemble the cylinder into aluminum head.
c) Tighten the 4 inner HEX head screws; be careful of no missing spring washer. If tighten
the screws by electrical or pneumatic driver, please check the torque of screw by 12mm
wrench to make sure tightening properly.
d) If the conditional, can put glue on the screw and then screw in(repeat the step above C)
*Suggestion: All above operations to be carried out by our authorized service agent.
Maintenance and inspection
Before do any maintenance, ensure unplug the plug.
1. Inspecting the demolition hammer
Use a dull accessory, such as bull point, cutter, etc., will cause motor malfunction and
efficiency degraded. Replace with a new one when your accessory is abased.
2. Inspecting the mounting screws
Regularly inspect all mounting screws and ensure that they are properly tightened. Any loose
should be tighten immediately, failure to do maybe cause serious hazard.
3. Inspecting the bit retainer
The retainer may become loose due to excessive use. Make sure the bit shank position is
hold securely, if any wear or damage is found, ask the authorized service people to maintenance.
4. Maintenance the motor
The motor is the heart of the machine, please avoid any damage to the winding, or any water
and oil to wet it.
5. Carbon brush replacements
Carbon brush are consumable parts, when it becomes worn or "limit worn" it can cause motor trouble, we
use auto-stop carbon brush, it stoped automatically when carbon brush worn out, at that time, replace a
new couple of them as follwing procedure:

13
1
φ6 plat washer
Hexagon socket Bolt M6X20
2Fan cover
3The cover of carbon bush holder
4Carbon brush
Loosen the four set screws and remove the fan cover. Remove the brush caps and carbon
brushes. After replacing the carbon brushes, tighten the brush caps securely and install the fan
cover with securely tightening four set screws.
Remark: after carbon brush replacement, please make sure all of the screws are tightened
enough!
6. Cleaning
Clean the machine regularly with a soft cloth, preferably after each use. Solvent such as gasoline,
thinner, alcohol etc.. These kind of chemical materials are not allowed to use, water or soap are
recommended!
7. Warranty
For the condition of warranty, please refer to the separately provided warranty card.
Environment
Faulty and /or discarded electrical or electronic apparatus have to be collected at the appropriate
recycling location.

14

15
Table of contents
Other Xinpu Power Hammer manuals

Xinpu
Xinpu XP-G50VA User manual

Xinpu
Xinpu XP-G55A User manual

Xinpu
Xinpu XP-G65BC-1 User manual

Xinpu
Xinpu XP-G55VB User manual

Xinpu
Xinpu XP-65ASB-1 User manual

Xinpu
Xinpu XP-65RA-2 User manual

Xinpu
Xinpu XP-G65BC User manual

Xinpu
Xinpu XP-G80BE User manual

Xinpu
Xinpu XP-65ASB User manual

Xinpu
Xinpu XP-G50VB User manual

Xinpu
Xinpu XP-45HD-1 User manual

Xinpu
Xinpu XP-G90A User manual

Xinpu
Xinpu XP-G65BH-1 User manual

Xinpu
Xinpu XP-G55B User manual

Xinpu
Xinpu XP-G80BD User manual

Xinpu
Xinpu XP-70AS User manual

Xinpu
Xinpu XP-65RA User manual

Xinpu
Xinpu XP-45HS User manual

Xinpu
Xinpu XP-45HC User manual

Xinpu
Xinpu XP-65RA-1 User manual