xLab TORPEDO SYSTEM 50 User manual

TORPEDO SYSTEM 50
AERODYNAMICACCESSORIES
STEP 1 MINI MOUNT AND CAGE ATTACHMENT
1. REMOVING BOTTLE. Hold Mount and twist bottle clockwise, lift nose and pull bottle forward and
out of the cage. Figure (A)
2. POSITIONING CAGE AND MINI MOUNT.Ensure the rear screw is as at the rear of the cage and in the rear of the slot in the Mount Figure (B).
Tighten the screws to 30 in lbs of torque. (3.4 Nm)
.
3. Thread a strap up through the Mount with the logo facing outwards. Pass the strap over the aero bar and
through the buckle and attach loosely. Rotate so buckle is under the aero bar.
4. ATTACHING MOUNT. Lay the Mount onto the aerobars. Position the rear straps as far back on the bars as possible. If any parts of the
mount or screws touch the stem, then add the Velcro Pads to the mount. Thread straps through buckles and tighten. Figure (C)
5. FINAL STRAP TIGHTENING. The non-slip silicone on the straps should be touching the aerobars. Center the Mount and
tighten opposite straps. Then go back and re-tighten all straps to ensure all straps are as tight as you can get them.
Make sure that the reinforced (double thickness) section of the polyester straps are in the slot on the
TORPEDO MINI MOUNT. Figure (D)
Figure (A)
Figure (C)
Figure (B)
Figure (D)
Shows threading of the straps
INTERMEDIATE KIT INSTRUCTIONS
IMPORTANT:
PLEASE COMPLETELY UNDERSTAND ALL USER INSTRUCTIONS AND SAFETY INFORMATION BEFORE USING THIS PRODUCT. AS WITH ANY HIGH TECH PRODUCT YOU WILL NEED
TO ROUTINELY CHECK FOR LOOSE HARDWARE, CRACKS OR OTHER DAMAGE AND REPLACE ITEMS AS NECESSARY. DO NOT USE PRODUCT IF ANY OF THESE CONDITIONS EXIST.
TOOLS REQUIRED:
4mm non-ball ended Allen wrench.
8mm open ended wrench.
Figure (F)
STEP 2 BOTTLE INSTALL
1. EASY INSTALL. Push bottle rearwards, ensuring the rear tab of the cage slides into the rear bottle recess. Next ensure the
rear cage screw head clicks into the long recess on the bottom of the bottle. The rear cage tab should now sit against the
vertical surface inside the back of the bottle. Figure (E)
2. LID INSTALL. The lid has a tether hole. Put the straw through this hole to avoid losing the lid when relling.
3. STRAW INSTALL. Determine which hole is best suited for you. Install the plug in the other hole from the inside of the bottle.
Start the plug at an angle and push up around the perimeter of plug. Ensure the top of the plug is completely through the
hole. The straw is designed to t tightly in the straw hole to prevent leaking. To best insert the straw, pinch and fold the
end of the straw while pushing it into the hole. For the straw to be vertical, tuck the end of the straw behind the groove
in the bottom of the bottle. Figure (F) After each ride, gradually trim the straw to your optimum length.
Figure (E)
C
M
Y
CM
MY
CY
CMY
K

AERODYNAMICACCESSORIES
INTERMEDIATE KIT INSTRUCTIONS
STEP 3 COMPUTER INSTALL (OPTIONAL)
The TORPEDO SYSTEM 50 is designed to be used with or without a computer in front of the
bottle for optimal visibility and functionality. Figure (G) & Figure (H)
1. Mount the (optional) XLAB AERO COMPUTER MOUNT on the nose of the TORPEDO MINI MOUNT with the supplied hardware and instructions.
2. The front edge of the computer should sit slightly behind the rider’s wrist. Slide the mount along the slot on the TORPEDO MINI MOUNT to accomplish
this placement and tighten completely to 30 in. lbs of torque. (3.4 Nm)
STEP 4 BOTTLE CARE
WASH YOUR TORPEDO BOTTLE, STRAW, PLUG AND LID EVERY TIME YOU USE IT AND BEFORE INITIAL FIRST USE.
Dishwasher
1. Remove all accessories from the bottle before washing (straw, plug and lids)
2. Wash in top rack only.
Hand Wash
1. Not necessary to remove accessories when cleaning by hand.
2. Fill bottle with soapy water.
3. Use one hand to cover the holes on top of the bottle.
4. Shake bottle vigorously.
5. Rinse and repeat.
Cleaning Straw: Use long thin brush to clean tube.
WARRANTY
VEE CAGE – Limited 2 Year
MINI MOUNT ALUM – Limited 2 Year
TORPEDO BOTTLE – Limited 2 Year
All Other Parts – Limited 6 Months
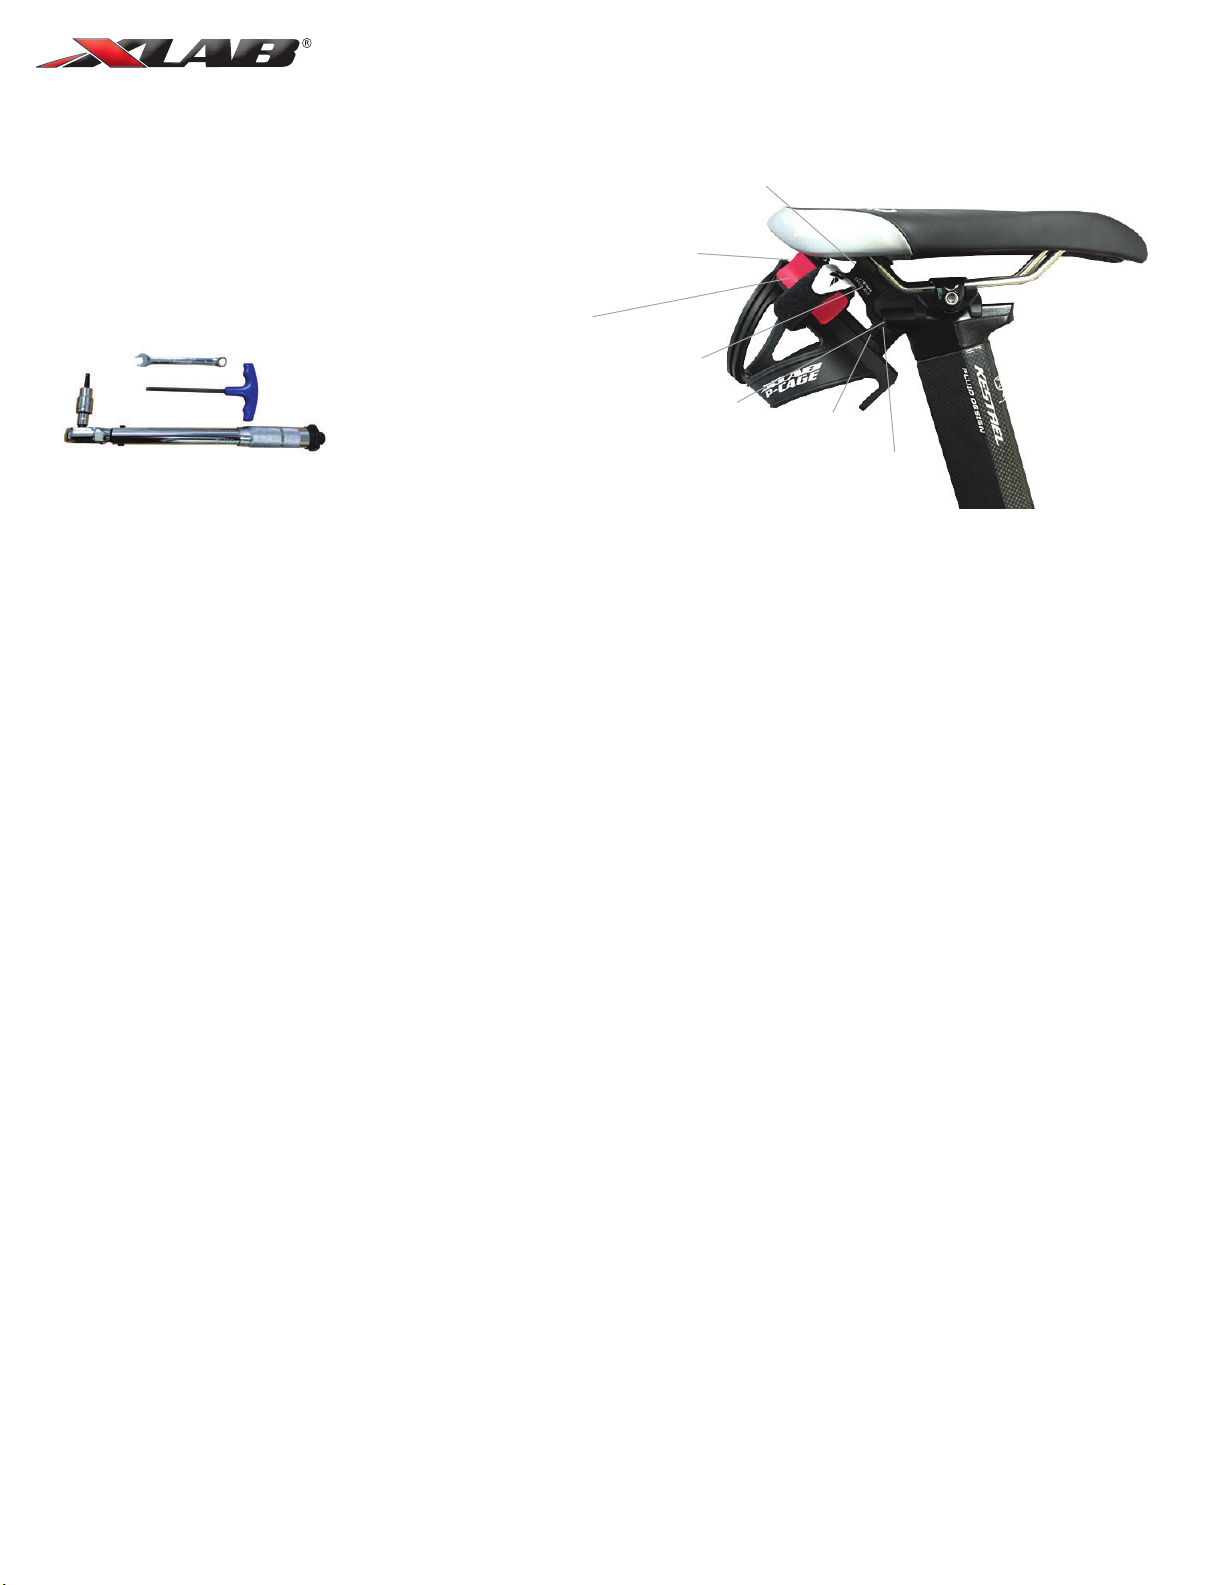
‘With’ Figure (G)
‘Without’ Figure (H)
WARRANTY – Limited 2 Year
STEALTH POCKET 400: HELPFUL TIP WHEN INSTALLING
When tightening the strap around your top tube, make sure you do not tuck excess strap in between the top tube and bag.
Excess strap material underneath the bag will reduce the gripping power of the bag.
NANOFLATOR INSTRUCTIONS
IMPORTANT: Please completely understand all user instructions and safety information before using this product.
1. PREPARE INFLATOR
NOTE: Do not activate a CO2cartridge until ready to use. Threaded CO2cartridges: Thread cartridge into the threaded base of inator until the cartridge just
contacts the puncture pin, then quickly and rmly twist to puncture (activate) the CO2cartridge. Inator is now charged.
2. CONNECT TO TIRE VALVE
IMPORTANT: Presta valve MUST be opened before inating tire. Failure to open valve completely may cause injury or damage to inator.
Presta & Schrader valves: Thread the head of the NANOFLATOR directly onto the tire valve.
3. CONTROLLABLY INFLATE
IMPORTANT: Hold CO2cartridge upright for best results. Twist the black knob counter clockwise to release CO2into the tire. Do not unthread CO until air
has been completely released. CAUTION: CO2cartridge must be completely empty before removal from inator. An activated cartridge removed from an
inator is dangerous! Do not over-inate tire as injury can result. To remove inator, unscrew the head from the tire valve.
CO2CARTRIDGES CAUTION
CONTENTS UNDER PRESSURE. DO NOT PUNCTURE OR HEAT ABOVE 120F / 49C. DO NOT INHALE OR DISCHARGE TOWARDS FACE OR BODY. KEEP CARTRIDGE AND DISPENSER OUT THE REACH OF CHILDREN.
DO NOT LEAVE IN ENCLOSED VEHICLE AS RUPTURE MAY OCCUR DUE TO OVERHEATING AND MAY CAUSE INJURY.
2
C
M
Y
CM
MY
CY
CMY
K

DELTA 100
TOOLS REQUIRED:
4mm Allen wrench.
8mm open ended wrench.
Torque Wrench
3/8” Black spacer
1/4” Black spacer
1/8” Silver spacers
beneath locknuts
15mm Screws with Loctite
30mm Screws
Back plate
AERODYNAMICACCESSORIES
INTERMEDIATE KIT INSTRUCTIONS
NOTE
The P-CAGE & MULTI-STRIKE REPAIR HOLDER come loosely attached to the DELTA Mount with 30mm long screws. This DELTA has a 3/8” black
cylindrical spacer on the bottom screw. The spacers are to ensure that even with long saddles like the ’zi:k that the water bottle will clear the rear of the saddle.
There are also two silver 1/8” spacers beneath the locking nuts, to allow easy access to the nuts with an 8mm wrench. The mount is attached loosely to its backplate
with two 15mm screws with Loctite on the threads that will help prevent the screws loosening once installed on the saddle. Do not fully tighten the cage until the
last step. This will help with installing the mount to the saddle.
INSTALLATION INSTRUCTIONS
1. Unscrew the two 15mm screws from the backplate.
2. Hold the Mount up to the back of the saddle rails and position the backplate inside the rails.
3. Insert the two 15mm screws through the Mount into the backplate. Hand-tighten and then check that the cage is in the position you require. Tighten to 30 in.lbs (3.4 Nm)
of torque. The Loctite on the threads will harden over 24 hours. You can still remove the screws in the future, but Loctite is a one-time use. You can purchase replacement
screws with Loctite on the XLAB web store.
4. Using a 4mm Allen wrench and an 8mm wrench, fully tighten the two 30mm long screws holding the cage to the mount. Tighten to 30 in.lbs (3.4 Nm) of torque.
WARRANTY
DELTA Mount - Limited 2 year
P-CAGE -Limited 2 year
MULTI-STRIKE REPAIR HOLDER - Limited 2 year
MULTI-STRIKE
REPAIR HOLDER
C
M
Y
CM
MY
CY
CMY
K
Table of contents
Other xLab Bicycle Accessories manuals

xLab
xLab Torpedo Kompact User manual

xLab
xLab TORPEDO SYSTEM 100 User manual

xLab
xLab TORPEDO VERSA 200 User manual

xLab
xLab TORPEDO SYSTEM 50 User manual

xLab
xLab TORPEDO KOMPACT 100 User manual

xLab
xLab TORPEDO VERSA 200 User manual

xLab
xLab TORPEDO SYSTEM 400 User manual

xLab
xLab TORPEDO VERSA 500 User manual