manuals.online logo
Brands
  1. Home
  2. •
  3. Brands
  4. •
  5. Xylem
  6. •
  7. Controllers
  8. •
  9. Xylem CentiPro Aquavar IPC User guide

Xylem CentiPro Aquavar IPC User guide

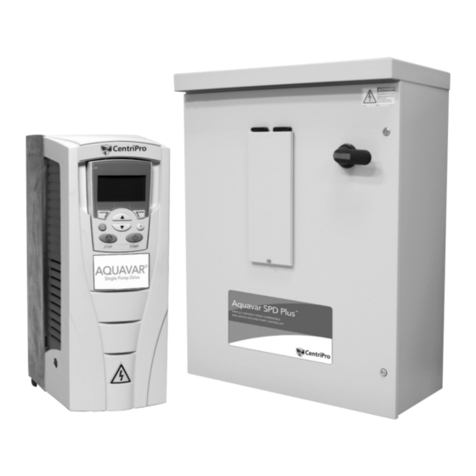
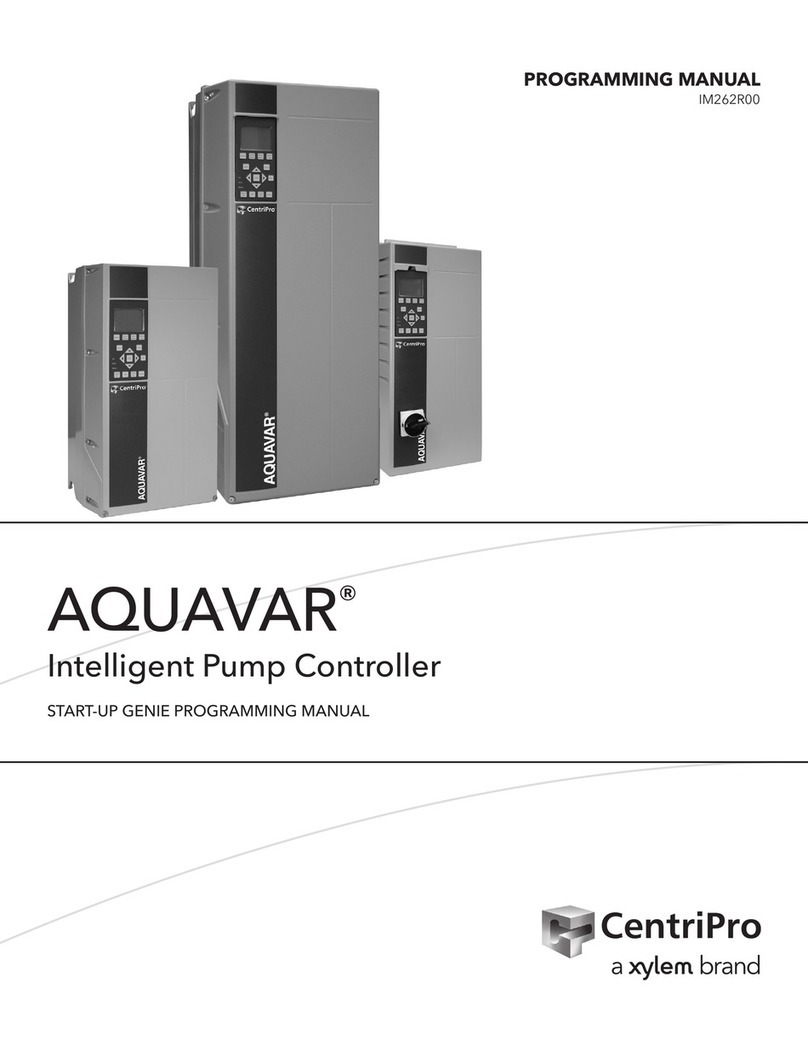
Aquavar® IPC
APPLICATION GUIDE
INSTRUCTION MANUAL
IM298
PAGE 2
Aquavar IPC Start-Up Genie
CentriPro
INDEX
Input and Motor Wiring ……………………………………………………………………… 3
Single Pump Programming and Commissioning ………………………………………… 4
Single Pump Control Wiring ………………………………………………………………… 9
Duplex Programming and Commissioning …………………………………………… 14
Duplex Control Wiring …………………………………………………………………… 17
Performing the No Flow Power Calibration …………………………………………… 19
List of all IPC Genie Parameter Numbers ……………………………………………… 24
Speed Control Setup ……………………………………………………………………… 26
Duplex Troubleshooting Guide ………………………………………………………… 28
IPC Question and Answers ……………………………………………………………… 30
Support Contact Information …………………………………………………………… 36
PAGE 3
Aquavar IPC Start-Up Genie
CentriPro
INPUT (MAINS) WIRING:
Connect 3–phase AC input power wiring to terminals
L1, L2, and L3.
For dedicated single phase input drives:
Connect single phase power wiring to L1 & L2.
Input Terminals
WIRING
OUTPUT WIRING TO MOTORS:
Connect output motor wires to terminal block labeled
U, V, W
Apply power
Ground
1 Phase
Power
Input
91 (L1)
92 (L2)
93 (L3)
95 PE
PAGE 4
Aquavar IPC Start-Up Genie
CentriPro
COMMISSIONING STEPS
PLEASE NOTE: Programming is required BEFORE any control wiring is performed.
1. Power on drives
2. Complete Programming. (Transducer fault will be present as your control wiring is not
installed.) It is OK to continue to program.
3. Power down both drives and then install control wiring. Follow wiring illustration later in this
guide.
Select Quick Menu
Select Parameter 04
“Start-Up Genie”
You are now able to start the Start-Up
Genie
PAGE 5
Aquavar IPC Start-Up Genie
CentriPro
Select English as Language and proceed
with the down arrow
Select YES to run the Start-Up Genie and
proceed with the down arrow
Select Motor from Setup Selection.
Reference motor nameplate.
Select Motor Horsepower
Select Motor Voltage
Select Motor Frequency
Select Motor Nominal Speed
PAGE 6
Aquavar IPC Start-Up Genie
CentriPro
✔Input Motor Current
✔Input Current Limit - SFA/FLA
Example:
SFA is 11.42, FLA is 10.38
Current Limit: 11.42/10.38 = 1.100 %
Carry over the decimal 2 places to the right
to ensure your Current Limit percentage
For Submersible motors we input SFA and
use current limit at 100%
Select Motor Type
Select Sleep Frequency Low Limit
Select Yes to Continue to the Application
Setup
PAGE 7
Aquavar IPC Start-Up Genie
CentriPro
Select either Single Pump or Duplex Control.
Follow the programming for single pump
application below.
Duplex Programming continues on page 13.
Select Constant Pressure for Application type
✔Select PSI for pressure control units
✔Select Ramp Time
Fast: 5 sec accelerate, 3 sec decelerate.
Medium: 10 sec accelerate, 5 sec
decelerate.
Slow: 20 sec accelerate, 10 sec decelerate.
FOR SINGLE PUMP COMMISSIONING
PAGE 8
Aquavar IPC Start-Up Genie
CentriPro
Select Yes to Autoset the rest of the settings.
For Simplex conguration, here are the
parameters that will get autoset:
Autoset Conguration
Constant
Pressure
Transducer Max Feedback 300 [unit]
Transducer Type 4-20mA
Feedback 1 Source AI 53
PID Performance Normal
Sleep Mode Enabled
Sleep Frequency 30 Hz
Restart Difference 5 [unit]
No Water/Loss of Prime Fault Enabled
No Water/Loss of Prime Restart Time 10 min.
Select Setpoint 1
Proceed with the down arrow on the next
two screens as you are verifying that your
Pressure Transducer is a 300 PSI, you are
wired in on Analog Input 53, that your
sleep frequency is 30 Hz, and your restart
difference is 5%, the No Water loss of prime
fault is enabled, and your restart time is 10
Minutes.
Cycle Power Off and prepare control wiring
PAGE 9
Aquavar IPC Start-Up Genie
CentriPro
Install Transducer cable on:
✔Brown on terminal 12 (24V)
✔White on terminal 53 (4-20MA)
✔Place ground shield between spring clip
and shielded cable.
Install Jumper wires on:
✔Terminal 12 and 18
The IPC has been congured to require a
start command on terminal 18. To apply
a start signal connect a jumper wire
between terminals 18 (DI 18, parameter
5-10) and 12 (24V dc). A start command
is given to the controller when terminal
18 is connected to 24V.
✔Terminal 29 and 32
This jumper allows the drive to
automatically restart in the event of a no
water loss of prime.
SINGLE PUMP CONTROL WIRING
PAGE 10
Aquavar IPC Start-Up Genie
CentriPro
✔Check Pump and Motor Rotation by
selecting Hand On. If motor is running
backwards, power down drive, wait ve
minutes, and rotate motor wires from the
drive. Once rotation is veried, select Off.
✔Select Auto On. Verify Unit cycles into
sleep mode at desired PSI.
PAGE 11
Aquavar IPC Start-Up Genie
CentriPro
✔Perform No Flow Power Calibration
✔Select Quick Menu
✔Select 04 Startup Genie
✔Change Setup Selection to Pump
Protection.
PERFORMING THE NO FLOW POWER CALIBRATION:
✔Select Enable for sleep mode.
✔Select 30 Hz for Sleep Frequency,
3 Seconds for Sleep Delay.
PAGE 12
Aquavar IPC Start-Up Genie
CentriPro
✔Select 10% for Restart difference 1.
✔Select 3 Seconds for Minimum Run Time.
10 Seconds for Minimum Sleep Time.
✔Select 0 PSI for Flow Check Window.
✔Select 10 Seconds for Flow Check Low
Time.
PAGE 13
Aquavar IPC Start-Up Genie
CentriPro
✔Select 10 Seconds for Flow Check High
Time.
✔Select Enable for No Flow Power Calibration.
WARNING: The No Flow Power Calibration
Process requires the pump to be operated at
no ow. This can produce high pressure within
the system. Ensure the system piping and
components are designed to withstand the
suction pressure plus shutoff head pressure
produced by the pump prior to starting the
calibration process.
✔Follow all onscreen instructions carefully.
✔Close outlet valve before starting
✔The drive will now run through steps 1-4.
✔Once the calibration is completed, select
OK and the down arrow to proceed.
Run Some Production and verify that the
drive is starting and cycling into sleep or
standby mode.
If you are having difculty, please refer to the
AQIPCQA IPC Troubleshooting guide at the
end of this guide.
PAGE 14
Aquavar IPC Start-Up Genie
CentriPro
Remember we will not install wiring until
programming is completed.
Press Ok to continue your programming
✔Select psi for Pressure control units
✔Select Ramp Time
Fast: 5 sec accelerate, 3 sec decelerate.
Medium: 10 sec accelerate, 5 sec
decelerate.
Slow: 20 sec accelerate, 10 sec decelerate.
DUPLEX PROGRAMMING
PAGE 15
Aquavar IPC Start-Up Genie
CentriPro
DUPLEX PROGRAMMING
Select Yes to Autoset the rest of the settings.
For Duplex conguration here are the
parameters that will get autoset:
Duplex Autoset Conguration Constant Pressure
Transducer Max Feedback 300 [unit]
Transducer Type 4-20mA
Feedback 1 Source AI 53
Sleep Frequency 30 Hz
Restart Difference 5 [unit]
No Water/Loss of Prime Fault Enabled
Duty Standby Disabled
Lag Start Frequency 59 Hz
Lag Stop Frequency 35 Hz
Alternation Enabled
Alternation Time 24 Hrs
Pump Exercise Time 0 s (Disabled)
✔Select Set point PSI
Cycle through these three screens and then
press OK.
You can now power off both drives and
prepare control wiring between the two
drives.
PAGE 16
Aquavar IPC Start-Up Genie
CentriPro
WIRING PREPARATION
Ensure that Start-Up Genie is complete. You can now prepare wiring for:
Jumpers on BOTH drives
Transducers on BOTH drives
Wiring Harness to connect BOTH drives
Duplex cable part # 9K706 (3 ft) or
#9K707 (6 ft)
DIP SWITCH SELECTION
• Simplex: Requires no action. Dipswitch is correct
position for 4-20MA Transducer Feedback.
• Duplex: Requires Analog 54
dipswitch to be moved over on
BOTH drives. To move dip switch
follow these instructions:
1. Remove Keypad
2. Carefully move Dipswitch A54 to the right to the
“I” position on BOTH drives. Please use care and
do not break the switch. Move it until you hear it
click into position.
PAGE 17
Aquavar IPC Start-Up Genie
CentriPro
• Install Jumper to run wire on Terminal #12 and #18 on both drives
• Install Transducer Cable: White on #53, Brown on #12
• Blue: Drive 1 Analog I/O #42 to Drive 2 Analog I/O #54
• Yellow: Drive 1 Analog I/O #54 to Drive 2 Analog I/O #42
• Violet: Drive 1 Digital I/O #13 to Drive 1 Relay 2 #04 (Internal Jumper)
• Red: Drive 1 Digital I/O #27 to Drive 2 Relay 2 #05
• Black: Drive 1 Relay #2 05 to Drive Digital #27
• White: Drive 1 Digital I/O #20 to Drive 2 Digital I/O #20
• Green: Drive 1 Digital I/O #29 to Drive 2 Digital I/O #32
• Brown: Drive 1 Digital I/O #32 to Drive 2 Digital I/O #29
• Orange: Drive 2 Digital I/O #13 to Drive 2 Relay 04 (Internal Jumper)
Drive 1 Drive 2
YELLOW
BROWN
BROWN BLUE WHITE
WHITE
WHITE
GREEN
BROWN
VIOLET
JUMPER TO
RUN JUMPER
TO RUN
BLACK
ORANGE
RED
Analog I/O
39 42 50 53 54 55
COM A OUT +10V A IN A IN COM
Digital I/O
12 13 18 19 27 29 32 33 20
+24V +24V D IN D IN D IN D IN D IN D IN COM
Relay 2
04 05 06
COM NO NC
Relay 2
04 05 06
COM NO NC
Digital I/O
12 13 18 19 27 29 32 33 20
+24V +24V D IN D IN D IN D IN D IN D IN COM
Analog I/O
39 42 50 53 54 55
COM A OUT +10V A IN A IN COM
PAGE 18
Aquavar IPC Start-Up Genie
CentriPro
Apply power to BOTH drives. Press “Auto
On” on both drives.
- Ensure that the Lead Pump is in 1(1) and
the Lag Pump is in 3(3) in upper right
corner
1. Check both Pumps and Motors Rotation by
selecting Hand On.
- CAUTION: If motor is running
backwards, power down drive, wait ve
minutes, and rotate motor wires from
drive.
- Switch any two of the motor wires
labeled U,V, or W.
2. Once rotation is veried, select Off.
3. Select Auto On.
- Verify Unit cycles into sleep mode at
desired PSI.
PAGE 19
Aquavar IPC Start-Up Genie
CentriPro
NO FLOW POWER CALIBRATION
The No Flow Power Calibration Setup
provides the method to program the no ow
power curve in to the controller
- In order to detect a no ow condition for
the various pump(s), the no ow power
curve needs to be programmed in to the
drive
Select Quick Menu
Select 04* Startup Genie
Change Setup Selection to Pump Protection.
Select Enable for sleep mode.
PAGE 20
Aquavar IPC Start-Up Genie
CentriPro
Select 30 Hz for Sleep Frequency, 3 Seconds
for Sleep Delay.
Select 10% for Restart difference 1.
Select 3 Seconds for Minimum Run Time
Select 10 Seconds for Minimum Sleep Time.
Select 0 PSI for Flow Check Window.
Select 10 Seconds for Flow Check Low Time.
NO FLOW POWER CALIBRATION

Other Xylem Controllers manuals

Xylem Flygt ENM 10 Owner's manual

Xylem

Xylem Flygt ENM 10 Owner's manual

Xylem CentriPro PC PLUS User manual

Xylem

Xylem CentriPro PC PLUS User manual

Xylem HYDROVAR HV2.1f User manual

Xylem

Xylem HYDROVAR HV2.1f User manual

Xylem Bell & Gossett Technologic PPS User manual
Xylem

Xylem Bell & Gossett Technologic PPS User manual

Xylem LOWARA QSM User manual

Xylem

Xylem LOWARA QSM User manual

Xylem McDonnell & Miller 150S Series User manual

Xylem

Xylem McDonnell & Miller 150S Series User manual

Xylem optimyze User manual

Xylem

Xylem optimyze User manual

Xylem LOWARA FF128DP Series User manual

Xylem

Xylem LOWARA FF128DP Series User manual

Xylem CentriPro Aquavar Owner's manual

Xylem

Xylem CentriPro Aquavar Owner's manual

Xylem Bell & Gossett Hoffman Specialty 2000 Series User manual

Xylem

Xylem Bell & Gossett Hoffman Specialty 2000 Series User manual

Xylem Aquavar IPC User manual

Xylem

Xylem Aquavar IPC User manual

Xylem Hydrovar HVL 2.015 Troubleshooting guide

Xylem

Xylem Hydrovar HVL 2.015 Troubleshooting guide

Xylem FLOJET 01752 C Series User manual

Xylem

Xylem FLOJET 01752 C Series User manual

Xylem Goulds ResiBoost RB111512 User manual

Xylem

Xylem Goulds ResiBoost RB111512 User manual

Xylem McDonnel & Miller 157S-RBP-MD User manual
Xylem

Xylem McDonnel & Miller 157S-RBP-MD User manual

Xylem McDonnell & Miller 1575 Series User manual

Xylem

Xylem McDonnell & Miller 1575 Series User manual

Xylem CentriPro SPD Plus User manual

Xylem

Xylem CentriPro SPD Plus User manual

Xylem FLYGT SmartRun SRC 311 User manual

Xylem

Xylem FLYGT SmartRun SRC 311 User manual

Xylem Bell & Gossett Hoffman Specialty 1140 Series User manual

Xylem

Xylem Bell & Gossett Hoffman Specialty 1140 Series User manual

Xylem FLYGT SmartRun SRC 311 User manual

Xylem

Xylem FLYGT SmartRun SRC 311 User manual

Xylem Bell & Gossett Zone Trol II Z-1 User manual

Xylem

Xylem Bell & Gossett Zone Trol II Z-1 User manual

Xylem hydrovar User manual

Xylem

Xylem hydrovar User manual
Xylem Bell & Gossett Technologic IPC Troubleshooting guide
Xylem

Xylem Bell & Gossett Technologic IPC Troubleshooting guide

Xylem HYDROVAR HV 2.015 User manual

Xylem

Xylem HYDROVAR HV 2.015 User manual

Popular Controllers manuals by other brands

Jesco TOPAX DX Operation & maintenance instructions

Jesco

Jesco TOPAX DX Operation & maintenance instructions

AMX NXA-WAPZD1000 Operation/reference guide

AMX

AMX NXA-WAPZD1000 Operation/reference guide

Barco ScreenPRO-II user guide

Barco

Barco ScreenPRO-II user guide

Canon imagePRESS C800 Series Technical & service manual

Canon

Canon imagePRESS C800 Series Technical & service manual

EasyPro RGBC2 Instructions for Operation, Safety, Warranty

EasyPro

EasyPro RGBC2 Instructions for Operation, Safety, Warranty

Endress+Hauser RA33 operating instructions

Endress+Hauser

Endress+Hauser RA33 operating instructions

Mitsubishi Electric CR750-D Series instruction manual

Mitsubishi Electric

Mitsubishi Electric CR750-D Series instruction manual

Allen-Bradley PowerFlex Reference manual

Allen-Bradley

Allen-Bradley PowerFlex Reference manual

Pentair raychem ngc-30/uit2 Programming guide

Pentair

Pentair raychem ngc-30/uit2 Programming guide

Auxdio BM828RII user manual

Auxdio

Auxdio BM828RII user manual

Resol DeltaSol BS Plus Manual for the specialised craftsman

Resol

Resol DeltaSol BS Plus Manual for the specialised craftsman

Grundfos LC 115 Series Installation and operating instructions
Grundfos

Grundfos LC 115 Series Installation and operating instructions
Fireye FLAME-MONITOR E110 manual

Fireye

Fireye FLAME-MONITOR E110 manual

Icop VSX-6150E-V2 user manual

Icop

Icop VSX-6150E-V2 user manual

EVZEN ELITE AVENZOR EVZ5 instruction manual

EVZEN

EVZEN ELITE AVENZOR EVZ5 instruction manual

FMS BKS309.MS operating manual

FMS

FMS BKS309.MS operating manual

LETON ESC Classic 50A quick start guide

LETON

LETON ESC Classic 50A quick start guide

Deep Sea Electronics Plc 550 manual

Deep Sea Electronics Plc

Deep Sea Electronics Plc 550 manual

manuals.online logo
manuals.online logoBrands
  • About & Mission
  • Contact us
  • Privacy Policy
  • Terms and Conditions

Copyright 2025 Manuals.Online. All Rights Reserved.