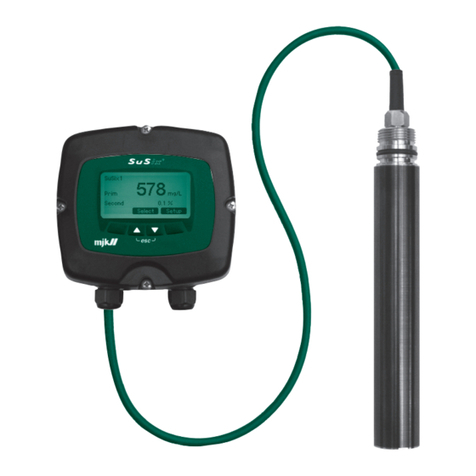
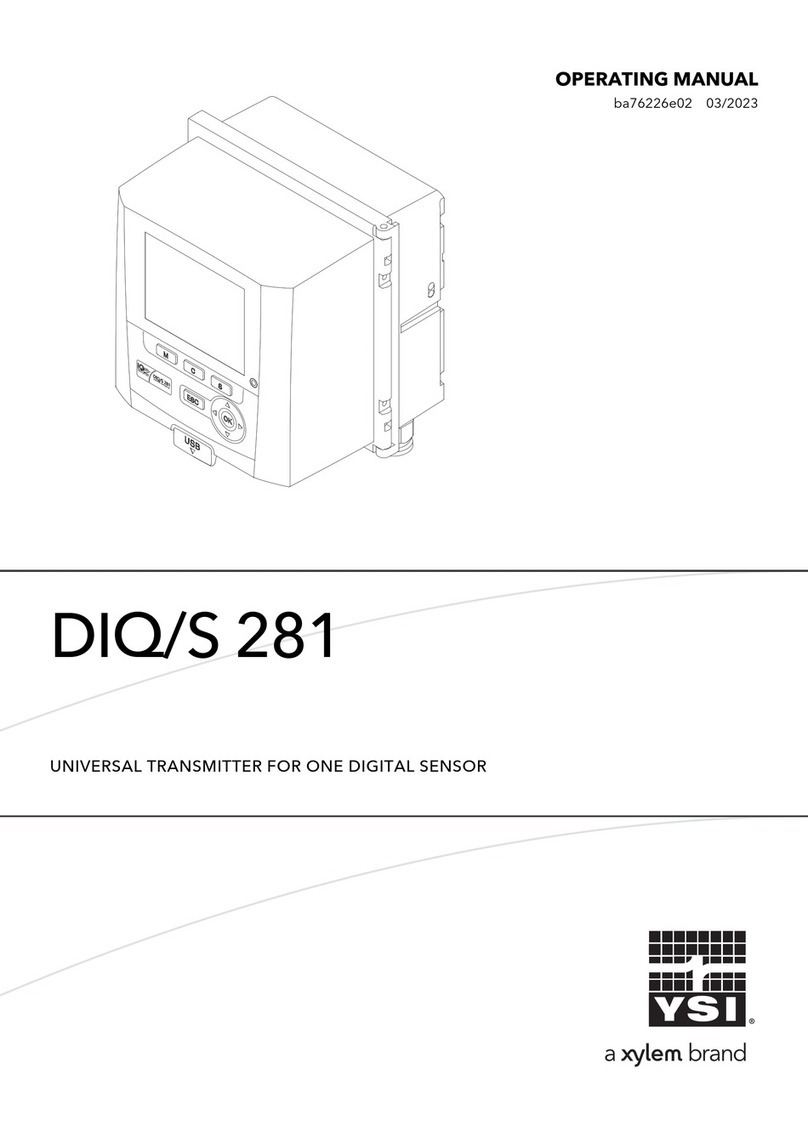
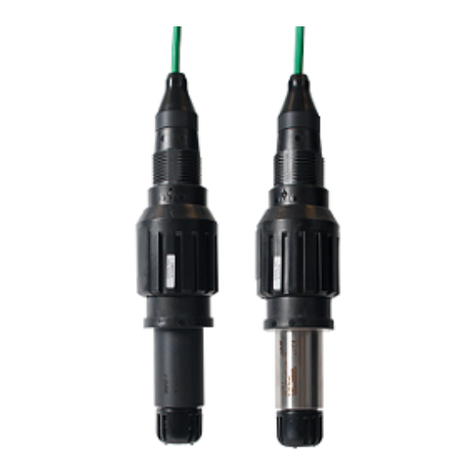
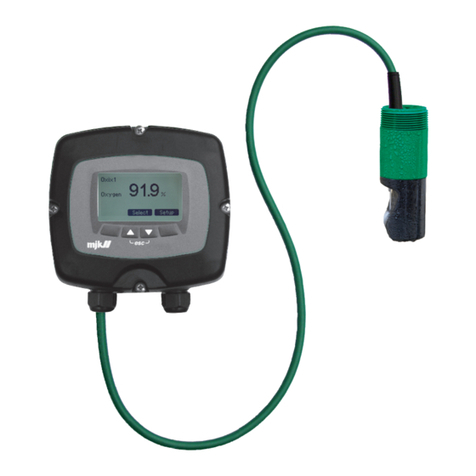
Xylem WTW DIQ/S 281 User manual

OPERATING MANUAL
ba77244e01 08/2020
DIQ/S 281
UNIVERSAL TRANSMITTER FOR ONE DIGITAL SENSOR
UNIVERSALTRANSMITTER
DIQ/S 281

DIQ/S 28X
2ba77244d01 08/2020
Copyright © 2017 Xylem Analytics Germany GmbH
Printed in Germany.

DIQ/S 281 Contents
3
ba77244e01 08/2020
Contents
1 Overview . . . . . . . . . . . . . . . . . . . . . . . . . . . . . . . . . . . . . . . . . . . . . . . . . . . . . . . . . . . . . 7
1.1 Structure and function . . . . . . . . . . . . . . . . . . . . . . . . . . . . . . . . . . . . . . . . . . . . . . . . . . . . . 7
1.2 USB interface . . . . . . . . . . . . . . . . . . . . . . . . . . . . . . . . . . . . . . . . . . . . . . . . . . . . . . . . . . . 8
1.3 Behavior of the system to a power failure . . . . . . . . . . . . . . . . . . . . . . . . . . . . . . . . . . . . . . 9
2 Safety . . . . . . . . . . . . . . . . . . . . . . . . . . . . . . . . . . . . . . . . . . . . . . . . . . . . . . . . . . . . . . . 10
2.1 Safety information . . . . . . . . . . . . . . . . . . . . . . . . . . . . . . . . . . . . . . . . . . . . . . . . . . . . . . . 10
2.1.1 Safety information in the operating manual . . . . . . . . . . . . . . . . . . . . . . . . . . . . . 10
2.1.2 Safety signs on the product . . . . . . . . . . . . . . . . . . . . . . . . . . . . . . . . . . . . . . . . . 10
2.1.3 Further documents providing safety information . . . . . . . . . . . . . . . . . . . . . . . 10
2.2 Safe operation . . . . . . . . . . . . . . . . . . . . . . . . . . . . . . . . . . . . . . . . . . . . . . . . . . . . . . . . . . 11
2.2.1 Authorized use . . . . . . . . . . . . . . . . . . . . . . . . . . . . . . . . . . . . . . . . . . . . . . . . . . . 11
2.2.2 Requirements for safe operation . . . . . . . . . . . . . . . . . . . . . . . . . . . . . . . . . . . . . 11
2.2.3 Unauthorized use . . . . . . . . . . . . . . . . . . . . . . . . . . . . . . . . . . . . . . . . . . . . . . . . . 11
2.3 User qualification . . . . . . . . . . . . . . . . . . . . . . . . . . . . . . . . . . . . . . . . . . . . . . . . . . . . . . . . 11
3 Installation . . . . . . . . . . . . . . . . . . . . . . . . . . . . . . . . . . . . . . . . . . . . . . . . . . . . . . . . . . . 12
3.1 Scopes of delivery . . . . . . . . . . . . . . . . . . . . . . . . . . . . . . . . . . . . . . . . . . . . . . . . . . . . . . . 12
3.2 Basic principles of installation . . . . . . . . . . . . . . . . . . . . . . . . . . . . . . . . . . . . . . . . . . . . . . 12
3.2.1 Requirements of the measurement location . . . . . . . . . . . . . . . . . . . . . . . . . . . . 12
3.3 Safety requirements of the electrical installation . . . . . . . . . . . . . . . . . . . . . . . . . . . . . . . . 12
3.4 Installation guidelines for lightning protection . . . . . . . . . . . . . . . . . . . . . . . . . . . . . . . . . . 13
3.5 Connecting the sensor . . . . . . . . . . . . . . . . . . . . . . . . . . . . . . . . . . . . . . . . . . . . . . . . . . . 15
3.5.1 IQ sensor with SNCIQ cable . . . . . . . . . . . . . . . . . . . . . . . . . . . . . . . . . . . . . . . . 15
3.5.2 IQ sensor with permanently mounted cable . . . . . . . . . . . . . . . . . . . . . . . . . . . . . 17
3.6 On-site mounting of the DIQ/S 28X . . . . . . . . . . . . . . . . . . . . . . . . . . . . . . . . . . . . . . . . . . 19
3.6.1 General information . . . . . . . . . . . . . . . . . . . . . . . . . . . . . . . . . . . . . . . . . . . . . . . 19
3.6.2 Mounting on a mounting stand with the SSH/IQ sun shield . . . . . . . . . . . . . . . . . 20
3.6.3 Mounting under the SD/K 170 sun shield . . . . . . . . . . . . . . . . . . . . . . . . . . . . . . . 22
3.6.4 Top hat rail mounting . . . . . . . . . . . . . . . . . . . . . . . . . . . . . . . . . . . . . . . . . . . . . . 23
3.6.5 Panel mounting . . . . . . . . . . . . . . . . . . . . . . . . . . . . . . . . . . . . . . . . . . . . . . . . . . 24
3.7 Electrical connections: General instructions . . . . . . . . . . . . . . . . . . . . . . . . . . . . . . . . . . . 27
3.8 Connecting the voltage supply . . . . . . . . . . . . . . . . . . . . . . . . . . . . . . . . . . . . . . . . . . . . . 28
3.8.1 DIQ/S 28X-CR2 (mains power version) . . . . . . . . . . . . . . . . . . . . . . . . . . . . . . . . 29
3.8.2 DIQ/S 28X-CR2/24V (24 V version) . . . . . . . . . . . . . . . . . . . . . . . . . . . . . . . . . . . 32
3.9 Connections to the relay and current outputs . . . . . . . . . . . . . . . . . . . . . . . . . . . . . . . . . . 35
3.9.1 General installation instructions . . . . . . . . . . . . . . . . . . . . . . . . . . . . . . . . . . . . . . 35
3.9.2 Usage of the auxiliary voltage . . . . . . . . . . . . . . . . . . . . . . . . . . . . . . . . . . . . . . . 37
3.10 Commissioning . . . . . . . . . . . . . . . . . . . . . . . . . . . . . . . . . . . . . . . . . . . . . . . . . . . . . . . . . 38
3.11 Installation examples . . . . . . . . . . . . . . . . . . . . . . . . . . . . . . . . . . . . . . . . . . . . . . . . . . . . . 40
3.11.1 Connection of a sensor without compressed air cleaning . . . . . . . . . . . . . . . . . . 40

Contents
4ba77244d01 08/2020
3.11.2 Connection of a sensor with compressed air cleaning . . . . . . . . . . . . . . . . . . . . . 41
3.11.3 Connection of a sensor that is located at a distance
(without compressed air cleaning) . . . . . . . . . . . . . . . . . . . . . . . . . . . . . . . . . . . . 43
3.12 Figures of the terminal strips . . . . . . . . . . . . . . . . . . . . . . . . . . . . . . . . . . . . . . . . . . . . . . . 44
4 Operation . . . . . . . . . . . . . . . . . . . . . . . . . . . . . . . . . . . . . . . . . . . . . . . . . . . . . . . . . . . . 45
4.1 Operating elements . . . . . . . . . . . . . . . . . . . . . . . . . . . . . . . . . . . . . . . . . . . . . . . . . . . . . . 45
4.1.1 Overview of the operating elements . . . . . . . . . . . . . . . . . . . . . . . . . . . . . . . . . . . 45
4.1.2 Display . . . . . . . . . . . . . . . . . . . . . . . . . . . . . . . . . . . . . . . . . . . . . . . . . . . . . . . . . 46
4.1.3 Keys . . . . . . . . . . . . . . . . . . . . . . . . . . . . . . . . . . . . . . . . . . . . . . . . . . . . . . . . . . . 48
4.2 General operating principles . . . . . . . . . . . . . . . . . . . . . . . . . . . . . . . . . . . . . . . . . . . . . . . 48
4.2.1 Navigating in menus, lists and tables . . . . . . . . . . . . . . . . . . . . . . . . . . . . . . . . . . 49
4.2.2 Entering texts or numerals . . . . . . . . . . . . . . . . . . . . . . . . . . . . . . . . . . . . . . . . . . 50
4.3 Access to the DIQ/S 28X with active access control . . . . . . . . . . . . . . . . . . . . . . . . . . . . . 52
4.4 Display of current measured values . . . . . . . . . . . . . . . . . . . . . . . . . . . . . . . . . . . . . . . . . 53
4.5 Messages and log book . . . . . . . . . . . . . . . . . . . . . . . . . . . . . . . . . . . . . . . . . . . . . . . . . . . 53
4.5.1 Message types . . . . . . . . . . . . . . . . . . . . . . . . . . . . . . . . . . . . . . . . . . . . . . . . . . . 53
4.5.2 Log book . . . . . . . . . . . . . . . . . . . . . . . . . . . . . . . . . . . . . . . . . . . . . . . . . . . . . . . . 54
4.5.3 Viewing detailed message texts . . . . . . . . . . . . . . . . . . . . . . . . . . . . . . . . . . . . . . 56
4.5.4 Acknowledge all messages . . . . . . . . . . . . . . . . . . . . . . . . . . . . . . . . . . . . . . . . . 57
4.6 Calibration data . . . . . . . . . . . . . . . . . . . . . . . . . . . . . . . . . . . . . . . . . . . . . . . . . . . . . . . . . 58
4.6.1 Calibration entries in the log book . . . . . . . . . . . . . . . . . . . . . . . . . . . . . . . . . . . . 58
4.6.2 Calibration history . . . . . . . . . . . . . . . . . . . . . . . . . . . . . . . . . . . . . . . . . . . . . . . . . 59
4.7 Status info of sensors and outputs . . . . . . . . . . . . . . . . . . . . . . . . . . . . . . . . . . . . . . . . . . 59
4.8 General course when calibrating, cleaning, servicing or repairing an IQ sensor . . . . 60
4.8.1 Maintenance condition of IQ sensors . . . . . . . . . . . . . . . . . . . . . . . . . . . . . . . . . . 61
4.8.2 Switching on the maintenance condition . . . . . . . . . . . . . . . . . . . . . . . . . . . . . . . 62
4.8.3 Switching off the maintenance condition . . . . . . . . . . . . . . . . . . . . . . . . . . . . . . . 63
4.9 USB interface . . . . . . . . . . . . . . . . . . . . . . . . . . . . . . . . . . . . . . . . . . . . . . . . . . . . . . . . . . . 63
4.10 Info on software versions . . . . . . . . . . . . . . . . . . . . . . . . . . . . . . . . . . . . . . . . . . . . . . . . . . 64
4.11 Software-Update for the DIQ/S 281 and sensors . . . . . . . . . . . . . . . . . . . . . . . . . . . . . . . 64
5 Settings/setup . . . . . . . . . . . . . . . . . . . . . . . . . . . . . . . . . . . . . . . . . . . . . . . . . . . . . . . .66
5.1 Selecting the language . . . . . . . . . . . . . . . . . . . . . . . . . . . . . . . . . . . . . . . . . . . . . . . . . . . 66
5.2 Terminal settings of the DIQ/S 28X . . . . . . . . . . . . . . . . . . . . . . . . . . . . . . . . . . . . . . . . . . 66
5.3 Access control . . . . . . . . . . . . . . . . . . . . . . . . . . . . . . . . . . . . . . . . . . . . . . . . . . . . . . . . . . 67
5.3.1 Activating the access control . . . . . . . . . . . . . . . . . . . . . . . . . . . . . . . . . . . . . . . . 68
5.3.2 Activating the instrument block . . . . . . . . . . . . . . . . . . . . . . . . . . . . . . . . . . . . . . . 70
5.3.3 Electronic key . . . . . . . . . . . . . . . . . . . . . . . . . . . . . . . . . . . . . . . . . . . . . . . . . . . . 71
5.3.4 Access to the DIQ/S 28X with active access control . . . . . . . . . . . . . . . . . . . . . . 72
5.4 Settings for sensors . . . . . . . . . . . . . . . . . . . . . . . . . . . . . . . . . . . . . . . . . . . . . . . . . . . . . . 72
5.5 Editing the list of outputs . . . . . . . . . . . . . . . . . . . . . . . . . . . . . . . . . . . . . . . . . . . . . . . . . . 74
5.6 Alarm settings . . . . . . . . . . . . . . . . . . . . . . . . . . . . . . . . . . . . . . . . . . . . . . . . . . . . . . . . . . 75
5.6.1 General information . . . . . . . . . . . . . . . . . . . . . . . . . . . . . . . . . . . . . . . . . . . . . . . 75
5.6.2 Setting up / editing alarms . . . . . . . . . . . . . . . . . . . . . . . . . . . . . . . . . . . . . . . . . . 75
5.6.3 Alarm output to display . . . . . . . . . . . . . . . . . . . . . . . . . . . . . . . . . . . . . . . . . . . . . 78
5.6.4 Alarm output as relay action . . . . . . . . . . . . . . . . . . . . . . . . . . . . . . . . . . . . . . . . . 79

DIQ/S 281 Contents
5
ba77244d01 08/2020
5.7 System settings . . . . . . . . . . . . . . . . . . . . . . . . . . . . . . . . . . . . . . . . . . . . . . . . . . . . . . . . . 79
5.7.1 Setting the date and time . . . . . . . . . . . . . . . . . . . . . . . . . . . . . . . . . . . . . . . . . . . 79
5.7.2 Location altitude / average air pressure . . . . . . . . . . . . . . . . . . . . . . . . . . . . . . . . 80
5.7.3 Function code . . . . . . . . . . . . . . . . . . . . . . . . . . . . . . . . . . . . . . . . . . . . . . . . . . . . 81
6 Outputs . . . . . . . . . . . . . . . . . . . . . . . . . . . . . . . . . . . . . . . . . . . . . . . . . . . . . . . . . . . . . 82
6.1 Outputs of the DIQ/S 281 . . . . . . . . . . . . . . . . . . . . . . . . . . . . . . . . . . . . . . . . . . . . . . . . . 82
6.2 Basic information on relay functions . . . . . . . . . . . . . . . . . . . . . . . . . . . . . . . . . . . . . . . . . 83
6.2.1 Monitoring . . . . . . . . . . . . . . . . . . . . . . . . . . . . . . . . . . . . . . . . . . . . . . . . . . . . . . 83
6.2.2 Limit indicator . . . . . . . . . . . . . . . . . . . . . . . . . . . . . . . . . . . . . . . . . . . . . . . . . . . . 83
6.2.3 Proportional output . . . . . . . . . . . . . . . . . . . . . . . . . . . . . . . . . . . . . . . . . . . . . . . . 84
6.3 Entering / editing the name of an output . . . . . . . . . . . . . . . . . . . . . . . . . . . . . . . . . . . . . . 91
6.4 Linking the output with a sensor . . . . . . . . . . . . . . . . . . . . . . . . . . . . . . . . . . . . . . . . . . . . 92
6.5 Deleting a link with an output . . . . . . . . . . . . . . . . . . . . . . . . . . . . . . . . . . . . . . . . . . . . . . 93
6.6 Setting the relay outputs . . . . . . . . . . . . . . . . . . . . . . . . . . . . . . . . . . . . . . . . . . . . . . . . . . 94
6.6.1 Relay action . . . . . . . . . . . . . . . . . . . . . . . . . . . . . . . . . . . . . . . . . . . . . . . . . . . . . 95
6.6.2 System monitoring . . . . . . . . . . . . . . . . . . . . . . . . . . . . . . . . . . . . . . . . . . . . . . . . 96
6.6.3 Sensor monitoring . . . . . . . . . . . . . . . . . . . . . . . . . . . . . . . . . . . . . . . . . . . . . . . . 97
6.6.4 Limit indicator . . . . . . . . . . . . . . . . . . . . . . . . . . . . . . . . . . . . . . . . . . . . . . . . . . . . 98
6.6.5 Frequency controller . . . . . . . . . . . . . . . . . . . . . . . . . . . . . . . . . . . . . . . . . . . . . . 98
6.6.6 Pulse-width output . . . . . . . . . . . . . . . . . . . . . . . . . . . . . . . . . . . . . . . . . . . . . . . 100
6.6.7 Cleaning . . . . . . . . . . . . . . . . . . . . . . . . . . . . . . . . . . . . . . . . . . . . . . . . . . . . . . . 100
6.6.8 Manual control . . . . . . . . . . . . . . . . . . . . . . . . . . . . . . . . . . . . . . . . . . . . . . . . . . 104
6.6.9 Alarm contact . . . . . . . . . . . . . . . . . . . . . . . . . . . . . . . . . . . . . . . . . . . . . . . . . . . 104
6.7 Setting the current outputs . . . . . . . . . . . . . . . . . . . . . . . . . . . . . . . . . . . . . . . . . . . . . . . 105
6.7.1 Recorder . . . . . . . . . . . . . . . . . . . . . . . . . . . . . . . . . . . . . . . . . . . . . . . . . . . . . . 106
6.7.2 PID controller . . . . . . . . . . . . . . . . . . . . . . . . . . . . . . . . . . . . . . . . . . . . . . . . . . . 107
6.7.3 Fixed current value . . . . . . . . . . . . . . . . . . . . . . . . . . . . . . . . . . . . . . . . . . . . . . . 111
6.8 Checking the condition of the outputs . . . . . . . . . . . . . . . . . . . . . . . . . . . . . . . . . . . . . . . 112
6.9 Behavior of linked outputs . . . . . . . . . . . . . . . . . . . . . . . . . . . . . . . . . . . . . . . . . . . . . . . . 112
6.9.1 Behavior in case of error . . . . . . . . . . . . . . . . . . . . . . . . . . . . . . . . . . . . . . . . . . 112
6.9.2 Behavior in non-operative condition . . . . . . . . . . . . . . . . . . . . . . . . . . . . . . . . . . 113
7 Maintenance and cleaning . . . . . . . . . . . . . . . . . . . . . . . . . . . . . . . . . . . . . . . . . . . . . 114
7.1 Maintenance . . . . . . . . . . . . . . . . . . . . . . . . . . . . . . . . . . . . . . . . . . . . . . . . . . . . . . . . . . 114
7.2 Cleaning . . . . . . . . . . . . . . . . . . . . . . . . . . . . . . . . . . . . . . . . . . . . . . . . . . . . . . . . . . . . . 114
8 What to do if ... . . . . . . . . . . . . . . . . . . . . . . . . . . . . . . . . . . . . . . . . . . . . . . . . . . . . . .115
8.1 Information on errors . . . . . . . . . . . . . . . . . . . . . . . . . . . . . . . . . . . . . . . . . . . . . . . . . . . . 115
8.2 Errors: causes and elimination . . . . . . . . . . . . . . . . . . . . . . . . . . . . . . . . . . . . . . . . . . . . 115
8.3 Replacing system components . . . . . . . . . . . . . . . . . . . . . . . . . . . . . . . . . . . . . . . . . . . . 116
8.3.1 Replacing passive components . . . . . . . . . . . . . . . . . . . . . . . . . . . . . . . . . . . . . 116
8.3.2 Replacing the IQ sensor . . . . . . . . . . . . . . . . . . . . . . . . . . . . . . . . . . . . . . . . . . . 116
9 Technical data . . . . . . . . . . . . . . . . . . . . . . . . . . . . . . . . . . . . . . . . . . . . . . . . . . . . . . . 118
9.1 DIQ/S 281 . . . . . . . . . . . . . . . . . . . . . . . . . . . . . . . . . . . . . . . . . . . . . . . . . . . . . . . . . . . . 118

Contents
6ba77244d01 08/2020
9.2 DIQ/JB . . . . . . . . . . . . . . . . . . . . . . . . . . . . . . . . . . . . . . . . . . . . . . . . . . . . . . . . . . . . . . . 122
9.3 DIQ/CHV . . . . . . . . . . . . . . . . . . . . . . . . . . . . . . . . . . . . . . . . . . . . . . . . . . . . . . . . . . . . . 123
9.4 Space required by mounted components . . . . . . . . . . . . . . . . . . . . . . . . . . . . . . . . . . . . 124
10 Accessories and options . . . . . . . . . . . . . . . . . . . . . . . . . . . . . . . . . . . . . . . . . . . . . . 125
11 Messages . . . . . . . . . . . . . . . . . . . . . . . . . . . . . . . . . . . . . . . . . . . . . . . . . . . . . . . . . . . 126
11.1 Explanation of the message codes . . . . . . . . . . . . . . . . . . . . . . . . . . . . . . . . . . . . . . . . . 126
11.1.1 Error messages . . . . . . . . . . . . . . . . . . . . . . . . . . . . . . . . . . . . . . . . . . . . . . . . . 126
11.1.2 Informative messages . . . . . . . . . . . . . . . . . . . . . . . . . . . . . . . . . . . . . . . . . . . . . 127
12 Index . . . . . . . . . . . . . . . . . . . . . . . . . . . . . . . . . . . . . . . . . . . . . . . . . . . . . . . . . . . . . . . 129

DIQ/S 281 Overview
7
ba77244d01 08/2020
1Overview
1.1 Structure and function
One digital single sensor (one sensor for one main parameter) can be con-
nected to the universal transmitter DIQ/S 28X.
This means one main parameter (e.g. pH, D.O., turbidity value...) and one
secondary parameter in addition (e.g. temperature) can be displayed and
administrated.
Each sensor is automatically recognized after being connected and immediately
starts measuring.
The universal transmitter has two relay outputs and two current outputs to be
connected to existing process control systems.
Branches The DIQ/JB branching module (accessory) is a simple passive module for the
branching or extending of SNCIQ lines.
Relay and current
outputs The relay- and current outputs can be linked with the sensor. Linked outputs can
be used to monitor sensors and for the output of measured values.
A relay output can be programmed as:
Monitoring relay
Limit monitor
Proportional output of measured values (pulse width or frequency output)
Control unit of a sensor cleaning system driven by compressed air.
A current output can be programmed as:
Analog output
PID controller
Compressed air-
driven cleaning
system
The universal transmitter DIQ/S 28X is prepared for the compressed air-driven,
time-controlled sensor cleaning function. For this, a DIQ/CHV valve module and
if necessary a CH cleaning head is required (both available as accessories). The
cleaning procedure is controlled by the Universal Transmitter. The universal
transmitter provides the supply voltage and control relay for the compressed air
valve in the DIQ/CHV valve module. This enables a simple setup and uncompli-
cated wiring.
Suitable sensors for the universal transmitter DIQ/S 28X are listed
in the WTW catalog or on the Internet.

Overview DIQ/S 281
8ba77244d01 08/2020
Example of a
simple system
figure 1-1 Simple systems with one sensor
1.2 USB interface
The USB interface of the DIQ/S 281 provides the following functions:
Connection of a USB memory device to carry out a software update (see
section 4.11)
Connection of a USB memory device to be used as an electronic key for sim-
ple access to the system when access control is switched on (see
section 5.3.3)
Connection of a USB hub for the reproduction of the USB interface.
Note:
The USB interface is designed for USB memorydevices with a maximum power
consumption of 1 watt. USB memory devices with a higher power consumption
have to be supplied with power by an extra power supply. If these instructions
are not complied with, the availability of the system can be adversely affected.
DIQ/JBDIQ/JB
Universal transmitter
DIQ/S 28XCR2
IQ sensor, digital

DIQ/S 281 Overview
9
ba77244d01 08/2020
1.3 Behavior of the system to a power failure
The system configuration is permanently retained. It consists of the following
settings:
– Sensor settings
– Settings and links of the relay outputs
– Settings of the current outputs
– System settings (display language, air pressure/altitude, passwords etc.)
Linked relay outputs switch to the non-active condition (open).
Current outputs switch to the non active-condition (0 mA).
A restart is carried out automatically when the power returns. The continues
working with the settings of the time prior to the power failure.
If the power failure lasted several hours the system clock has to be reset.
The USB interface is equipped with a protective cover.
Only remove the protective cover when you want to connect a USB
device. Immediately close the USB connection again when you
have removed the USB device.
When the USB connection is open, there is a danger of corrosion.

Safety DIQ/S 281
10 ba77244d01 08/2020
2 Safety
2.1 Safety information
2.1.1 Safety information in the operating manual
This operating manual provides important information on the safe operation of
the product. Read this operating manual thoroughly and make yourself familiar
with the product before putting it into operation or working with it. The operating
manual must be kept in the vicinity of the product so you can always find the
information you need.
Important safety instructions are highlighted in this operating manual. They are
indicated by the warning symbol (triangle) in the left column. The signal word
(e.g. "CAUTION") indicates the level of danger:
indicates a situation where goods might be damaged if the actions mentioned
are not taken.
2.1.2 Safety signs on the product
Note all labels, information signs and safety symbols on the product. A warning
symbol (triangle) without text refers to safety information in this operating
manual.
2.1.3 Further documents providing safety information
The following documents provide additional information, which you should
observe for your safety when working with the measuring system:
Operating manuals of other components of the measuring system
Safety datasheets of calibration and maintenance equipment (e.g. cleaning
solutions).
WARNING
indicates a possibly dangerous situation that can lead to seri-
ous (irreversible) injury or death if the safety instruction is not
followed.
CAUTION
indicates a possibly dangerous situation that can lead to slight
(reversible) injury if the safety instruction is not followed.

DIQ/S 281 Safety
11
ba77244d01 08/2020
2.2 Safe operation
2.2.1 Authorized use
The authorized use of the DIQ/S 28X Universal Transmitter consists of its use
in online analysis. Only the operation and running of the sensor according to the
instructions and technical specifications given in this operating manual is autho-
rized (see chapter 9 TECHNICAL DATA). Any other use is considered unautho-
rized.
2.2.2 Requirements for safe operation
Note the following points for safe operation:
The product may only be operated according to the authorized use specified
above.
The product may only be operated under the environmental conditions men-
tioned in this operating manual.
The product may only be supplied with power by the energy sources men-
tioned in this operating manual.
The product may only be opened if this is explicitly described in this operating
manual (example: connecting electrical lines to the terminal strip).
2.2.3 Unauthorized use
The product must not be put into operation if:
it is visibly damaged (e.g. after being transported)
it was stored under adverse conditions for a lengthy period of time (storing
conditions, see chapter 9 TECHNICAL DATA).
2.3 User qualification
Target group The DIQ/S 28X Universal Transmitter was developed for online analysis. Some
maintenance activities, e.g. changing the membrane caps in D.O. sensors,
require the safe handling of chemicals. Thus, we assume that the maintenance
personnel is familiar with the necessary precautions to take when dealing with
chemicals as a result of their professional training and experience.
Special user
qualifications
The following installation activities may only be performed by a qualified electri-
cian:
Connection of the DIQ/S 28X to the power supply.
Connecting external, line voltage-carrying circuits to relay contacts.

Installation DIQ/S 281
12 ba77244d01 08/2020
3 Installation
3.1 Scopes of delivery
The following parts are included in the scope of delivery:
Universal transmitter DIQ/S 28X
Accessory kit with:
– Contact carrier with screws
– ISO cap nuts with screws and ring washers
– Cable glands with sealing gaskets
Operating manual.
3.2 Basic principles of installation
3.2.1 Requirements of the measurement location
The measurement location must meet the environmental conditions specified in
section 9.1 DIQ/S 281.
Controlled
environmental
conditions
Work on the open instrument (e.g. during mounting, installation, maintenance)
may only be carried out under controlled environmental conditions:
3.3 Safety requirements of the electrical installation
Electrical equipment (such as motors, contactors, cables, lines, relays,
switches, instruments) must meet the following requirements:
Compliance with national regulations (e.g. NEC, VDE and IEC)
Suitability for the electrical conditions at the place of installation
– Maximum operational voltage
– Maximum operational current
Suitability for the ambient conditions at the place of installation
– Temperature resistance (minimum and maximum temperature)
– Stability against UV light in the case of outdoor usage
– Protection against water and dust (IP type of protection).
Suitable fuse protection of the electrical circuit
– Overcurrent protection devices
Temperature + 5 °C ... + 40 °C (+ 41 ... +104 °F)
Relative humidity ≤ 80 %

DIQ/S 281 Installation
13
ba77244d01 08/2020
(according to the technical data of the instrument input or output)
– Overvoltage limitations of overvoltage category II
Suitable external separator (e.g. switch or circuit-breaker) for the power sup-
ply of permanently installed instruments with separate power connection
– compliant with the following regulations
- IEC 60947-1
- IEC 60947-3
– in the vicinity of the instruments (recommendation)
Flame resistant (cable and lines),
compliant with the following regulations
– UL 2556 VW-1 (for USA, Canada)
– IEC 60332-1-2 (outside the USA, Canada)
3.4 Installation guidelines for lightning protection
During the use of the DIQ/S 28X universal transmitter, particularly in outdoor
areas, adequate protection against (electrical) surges must be provided. A surge
is a summation phenomenon of surge voltage and surge current. It is generated
through the indirect effect of a lightning event or switching operation in the
mains, in the grounding system and in information technology lines.
To be adequately protected against the damaging effects of surges, an inte-
grated concept of the following protective measures is required:
internal device-related protective measures and
external protective measures of the installation environment.
The internal device-related protective measures are already integrated in the
WTW online instrumentation as so-called 'lightning protection' (see
chapter 9 TECHNICAL DATA).
The external protective measures of the installation environment can be carried
out with respect to the following guidelines:
1 All lines of systems must be
a) installed inside (or else close to) the grounded metallic mounting construc-
tions, e.g. handrails, pipes and posts if possible
b) or, particularly in the case of longer lines, laid in the ground.
Background: The formation of highly lightning hazardous inductive loops be-
tween the cables and ground is avoided through the low clearance of the
grounded metal construction or by installation in the ground.
2 Only IQ cable material may be used. This cable material is an important pre-
requisite for the hazard-free discharging of the surge without inadmissibly
high overvoltages developing along the line at the same time that could have
a damaging effect on the individual components.
3 All metallic mounting constructions (handrails, pipes, posts etc.) on which

Installation DIQ/S 281
14 ba77244d01 08/2020
DIQ modules are installed must be connected to the local potential equaliza-
tion system and the grounding system or must be individually sufficiently
grounded locally according to the codes of practice.
For the individual grounding of the measuring point the mounting construc-
tion must be solidly connected by means of a large-area auxiliary electrode
with the measuring medium.
Metallic control shafts/pipes and other large-area metallic bodies that reach
into the measuring medium are, for example, ideal for use in the grounding
of the mounting construction. This creates a set path for the main surge. As
a result it is possible to avoid the surge being discharged via the cable and
via the valuable sensor in the measuring medium.
4 It is recommended to attach a metallic or nonmetallic sun shield to each out-
side location of the DIQ modules. Sun shields protect the electric field lines
in the area of the DIQ module due to an advantageous development of the
electrical field lines in the area of the MIQ module and promote the dissipa-
tion of the surge via the mounting construction.
5 The line voltage for the supply of the DIQ/S 28X must comply with overvolt-
age category II. Generally this is ensured through the public operator of the
power supply networks. In company-owned networks, e.g. in all power supply
systems owned by wastewater treatment plants, this must be kept separate
by a potential equalization and a surge protection system for the plant.
6 One part of the safety and lightning protection concept is based on the high-
grade protective insulation of the DIQ/S 28X. It does not have or require any
protective ground conductor or earth terminal. Avoid any direct contact of any
SENSOR connections or the metallic sensor enclosures with the local
grounding or potential equalization system and with metallic construction el-
ements (see point 8).
7 Additional external lightning protection measures, e.g. the use of overvoltage
surge arresters, are not necessary for protection against the indirect effects
of lightning and could possibly result in malfunctions.
8 For the realization of the internal lightning protection of the system (e.g.
wastewater treatment plant control stands) and for the protection of external
resources, cable entry points into buildings or distributions coming from the
DIQ/S 28X must be carried out as follows:
– The shield of SNCIQ or SNCIQ-UG cables can be connected to the local
potential equalization with a gas overvoltage arrester. Use shield clamps
for the contacting of the shield. The shield of the cable must not be opened
under any circumstances.
– 0/4-20 mA interfaces must be realized with shielded cables. The cable
shield must be connected directly to the potential equalization(s) provided.
If plant potential equalization systems are provided on both sides, the
shield must also be connected on both sides. The inner conductors must
have no contact with the potential equalization.
– Relay lines should be connected to the local potential equalization in order
to provide general and consistent protection via gas overvoltage surge
arresters.

DIQ/S 281 Installation
15
ba77244d01 08/2020
3.5 Connecting the sensor
The sensor is connected to the SENSORNET connector of the DIQ/S 281.
General
installation
instructions
Lines must always be installed separately at a minimum distance of 20 cm from
other lines that carry a voltage greater than 60 V.
The free end of the sensor cable was stripped in the factory and all the wires are
fitted with wire end sleeves.
Tools Phillips screwdriver
Small screwdriver.
3.5.1 IQ sensor with SNCIQ cable
NOTE
The sensor cable may only be connected to the SENSORNET connector. No
wire of the cable may be connected with an external electrical potential. Other-
wise, malfunctions could occur.
1 On the left-hand side of the DIQ/S 28X, remove the two countersunk
screws and open the enclosure.

Installation DIQ/S 281
16 ba77244d01 08/2020
figure 3-1 Connecting the cable (example DIQ/S 28XCR2)
2 Screw the cable gland (no. 029 212, pos. 1 in figure 3-1) with the sealing
(pos. 2) into the housing at the mounting position for the SENSORNET
connection (see label on the bottom of the housing)
3 Loosen the cap nut (pos. 3 in figure 3-1).
4 Feed the sensor cable through the cable gland into the enclosure.
SENSORNET
SACIQSNCIQ
SNCIQ/UG
1
3
2X3 X2 X1
SENSORNET 1
RED
ROT
SHIELD
SCHIRM
GREEN
GRÜN

DIQ/S 281 Installation
17
ba77244d01 08/2020
figure 3-2 SENSORNET connector (example DIQ/S 28X CR2)
3.5.2 IQ sensor with permanently mounted cable
NOTE
The sensor cable may only be connected to the SENSORNET connector. No
wire of the cable may be connected with an external electrical potential. Other-
wise, malfunctions could occur.
5 Connect the cable ends to the terminal strip. At the same time, look out
for the designations of the terminals (red / shield / green).
6 Tighten the cap nut (pos. 3 in figure 3-1).
7 Close the enclosure.
The complete assignment of the terminal strip is shown in
section 3.12.
For further instructions on the mounting of the sensor at the applica-
tion location, please refer to the relevant manual (immersion depth,
etc.).
1 On the left-hand side of the DIQ/S 28X, remove the two countersunk
screws and open the enclosure.
Sensor
X3 X2 X1
SENSORNET
RED
ROT
SHIELD
SCHIRM
GREEN
GRÜN
red green
black

Installation DIQ/S 281
18 ba77244d01 08/2020
figure 3-3 Connecting the cable (example DIQ/S 28XCR2)
2 Screw the cable gland (no. 029 212, pos. 1 in figure 3-1) with the sealing
(pos. 2) into the housing at the mounting position for the SENSORNET
connection (see label on the bottom of the housing)
3 Loosen the cap nut (pos. 3 in figure 3-1).
4 Feed the sensor cable through the cable gland into the enclosure.
SENSORNET
1
3
2X3 X2 X1
SENSORNET 1
RED
ROT
SHIELD
SCHIRM
GREEN
GRÜN
Sensor

DIQ/S 281 Installation
19
ba77244d01 08/2020
figure 3-4 SENSORNET connection
3.6 On-site mounting of the DIQ/S 28X
3.6.1 General information
The universal transmitter DIQ/S 28X is designed for stationary installation. With
the aid of mounting accessories, the setup can be adjusted to meet various
requirements.
Components installed outside must always be protected by a sun shield against
the effects of the weather (snow, ice and direct solar radiation). Otherwise, mal-
5 Connect the cable ends to the terminal strip. When doing so, look out
for the designations of the terminals (white & brown / shield / green).
6 Tighten the cap nut (pos. 3 in figure 3-1).
7 Close the enclosure.
The complete assignment of the terminal strip is shown in
section 3.12.
For further instructions on the mounting of the sensor at the applica-
tion location, please refer to the relevant manual (immersion depth,
etc.).
Sensor
X3 X2 X1
SENSORNET
RED
ROT
SHIELD
SCHIRM
GREEN
GRÜN
red green
black

Installation DIQ/S 281
20 ba77244d01 08/2020
functions can result. Always mount the universal transmitter in an upright posi-
tion. Do not under any circumstances install the universal transmitter without
rain protection with the lid facing upwards (danger of retained humidity and pen-
etration of moisture).
No contact base may be mounted on the back of the module (danger of short-
circuit!) if the module is mounted on a wall, a sun shield, or a top hat rail.
Installation
options
The most important types of installation for the universal transmitter are
described in the following chapters:
Mounting with sun shield SSH/IQ:
(see section 3.6.2).
Mounting to the sun shield SD/K 170
The sun shield SD/K 170 provides room for the universal transmitter. The sun
shield can be mounted to round or square section pipes (e.g. rails) with the
aid of the MR/SD 170 mounting kit (section 3.6.3).
Wall mounting:
The universal transmitter is permanently fixed to a wall. For wall mounting,
use the WMS/IQ mounting set (see chapter 10 ACCESSORIES AND OPTIONS).
Panel mounting:
The universal transmitter is mounted in the aperture of a switch panel. The
dimensions of the aperture are 138 mm x 138 mm. The panel may not be
thicker than 10 mm (section 3.6.5).
Top hat rail mounting:
The universal transmitter is mounted on a 35 mm top hat rail with the aid of a
bracket, e.g. in a control cabinet. The connection can be released again with
one simple movement (section 3.6.4).
The following chapters describe the mounting of the universal transmitter.
3.6.2 Mounting on a mounting stand with the SSH/IQ sun shield
Materials and tools
required
SSH/IQ sun shield (see chapter 10 ACCESSORIES AND OPTIONS).
4 mm set screw wrench
Phillips screwdriver.
Table of contents
Other Xylem Transmitter manuals
Popular Transmitter manuals by other brands

Dejero
Dejero EnGo 3x manual

HLLY Electronics
HLLY Electronics HLLY TX-01S instruction manual

RKI Instruments
RKI Instruments 65-2397SS Operator's manual

Teledyne Analytical Instruments
Teledyne Analytical Instruments LXT-380 instructions

Lectrosonics
Lectrosonics UM250C Operating instructions and troubleshooting guide

Lunasea
Lunasea LLB-45RE-91-K1 Technical data