Yale UNOplus Operating instructions

COLUMBUS McKINNON Industrial Products GmbH
Postfach 10 13 24 •D-42513 Velbert, Germany
Am Lindenkamp 31 •D-42549 Velbert, Germany
Phone +49 (0) 20 51/600-0 •Fax +49 (0) 20 51/600-127
Ident.-No.: 09901114 /10.2012
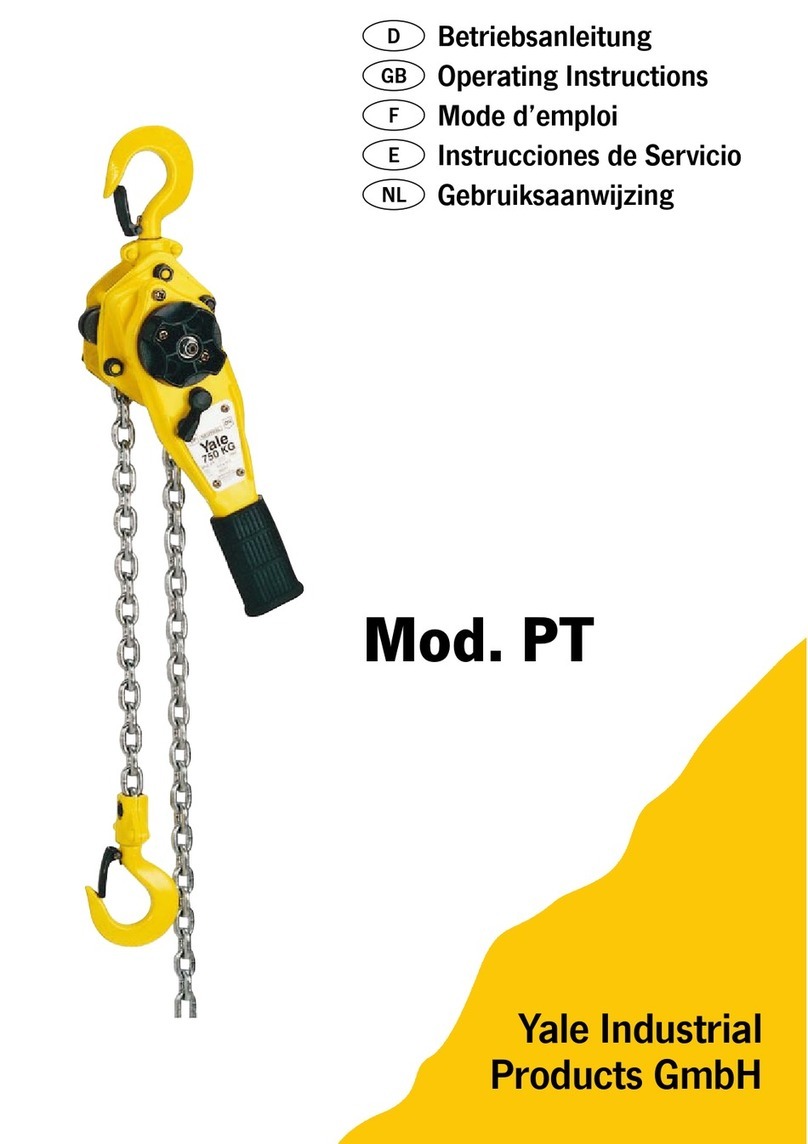
Allzweckgerät
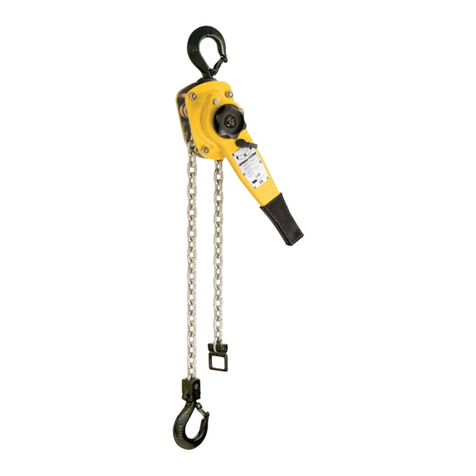
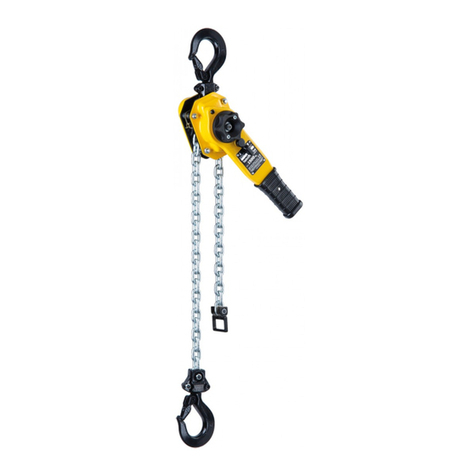
Ratchet lever hoist
Palan à levier à rochet
UNOplus
WLL 750 - 6.000 kg
Original Betriebsanleitung
(Gilt auch für Sonderausführungen)
Translated Operating Instructions
(Also applicable for special versions)
Traduction de mode d’emploi
(Cela s‘applique aussi aux autres versions)
DE
EN
FR

2 von 18
Deutsch
VORWORT
Produkte der CMCO Industrial Products GmbH
sind nach dem Stand der Technik und den
anerkannten gültigen Regeln gebaut. Durch
unsachgemäße Handhabungen können
dennoch bei der Verwendung der Produkte
Gefahren für Leib und Leben des Benutzers
oder Dritter auftreten bzw. Beschädigungen
am Hebezeug oder anderen Sachwerten
entstehen.
Der Betreiber ist für die sach- und fachge-
rechte Unterweisung des Bedienpersonals
verantwortlich. Dazu ist die Betriebsanleitung
von jedem Bediener vor der ersten Inbetrieb-
nahme sorgfältig zu lesen.
Diese Betriebsanleitung soll erleichtern, das
Produkt kennenzulernen und die bestim-
mungsgemäßen Einsatzmöglichkeiten zu
nutzen. Die Betriebsanleitung enthält wichtige
Hinweise, um das Produkt sicher, sachgerecht
und wirtschaftlich zu betreiben. Ihre Beach-
tung hilft Gefahren zu vermeiden, Repara-
turkosten und Ausfallzeiten zu vermindern
und die Zuverlässigkeit und Lebensdauer des
Produktes zu erhöhen. Die Betriebsanleitung
muss ständig am Einsatzort des Produktes
verfügbar sein. Neben der Betriebsanleitung
und den im Verwenderland und an der Ein-
satzstelle geltenden verbindlichen Regelungen
zur Unfallverhütungsvorschrift sind auch
die anerkannten Regeln für sicherheits- und
fachgerechtes Arbeiten zu beachten.
Das Personal für Bedienung, Wartung oder Re-
paratur des Produktes muss die Anweisungen
in dieser Betriebsanleitung lesen, verstehen
und befolgen.
Die beschriebenen Schutzmaßnahmen führen
nur dann zu der erforderlichen Sicherheit,
wenn das Produkt bestimmungsgemäß
betrieben und entsprechend den Hinweisen
installiert bzw. gewartet wird. Der Betreiber
ist verpflichtet, einen sicheren und gefahrlosen
Betrieb zu gewährleisten.
BESTIMMUNGSGEMÄSSE
VERWENDUNG
- Das Gerät dient dem Heben, Ablassen,
Ziehen und Spannen von Lasten.
- Das Gerät eignet sich ebenfalls zur La-
dungssicherung im Straßenverkehr nach
EN 12195 z.B. auf LKW. Hierzu sind die
Spannkraft STF sowie die Handkraft SHF, die
auf dem Typenschild angegeben sind, zu
berücksichtigen (Tab. 1).
- Eine andere oder darüber hinaus-
gehende Benutzung gilt als nicht
bestimmungsgemäß. Für hieraus
resultierende Schäden haftet Colum-
bus McKinnon Industrial Products
GmbH nicht. Das Risiko trägt allein
der Anwender bzw. Betreiber.
- Die auf dem Gerät angegebene Tragfähigkeit
(WLL) ist die maximale Last, die angeschla-
gen werden darf.
- Sollte das Hebezeug zum häufigen Ablassen
aus großen Höhen oder im Taktbetrieb ein-
gesetzt werden, ist wegen evtl. Überhitzung
zuvor mit dem Hersteller Rücksprache zu
halten.
- Sowohl der Trag- als auch der Lasthaken
des Gerätes muss sich im Moment des
Anhebens der Last in einer Lotrechten über
dem Schwerpunkt (S) der Last befinden, um
ein Pendeln der Last beim Hebevorgang zu
vermeiden (Fig. 1).
- Die Auswahl und Bemessung der geeigneten
Tragkonstruktion obliegt dem Betreiber.
- Beim Einhängen des Gerätes ist vom Bedie-
ner darauf zu achten, dass das Hebezeug
so bedient werden kann, dass der Bediener
weder durch das Gerät selbst noch durch
das Tragmittel oder die Last gefährdet wird.
- Der Bediener darf eine Lastbewegung erst
dann einleiten, wenn er sich davon überzeugt
hat, dass die Last richtig angeschlagen ist
und sich keine Personen im Gefahrenbereich
aufhalten.
- Der Aufenthalt unter einer angehobenen Last
ist verboten.
- Lasten nicht über längere Zeit oder unbeauf-
sichtigt in angehobenem oder gespanntem
Zustand belassen.
- Das Hebezeug kann in einer Umgebungs-
temperatur zwischen –10 °C und +50 °C
eingesetzt werden.
Bei Extrembedingungen muss mit dem
Hersteller Rücksprache genommen werden.
ACHTUNG: Bei Umgebungstemperaturen
unter 0°C vor Benutzung durch 2-3maliges
Anheben und Absenken einer kleinen Last
überprüfen, ob die Bremse vereist ist.
- Vor dem Einsatz des Hebezeuges in be-
sonderen Atmosphären (hohe Feuchtigkeit,
salzig, ätzend, basisch) oder der Handha-
bung gefährlicher Güter (z.B. feuerflüssige
Massen, radioaktive Materialien) ist mit dem
Hersteller Rücksprache zu halten.
- Zum Anschlagen einer Last dürfen nur
zugelassene und geprüfte Anschlagmittel
benutzt werden.
- Zur bestimmungsgemäßen Verwendung
gehört neben der Beachtung der Betriebs-
anleitung auch die Einhaltung der Wartungs-
anleitung.
- Bei Funktionsstörungen oder abnormalen
Betriebsgeräuschen ist das Hebezeug sofort
außer Betrieb zu setzen.
SACHWIDRIGE VERWENDUNG
(Nicht vollständige Auflistung)
- Die Tragfähigkeit des Gerätes (WLL) bzw. des
Tragmittels sowie der Tragkonstruktion darf
nicht überschritten werden.
- Das Gerät darf nicht zum Losreißen fest-
sitzender Lasten verwendet werden. Es ist
ebenso verboten, eine Last in die schlaffe
Lastkette fallen zu lassen (Gefahr des
Kettenbruchs).
- Das Entfernen oder Verdecken von Beschrif-
tungen (z.B. durch Überkleben), Warnhinwei-
sen oder dem Typenschild ist untersagt.
- Beim Transport der Last ist eine Pendel-
bewegung (Fig. 2) und das Anstoßen an
Hindernisse zu vermeiden.
- Die Last darf nicht in Bereiche bewegt wer-
den, die für den Bediener nicht einsehbar
sind. Nötigenfalls hat er sich um Hilfestellung
zu bemühen.
- Motorischer Antrieb des Gerätes ist verboten.
- Eine Hebelverlängerung ist nicht statthaft
(Fig. 3). Es dürfen nur Original-Handhebel
verwendet werden.
- Das Gerät darf niemals mit mehr als der
Kraft einer Person bedient werden.
- Schweißarbeiten an Haken und Lastkette
sind verboten. Die Lastkette darf nicht als
Erdungsleitung bei Schweißarbeiten verwen-
det werden (Fig. 4).
- Schrägzug, d.h. seitliche Belastungen des
Gehäuses oder der Unterflasche, ist verboten
(Fig. 5).
- Die Lastkette darf nicht als Anschlagkette
(Schlingkette) verwendet werden (Fig. 6).
- Ein ohne Rücksprache mit dem Hersteller
verändertes Gerät darf nicht benutzt werden.
- Die Benutzung des Hebezeuges zum Trans-
port von Personen ist verboten (Fig. 7).
- Lastkette nicht knoten oder mit Bolzen,
Schraube, Schraubendreher oder Ähn-
lichem verbinden. Fest in Hebezeugen einge-
baute Lastketten dürfen nicht instandgesetzt
werden (Fig. 8).
- Das Entfernen der Sicherheitsbügel von
Trag- bzw. Lasthaken ist verboten (Fig. 9).
DE
Seite 2
Page 5
Page 9
DE
EN
FR

3 von 18
- Hakenspitze nicht belasten (Fig. 10). Das
Anschlagmittel muss immer im Hakengrund
aufliegen.
- Das Kettenendstück (Fig. 12) darf nicht als
betriebsmäßige Hubbegrenzung verwendet
werden.
- Ein betriebsmäßiges Drehen der aufgenom-
menen Lasten ist verboten, da die Unterfla-
sche des Gerätes dafür nicht konzipiert ist.
Ist ein betriebsmäßiges Drehen vorgesehen,
müssen sog. Drallfänger eingesetzt werden
bzw. es ist mit dem Hersteller Rücksprache
zu halten.
- In den Lasthaken des Hebezeuges darf nur
ein einzelnes Lastaufnahmemittel gehängt
werden.
- Niemals in bewegliche Teile greifen.
- Gerät nicht aus großer Höhe fallen lassen.
Es sollte immer sachgemäß auf dem Boden
abgelegt werden.
- Das Gerät darf nicht in explosionsfähiger
Atmosphäre eingesetzt werden (Sonderaus-
führungen auf Anfrage).
PRÜFUNG VOR DER ERSTEN
INBETRIEBNAHME
Vor der ersten Inbetriebnahme, vor der Wie-
derinbetriebnahme und nach grundlegenden
Änderungen ist das Produkt einschließlich der
Tragkonstruktion einer Prüfung durch eine
befähigte Person* zu unterziehen.
Diese Prüfung besteht im Wesentlichen aus
einer Sicht- und Funktionsprüfung. Diese
Prüfungen sollen sicherstellen, dass sich das
Hebezeug in einem sicheren Zustand befindet,
ordnungsgemäß aufgestellt und betriebsbereit
ist und gegebenenfalls Mängel bzw. Schäden
festgestellt und behoben werden.
*Als befähigte Personen können z. B. die
Wartungsmonteure des Herstellers oder Lie-
feranten angesehen werden. Der Unternehmer
kann aber auch entsprechend ausgebildetes
Fachpersonal des eigenen Betriebes mit der
Prüfung beauftragen.
Vor der Inbetriebnahme ist die Funktion
des Kettentriebes im unbelasteten
Zustand zu testen.
PRÜFUNG VOR ARBEITSBEGINN
Vor jedem Arbeitsbeginn ist das Gerät ein-
schließlich der Tragmittel, Ausrüstung und
Tragkonstruktion auf augenfällige Mängel
und Fehler wie z.B. Verformungen, Anrisse,
Verschleiß und Korrosionsnarben zu über-
prüfen. Weiterhin sind die Bremse und das
korrekte Einhängen des Gerätes und der Last
zu überprüfen.
Bremsfunktion prüfen
Vor Arbeitsbeginn unbedingt die Funktion der
Bremse prüfen:
Dazu ist mit dem Gerät eine Last über eine
kurze Distanz zu heben, zu ziehen oder zu
spannen und wieder abzusenken bzw. zu
entlasten. Beim Loslassen des Handhebels
muss die Last in jeder beliebigen Position
gehalten werden.
Diese Überprüfung soll sicherstellen, dass
auch bei Temperaturen unter 0 °C die
Bremsscheiben nicht vereist sind. Sie ist
mindestens zweimal zu wiederholen, bevor mit
der weiteren Arbeit begonnen wird.
ACHTUNG: Bei Funktionsstörung der Bremse
ist das Gerät sofort außer Betrieb zu setzen
und Rücksprache mit dem Hersteller zu halten!
Überprüfung des Anschlagpunktes
- Der Anschlagpunkt für das Hebezeug ist so
zu wählen, dass die Tragkonstruktion, an der
es montiert werden soll, eine ausreichende
Stabilität besitzt und die zu erwartenden
Kräfte sicher aufgenommen werden können.
- Es ist dafür zu sorgen, dass sich das Gerät
auch unter Last frei ausrichten kann, da
sonst unzulässige Zusatzbelastungen auf-
treten können.
- Die Auswahl und Bemessung der geeigneten
Tragkonstruktion obliegt dem Betreiber.
Überprüfung der Lastkette
Die Lastkette muss auf äußere Fehler,
Verformungen, Anrisse, Korrosionsnarben,
Verschleiß und ausreichende Schmierung
überprüft werden.
Überprüfung des Kettenendstücks
Das Kettenendstück muss unbedingt und
immer am losen Kettenende montiert sein
(Fig. 12). Abnutzungen bzw. Fehlstellungen
dürfen nicht vorhanden sein.
Überprüfung des Trag- und Lasthakens
Der Trag- bzw. Lasthaken muss auf Risse,
Verformungen, Beschädigungen, Abnutzung
und Korrosionsnarben überprüft werden.
Der Sicherheitsbügel muss leichtgängig und
voll funktionsfähig sein.
Überprüfung des Kettenverlaufs der
Unterflasche
Vor jeder Inbetriebnahme zwei- oder mehrst-
rangiger Geräte ist darauf zu achten, dass die
Lastkette nicht verdreht oder verschlungen ist.
Bei zwei- oder mehrstrangigen Geräten kann
es zu einer Verdrehung z.B. dann kommen,
wenn die Unterflasche umgeschlagen wurde
(Fig. 11). Bei Kettenersatz ist auf richtigen
Kettenverlauf zu achten (Fig. 13). Die Ketten-
schweißnaht muss nach außen zeigen.
Es dürfen nur Lastketten eingebaut werden,
die vom Hersteller zugelassen sind.
Bei Nichteinhaltung dieser Vorgabe erlischt die
gesetzliche Gewährleistung bzw. Garantie mit
sofortiger Wirkung.
FUNKTION / BETRIEB
Kettenfreischaltung
Schalthebel (Fig. 12) in Neutralstellung
bringen. Die Kette kann in beide Richtungen
gezogen und der Lastkettenstrang so schnell
auf Vorspannung gebracht werden.
ACHTUNG: Die Mindestbelastung für das
automatische Schließen der Bremse liegt
zwischen 30 und 45 kg.
Heben der Last
Schalthebel in Richtung Heben ‚ ‘ drehen und
einrasten lassen (Fig. 12).
Mit dem Handhebel Pumpbewegungen aus-
führen. Wenn das Hebezeug unter Last steht,
ohne dass damit gearbeitet wird, muss der
Schalthebel in Stellung Heben ‚ ‘ verbleiben.
Senken der Last
Schalthebel in Richtung Senken ‚ ‘ drehen
und einrasten lassen (Fig. 12).
Mit dem Handhebel Pumpbewegungen
ausführen.
Verspannung der Bremse
Wird ein unter Last stehendes Hebezeug
durch Abheben der Last bzw. Einreißarbeiten
plötzlich entlastet, ohne dass zuvor die Senk-
arbeit eingeleitet wurde, so bleibt die Bremse
geschlossen. Ein Schließen der Bremse
erfolgt ebenfalls, wenn der Lasthaken mit
der Unterflasche zu fest gegen das Gehäuse
gezogen wird.
Lösen der verspannten Bremse
Schalthebel in Richtung Senken , ‘ drehen
und den Handhebel ruckartig durchdrücken.
Falls die Verspannung sehr hoch ist, kann die
Bremse mit einer schlagartigen Belastung auf
den Handhebel gelöst werden.
PRÜFUNG, WARTUNG UND
REPARATUR
Laut bestehenden nationalen/internationalen
Unfallverhütungs- bzw. Sicherheitsvorschriften
müssen Hebezeuge
• gemäß der Gefahrenbeurteilung des
Betreibers,
• vor der ersten Inbetriebnahme,
• vor der Wiederinbetriebnahme nach
Stilllegung,
• nach grundlegenden Änderungen,
• jedoch mindestens 1 x jährlich durch eine
befähigte Person geprüft werden.

4 von 18
ACHTUNG: Die jeweiligen Einsatzbedingun-
gen (z.B. in der Galvanik) können kürzere
Prüfintervalle notwendig machen.
Reparaturarbeiten dürfen nur von Fachwerk-
stätten, die Original Yale-Ersatzteile verwen-
den, durchgeführt werden. Die Prüfung (im
Wesentlichen Sicht- und Funktionsprüfung) hat
sich auf die Vollständigkeit und Wirksamkeit
der Sicherheitseinrichtungen sowie auf den
Zustand des Gerätes, der Tragmittel, der
Ausrüstung und der Tragkonstruktion hin-
sichtlich Beschädigung, Verschleiß, Korrosion
oder sonstigen Veränderungen zu erstrecken.
Die Inbetriebnahme und die wiederkehrenden
Prüfungen müssen dokumentiert werden (z.B.
in der CMCO-Werksbescheinigung).
Auf Verlangen sind die Ergebnisse der Prü-
fungen und die sachgemäße Reparaturdurch-
führung nachzuweisen. Ist das Hebezeug (ab
1t Hubgewicht) an oder in einem Fahrwerk
eingebaut und wird mit dem Hebezeug
eine gehobene Last in eine oder mehrere
Richtungen bewegt, wird die Anlage als Kran
betrachtet und es sind ggf. weitere Prüfungen
durchzuführen.
Lackbeschädigungen sind auszubessern, um
Korrosion zu vermeiden. Alle Gelenkstellen
und Gleitflächen sind leicht zu schmieren.
Bei starker Verschmutzung ist das Gerät zu
reinigen.
Spätestens nach 10 Jahren muss das Gerät
einer Generalüberholung unterzogen werden.
Insbesondere die Maße der Lastkette, des
Last- und des Traghakens bedürfen der Be-
obachtung. Sie sind mit den Tabellenmaßen
(Tab. 2, Tab. 3) zu vergleichen.
ACHTUNG: Der Austausch von Bauteilen
zieht zwangsläufig eine anschließende Prüfung
durch eine befähigte Person nach sich!
Prüfung der Lastkette (nach DIN 685-5)
Die Lastkette ist jährlich, jedoch spätestens
nach 50 Betriebsstunden auf mechanische
Schäden zu untersuchen. Sie muss auf äußere
Fehler, Verformungen, Anrisse, Korrosionsnar-
ben, Verschleiß und ausreichende Schmierung
überprüft werden.
Rundstahlketten müssen ausgewechselt wer-
den, wenn die ursprüngliche Nenndicke ´d´
am stärksten verschlissenen Kettenglied um
mehr als 10 % abgenommen hat oder wenn
die Kette über eine Teilung ´pn´ eine Längung
von 5% (Fig. 14) oder 11 Teilungen (11 x pn)
eine Längung von 3 % erfahren hat.
Die Nominalwerte und Verschleißgrenzen sind
Tabelle 2 zu entnehmen.
Bei Erreichen eines der Grenzwerte ist die
Lastkette auszutauschen.
Wartung der Lastkette
Kettenverschleiß in den Gelenkstellen ist in
den weitaus meisten Fällen auf ungenügende
Pflege der Kette zurückzuführen. Um eine
optimale Schmierung der Umlenkungen zu ge-
währleisten, muss die Kette in regelmäßigen,
auf den Einsatz abgestimmten Zeitabständen,
mit kriechfähigem Schmierstoff (z.B. Getriebe-
öl) geschmiert werden.
Bei verschleißfördernden Umgebungsein-
flüssen, wie z.B. Sand etc. sollte ein Tro-
ckenschmiermittel, wie z.B. PTFE-Spray,
verwendet werden.
Durch eine sorgfältige Schmierung der
Lastkette kann die Standzeit auf das 20- bis
30-fache gegenüber einer ungewarteten Kette
verlängert werden.
- Beim Schmiervorgang ist die Kette zu
entlasten, damit das Öl die verschleißbe-
anspruchten Umlenkungen benetzen kann.
Die aneinander liegenden Umlenkungen
müssen stets Schmierstoff aufweisen,
ansonsten kommt es zu einem erhöhten
Kettenverschleiß.
- Es genügt nicht, die Ketten von außen zu
schmieren, weil so nicht gewährleistet ist,
dass sich in den Umlenkstellen ein Schmier-
film aufbaut.
- Bei konstantem Hubweg der Kette muss auf
den Umschaltbereich von Hub- in Senkbewe-
gung besonders geachtet werden.
- Es ist darauf zu achten, dass die Lastkette
über ihre gesamte Länge geschmiert wird,
auch der Teil der Kette, der sich im Gehäuse
des Hebezeuges befindet.
- Verschmutzte Ketten mit Petroleum oder
einem ähnlichen Reinigungsmittel säubern,
keinesfalls die Kette erhitzen.
- Beim Schmiervorgang muss der Verschleiß-
zustand der Kette mit überprüft werden.
ACHTUNG: Es ist dafür Sorge zu tragen, dass
kein Schmiermittel in den Bremsraum gelangt.
Ein Versagen der Bremse kann die Folge sein.
Austausch der Lastkette
Die Lastkette ist bei sichtbaren Beschädigun-
gen oder Verformungen, jedoch spätestens
bei Erreichen der Ablegereife, durch eine
neue Kette gleicher Abmessungen und Güte
zu ersetzen.
Der Austausch einer ablegereifen Lastkette
darf nur von einer autorisierten Fachwerkstatt
durchgeführt werden.
Es dürfen nur Lastketten eingebaut werden,
die vom Hersteller zugelassen sind. Bei
Nichteinhaltung dieser Vorgabe erlischt die
gesetzliche Gewährleistung bzw. Garantie mit
sofortiger Wirkung.
Hinweis: Ein Lastkettenwechsel ist ein doku-
mentationspflichtiger Vorgang!
Einstrangiges Hebezeug
- Neue Kette nur im entlasteten Zustand
einziehen.
- Als Hilfsmittel wird ein offenes Lastketten-
glied benötigt. Es kann durch Herausschlei-
fen eines Stückes aus einem vorhandenen
Kettenglied gleicher Dimension hergestellt
werden. Dabei muss die Länge des he-
rausgetrennten Stückes mindestens der
Kettengliedstärke entsprechen.
- Lasthaken von der alten Lastkette demontie-
ren und offenes Lastkettenglied in das lose
Ende der Lastkette hängen.
- Die neue, geschmierte Lastkette ist ebenfalls
in das offene Kettenglied einzuhängen und
durch das Hubwerk zu ziehen (Handrad im
Uhrzeigersinn drehen).
- Kette nicht verdreht einbauen. Die Schweiß-
nähte müssen vom Lastkettenrad nach
außen weisen.
- Sobald die alte Lastkette das Hubwerk
durchlaufen hat, kann sie zusammen mit
dem offenen Kettenglied ausgehängt und
der Lasthaken an der neu eingezogenen
Lastkette befestigt werden.
- Das Kettenendstück muss vom Leerstrang
der alten, ausgetauschten Lastkette entfernt
und am Leerstrang der neu eingezogenen
Lastkette angebracht werden.
ACHTUNG: Das Kettenendstück muss
unbedingt am losen Kettenende (Leerstrang)
montiert/vorhanden sein (Fig. 12).
Mehrstrangiges Hebezeug
ACHTUNG: Neue Kette nur im entlasteten
Zustand der Unterflasche einziehen, da die
Unterflasche sonst beim Lösen der Lastkette
herunterfallen kann. Verletzungsgefahr!
- Als Hilfsmittel wird ein offenes Lastketten-
glied benötigt. Es kann durch Herausschlei-
fen eines Stückes aus einem vorhandenen
Kettenglied gleicher Dimension hergestellt
werden. Dabei muss die Länge des he-
rausgetrennten Stückes mindestens der
Kettengliedstärke entsprechen.
- Das Laststrangende der Lastkette vom Ge-
häuse des Hubwerks oder der Unterflasche
lösen (je nach Modell).
- Vorbereitetes, offenes Lastkettenglied in das
nun freie Lastkettenende hängen.
- Die neue, geschmierte Lastkette ebenfalls in
das offene Kettenglied einhängen und durch
die Unterflasche und das Hubwerk ziehen
(Handrad im Uhrzeigersinn drehen).
- Kette nicht verdreht einbauen. Die Schweiß-
nähte müssen vom Lastkettenrad nach
außen weisen.
- Sobald die alte Lastkette das Hubwerk durch-
laufen hat, kann sie zusammen mit dem
offenen Kettenglied ausgehängt werden.

5 von 18
- Das Laststrangende der neu eingezogenen
Lastkette am Gehäuse/Rahmen bzw. an
der Unterflasche (modellabhängig) des
Hebezeuges befestigen.
- Loses Ende des Leerstranges der neuen
Lastkette wieder mit dem Kettenendstück
versehen.
ACHTUNG: Das lose Leerstrangende muss
unbedingt am Kettenendstück montiert sein
(Fig. 12).
Prüfung des Last- und Traghakens
Die Prüfung der Haken auf Verformung,
Beschädigungen, Oberflächenrisse, Abnut-
zung und Korrosion ist nach Bedarf, jedoch
mindestens einmal im Jahr durchzuführen.
Die jeweiligen Einsatzbedingungen können
auch kürzere Prüfintervalle erforderlich
machen.
Haken, die laut Prüfung verworfen wurden,
sind durch neue zu ersetzen. Schweißungen
an Haken, z. B. zum Ausbessern von Ab-
nutzung sind nicht zulässig. Trag- und/oder
Lasthaken müssen ausgewechselt werden,
wenn die Maulöffnung um 10% aufgeweitet
ist (Fig. 15) oder wenn die Nennmaße durch
Abnutzung um 5 % abgenommen haben.
Die Nominalwerte und Verschleißgrenzen
sind Tabelle 3 zu entnehmen. Bei Erreichen
eines der Grenzwerte sind die Bauteile
auszuwechseln.
Prüfung der Bremse
Bei Auffälligkeiten (z.B. defekten Friktions-
scheiben) ist sofort mit dem Hersteller
Rücksprache zu halten. Alle Bauteile der
Bremse sind auf Verschleiß, Beschädigungen,
Verfärbungen durch Überhitzung und Funktion
hin zu überprüfen.
Friktionsscheiben unbedingt frei von Fett, Öl,
Wasser und Schmutz halten. Die Verklebung
der Friktionsscheiben ist zu überprüfen.
Reparaturen dürfen nur von autorisier-
ten Fachwerkstätten, die Original Yale-
Ersatzteile verwenden, durchgeführt
werden.
Nach einer erfolgten Reparatur sowie nach
längerer Standzeit ist das Hebezeug vor der
Wiederinbetriebnahme erneut zu prüfen.
Die Prüfungen sind vom Betreiber zu
veranlassen.
TRANSPORT, LAGERUNG, AUSSER-
BETRIEBNAHME UND ENTSORGUNG
Beim Transport des Gerätes sind
folgende Punkte zu beachten:
• Gerät nicht stürzen oder werfen, immer
vorsichtig absetzen.
• Die Lastkette ist so zu transportieren, dass
sie sich nicht verknoten kann und sich keine
Schlaufen bilden können.
• Geeignete Transportmittel verwenden.
Diese richten sich nach den örtlichen
Gegebenheiten.
Bei der Lagerung oder der
vorübergehenden Außerbetriebnahme
des Gerätes sind folgende Punkte zu
beachten:
• Das Gerät an einem sauberen und
trockenen Ort lagern.
• Das Gerät inkl. aller Anbauteile vor Ver-
schmutzung, Feuchtigkeit und Schäden
durch eine geeignete Abdeckung schützen.
• Haken vor Korrosion schützen.
• Die Kette ist mit einem leichten Schmierfilm
zu überziehen.
ACHTUNG: Es ist dafür Sorge zu tragen,
dass kein Schmiermittel in den Bremsraum
gelangt. Ein Versagen der Bremse kann
die Folge sein.
• Da bei Temperaturen unter 0 °C die Brems-
scheiben vereisen können, sollte das Gerät
mit geschlossener Bremse gelagert werden.
Hierzu den Umschalthebel auf Heben
‚‘ stellen und mit dem Handhebel bei
gleichzeitigem Festhalten des Laststranges
pumpen.
• Soll das Gerät nach der Außerbetriebnahme
wieder zum Einsatz kommen, ist es zuvor
einer erneuten Prüfung durch eine befähigte
Person zu unterziehen.
Entsorgung:
Nach Außerbetriebnahme sind die Teile
des Gerätes entsprechend den gesetzlichen
Bestimmungen der Wiederverwertung zuzu-
führen bzw. zu entsorgen.
Weitere Informationen und Betriebs-
anleitungen zum Download sind unter
www.cmco.eu zu finden!
English
INTRODUCTION
Products of CMCO Industrial Products GmbH
have been built in accordance with the state-
of-the-art and generally accepted engineering
standards. Nonetheless, incorrect handling
when using the products may cause dangers
to life and limb of the user or third parties
and/or damage to the hoist or other property.
The operating company is responsible for
the proper and professional instruction of
the operating personnel. For this purpose, all
operators must read these operating instruc-
tions carefully prior to the initial operation.
These operating instructions are intended to
acquaint the user with the product and enable
him to use it to the full extent of its intended
capabilities. The operating instructions contain
important information on how to operate the
product in a safe, correct and economic way.
Acting in accordance with these instructions
helps to avoid dangers, reduce repair costs
and downtimes and to increase the reliability
and lifetime of the product. The operating
instructions must always be available at the
place where the product is operated. Apart
from the operating instructions and the ac-
cident prevention act valid for the respective
country and area where the product is used,
the commonly accepted regulations for safe
and professional work must also be adhered
to. The personnel responsible for operation,
maintenance or repair of the product must
read, understand and follow these operating
instructions.
The indicated protective measures will only
provide the necessary safety, if the product
is operated correctly and installed and/or
maintained according to the instructions. The
operating company is committed to ensure
safe and trouble-free operation of the product.
CORRECT OPERATION
- The unit is used for lifting, lowering, pulling
and tensioning of loads.
- The unit is also suitable for lashing of loads
on trucks etc. on public roads according to
EN 12195. Tensioning force STF and hand
force SHF, which are indicated on the identity
plate, must be taken into account (Tab. 1).
- Any different or exceeding use is con-
sidered incorrect. Columbus McKinnon
Industrial Products GmbH will not accept
any liability for damage resulting from
such use. The risk is borne by the user
or operating company alone.
- The load capacity indicated on the unit is the
maximum working load limit (WLL) that may
be attached.
EN

6 von 18
- If the hoist is to be used for frequent lowering
from large heights or in indexed operation,
first consult the manufacturer for advice
because of possible overheating.
- The top hook and the load hook of the unit
must be in a vertical line above the load
centre of gravity (S) when the load is lifted,
in order to avoid load sway during the lifting
process (Fig. 1).
- The selection and calculation of the appropri-
ate supporting structure are the responsibil-
ity of the operating company.
- The operator must ensure that the hoist is
suspended in a manner that makes it pos-
sible to operate the unit without exposing
himself or other personnel to danger by the
unit itself, the suspension or the load.
- The operator may start moving the load only
after it has been attached correctly and all
persons are clear of the danger zone.
- Do not allow personnel to stay or pass under
a suspended load.
- A lifted or clamped load must not be left
unattended or remain lifted or clamped for
a longer period of time.
- The hoist may be used at ambient tempera-
tures between –10 °C and +50 °C.
Consult the manufacturer in the case of
extreme working conditions.
ATTENTION: Before use at ambient tem-
peratures of less than 0°C, check the brake
for freezing by lifting and lowering a small
load 2 - 3 times.
- Prior to operation of the hoist in special
atmospheres (high humidity, salty, caustic,
alkaline) or handling hazardous goods (e.g.
molten compounds, radioactive materials),
consult the manufacturer for advice.
- For attaching a load, only approved and
certified lifting tackle must be used.
- Correct operation involves compliance with
the operating instructions and in addition
also compliance with the maintenance
instructions.
- In case of functional defects or abnormal
operating noise, stop using the hoist imme-
diately.
INCORRECT OPERATION
(List not complete)
- Do not exceed the rated load capacity (WLL)
of the unit and/or the suspension and the
supporting structure.
- The unit must not be used for pulling free
fixed loads. It is also prohibited to allow loads
to drop when the chain is in a slack condition
(danger of chain breakage).
- Removing or covering labels (e.g. by adhe-
sive labels), warning information signs or the
identity plate is prohibited.
- When transporting loads ensure that the load
does not swing (Fig. 2) or come into contact
with other objects.
- The load must not be moved into areas which
are not visible to the operator. If necessary,
he must ensure he is given help.
- Driving the unit with a motor is not allowed.
- The lever must not be extended (Fig. 3). Only
original hand levers must be used.
- The unit must never be operated with more
than the power of a person.
- Welding on hook and load chain is strictly
forbidden. The load chain must never be
used as a ground connection during welding
(Fig. 4).
- Side pull, i. e. side loading of either the hous-
ing or the bottom block (Fig. 5) is forbidden.
- The load chain must not be used as a chain
sling (Fig. 6).
- A unit changed without consulting the
manufacturer must not be used.
- Do not use the hoist for the transportation
of people (Fig. 7).
- Do not knot the load chain or connect it by
using pins, bolts, screw drivers or similar. Do
not repair load chains installed in the hoist
(Fig. 8).
- Removing the safety latches from top and/
or load hooks is forbidden (Fig. 9).
- Never attach the load to the tip of the hook
(Fig. 10). The lifting tackle must always be
seated in the saddle of the hook.
- Do not use the chain stop (Fig. 12) as an
operational limit device.
- Turning of loads under normal operating
conditions is not allowed, as the bottom
blocks of the hoists are not designed for this
purpose. If loads must be turned in normal
operation, an anti-twist swivel must be used
or the manufacturer must be consulted.
- Only one load lifting attachment may be
suspended in the load hook of the hoist.
- Never reach into moving parts.
- Do not allow the unit to fall from a large
height. Always place it properly on the
ground.
- The unit must not be used in potentially
explosive atmospheres (special models on
request).
INSPECTION BEFORE INITIAL
OPERATION
Prior to initial operation, before it is put
into operation again and after substantial
changes, the product including the supporting
structure must be inspected by a competent
person*. The inspection mainly consists of a
visual inspection and a function check. These
inspections are intended to establish that the
hoist is in a safe condition, has been set up
appropriately and is ready for operation and
that any defects or damage are detected and
eliminated, as required.
*Competent persons may be, for example, the
maintenance engineers of the manufacturer or
the supplier. However, the company may also
assign performance of the inspection to its
own appropriately trained specialist personnel.
Before putting the unit into operation,
check functioning of the chain drive in
unloaded condition.
INSPECTIONS BEFORE STARTING
WORK
Before starting work, inspect the unit including
the suspension, equipment and supporting
structure for visual defects, e. g. deformations,
superficial cracks, wear and corrosion marks.
In addition also test the brake and check that
the hoist and the load are correctly attached.
Checking the brake function
Before starting work, always check operation
of the brake:
To do this, lift, pull or tension and lower or
release a load over a short distance with the
unit. When the hand lever is released, the load
must be held in any position.
This check is intended to ensure that even
at temperatures below 0°C, the brake disks
are not frozen. Repeat it at least twice, before
starting further work.
ATTENTION: If the brake does not function
properly, the unit must be immediately taken
out of service and the manufacturer must
be contacted!
Inspection of the attachment point
- The attachment point for the hoist must be
selected so that the supporting structure to
which it is to be fitted has sufficient stability
and to ensure that the expected forces can
be safely absorbed.
- The unit must align freely also under load
in order to avoid impermissible additional
loading.
- The selection and calculation of the appropri-
ate supporting structure are the responsibil-
ity of the operating company.
Inspection of the load chain
Inspect the load chain for sufficient lubrication
and check for external defects, deformations,
superficial cracks, wear and corrosion marks.
Inspection of the chain stop
The chain stop must always be fitted to the
loose chain end (Fig. 12). There must be no
wear or incorrect alignment.

7 von 18
Inspection of the top hook and load hook
The top and load hooks must be checked
for cracks, deformations, damage, wear and
corrosion marks. The safety latch must move
freely and be fully functioning.
Inspection of chain reeving
in the bottom block
All units with two or more chain falls must be
inspected before initial operation to ensure
that the load chain is not twisted or kinked.
The chains of hoists with two or more falls may
become twisted if the bottom block is rolled
over, for example (Fig. 11).
When replacing the chain, make sure that the
chain is reeved correctly (Fig. 13). The chain
weld must face outwards.
Only fit load chains which have been approved
by the manufacturer. Non-compliance with this
specification will render the legal warranty or
guarantee void with immediate effect.
FUNCTION / OPERATION
Releasing the chain
Turn pawl rod lever (Fig. 12) to neutral (central)
position. The chain can now be pulled in
both directions and the load chain fall will be
quickly tensioned.
ATTENTION: The minimum load to engage
the automatic brake lies between 30 and
45 kg.
Lifting the load
Turn pawl rod lever to the lifting position ‚ ‘
and lock it (Fig. 12).
Operate hand lever with a pumping action. If
work is stopped while the hoist is under load,
the pawl rod lever must remain in the lifting
position ‚ ‘.
Lowering the load
Turn pawl rod lever to the lowering position ‚ ‘
and lock it (Fig. 12).
Operate hand lever with a pumping action.
Brake jamming
lf a hoist, which is under load, is suddenly
relieved of load pressure, e.g. by lifting off the
load or when pulling down walls, and lower-
ing has not been initiated first, the brake will
remain locked. The brake will also lock if the
load hook with the bottom block is pulled too
tightly against the housing.
Releasing the jammed brake
Turn pawl rod lever to the lowering position , ’
and operate hand lever with a vigorous stroke.
lf the brake is jammed on extremely tight, it
can be released by striking the hand lever.
INSPECTION, MAINTENANCE AND
REPAIR
According to national and international acci-
dent prevention and safety regulations hoisting
equipment must be inspected:
• in accordance with the risk assessment of
the operating company
• prior to initial operation
• before the unit is put into service again
following a shut down
• after substantial changes
• however, at least once per year, by a
competent person.
ATTENTION: Actual operating conditions (e.g.
operation in galvanizing facilities) can dictate
shorter inspection intervals.
Repair work may only be carried out by a spe-
cialist workshop that uses original Yale spare
parts. The inspection (mainly consisting of a
visual inspection and a function check) must
determine that all safety devices are complete
and fully operational and cover the condition
of the unit, suspension, equipment and sup-
porting structure with regard to damage, wear,
corrosion or any other alterations.
Initial operation and recurring inspections
must be documented (e.g. in the CMCO works
certificate of compliance).
If required, the results of inspections and ap-
propriate repairs must be verified. If the hoist
(from 1 t lifting weight) is fitted on or in a trolley
and if the hoist is used to move a lifted load
in one or several directions, the installation
is considered to be a crane and the further
inspections must be carried out, as required.
Paint damage should be touched up in order to
avoid corrosion. All joints and sliding surfaces
should be slightly greased. In the case of heavy
contamination, the unit must be cleaned.
The unit must be given a general overhaul
after 10 years, at the latest.
In particular, check the dimensions of the
load chain, the load hook and the top hook.
They must be compared with the dimensions
specified in the table (Tab. 2, Tab. 3).
ATTENTION: After the replacement of
components, a subsequent inspection by a
competent person is obligatory!
Inspection of the load chain
(acc. to DIN 685-5)
Load chains must be inspected for mechanical
damage at annular intervals, however after
50 operating hours, at the latest. Inspect the
load chain for sufficient lubrication and check
for external defects, deformations, superficial
cracks, wear and corrosion marks.
Round steel section chains must be replaced
when the original nominal thickness ´d´ on
the chain link with the worst wear has been
reduced by more than 10% or when the chain
has elongated over one pitch ´pn´ by 5 %
(Fig. 14) or over 11 pitches (11 x pn) by 3 %.
Nominal dimensions and wear limits are
shown in table 2. If one of the limit values is
reached, the load chain must be replaced.
Maintenance of the load chain
In most cases, chain wear in the link points
is caused by insufficient care of the chain. In
order to ensure optimal lubrication of the link
contact points, lubricate the chain at regular
intervals adapted to the application with creep-
type lubricant (e.g. gear oil).
A dry film lubricant, e.g. PTFE spray, should
be used in environments where abrasives like
sand, etc., occur.
The service life of the load chain can be in-
creased by careful lubrication to 20 - 30 times
compared with a chain that is not serviced.
- When lubricating the chain, make sure the
chain is in no-load condition so that the oil
can reach the contact points of the chain
links which are subject to wear. Chain link
parts contacting each other must always be
coated with lubricant, otherwise increased
wear on the chain results.
- It is not sufficient to lubricate the chains on
the outside as this does not ensure that a
lubricant film can build up in the contact
points.
- With a constant lifting path of the chain, the
change-over area from lifting to lowering
movement must be checked in particular.
- Make sure that the load chain is lubricated
over its entire length, also including the part
of the chain in the housing of the hoist.
- Clean dirty chains with petroleum or a similar
cleaning agent, never heat the chain.
- When lubricating the chain, also check the
chain for wear.
ATTENTION: It must be ensured that no lub-
ricant can penetrate into the brake enclosure.
This may result in failure of the brake.
Replacing the load chain
The load chain must be replaced by a new
chain of the same dimensions and quality in
the event of visible damage or deformations,
however, when the discarding status has been
reached, at the latest.
A load chain to be discarded must only be
replaced by an authorized specialist workshop.
Only fit load chains which have been approved
by the manufacturer. Non-compliance with this
specification will render the legal warranty or
guarantee void with immediate effect.
Note: Replacement of a load chain must be
documented!

8 von 18
Hoist with single fall
- Only pull in the new chain in no-load condi-
tion.
- An open load chain link is required as a
tool. It can be obtained by using an abrasive
wheel to cut a section from an existing link
with the same dimension. The length of the
cut section must at least correspond to the
thickness of the link.
- Remove load hook from the old load chain
and suspend open load chain link in the
loose end of the load chain.
- Suspend the new, lubricated load chain also
in the open link and pull it through the hoist
unit (turn hand wheel clockwise).
- Do not fit a twisted chain. The welds must
face outwards from the chain wheel.
- When the old load chain has passed through
the hoist unit it can be detached together
with the open chain link and the load hook
can be fitted on the new load chain just
pulled in.
- Detach the chain stop from the loose end of
the old, replaced load chain and fit it to the
loose end of the new load chain just pulled
in.
ATTENTION: The chain stop must always
be fitted to the loose end of the chain (idle
fall) (Fig. 12).
Hoist with several falls
ATTENTION: Only pull in the new chain when
the bottom block is unloaded, otherwise the
bottom block may drop when the load chain
is detached. Danger of injury!
- An open load chain link is required as a
tool. It can be obtained by using an abrasive
wheel to cut a section from an existing link
with the same dimension. The length of the
cut section must at least correspond to the
thickness of the link.
- Detach the loaded-fall end of the load chain
from the housing of the hoist unit or the
bottom block (depending on model).
- Suspend prepared, open load chain link in
the now free load chain end.
- Suspend the new, lubricated load chain
also in the open link and pull it through the
bottom block and the hoist unit (turn hand
wheel clockwise).
- Do not fit a twisted chain. The welds must
face outwards from the chain wheel.
- When the old load chain has passed through
the hoist unit it can be detached together
with the open chain link.
- Fix the loaded-fall end of the new load chain
on the housing/frame or on the bottom block
(depending on model) of the hoist.
- Attach the chain stop to the loose end of the
new load chain.
ATTENTION: The loose end of the idle
fall must always be fitted to the chain stop
(Fig. 12).
Inspection of the load hook and top hook
Inspect the hook for deformation, damage,
surface cracks, wear and signs of corrosion,
as required, but at least once a year. Actual
operating conditions may also dictate shorter
inspection intervals.
Hooks that do not fulfil all requirements must
be replaced immediately. Welding on hooks,
e.g. to compensate for wear or damage is
not permissible. Top and/or load hooks must
be replaced when the mouth of the hook has
opened more than 10% (Fig. 15) or when the
nominal dimensions have reduced by 5% as
a result of wear.
Nominal dimensions and wear limits are
shown in table 3. If a limit value is reached,
replace the components.
Inspection of the brake
Immediately contact the manufacturer, if
irregularities are found (e.g. defective friction
disks). All components of the brake must
be checked for wear, damage, discoloration
caused by overheating and for functioning.
Friction disks must always be kept free from
grease, oil, water or dirt. Check the bonding
of the friction disks.
Repairs may only be carried out by
authorized specialist workshops that
use original Yale spare parts.
After repairs have been carried out and
after extended periods of non-use, the hoist
must be inspected again before it is put into
service again.
The inspections have to be initiated by
the operating company.
TRANSPORT, STORAGE, DECOMMIS-
SIONING AND DISPOSAL
Observe the following for transporting
the unit:
• Do not drop or throw the unit, always deposit
it carefully.
• Load chains must be transported in a way
to avoid knotting and formation of loops.
• Use suitable transport means. These
depend on the local conditions.
Observe the following for storing or
temporarily taking the unit out of
service:
• Store the unit at a clean and dry place.
• Protect the unit incl. all accessories against
contamination, humidity and damage by
means of a suitable cover.
• Protect hooks against corrosion.
• A light oil film should be applied to the chain.
ATTENTION: It must be ensured that no
lubricant can penetrate into the brake enclo-
sure. This may result in failure of the brake.
• Since the brake disks may freeze at
temperature below 0 °C, the unit should
be stored with closed brake. For this pur-
pose, move the change-over lever to lifting
‚‘ and operate the hand lever with a
pumping action, while holding the load fall.
• If the unit is to be used again after it has
been taken out of service, it must first be
inspected again by a competent person.
Disposal:
After taking the unit out of service, recycle or
dispose of the parts of the unit in accordance
with the legal regulations.
Further information and operating
instructions for download can be found
at www.cmco.eu!

9 von 18
Français
INTRODUCTION
Les produits de CMCO Industrial Products
GmbH ont été construits conformément aux
normes techniques de pointe et générale-
ment reconnues. Néanmoins, une utilisation
incorrecte des produits peuvent engendrer un
accident grave ou fatal de l’utilisateur ou un
tiers ou encore des dommages pour le palan
ou d’autres biens.
La société propriétaire est chargée de la
formation appropriée et professionnelle des
opérateurs. À cette fin, tous les opérateurs
doivent lire ces instructions d’utilisation
soigneusement avant l’utilisation initiale. Ces
instructions visent à familiariser l’opérateur
avec le produit et lui permettre de l’utiliser
dans toute la mesure de ses capacités. Le
manuel d’instructions contient des renseigne-
ments importants sur la façon d’utiliser le
produit d’une manière sûre, économique et
correcte. Agir conformément à ces instructions
aide à éviter les dangers, de réduire les coûts
de réparation et les périodes d’indisponibilité
et d’augmenter la fiabilité et la durée de vie du
produit. Le manuel d’instruction doit toujours
être disponible à l’endroit où le produit est
utilisé. Mis à part le mode d’ emploi et les
règles de prévention des accidents valables
pour le pays et la zone où le produit est utilisé,
le règlement communément reconnu pour
un travail professionnel et sûr doit également
être respecté. Le personnel responsable de
l’utilisation, de l’entretien ou des réparations
du produit doit lire, comprendre et suivre
le manuel d’instructions. Les mesures de
protection indiquées ne fourniront la sécurité
nécessaire que si le produit est utilisé correcte-
ment, installé et entretenu conformément aux
instructions. La société propriétaire s’engage
à assurer un fonctionnement sûr et sans
problème du produit.
UTILISATION CORRECTE
- Le palan a été conçu pour lever, tirer, main-
tenir ou serrage en tension des charges.
- Toute utilisation différente ou hors des
limites est considérée comme incor-
recte. Columbus McKinnon Industrial
Products GmbH n‘acceptera aucune
responsabilité pour les dommages
résultant de cette utilisation. Le risque
est seulement pris par l‘utilisateur ou
la société propriétaire.
- La capacité de charge indiquée sur l‘appareil
est le maximum de charge (WLL) qui peut-
être être manié.
- Si le treuil doit être utilisé pour baisser des
charges fréquement de grande hauteur ou
FR en opération indexée, d‘abord consulter le
fabricant pour obtenir des conseils sur une
possible surchauffe.
- Les crochets de levage et de suspension de
l’appareil doivent êtres sur une ligne verticale
au-dessus du centre de gravité de la charge
(S) lorsque la charge est levée, afin d’éviter
le balancement de la charge pendant le
processus de levage (Fig. 1).
- La sélection et le calcul de la structure de
support appropriée sont la responsabilité de
la société propriétaire.
- L‘utilisateur doit s‘assurer que le palan est
suspendu d‘une manière qui assure un
fonctionnement sans danger pour lui-même
ou pour d‘autres membres du personnel du
palan lui-même, des éléments de suspensi-
on ou de la charge.
- L‘utilisateur peut commencer à déplacer la
charge seulement qu’après l‘avoir attaché
correctement, et qu‘aucune personne ne
se trouve dans la zone de danger.
- Personne ne doit se trouver ou passer sous
une charge suspendue.
- Une charge levée ou fixée ne doit pas être
laissé sans surveillance ou rester levée ou
fixée pour une longue période.
- Le palan peut être utilisé dans une tempéra-
ture ambiante entre -10 °C et + 50 °C.
Consulter le fabricant dans le cas de condi-
tions de travail extrêmes.
ATTENTION : Avant l‘emploi à des tempéra-
tures ambiantes de moins de 0 °C, vérifier
les freins pour la congélation en soulevant
et en abaissant une petite charge 2 - 3 fois.
- Avant de l‘installation du palan dans des
atmosphères particulières (humidité, salée,
caustique, alcaline) ou de la manutention
des marchandises dangereuses (p. ex.
fondus composés, matières radioactives),
consulter le fabricant pour obtenir des
conseils.
- Pour attacher une charge, seul des ac-
cessoires de levage approuvés et certifiés
doivent être utilisés.
- Un emploi correct implique la conformité
avec le mode d‘emploi et aussi les instruc-
tions d‘entretien.
- En cas de défauts fonctionnels ou bruit de
fonctionnement anormal, cesser d‘utiliser le
palan immédiatement.
UTILISATION INCORRECTE
(Liste incomplète)
- Ne pas dépasser la capacité de charge
nominale (CMU) de l‘appareil et/ou des
moyens de suspension et de la structure de
support.
- L‘appareil ne doit pas servir à déloger des
charges coincées Il est également interdit de
laisser tomber des charges quand la chaîne
n’est pas tendue (risque de rupture de la
chaîne).
- Il est interdit d‘enlever ou de couvrir les
étiquettes de légende (par exemple par des
auto-collants), les étiquettes d‘avertissement
ou la plaque d‘identification.
- Lors du transport d‘une charge s‘assurer
que celle-ci ne balance pas (Fig. 2) ou qu‘elle
n‘entre pas en contact avec d‘autres objets.
- La charge ne doit pas être déplacée dans des
zones qui ne sont pas visibles à l‘opérateur.
Si nécessaire, il doit se faire assister.
- Il n‘est pas autorisé de motoriser l‘appareil.
- Ne pas rallonger le levier de manoeuvre
(Fig. 3).
- L‘appareil de doit jamais être utilisé avec
plus de puissance que celle d‘une personne.
- Il est strictement interdit de faire des soudu-
res sur le crochet et la chaîne de charge. La
chaîne de charge ne doit jamais être utilisée
comme référence terre durant le soudage.
- Il est interdit d’appliquer des forces latérales
sur le carter ou le crochet de charge (Fig. 5).
- La chaîne de charge ne doit pas être utilisée
comme élingue (Fig. 6).
- Un appareil modifiée sans avoir consulté le
fabricant ne doit pas être utilisé.
- Ne jamais utiliser pas le palan pour le
transport de personnes (Fig. 7).
- Ne pas faire de nœuds dans de la chaîne de
charge ou la connecter à l‘aide de chevilles,
boulons, tournevis ou similaire. Ne pas
réparer les chaînes installées dans le treuil
(Fig. 8).
- Il est interdit d‘enlever les linguets de sécuri-
té des crochets de suspension et de charge
(Fig. 9).
- Ne jamais attacher la charge sur la pointe
du crochet (Fig. 10). L‘accessoire de levage
doit toujours être positionné dans le fond du
crochet.
- N‘utilisez pas l‘arrêt de chaîne (Fig. 12)
comme dispositif répétitif de fin de course.
- il n‘est pas autorisé de tourner des charges
dans des conditions normales d‘utilisation
car les crochets de charge ne sont pas
conçus à cette fin. Si des charges doivent
être tournées , un pivot anti-torsion doit être
utilisé ou le fabricant doit être consulté.
- Seulement un accessoire de levage peut
être suspendu dans le crochet de charge
du palan.
- Ne pas s‘approcher de pièces mobiles.
- Ne jamais laisser tomber l‘appareil de gran-
de hauteur. Toujours le placer correctement
sur le sol.
- L‘appareil ne doit pas être utilisé dans
une atmosphère explosible (dans ce cas,
modèles spéciaux sur demande).

10 von 18
INSPECTION AVANT MISE EN SERVICE
Avant la première mise en service, avant
d’être mise en opération et après des modi-
fications substantielles, le produit, y compris
la structure de support doit être inspecté par
une personne compétente *. L’inspection se
compose principalement d’une inspection
visuelle et une vérification de fonctionnement.
Ces inspections ont pour but d’établir que
le palan est en bon état, a été mis en place
correctement, qu’il est prêt pour l’emploi et
que les défauts ou dommages sont découverts
et, si besoin, éliminés.
*L’inspection doit être réalisée par un repré-
sentant du fabricant ou par un utilisateur
désigné par l’entreprise. Les contrôles doivent
être provoqués par l’utilisateur.
Avant de mettre l‘appareil en opération,
vérifier le fonctionnement des engrena-
ges sans charge.
INSPECTION AVANT DE COMMENCER
A TRAVAILLER
Avant de commencer à travailler inspecter
l’appareil y compris les accessoires l’équi-
pement et la structure de support pour des
défauts visuels, p. ex. des déformations,
fissures superficielles, marques d’usure et
la corrosion. En outre également tester le
frein et vérifiez que le palan et la charge sont
correctement attachés.
Vérification de la fonction de freinage
Avant de commencer à travailler, toujours
vérifier le fonctionnement du frein : pour ce
faire, lever, tirer ou mettre sous tension et
abaisser ou relâcher une charge sur une
courte distance avec le palan. Lorsque le
levier de manoeuvre est relâchée, la charge
doit être tenue dans n’importe quelle position.
Ce contrôle vise à s’assurer que même à des
températures inférieures à 0 °C, les disques
de frein ne sont pas figés. Répéter au moins
deux fois avant de commencer l’emploi.
ATTENTION : Si le frein ne fonctionne pas
correctement, l’appareil doit être immédia-
tement mis hors service et le fabricant doit
être contacté !
Inspection du point de fixation
- Le point de fixation du palan doit être sélec-
tionné de telle manière que la structure de
support fournisse une stabilité suffisante
et que les forces prévues puissent être
absorbés en toute sécurité.
- L’appareil doit aligner librement sous charge
afin d’éviter une charge supplémentaire
inacceptable
- La sélection et le calcul de la structure de
support appropriée sont la responsabilité de
la société propriétaire.
Inspection de la chaîne de charge
Inspectez la chaîne de charge pour une
lubrification suffisante et de vérifiez si il y a
des défauts externes, déformations, fissures
superficielles, marques d’usure ou de la
corrosion.
Inspection de l’arrêt de chaîne
L’arrêt de chaîne doit toujours être monté à
l’extremité libre de la chaîne (Fig. 12). Il ne
doit pas être usé ou aligné incorrectement.
Inspection des crochets de charge et
de suspension
Le crochet de charge et le crochet de suspen-
sion doit être vérifié pour des fissures, des
déformations, des dommages et des marques
de corrosion. Le linguet de sécurité doit se
déplacer librement et être complètement
fonctionnel.
Inspection de la course de chaîne
dans la moufle inférieure.
Tous les appareils avec deux ou plusieurs
brins doivent être inspectés avant la première
mise en service pour s’assurer que la chaîne
de charge n’est pas tournée ou pliée. Les
chaînes de charge avec deux ou plusieurs
brins peuvent devenir torurnées si le bloc de
fond est par exemple renversé(Fig. 11).
Lors du remplacement de la chaîne, assurez-
vous que la chaîne est placée correctement
(Fig. 13). Les soudures de maillons doivent
faire face vers l’extérieur.
Remplacer seulement avec des chaînes
qui ont été approuvées par le fabricant. La
garantie sera immédiatement déclarée nulle,
non-avenue et sans effet si cette spécification
n’est pas respectée.
FONCTIONNEMENT/MISE EN SERVICE
Dispositif de roue libre
Placer le levier inverseur (Fig. 12) en position
centrale (NEUTRAL). La chaîne peut
maintenant être tirée dans les deux directions
et le crochet de charge sera rapidement mis
en position souhaitée.
ATTENTION: Une charge minimale comprise
entre 30 et 45 kg est requise pour fermer et
faire fonctionner automatiquement le frein.
Lever la charge
Placer le levier en position haute: lever‚ ‘
(Fig. 12). Manoeuvrer le levier. Si le travail est
interrompu lorsque le palan est en charge, le
levier doit être en position haute: lever ‚ ’ et
non en position centrale NEUTRE ou position
basse: descendre ‚ ‘.
Baisser la charge
Placer le levier en position basse: descendre
‚‘. Manoeuvrer le levier.
Blocage du frein
Si un palan se trouvant en charge est brus-
quement délesté de sa charge sans qu’il y
ait eu de travail de descente, ou si la charge
rencontre un obstacle lors de la montée, le
frein peut alors se bloquer. Le frein se bloquera
aussi si le crochet de charge ou la moufle sont
tirés trop fort contre le carter.
Déblocage du frein
Placer le levier en position basse: descendre
‚‘. Actionner le levier de manoeuvre. Si le
frein a été bloqué par une tension extrême ac-
tionner le levier de manoeuvre d’un coup sec.
INSPECTION, SERVICE ET
RÉPARATION
Selon les règlements nationaux et interna-
tionaux pour la prévention des accidents et
de la sécurité les appareils de levage doivent
être inspectés:
• conformément à l’évaluation des risques
de l’entreprise propriétaire
• avant l’emploi initial
• avant que l’appareil soit remis en service
après un arrêt d’utilisation
• après de substantielles modifications
• par ailleurs, au moins une fois par an, par
une personne compétente.
ATTENTION Les conditions réelles d’em-
ploi (par exemple, l’emploi dans les instal-
lations de galvanisation) peuvent dicter de
plus courts intervalles d’inspection.
Les réparations ne peuvent être effectuées
que par une societé spécialisée qui utilise
des pièces de rechange originales Yale.
L’inspection (principalement constituée d’une
inspection visuelle et une vérification de la
fonction) doit déterminer que tous les disposi-
tifs de sécurité sont complets et opérationnels
et aussi l’état de l’appareil, des accessoires
de suspension et de la structure de support
(dommages, usure, corrosion ou tout autres
altérations).
La mise en service et les inspections pério-
diques doivent être documentés (par exemple
dans le cahier de travaux CMCO).
Si voulu, les résultats des inspections et des
réparation peuvent être consultés. Si le palan
(Capacité à partir de 1 t) est monté sur ou dans
un chariot ou et si le palan est utilisé pour
déplacer une charge dans une ou plusieurs
directions, l’installation est considéré comme
une grue et si besoin des inspections supplé-
mentaires doivent être effectuées.
Les dégâts de peinture doivent être retouchés
afin d’éviter la corrosion. Tous les joints et
les surfaces de glissement doivent être légè-
rement graissés. Si l´appareil est très sale il
faut le nettoyer.

11 von 18
L’appareil doit être soumis à une révision
générale au moins une fois tous les 10 ans.
En particulier, vérifiez les dimensions de la
chaîne de charge, du crochet de charge et
du crochet de suspension. Ils doivent être
comparés avec les dimensions spécifiées dans
la table (table 2, table 3).
ATTENTION : Après avoir remplacé des
composants, une inspection par une personne
qualifiée est nécessaire !
Inspection de la chaîne de charge
(acc à DIN 685-5)
Les chaînes de charge doivent être inspectés
pour dommages mécaniques à intervalles
annuels, mais au moins toutes les 50 heures
d’emploi. Inspectez la chaîne de charge pour
la lubrification suffisante et pour des défauts
externes, déformations, fissures superficielles,
marques d’usure et de la corrosion.
Une chaîne en acier rond doit être remplacé
lorsque l’épaisseur nominale originale d’un
des maillons de la chaîne a été réduite de
plus de 10 % par l’usure ou lorsque un maillon
s’est allongé à l’intérieur ´ pn´ de 5 % (Fig. 14)
ou à l’intérieur de 11 maillons (11 x pn) de
plus de 3 %.
Les dimensions nominales et les limites
d’usure se trouvent dans le tableau 2. Si la
limite de l’une des valeurs est atteinte, la
chaîne de charge doit être remplacée
Maintenance de la chaîne de charge
Dans la plupart des cas, l’usure de la chaîne
aux points de liaison est causée par une
maintenance insuffisante de la chaîne. Afin
d’assurer une lubrification optimale des points
de contact de maillons, lubrifier la chaîne à
intervalles réguliers, avec un lubrifiant adapté
(par exemple de l’huile de transmission).
Un lubrifiant à film sec, par exemple un
aérosol PTFE, devrait être utilisé dans des
environnements abrasifs comme le sable, etc.
La durée de vie de la chaîne de charge peut
être augmentée de 20 à 30 fois par une bonne
lubrification périodique par rapport à une
chaîne qui n’est pas maintenue.
- Lors de la lubrification de la chaîne, assurez-
vous que la chaîne est sans charge afin que
l’huile puisse atteindre les points de contact
les maillons de chaîne qui sont particulière-
ment soumis à l’usure. Les points de contact
des maillons de chaîne doivent toujours être
recouverts de lubrifiant, sinon cela résultera
en une plus grande usure de la chaîne.
- Il n’est pas suffisant de lubrifier les chaînes
à l’extérieur car cela ne garantit pas qu’un
film lubrifiant puisse s’accumuler aux points
de contact.
- Avec une voie de levage constant de la
chaîne, la zone de changement entre la des-
cente et la levée doit être particulièrement
bien maintenue.
- Assurez-vous que la chaîne de charge est
lubrifiée sur toute sa longueur, y compris la
partie de la chaîne dans le boitier du palan.
- Nettoyez les chaînes sales avec du pétrole
ou produit de nettoyage similaire, ne jamais
chauffer la chaîne.
- Lors de la lubrification de la chaîne vérifier
la chaîne pour l’usure.
ATTENTION : Il faut s’assurer qu’aucun
lubrifiant ne puisse pénétrer dans le frein. Le
frein risque de cesser de fonctionner.
Remplacer la chaîne de charge
La chaîne de charge doit être remplacée par
une nouvelle chaîne de même dimensions et
qualité, dans le cas ou la chaîne est endom-
magé ou déformée, mais aussi au plus tard
à la fin du temps de vie.
Une chaîne de charge doit toujours être
remplacée par un spécialiste autorisé. Utiliser
seulement des chaînes qui ont été approuvés
par le fabricant. La garantie sera immédiate-
ment déclarée nulle, non-avenue et sans effet
si cette spécification n’est pas respectée.
NOTE : Le remplacement d’une chaîne de
charge doit être documenté !
Inspection des crochets de charge et
de suspension
Inspecter au besoin le crochet pour la défor-
mation, les dommages, fissures de surfaces,
usure et des signes de corrosion, mais au
moins une fois par an. Les conditions réelles
d’emploi peuvent également dicter plus courts
intervalles d’inspection.
Les crochets qui ne satisfont pas à toutes les
exigences doivent être remplacés immédiate-
ment. Il n’est pas permis de faire des soudures
sur les crochets, par exemple pour compenser
l’usure ou des dommages. Les crochets de
suspension et / ou de charge doivent être
remplacés lorsque le crochet s’est ouvert de
plus de 10 % (Fig. 14, mesure a) ou lorsque
les dimensions nominales ont diminués
de 5 % à cause de l’usure. Les dimensions
nominales et les limites d’usure se trouvent
dans le tableau 3. Si le limite de l’une des
valeurs est atteinte, la chaîne de charge doit
être remplacée.
Inspection du frein
Contactez immédiatement le fabricant, si des
irrégularités sont trouvées (par ex. des disques
de friction défectueux). Tous les composants
du frein doivent être vérifiés pour l ‘usure,
les dommages, la décoloration causé par la
surchauffe et le fonctionnement.
Les disques de friction doivent toujours être
maintenus exempt de graisse, d’huile, d’eau
ou de saletés. Vérifiez si les disques de friction
sont entre collés.
Les réparations doivent uniquement
être effectuées par des spécialistes
autorisés qui utilisent des pièces de
rechange originales Yale.
Après que des réparations ont été effectuées
et après de longues périodes sans utilisation,
le palan doit être inspecté avant qu’il soit mis
de nouveau en service.
Les inspections doivent être initiées par
la société proprietaire.
TRANSPORT, STOCKAGE ET MISE HORS
SERVICE
Observer le suivant pour le transport
de l’appareil:
• Ne pas laisser tomber ou jeter l’appareil,
toujours poser soigneusement.
• Le chaîne de charge doivent être transportés
de façon à éviter la formation de boucles
et de nœuds.
• Utilisez un moyen transport approprié.
Celui-ci dépend des conditions locales.
Observer les instructions suivantes
pour le stockage ou la prise
temporaire hors service:
• Stocker l’unité dans un endroit propre
et sec.
• Protéger l’appareil incl. tous les accessoires
contre la contamination, l’humidité et les
dommages avec une couverture conve-
nable.
• Protéger les crochets contre la corrosion.
• Un léger film de lubrification doit être
appliqué sur la chaîne.
• Parce que les disques de frein peuvent
geler à des températures inférieures à 0 °C,
l’appareil doit être stocké avec frein fermé.
• Si l’appareil doit être utilisé après avoir
été mis hors service, il doit d’abord être
inspecté par une personne compétente.
Élimination
Après la mise hors service de l’appareil,
recycler ou éliminer les parties de l’appareil
en conformité avec les règlements juridiques.
Plus d’informations et de modes d’em-
ploi pour téléchargement se trouvent à
www.cmco.eu !

12 von 18
Fig. 9 Fig. 11Fig. 10
Fig. 1
S
Fig. 6
Fig. 3 Fig. 4
Fig. 5 Fig. 7
Fig. 8
Fig. 2
Bestimmungsgemäße Verwendung
Correct operation
Utilisation correcte
DE
EN
FR
Sachwidrige Verwendung
Incorrect operation
Utilisations incorrectes
DE
EN
FR

13 von 18
Beschreibung
1 Traghaken
mit Sicherheitsbügel
2 Gehäuse
3 Lastkette
4 Unterflasche
5 Lasthaken
mit Sicherheitsbügel
6 Handrad
7 Schalthebel
8 Handhebel
9 Kettenendstück
8
1
2
3
4
5
6
Fig. 12
7
9
Description
1 Top hook
with safety latch
2 Housing
3 Load chain
4 Bottom block
5 Load hook
with safety latch
6 Handwheel
7 Pawl rod lever
8 Hand lever
9 Chain stop
Description
1 Crochet de suspension,
linguet de sécurité
2 Carter
3 Chaîne de charge
4 Moufle
5 Crochet de charge,
linguet de sécurité
6 Volant de manouvre
7 Levier inverseur
8 Levier de manoeuvre
9 Arrêt de chaîne

14 von 18
Fig. 15
b
h
a
Fig. 14
Fig. 13
Kettenverlauf
Chain reeving
Déroulement de la chaîne
DE
EN
pn11 x pn
d1
d2
d = Nenndicke der Kette / Nominal thickness of chain
d1, d2 = Istwert / Actual value
d1 + d2
dm = ≤ 0,9 d
2
d
1500 kg 3000 kg 6000 kg750 kg
FR

15 von 18
UNOplus 750 1500 3000 6000
Tragfähigkeit / Capacity / Capacité [kg] 750 1.500 3.000 6.000
Anzahl Kettenstränge / Number of chain falls /
Nombre de brins de chaîne 1112
Kettenabmessung d x pn / Chain dimensions d x pn /
Dimensions de la chaîne d x pn
[mm] 6 x 18 8 x 24 10 x 30 10 x 30
Kürzester Hakenabstand / Min. headroom /
Hauteur perdue [mm] 340 410 510 690
Handhebellänge / Hand lever length /
Longueur du levier manuel de commande [mm] 250 330 380 380
Hubkraft bei Nennlast / Hand pull at rated load /
Effort sur la chaîne de manoeuvre [daN] 20,0 35,0 40,0 40,0
Gewicht bei Normalhub / Net weight at standard lift /
Poids net en course standard [kg] 7,2 12,5 21,5 32,0
Spannkraft STF / Tensioning force STF /
Tension max. STF à appliquer sur chaine [daN] 750 1500 3000 6000
Handkraft SHF / Hand force SHF/
Effort min. SHF à appliquer manuellement sur le levier [daN] 20,0 35,0 40,0 40,0
Tab. 1
Nominalwerte und Verschleißgrenzen / Nominal values and wear limitation
UNOplus 750 1500 3000 6000
Rundstahlkette / Round link chain [mm] 6 x 18 8 x 24 10 x 30 10 x 30
Güteklasse / Grade T T T T
Durchmesser / Diameter dnom.
dmin.
[mm]
[mm]
6,0
5,4
8,0
7,2
10,0
9,0
10,0
9,0
Teilung / Pitch pn nom.
pn max.
[mm]
[mm]
18,0
18,9
24,0
25,2
30,0
31,5
30,0
31,5
Meßlänge / Length 11 x pn nom.
11 x pn max.
[mm]
[mm]
198,0
203,9
264,0
271,9
330,0
339,9
330,0
339,9
Tab. 2
Hakenmaße / Hook dimensions
UNOplus 750 1500 3000 6000
Hakenöffnungsmaß / Hook opening
anom.
amax.
[mm]
[mm]
26,0
28,6
32,0
35,2
40,0
44,0
44,0
48,4
Maß Hakenbreite / Hook width
bnom.
bmin.
[mm]
[mm]
16,0
15,2
21,0
20,0
27,0
25,7
33,0
31,4
Maß Hakendicke / Hook height
hnom.
hmin.
[mm]
[mm]
22,0
20,9
28,0
26,6
36,0
34,2
45,0
42,8
Tab. 3

16 von 18
Original EG Konformitätserklärung 2006/42/EG (Anhang II A)
Hiermit erklären wir, dass das nachstehend bezeichnete Produkt in seiner Konzipierung und Bauart sowie in der von uns in Verkehr
gebrachten Ausführung den einschlägigen grundlegenden Sicherheits- und Gesundheitsanforderungen der EG-Richtlinien Maschinen
entspricht. Bei einer nicht mit uns abgestimmten Änderung/Ergänzung des Produktes verliert diese EG-Konformitätserklärung ihre Gültigkeit.
Weiterhin verliert diese EG-Konformitätserklärung ihre Gültigkeit, wenn das Produkt nicht entsprechend den in der Betriebsanleitung
aufgezeigten bestimmungsgemäßen Einsatzfällen eingesetzt wird und die regelmäßig durchzuführenden Überprüfungen nicht ausgeführt
werden.
Produkt: Handhebezeug
Typ: Allzweckgerät UNOplus Tragfähigkeit: 750 - 6.000 kg
UNOplus 750, UNOplus 1500, UNOplus 3000, UNOplus 6000
Serien Nr.: Seriennummern für die einzelnen Geräte werden archiviert
Einschlägige EG-Richtlinien: EG-Maschinenrichtlinie 2006/42/EG
Angewandte Normen: ISO 12100:2010; EN 349:1993+A1:2008; EN 818-1:1996+A1:2008; EN 818-7:2002+A1:2008;
EN 12195-3:2001; EN 13157:2010; DIN 685-5:1981; DIN 5684-2:1984; DIN 15400:1990;
DIN 15404-1:1989; BGV D6; BGV D8; BGR 500
Qualitätssicherung: EN ISO 9001:2008
Firma / Dokumentationsbevollmächtigter: COLUMBUS McKINNON Industrial Products GmbH
Am Lindenkamp 31, 42549 Velbert, Germany
Datum / Hersteller-Unterschrift: 24.10.2012
Dipl.-Ing. Andreas Oelmann
Angaben zum Unterzeichner: Leiter Qualitätswesen
Translation of the original EC Declaration of Conformity 2006/42/EC (Appendix II A)
We hereby declare, that the design, construction and commercialised execution of the below mentioned machine complies with the
essential health and safety requirements of the EC Machinery Directive.
The validity of this declaration will cease in case of any modification or supplement not being agreed with us previously.
Furthermore, validity of this declaration will cease in case that the machine will not be operated correctly and in accordance to the
operating instructions and/or not be inspected regularly.
Product: Hand hoist
Type: Ratchet lever hoist UNOplus Capacity: 750 - 6.000 kg
UNOplus 750, UNOplus 1500, UNOplus 3000, UNOplus 6000
Serial no.: Serial numbers for the individual units are recorded
Relevant EC Directives: EC Machinery Directive 2006/42/EC
Transposed standards ISO 12100:2010; EN 349:1993+A1:2008; EN 818-1:1996+A1:2008; EN 818-7:2002+A1:2008;
in particular: EN 12195-3:2001; EN 13157:2010; DIN 685-5:1981; DIN 5684-2:1984; DIN 15400:1990;
DIN 15404-1:1989; BGV D6; BGV D8; BGR 500
Quality assurance: EN ISO 9001:2008
Company / Authorised representative for technical data: COLUMBUS McKINNON Industrial Products GmbH
Am Lindenkamp 31, 42549 Velbert, Germany
DE
EN

17 von 18
Traduction de la Déclaration de Conformité 2006/42/CE (Annexe II A) originale
Nous déclarons que la machine désignée ci-dessous correspond tant dans sa conception que dans sa construction aux exigences es-
sentielles de santé et de sécurité des directives machines CE. La validité de cette déclaration cessera en cas de modification ou élément
ajouté n‘ayant pas bénéficié précédemment de notre accord.
De plus, la validité de cette déclaration cessera si l‘utilisation de la machine n‘est pas conforme aux instructions de mise en service, et
si elle n‘est pas vérifiée réguliérement.
Produit: Palan manuel à chaîne
Type d’appareil: Palan à levier à rochet mod. UNOplus Capacité: 750 - 6.000 kg
UNOplus 750, UNOplus 1500, UNOplus 3000, UNOplus 6000
N° de série: Les numéros de série de chaque appareil sont enregistrés dans le livre de production
Directives CE correspondantes: Directive machines 2006/42/CE
Normes, en particulier: ISO 12100:2010; EN 349:1993+A1:2008; EN 818-1:1996+A1:2008; EN 818-7:2002+A1:2008;
EN 12195-3:2001; EN 13157:2010; DIN 685-5:1981; DIN 5684-2:1984; DIN 15400:1990;
DIN 15404-1:1989; BGV D6; BGV D8; BGR 500
Assurance qualité: EN ISO 9001:2008
Société / Personne autorisée á constituer le dossier technique: COLUMBUS McKINNON Industrial Products GmbH
Am Lindenkamp 31, 42549 Velbert, Germany
FR

*Diese Niederlassungen gehören der Matrix-Zertifizierung nach EN ISO 9001:ff an.
*These subsidiaries belong to the matrix-certification-system according to EN ISO 9001:ff.
Technische Änderungen vorbehalten. Keine Gewährleistung für Druckfehler oder Irrtümer – Subject to engineering changes and improvements. No warranty for printing errors or mistakes.
Reproduktionen, gleich welcher Art, nur mit schriftlicher Genehmigung der COLUMBUS McKINNON Industrial Products GmbH!
Reproduction of any kind, only with written authorisation of COLUMBUS McKINNON Industrial Products GmbH!
Germany
COLUMBUS McKINNON
Industrial Products GmbH*
Am Lindenkamp 31
42549 Velbert
Phone: 00 49 (0) 20 51/600-0
Web Site: www.cmco.eu
Web Site: www.yale.de
E-mail: info.velbert@cmco.eu
COLUMBUS McKINNON
Engineered Products GmbH*
Am Silberpark 2-8
86438 Kissing
Phone: 00 49 (0) 8233 2121-800
Web Site: www.cmco.eu
Web Site: www.pfaff-silberblau.com
E-Mail: info.kissing@cmco.eu
Dubai
COLUMBUS McKINNON
Industrial Products ME FZE
Warehouse No. FZSBD01
P.O. Box 261013
Jebel Ali
Dubai, U.A.E.
Phone: 00 971 4 880 7772
Web Site: www.cmco.eu
E-mail: sales.uae@cmco.eu
China
Hangzhou LILA
Lifting and Lashing Co. Ltd.*
3350 Nanhuan Road, Zhijiang Industrial Park
Hangzhou High-tech Zone
Zhejiang Province
Phone: 00 86 10 85 23 63 86
Web Site: www.yale-cn.com
E-mail: inquiryasia@cmworks.com
COLUMBUS McKINNON (Hangzhou)*
Industrial Products Co. Ltd.
No. 100 Luofeng Road
Xiaoshan, Yiqiao, Zhejiang Province
Postcode 311256
Phone: 00 86 10 85 23 63 86
Web Site: www.yale-cn.com
E-mail: inquiryasia@cmworks.com
France
COLUMBUS McKINNON France SARL*
Zone Industrielle des Forges
18108 Vierzon Cedex
Phone: 00 33 (0) 248/71 85 70
Web Site: www.cmco-france.com
E-mail: centrale@cmco-france.com
Spain and Portugal
COLUMBUS McKINNON Ibérica S.L.U.
Ctra. de la Esclusa, 21 acc. A
41011 Sevilla
Phone: 00 34 954 29 89 40
Web Site: www.yaleiberica.com
E-mail: informacion@cmco.eu
South Africa
CMCO Material Handling (Pty) Ltd.*
P.O. Box 15557
Westmead, 3608
Phone: 00 27 (0) 31/700 43 88
Web Site: www.yale.co.za
E-mail: sales@cmcosa.co.za
Yale Engineering Products (Pty) Ltd.
12 Laser Park Square, 34 Zeiss Rd.
Laser Park Industrial Area, Honeydew
Phone: 00 27 (0) 11/794 29 10
Web Site: www.yalejhb.co.za
E-mail: info@yalejhb.co.za
Yale Lifting & Mining Products (Pty) Ltd.
P.O. Box 592
Magaliesburg, 1791
Phone: 00 27 (0) 14/577 26 07
Web Site: www.yale.co.za
E-mail: sales@yalelift.co.za
Thailand
Yale Industrial Products Asia Co. Ltd.
54 BB.Building, Room No. 1510, 15th Floor,
Sukhumvit 21 (Asoke) Road, Klongtoey Nua
Wattana, Bangkok 10110
Phone: 00 66 (0) 26 64 03 00
Web Site: www.yale-thailand.com
Turkey
COLUMBUS McKINNON
Kaldırma Ekip. San. ve Tic. Ltd. Şti.
Davutpaşa Caddesi Emintaş
Davutpaşa Matbaacılar Sitesi No. 103/233-234
34010 Topkapi-istanbul
Phone: 00 90 (212) 210 7 555
Web Site: www.cmco.eu
Hungary
COLUMBUS McKINNON Hungary Kft.
Vásárhelyi út 5. VI ép
8000 Székesfehérvár
Phone: 00 36 (22) 546-720
Web Site: www.yale.de
E-mail: info@cmco-hungary.com
United Kingdom
COLUMBUS McKINNON Corporation Ltd.
Knutsford Way, Sealand Industrial Estate
Chester CH1 4NZ
Phone: 00 44 (0) 1244375375
Web Site: www.cmco.eu
E-mail: sales.uk@cmworks.eu
Unit 1A, The Ferguson Centre
57-59 Manse Road
Newtownabbey BT36 6RW
Northern Ireland
Phone: 00 44 (0) 28 90 840697
Web Site: www.cmco.eu
E-mail: sales@yaleip.co.uk
Italy
COLUMBUS McKINNON Italia S.r.l.
Via P. Picasso, 32
20025 Legnano (MI)
Phone: 00 39 (0) 331/57 63 29
Web Site: www.cmco.eu
E-mail: claudio.franchi@cmworks.eu
Netherlands
COLUMBUS McKINNON Benelux B.V.*
Grotenoord 30
3341 LT Hendrik Ido Ambacht
Phone: 00 31 (0) 78/6 82 59 67
Web Site: www.yaletakels.nl
E-mail: yaletakels@cmco.eu
Austria
COLUMBUS McKINNON Austria GmbH*
Gewerbepark, Wiener Straße 132a
2511 Pfaffstätten
Phone: 00 43 (0) 22 52/4 60 66-0
Web Site: www.yale.at
E-mail: zentrale@cmco.at
Poland
COLUMBUS McKINNON Polska Sp. z o.o.
Ul. Owsiana 14
62-064 PLEWISKA
Phone: 00 48 (0) 61 6 56 66 22
Web Site: www.pfaff.info.pl
E-Mail: kontakt@pfaff-silberblau.pl
Russia
COLUMBUS McKINNON Russia LLC
Chimitscheski Pereulok, 1, Lit. AB
Building 72, Office 33
198095 St. Petersburg
Phone: 007 (812) 322 68 38
Web Site: www.yale.de
E-mail: info@yalekran.ru
Switzerland
COLUMBUS McKINNON Switzerland AG
Dällikerstraße 25
8107 Buchs ZH
Phone: 00 41 (0) 44 8 51 55 77
Web Site: www.cmco.ch
E-mail: info@cmco.ch
Other manuals for UNOplus
1
Table of contents
Other Yale Chain Hoist manuals

Yale
Yale LH2 User manual

Yale
Yale UNOplus A Series Operating instructions

Yale
Yale VSIII Series User manual

Yale
Yale CPE Series Operating instructions

Yale
Yale CPS User manual

Yale
Yale CPEF User manual

Yale
Yale lift LHP User manual

Yale
Yale PT User manual

Yale
Yale CPA Series Training manual

Yale
Yale Yalehandy User manual