manuals.online logo
Brands
  1. Home
  2. •
  3. Brands
  4. •
  5. Yamaha
  6. •
  7. Conference System
  8. •
  9. Yamaha PJP-20URs User manual

Yamaha PJP-20URs User manual

Daisy-chain connection of PJP-20URs
Maximum of 4 units of PJP-20URs can be daisy chained by
installing Yamaha PJP Cascade driver. Daisy chaining the
units is useful for having a meeting in a large conference
room or with a large number of persons.
•Use Ver.1.07 or higher of the firmware of PJP-20UR.
•Any other projectphone except PJP-20UR can not be
used in daisy-chain connection.
•Do not connect 5 or more units of PJP-20UR.
•Refer to the Instructions Manual provided with PJP-
20UR for basic operation.
Check the specifications
of computer
The computer used for daisy-chain connection of PJP-
20UR should meet the following system requirement.
When Using Windows 7
When Using Windows Vista
When Using Windows XP
•Audio playback may interrupt in rare cases depending on
the status of use of PC (task load or status of available
memory).
•Daisy-chain connection can not be used with Windows
2000 and MacOS.
Installing the Driver
By installing the driver in the computer connected to PJP-
20UR units, the units can be daisy chained for use.
In this procedure, Windows 7 is used as an example.
1Download the driver.
Download Yamaha PJP Cascade driver from
the following website.
http://www.yamaha.co.jp/projectphone/
2Double click the downloaded
“Yamaha_PJP_Cascade_Setup.exe”.
Setup program will start.
y
Warning message regarding the execution of installer may
appear. Continue with the installation as this operation is
already tested and verified.
3Click “Next”.
4Read the “License Agreement”
carefully, select “I accept the terms of
the license agreement”, and then click
“Next”.
If you do not agree, select “I do not accept the
terms of the license agreement” to terminate
the installation.
When daisy-chaining 2 units
When daisy-chaining 3-4 units
OS 32bit/64bit
CPU
Core2 Duo 2.0GHz and above Core2 Duo 2.5GHz and above
Other
Memory 2GB and above, USB2.0 High Speed supported
When daisy-chaining 2 units
When daisy-chaining 3-4 units
OS 32bit, SP1 and above
CPU
Core2 Duo 2.0GHz and above Core2 Duo 3.0GHz and above
Other
Memory 2GB and above, USB2.0 High Speed supported
When daisy-chaining 2 units
When daisy-chaining 3-4 units
OS 32bit, SP2 and above
CPU Core2 Duo 2.0GHz and above
Other
Memory 2GB and above, USB2.0 High Speed supported
Note
Note
WY83880
5Click [Install].
Installation will start.
y
•When using Windows 7/Vista, a warning message may
appear for continuing the installation. Proceed with the
installation as this operation is already tested and
verified.
•When using Windows XP, the “Hardware Installation”
screen may appear. Proceed with the installation as this
operation is already tested and verified.
6The “Microsoft Visual C++ 2005 SP1
Redistributa…” screen appears. Click
“Yes” after confirming the details of
license agreement.
7Select “Yes, I want to restart my
computer now.” and click “Finish”.
PC will restart and installation will complete.
this procedure, Windows 7 is used as an example.
Delete the driver from the PC by selecting [Start]–[Control
Panel]–[Uninstall a program]–[Yamaha PJP Cascade] from
the taskbar in sequence.
For uninstalling the driver, login with the id used for setup.
Daisy-chain connection of
PJP-20URs
Daisy-chain connection of PJP-20URs is established
through USB hub equipped with Multiple Transaction
Translator function (self power).
•Use the USB hub equipped with Multiple Transaction
Translator function. Or else, units may not function
normally due to USB spectrum trouble. Refer to http://
www.yamaha.co.jp/projectphone/ for the tested and
verified USB hubs.
•Ensure to use USB hub in self power (AC) mode.
•Use the USB cable supplied with PJP-20UR or
commercially available certified USB cable (maximum
5m).
•Do not use USB extension cable. Units may not function
normally.
•Do not remove PJP-20UR or USB hub in the middle of
web conference. Device may not function normally.
Uninstalling the Driver
Note
Note
PROJECTPHONEPJP-20UR
MIC
ZONE
PROJECTPHONEPJP-20UR
MIC
ZONE
PROJECTPHONEPJP-20UR
MIC
ZONE
PROJECTPHONEPJP-20UR
MIC
ZONE
Changing the audio device
settings
•Audio device setting in the control panel (explained after
this) is to be done before starting up the Web
conferencing software at all times.
•When using in a web conference, in addition to the
settings of audio device of control panel described
below, select “Yamaha PJP Cascade” in the settings of
audio device (speaker, microphone) of web conferencing
software as well.
•All the connected PJP-20URs may not appear on the
setting screen of audio device on the following control
panel. In this case, on the device manager screen,
delete the PJP-20URs that are not recognized correctly,
and reconnect the USB cable.
•Change the settings of audio device only after
connecting all USB devices.
When Using Windows 7/Vista
In this procedure, Windows 7 is used as an example.
1Click the “Start” menu and click
“Control Panel”.
2Click “Classic View”.
3Click “Sound”.
The “Sound” screen appears.
4Click the “Playback” tab.
5Select “Yamaha PJP Cascade” and
click “Set Default”.
6Click the “Recording” tab.
7Select “Yamaha PJP Cascade” and
click “Set Default”.
8Click “OK” to close the “Sound”
screen.
When Using Windows XP
1Click the “Start” menu and click
“Control Panel”.
2Click “Sounds, Speech, and Audio
Devices”.
3Click “Sounds and Audio Devices”.
The “Sounds and Audio Devices Properties”
screen will appear.
4Click the “Audio” tab.
5Change the settings and click
“Apply”.
•“Default device” in “Sound playback”:
Yamaha PJP Cascade
Note
(May 2011)
•“Default device” in “Sound recording”:
Yamaha PJP Cascade
6Click the [Voice] tab.
7Change the settings and click [Apply].
•“Default device” in “Voice playback”:
Yamaha PJP Cascade
•“Default device” in “Voice recording”:
Yamaha PJP Cascade
8Click [OK] to close the “Sounds and
Audio Devices Properties” screen.
Installing the PJO-20URs
in the conference room
Install the daisy-chained PJP-20URs by following the
examples below. Echo will be produced at the other end if
the PJP-20URs are placed too close to each other.
(4 units in a side-by-side arrangement)
Keep a distance of approximately 2m between the centers
of unit each placed in a side-by-side arrangement.
(4 units in a linear arrangement)
Keep a distance of approximately 2m between the centers
of unit each placed in a linear arrangement.
Adjusting the Volume
Adjust the volume of “Yamaha PJP Cascade” when
adjusting the volume from the property screen of audio
device (When using Windows 7/Vista; Step 5-7, When
using Windows XP: Step 5). Device will not function
properly if you adjust the volume of “Yamaha PJP-20UR”
by mistake.
Adjusting the speaker volume
Adjust the speaker volume from PJP-20UR or PC.
Operating a PJP-20UR or computer reflects the operation
in other interlocked PJP-20URs.
Adjusting the microphone level
Adjust the microphone level from PC. Operating the PC
reflects the operation in all the interlocked PJP-20URs.
Muting the speakers/microphones
Mute the speakers/microphones from PJP-20UR or PC.
Operating a PJP-20UR or computer reflects the operation
in other interlocked PJP-20URs.
MIC
ZONE
MIC
ZONE
MIC
ZONE
MIC
ZONE
Approximately
2m
Approximately
2m
Approximately 2m
MIC
ZONE
MIC
ZONE
MIC
ZONE
MIC
ZONE
Approximately 2m
Approximately 2m
Approximately 2m
Note

Other Yamaha Conference System manuals

Yamaha ADECIA User manual

Yamaha

Yamaha ADECIA User manual

Yamaha PJP-50R Assembly instructions

Yamaha

Yamaha PJP-50R Assembly instructions

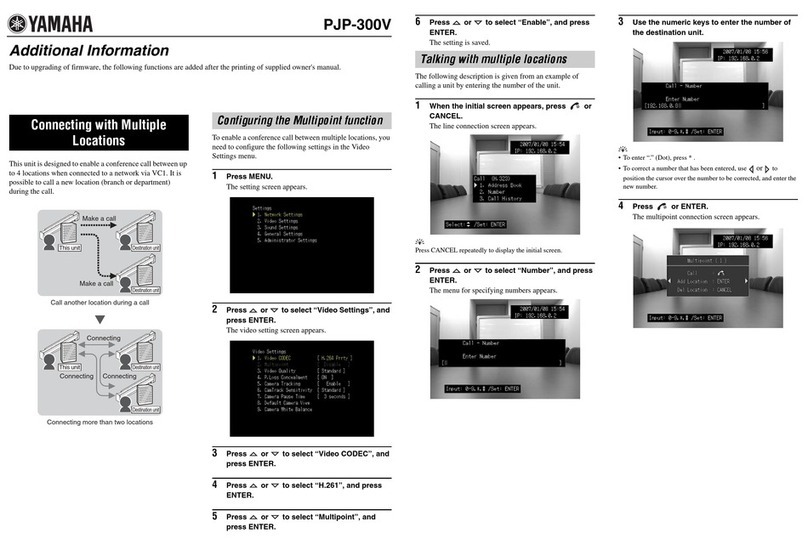
Yamaha PJP-300V Installation manual

Yamaha

Yamaha PJP-300V Installation manual

Yamaha PJP-MC24 User manual

Yamaha

Yamaha PJP-MC24 User manual

Yamaha PJP-EC200 Manual

Yamaha

Yamaha PJP-EC200 Manual

Yamaha PJP-50R User manual

Yamaha

Yamaha PJP-50R User manual

Yamaha CS-700 Series User manual

Yamaha

Yamaha CS-700 Series User manual

Yamaha CS-700 Series User manual

Yamaha

Yamaha CS-700 Series User manual

Yamaha CS-800 User manual

Yamaha

Yamaha CS-800 User manual

Yamaha Revolabs FLX2 Parts list manual

Yamaha

Yamaha Revolabs FLX2 Parts list manual

Yamaha ProjectPhone PJP-100H User manual

Yamaha

Yamaha ProjectPhone PJP-100H User manual

Yamaha PJP-50USB User manual

Yamaha

Yamaha PJP-50USB User manual
Yamaha PJP-EC200 Manual

Yamaha

Yamaha PJP-EC200 Manual

Yamaha ADECIA RM-CR User manual

Yamaha

Yamaha ADECIA RM-CR User manual

Yamaha ProjectPhone PJP-100H Installation manual

Yamaha

Yamaha ProjectPhone PJP-100H Installation manual

Yamaha CS-700 Series User manual

Yamaha

Yamaha CS-700 Series User manual
Yamaha PJP-EC200 User manual

Yamaha

Yamaha PJP-EC200 User manual

Yamaha PJP-EC200 User guide

Yamaha

Yamaha PJP-EC200 User guide

Yamaha CS-700 Series User manual

Yamaha

Yamaha CS-700 Series User manual

Yamaha CS-500 User manual

Yamaha

Yamaha CS-500 User manual

Yamaha CS-500 Instruction sheet

Yamaha

Yamaha CS-500 Instruction sheet

Yamaha ProjectPhone PJP-100H User manual

Yamaha

Yamaha ProjectPhone PJP-100H User manual

Yamaha CS-700 Series User manual

Yamaha

Yamaha CS-700 Series User manual

Yamaha CS-800 User manual

Yamaha

Yamaha CS-800 User manual

Popular Conference System manuals by other brands

Speakerbus AYRE user guide

Speakerbus

Speakerbus AYRE user guide

Motorola AC1000 user guide

Motorola

Motorola AC1000 user guide

Polycom SoundPoint IP 500 SIP 3.0 user guide

Polycom

Polycom SoundPoint IP 500 SIP 3.0 user guide

ITC TS-0604M user manual

ITC

ITC TS-0604M user manual

Comdial SCbus Installing

Comdial

Comdial SCbus Installing

Yealink MeetingSpace VC500 manual

Yealink

Yealink MeetingSpace VC500 manual

JDS Uniphase Talk-N-Trace TM-110 user guide

JDS Uniphase

JDS Uniphase Talk-N-Trace TM-110 user guide

Poly Studio R30 Beta user guide

Poly

Poly Studio R30 Beta user guide

Motorola MOSCAD-L Schematic diagrams

Motorola

Motorola MOSCAD-L Schematic diagrams

Rath Janus SmartView Visual Installation & operation manual

Rath

Rath Janus SmartView Visual Installation & operation manual

Grandstream Networks GDS3710 Quick reference guide

Grandstream Networks

Grandstream Networks GDS3710 Quick reference guide

AT&T MERLIN Plus user guide

AT&T

AT&T MERLIN Plus user guide

Texas Instruments TLV320DAC3203 reference guide

Texas Instruments

Texas Instruments TLV320DAC3203 reference guide

Monacor CS-100 Series instruction manual

Monacor

Monacor CS-100 Series instruction manual

LifeSize Express user guide

LifeSize

LifeSize Express user guide

Ercogener GenPro 325e instruction sheet

Ercogener

Ercogener GenPro 325e instruction sheet

Polycom 3000 Specifications

Polycom

Polycom 3000 Specifications

Huawei TE30 quick start guide

Huawei

Huawei TE30 quick start guide

manuals.online logo
manuals.online logoBrands
  • About & Mission
  • Contact us
  • Privacy Policy
  • Terms and Conditions

Copyright 2025 Manuals.Online. All Rights Reserved.