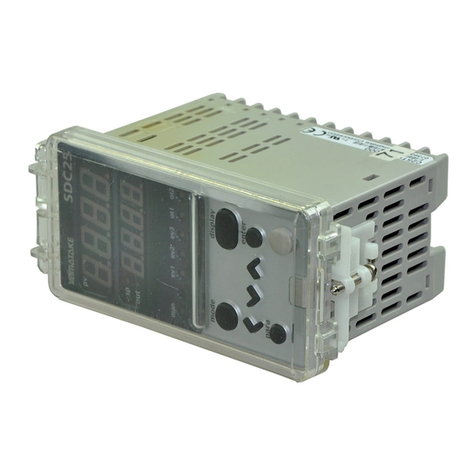
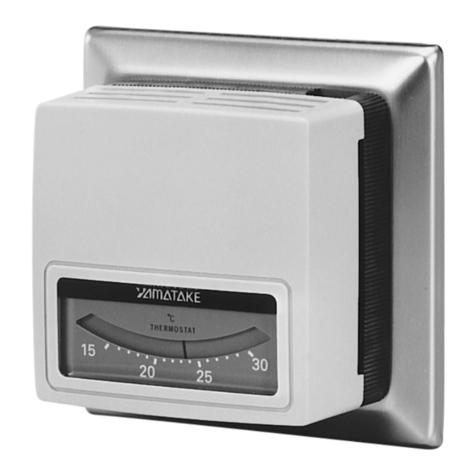
Yamatake DigitroniK DCP32 User manual

DigitroniK
Digital Program Controller
DCP32
User’s Manual
No. CP-SP-1042E
Thank you for purchasing the DigitroniK
Digital Program Controller DCP32.
This manual contains information for
ensuring correct use of the DCP32. It
also provides necessary information for
installation, maintenance, and
troubleshooting.
This manual should be read by those
who design and maintain devices that
use the DCP32.
Be sure to keep this manual nearby for
handy reference.

When using this product in applications that require particular safety or when using this
product in important facilities, pay attention to the safety of the overall system and
equipment. For example, install fail-safe mechanisms, carry out redundancy checks
and periodic inspections, and adopt other appropriate safety measures as required.
RESTRICTIONS ON USE
DigitroniK®is a registered trademark of Yamatake Corporation.
DCP31, DCP32, SDC20, SDC21, SDC30, SDC31, SDC40, MA500 and MX200
are registered trademarks of Yamatake Corporation.
©1998 Yamatake Corporation ALL RIGHTS RESERVED
Make sure that this Instruction Manual is handed over to the user before
the product is used.
Copying or duplicating this Instruction Manual in part or in whole is for-
bidden. The information and specifications in this Instruction Manual are
subject to change without notice.
Considerable effort has been made to ensure that this Instruction
Manual is free from inaccuracies and omissions.
If you should find any inaccuracies or omissions, please contact
Yamatake Corporation.
In no event is Yamatake Corporation liable to anyone for any indirect,
special or consequential damages as a result of using this product.
REQUEST

■About Icons
Safety precautions are for ensuring safe and correct use of this product, and for
preventing injury to the operator and other people or damage to property. You must
observe these safety precautions. The safety precautions described in this manual
are indicated by various icons.
The following describes the icons and their meanings. Be sure to read and
understand the following descriptions before reading this manual.
■Examples
i
Triangles warn the user of a possible danger that may be caused by
wrongful operation or misuse of this product.
These icons graphically represent the actual danger. (The example on
the left warns the user of the danger of electrical shock.)
White circles with a diagonal bar notify the user that specific actions are
prohibited to prevent possible danger.
These icons graphically represent the actual prohibited action. (The
example on the left notifies the user that disassembly is prohibited.)
Black filled-in circles instruct the user to carry out a specific obligatory
action to prevent possible danger.
These icons graphically represent the actual action to be carried out.
(The example on the left instructs the user to remove the plug from the
outlet.)
SAFETY PRECAUTIONS
WARNING Warnings are indicated when mishandling this product might
result in death or serious injury to the user.
CAUTION Cautions are indicated when mishandling this product might
result in minor injury to the user, or only physical damage to
this product.

ii
WARNING
CAUTION
Use the DCP32 within the operating ranges recommended in the specifica-
tions (temperature, humidity, voltage, vibration, shock, mounting direction,
atmosphere, etc.).
Failure to do so might cause fire or faulty operation.
Do not block ventilation holes.
Doing so might cause fire or faulty operation.
Do not allow lead clippings, chips or water to enter the DCP32 case.
Doing so might cause fire or faulty operation.
Wire the DCP32 properly according to predetermined standards.
Also wire the DCP32 using designed power leads according to recognized
installation methods.
Failure to do so might cause electric shock, fire or faulty operation.
Inputs to the current input terminals and on the DCP32 should be
within the current and voltage ranges listed in the specifications.
Failure to do so might cause fire or faulty operation.
Firmly tighten the terminal screws at the torque listed in the specifications.
Insufficient tightening of terminal screws might cause electric shock or fire.
Do not use unused terminals on the DCP32 as relay terminals.
Doing so might cause electric shock, fire or faulty operation.
We recommend attaching the terminal cover (sold separately) after wiring
the DCP32.
Failure to do so might cause electric shock.
33
31
Before removing or mounting the DCP32, be sure to turn the power OFF.
Failure to do so might cause electric shock.
Do not disassemble the DCP32.
Doing so might cause electric shock or faulty operation.
Before connecting the DCP32 to the measurement target or external control
circuits, make sure that the FG terminal is properly grounded (100Ωmax.).
Failure to do so might cause electric shock or fire.
Turn the DCP32 OFF before starting wiring.
Failure to do so might cause electric shock.
Do not touch electrically charged parts such as the power terminals.
Doing so might cause electric shock.

iii
CAUTION
Use Yamatake Corporation's SurgeNon if there is the risk of power surges
caused by lightning.
Failure to do might cause fire or faulty operation.
Before replacing the battery, be sure to turn the power OFF.
Failure to do so might cause electric shock.
Do not touch internal components immediately after turning the power OFF
to replace the battery.
Doing so might cause burns.
・Do not insert the battery with the polarities (+, -) reversed.
・Do not use damaged (broken battery skin, leaking battery fluid) batteries.
・Do not throw batteries into fires, or charge, short-circuit, disassemble or
heat batteries.
・Store batteries in low-temperature, dry locations.
Failure to observe the above cautions may cause batteries to emit heat or
split, or battery fluid to leak.
Store batteries out of the reach of small children.
Batteries are small and are easy to swallow. If a child swallows a battery,
consult a physician immediately.
Do not throw used batteries into fires or dispose at the user site.
Return used batteries to Yamatake Corporation or your dealer.
If you touch components inside the DCP32, touch a grounded metal object
to discharge any static electricity from your body.
Otherwise, static electricity might damage the components.
Handling Precautions
After turning the power ON, do not operate the DCP32 for at least 15
seconds to allow the DCP32 to stabilize.

iv
To reduce of electrical shock which could cause personal injury, all safety notices in
this documentation.
This symbol warns the user of a potential shock hazardous live voltages may be
accessible.
・If the equipment is used in a manner not specified by the manufacturer, the protection
provided by the equipment must be impaired.
・Do not replace any component (or part) not explicity specified as replaceable by your
supplier.
・All wiring must be in accordance with local norms and carried out by authorized
experienced personnel.
・The ground terminal must be connected before any other wiring (and disconnected last).
・A switch in the main supply is required near the equipment.
・In the case of AC power supply models, the main power supply wiring requires a (T) 1.0 A,
250 V fuse(s).(IEC127)
EQUIPMENT RATINGS
Supply voltages 100 to 240 Vac (operation power voltages 90 to 264 Vac)
Frequency 50/60 Hz
Power or current ratings 30 VA maximum
EQUIPMENT CONDITIONS
Do not operate the instrument in the presence of flammable liquids or vapors. Operation of any
electrical instrument in such an environment constitutes a safety hazard.
Temperature 0 to 50℃
Humidity 10 to 90%RH
Vibration Frequency 10 to 60 Hz
Acceleration 1.96 m/s2maximum
Installation category Category II (IEC664-1, EN61010-1)
Pollution degree 2
EQUIPMENT INSTALLATION
The controller must be mounted into a panel to limit operator access to the rear terminal.
Specification of common mode voltage; The common mode voltages of all I/O except for main
supply and relay outputs are less than 30 Vrms, 42.4 V peak and 60 Vdc .
APPLICABLE STANDARDS
EN61010-1, EN50081-2, EN50082-2
CAUTION
Danger of explosion if battery is incorrectly replaced.
Replace only with the same or equivalent type recommended by the manufacturer.
Dispose of used batterries according to the manufacturer’s instructions.
SAFETY REQUIREMENTS

Request
v
The Role of This Manual
The filter on the front of the DCP32 is covered with a protective film to protect the surface of the DCP32.
When you have finished mounting and wiring the DCP32, fix cellophane adhesive tape on the corners of the filter,
and pull in the direction of the arrow to peel off the protective film.
Pull towards you.
Handling Precautions
Peeling off the protective film with your fingernail might scratch the surface
of the DCP32.
DigitroniK CPL Communications DCP31/32 Version
Manual No. CP-UM-1760E
This manual is required reading for those using the CPL communications
functions of the DCP32.
This manual describes an outline of CPL communications, wiring,
communications procedures and DCP communications data, how to
remedy trouble, and communications specifications.
XXXXX
XXXXXX
ser's anua
XXXXX
No. CP-UM-XXXXE
XXXXXXXXXXXXXX
XXXXXXXXXXXXXXXX
XXXXXXXXXXXXXXXX
XXXXXXXXXXXXXXXX
XXXXXXXXXXXXXXXX
XXXXXXXXXXXXXXXX
Product Manual Manual No. CP-SP1042E
This manual
This manual is provided with the DCP32 (single-loop model).
It is required reading for those in charge of designing, producing and
maintaining control systems incorporating the DCP32, and for those using
the DCP32 in other applications.
It describes mounting onto control panels, wiring, parameter setup,
program setup, operation methods, maintenance and inspection,
troubleshooting and specifications.
XXXXX
XXXXXX
ser's anua
XXXXX
No. CP-UM-XXXXE
XXXXXXXXXXXXXX
XXXXXXXXXXXXXXXX
XXXXXXXXXXXXXXXX
XXXXXXXXXXXXXXXX
XXXXXXXXXXXXXXXX
XXXXXXXXXXXXXXXX
The following two manuals have been prepared for the DCP32. The following gives a brief outline of the manual.
If you do not have the required manual, contact Yamatake Corporation or your dealer.

Organization of This User’s Manual
vi
This user's manual comprises the following ten chapters.
Chapter 1. GENERAL This chapter describes DCP32 applications, features and basic function blocks.
It also gives a list of model numbers.
Chapter 2. NAMES & FUNCTIONS OF PARTS
This chapter describes the names and functions of DCP32 parts, input types and
range Nos.
Chapter 3. INSTALLATION & MOUNTING
This chapter describes how to mount the DCP32 on control panels. This chapter is
required reading for designers of control systems using the DCP32.
Chapter 4. WIRING This chapter describes the precautions when wiring the DCP32 to a control system
and how to wire the DCP32. This chapter is required reading for designers of
control systems and supervisors of wiring work.
Chapter 5. FUNCTIONS This chapter describes the functions of the DCP32. This chapter is required
reading for designers of control systems using the DCP32.
Chapter 6. OPERATION This chapter describes how to switch the basic display states of the DCP32, and
select and run programs. This chapter is required reading for designers of control
systems using the DCP32 and users of control systems.
Chapter 7. PARAMETER SETUP
This chapter describes how to set up parameters on the DCP32 and the meaning of
settings.
Chapter 8. PROGRAM SETUP
This chapter describes how to set up programs on the DCP32 and the meanings of
settings.
Chapter 9. MAINTENANCE & TROUBLESHOOTING
This chapter describes points to check when the DCP32 is not working properly or
how to remedy trouble that might occur.
Chapter 10. SPECIFICATIONS
This chapter describes the general specifications, performance specifications and
external dimensions of the DCP32.

Contents
vii
SAFETY PRECAUTIONS
SAFETY REQUIREMENT
Request
The Role of This Manual
Organization Used in This Manual
Contents
Conventions Used inThis Manual
Chapter 1. GENERAL
1-1 Features. . . . . . . . . . . . . . . . . . . . . . . . . . . . . . . . . . . . . . . . . . . . . . . . . . . . . . . 1-1
1-2 Basic Function Blocks . . . . . . . . . . . . . . . . . . . . . . . . . . . . . . . . . . . . . . . . . . . 1-2
1-3 Data Structure. . . . . . . . . . . . . . . . . . . . . . . . . . . . . . . . . . . . . . . . . . . . . . . . . . 1-3
1-4 System Configuration. . . . . . . . . . . . . . . . . . . . . . . . . . . . . . . . . . . . . . . . . . . . 1-4
■System configuration by CPL communications . . . . . . . . . . . . . . . . . . . 1-4
1-5 Model Numbers. . . . . . . . . . . . . . . . . . . . . . . . . . . . . . . . . . . . . . . . . . . . . . . . . 1-5
Chapter 2. NAMES & FUNCTIONS OF PARTS
2-1 Structure . . . . . . . . . . . . . . . . . . . . . . . . . . . . . . . . . . . . . . . . . . . . . . . . . . . . . . 2-1
2-2 Console . . . . . . . . . . . . . . . . . . . . . . . . . . . . . . . . . . . . . . . . . . . . . . . . . . . . . . . 2-2
■Basic display state . . . . . . . . . . . . . . . . . . . . . . . . . . . . . . . . . . . . . . . . . . . 2-2
■Displays. . . . . . . . . . . . . . . . . . . . . . . . . . . . . . . . . . . . . . . . . . . . . . . . . . . . 2-2
■Keys. . . . . . . . . . . . . . . . . . . . . . . . . . . . . . . . . . . . . . . . . . . . . . . . . . . . . . . 2-5
■Combined key operations . . . . . . . . . . . . . . . . . . . . . . . . . . . . . . . . . . . . . 2-7
■Loader jack . . . . . . . . . . . . . . . . . . . . . . . . . . . . . . . . . . . . . . . . . . . . . . . . . 2-8
2-3 Input Type and Range No. . . . . . . . . . . . . . . . . . . . . . . . . . . . . . . . . . . . . . . . . 2-9
■Inputs 1 . . . . . . . . . . . . . . . . . . . . . . . . . . . . . . . . . . . . . . . . . . . . . . . . . . . . 2-9
■Inputs 2 . . . . . . . . . . . . . . . . . . . . . . . . . . . . . . . . . . . . . . . . . . . . . . . . . . . 2-10
Chapter 3. INSTALLATION & MOUNTING
3-1 Installation. . . . . . . . . . . . . . . . . . . . . . . . . . . . . . . . . . . . . . . . . . . . . . . . . . . . . 3-1
■Mounting locations. . . . . . . . . . . . . . . . . . . . . . . . . . . . . . . . . . . . . . . . . . . 3-1
■Noise generating sources and countermeasures . . . . . . . . . . . . . . . . . . 3-2
■Dust-proof cover. . . . . . . . . . . . . . . . . . . . . . . . . . . . . . . . . . . . . . . . . . . . . 3-2
3-2 Mounting . . . . . . . . . . . . . . . . . . . . . . . . . . . . . . . . . . . . . . . . . . . . . . . . . . . . . . 3-3
■Panel cutout dimensions. . . . . . . . . . . . . . . . . . . . . . . . . . . . . . . . . . . . . . 3-3
■Mounting method . . . . . . . . . . . . . . . . . . . . . . . . . . . . . . . . . . . . . . . . . . . . 3-4
Chapter 4. WIRING
4-1 Wiring Precautions. . . . . . . . . . . . . . . . . . . . . . . . . . . . . . . . . . . . . . . . . . . . . . 4-1
4-2 Compensating Lead . . . . . . . . . . . . . . . . . . . . . . . . . . . . . . . . . . . . . . . . . . . . . 4-3
4-3 Terminal Connections . . . . . . . . . . . . . . . . . . . . . . . . . . . . . . . . . . . . . . . . . . . 4-4
4-4 Layout of Terminals and Recommended Lead Draw-out Direction. . . . . . . 4-5
4-5 Connecting the Ground and Power Supply . . . . . . . . . . . . . . . . . . . . . . . . . . 4-6
■Power supply . . . . . . . . . . . . . . . . . . . . . . . . . . . . . . . . . . . . . . . . . . . . . . . 4-6
■Ground. . . . . . . . . . . . . . . . . . . . . . . . . . . . . . . . . . . . . . . . . . . . . . . . . . . . . 4-6
4-6 Wiring of Standard and Add-on Terminal Base. . . . . . . . . . . . . . . . . . . . . . . 4-7
■Standard terminal layout . . . . . . . . . . . . . . . . . . . . . . . . . . . . . . . . . . . . . . 4-7
■Add-on terminal layout. . . . . . . . . . . . . . . . . . . . . . . . . . . . . . . . . . . . . . . . 4-7

4-7 Connecting Inputs (analog inputs) . . . . . . . . . . . . . . . . . . . . . . . . . . . . . . . . . 4-8
■Connecting input 1. . . . . . . . . . . . . . . . . . . . . . . . . . . . . . . . . . . . . . . . . . . 4-8
■Connecting input 2. . . . . . . . . . . . . . . . . . . . . . . . . . . . . . . . . . . . . . . . . . . 4-8
4-8 Connecting Control Outputs (outputs 1, 2, 3) . . . . . . . . . . . . . . . . . . . . . . . 4-10
■Relay output (0D) . . . . . . . . . . . . . . . . . . . . . . . . . . . . . . . . . . . . . . . . . . . 4-10
■Current output (5G) . . . . . . . . . . . . . . . . . . . . . . . . . . . . . . . . . . . . . . . . . 4-10
■Position-proportional output (2G). . . . . . . . . . . . . . . . . . . . . . . . . . . . . . 4-11
■Heat/cool output (3D) . . . . . . . . . . . . . . . . . . . . . . . . . . . . . . . . . . . . . . . . 4-12
■Heat/cool output (5K) . . . . . . . . . . . . . . . . . . . . . . . . . . . . . . . . . . . . . . . . 4-13
4-9 Connecting Auxiliary Outputs (output 3) . . . . . . . . . . . . . . . . . . . . . . . . . . . 4-14
■0D, 5G auxiliary outputs. . . . . . . . . . . . . . . . . . . . . . . . . . . . . . . . . . . . . . 4-14
4-10 Connecting Event Output (relay output). . . . . . . . . . . . . . . . . . . . . . . . . . . . 4-15
4-11 Connecting Time Event Output (open-collector). . . . . . . . . . . . . . . . . . . . . 4-16
4-12 Connecting External Switch (RSW) Input. . . . . . . . . . . . . . . . . . . . . . . . . . . 4-17
4-13 Connecting for Communications . . . . . . . . . . . . . . . . . . . . . . . . . . . . . . . . . 4-19
■RS-485 interface . . . . . . . . . . . . . . . . . . . . . . . . . . . . . . . . . . . . . . . . . . . . 4-19
4-14 Isolating Inputs and Outputs. . . . . . . . . . . . . . . . . . . . . . . . . . . . . . . . . . . . . 4-22
■Control outputs 0D, 5G, 3D, 5K. . . . . . . . . . . . . . . . . . . . . . . . . . . . . . . . 4-22
■Control output 2G. . . . . . . . . . . . . . . . . . . . . . . . . . . . . . . . . . . . . . . . . . . 4-22
Chapter 5. FUNCTIONS
5-1 Data . . . . . . . . . . . . . . . . . . . . . . . . . . . . . . . . . . . . . . . . . . . . . . . . . . . . . . . . . . 5-1
■Data types . . . . . . . . . . . . . . . . . . . . . . . . . . . . . . . . . . . . . . . . . . . . . . . . . . 5-1
5-2 Program Patterns . . . . . . . . . . . . . . . . . . . . . . . . . . . . . . . . . . . . . . . . . . . . . . . 5-2
■Patterns . . . . . . . . . . . . . . . . . . . . . . . . . . . . . . . . . . . . . . . . . . . . . . . . . . . . 5-2
■Events 1 to 3 . . . . . . . . . . . . . . . . . . . . . . . . . . . . . . . . . . . . . . . . . . . . . . . . 5-3
■Time events 1 to 5. . . . . . . . . . . . . . . . . . . . . . . . . . . . . . . . . . . . . . . . . . . . 5-6
■PID set selection. . . . . . . . . . . . . . . . . . . . . . . . . . . . . . . . . . . . . . . . . . . . . 5-8
■G.Soak (guarantee soak) . . . . . . . . . . . . . . . . . . . . . . . . . . . . . . . . . . . . . . 5-9
■PV start . . . . . . . . . . . . . . . . . . . . . . . . . . . . . . . . . . . . . . . . . . . . . . . . . . . 5-10
■Cycle . . . . . . . . . . . . . . . . . . . . . . . . . . . . . . . . . . . . . . . . . . . . . . . . . . . . . 5-10
■Pattern link . . . . . . . . . . . . . . . . . . . . . . . . . . . . . . . . . . . . . . . . . . . . . . . . 5-11
■Tag . . . . . . . . . . . . . . . . . . . . . . . . . . . . . . . . . . . . . . . . . . . . . . . . . . . . . . . 5-11
5-3 Modes . . . . . . . . . . . . . . . . . . . . . . . . . . . . . . . . . . . . . . . . . . . . . . . . . . . . . . . 5-12
■Mode type . . . . . . . . . . . . . . . . . . . . . . . . . . . . . . . . . . . . . . . . . . . . . . . . . 5-12
■Mode transition. . . . . . . . . . . . . . . . . . . . . . . . . . . . . . . . . . . . . . . . . . . . . 5-14
■Mode transition operations . . . . . . . . . . . . . . . . . . . . . . . . . . . . . . . . . . . 5-15
■Mode transition limitations . . . . . . . . . . . . . . . . . . . . . . . . . . . . . . . . . . . 5-16
5-4 Controller and Programmer. . . . . . . . . . . . . . . . . . . . . . . . . . . . . . . . . . . . . . 5-17
5-5 Input Processing Functions. . . . . . . . . . . . . . . . . . . . . . . . . . . . . . . . . . . . . . 5-18
5-6 Output Processing Functions . . . . . . . . . . . . . . . . . . . . . . . . . . . . . . . . . . . . 5-20
■Exchanging MV1/MV2. . . . . . . . . . . . . . . . . . . . . . . . . . . . . . . . . . . . . . . . 5-20
■Control output CH1. . . . . . . . . . . . . . . . . . . . . . . . . . . . . . . . . . . . . . . . . . 5-21
■SP output. . . . . . . . . . . . . . . . . . . . . . . . . . . . . . . . . . . . . . . . . . . . . . . . . . 5-29
■Auxiliary output . . . . . . . . . . . . . . . . . . . . . . . . . . . . . . . . . . . . . . . . . . . . 5-30
viii

ix
Chapter 6. OPERATION
6-1 Turning the Power ON . . . . . . . . . . . . . . . . . . . . . . . . . . . . . . . . . . . . . . . . . . . 6-1
6-2 Switching the Basic Display . . . . . . . . . . . . . . . . . . . . . . . . . . . . . . . . . . . . . . 6-2
■Display in program operation mode. . . . . . . . . . . . . . . . . . . . . . . . . . . . . 6-3
■Display in constant-value operation mode . . . . . . . . . . . . . . . . . . . . . . . 6-7
6-3 Program Selection . . . . . . . . . . . . . . . . . . . . . . . . . . . . . . . . . . . . . . . . . . . . . 6-10
■How to select the program No. . . . . . . . . . . . . . . . . . . . . . . . . . . . . . . . . 6-10
6-4 External Switch (RSW) Operations . . . . . . . . . . . . . . . . . . . . . . . . . . . . . . . . 6-11
■External switch (RSW) input . . . . . . . . . . . . . . . . . . . . . . . . . . . . . . . . . . 6-11
■Program selection . . . . . . . . . . . . . . . . . . . . . . . . . . . . . . . . . . . . . . . . . . 6-12
■Read timing. . . . . . . . . . . . . . . . . . . . . . . . . . . . . . . . . . . . . . . . . . . . . . . . 6-13
6-5 Manual Operation and Auto-tuning. . . . . . . . . . . . . . . . . . . . . . . . . . . . . . . . 6-14
■Manual operation . . . . . . . . . . . . . . . . . . . . . . . . . . . . . . . . . . . . . . . . . . . 6-14
■Auto-tuning (AT). . . . . . . . . . . . . . . . . . . . . . . . . . . . . . . . . . . . . . . . . . . . 6-14
Chapter 7. PARAMETER SETUP
7-1 Parameter Setup . . . . . . . . . . . . . . . . . . . . . . . . . . . . . . . . . . . . . . . . . . . . . . . . 7-1
■Selecting the setting group in the parameter setup . . . . . . . . . . . . . . . . 7-1
■Moving individual items in the parameter setup . . . . . . . . . . . . . . . . . . 7-2
■Changing individual items and how to return from the setup state . . . 7-2
7-2 How to Use PARA Keys . . . . . . . . . . . . . . . . . . . . . . . . . . . . . . . . . . . . . . . . . . 7-4
■How to register functions to PARA keys . . . . . . . . . . . . . . . . . . . . . . . . . 7-4
7-3 Parameter Setup List . . . . . . . . . . . . . . . . . . . . . . . . . . . . . . . . . . . . . . . . . . . . 7-6
■Variable parameter settings. . . . . . . . . . . . . . . . . . . . . . . . . . . . . . . . . . . . 7-7
■Description of variable parameter settings . . . . . . . . . . . . . . . . . . . . . . . 7-9
■Variable parameter 2 settings . . . . . . . . . . . . . . . . . . . . . . . . . . . . . . . . . 7-16
■Description of variable parameter 2 settings. . . . . . . . . . . . . . . . . . . . . 7-17
■Event configuration data settings. . . . . . . . . . . . . . . . . . . . . . . . . . . . . . 7-18
■Description of event configuration data. . . . . . . . . . . . . . . . . . . . . . . . . 7-24
■PID parameter 1 settings . . . . . . . . . . . . . . . . . . . . . . . . . . . . . . . . . . . . . 7-25
■PID parameter 2 settings . . . . . . . . . . . . . . . . . . . . . . . . . . . . . . . . . . . . . 7-28
■Setup data settings . . . . . . . . . . . . . . . . . . . . . . . . . . . . . . . . . . . . . . . . . 7-29
■Description of setup data settings . . . . . . . . . . . . . . . . . . . . . . . . . . . . . 7-38
■Table data settings. . . . . . . . . . . . . . . . . . . . . . . . . . . . . . . . . . . . . . . . . . 7-46
■Description of table data settings. . . . . . . . . . . . . . . . . . . . . . . . . . . . . . 7-47
■Constant-value operation data settings. . . . . . . . . . . . . . . . . . . . . . . . . 7-48
Chapter 8. PROGRAM SETUP
8-1 Program Setup . . . . . . . . . . . . . . . . . . . . . . . . . . . . . . . . . . . . . . . . . . . . . . . . . 8-1
■How to enter program setup . . . . . . . . . . . . . . . . . . . . . . . . . . . . . . . . . . . 8-1
■Selecting the program No. to set up. . . . . . . . . . . . . . . . . . . . . . . . . . . . . 8-1
■Mode transition. . . . . . . . . . . . . . . . . . . . . . . . . . . . . . . . . . . . . . . . . . . . . . 8-2
■Programming map . . . . . . . . . . . . . . . . . . . . . . . . . . . . . . . . . . . . . . . . . . . 8-4
■Display details. . . . . . . . . . . . . . . . . . . . . . . . . . . . . . . . . . . . . . . . . . . . . . . 8-5
■Setting up pattern items. . . . . . . . . . . . . . . . . . . . . . . . . . . . . . . . . . . . . . . 8-5
■Setting up SP 2 items. . . . . . . . . . . . . . . . . . . . . . . . . . . . . . . . . . . . . . . . . 8-6
■Setting up events 1 to 3 items. . . . . . . . . . . . . . . . . . . . . . . . . . . . . . . . . . 8-6
■Setting up time events 1 to 5. . . . . . . . . . . . . . . . . . . . . . . . . . . . . . . . . . . 8-8

x
■Setting up PID set No. items (CH1). . . . . . . . . . . . . . . . . . . . . . . . . . . . . . 8-9
■Setting up PID set No. items (CH2). . . . . . . . . . . . . . . . . . . . . . . . . . . . . 8-10
■Setting up G.Soak (guarantee soak) items (CH1) . . . . . . . . . . . . . . . . . 8-11
■Setting up G.Soak (guarantee soak) items (CH2) . . . . . . . . . . . . . . . . . 8-12
■Setting up PV start items. . . . . . . . . . . . . . . . . . . . . . . . . . . . . . . . . . . . . 8-13
■Setting up cycle items . . . . . . . . . . . . . . . . . . . . . . . . . . . . . . . . . . . . . . . 8-14
■Setting up pattern link items . . . . . . . . . . . . . . . . . . . . . . . . . . . . . . . . . . 8-15
■Deleting programs . . . . . . . . . . . . . . . . . . . . . . . . . . . . . . . . . . . . . . . . . . 8-16
■Inserting and deleting segments. . . . . . . . . . . . . . . . . . . . . . . . . . . . . . . 8-17
8-2 Copying Programs . . . . . . . . . . . . . . . . . . . . . . . . . . . . . . . . . . . . . . . . . . . . . 8-19
■Operation. . . . . . . . . . . . . . . . . . . . . . . . . . . . . . . . . . . . . . . . . . . . . . . . . . 8-19
8-3 General Reset . . . . . . . . . . . . . . . . . . . . . . . . . . . . . . . . . . . . . . . . . . . . . . . . . 8-20
■Operation. . . . . . . . . . . . . . . . . . . . . . . . . . . . . . . . . . . . . . . . . . . . . . . . . . 8-20
Chapter 9. MAINTENANCE & TROUBLESHOOTING
9-1 Maintenance . . . . . . . . . . . . . . . . . . . . . . . . . . . . . . . . . . . . . . . . . . . . . . . . . . . 9-1
9-2 Self-diagnostics and Alarm Code Display . . . . . . . . . . . . . . . . . . . . . . . . . . . 9-2
■Self-diagnostics at power ON . . . . . . . . . . . . . . . . . . . . . . . . . . . . . . . . . . 9-2
■Self-diagnostics at each sampling cycle . . . . . . . . . . . . . . . . . . . . . . . . . 9-2
■Intermittent self-diagnostics during operation . . . . . . . . . . . . . . . . . . . . 9-3
■Self-diagnostics only when certain functions are operating . . . . . . . . . 9-3
■Alarm code display. . . . . . . . . . . . . . . . . . . . . . . . . . . . . . . . . . . . . . . . . . . 9-3
■Alarm categories. . . . . . . . . . . . . . . . . . . . . . . . . . . . . . . . . . . . . . . . . . . . . 9-4
9-3 Trouble during Key Entry. . . . . . . . . . . . . . . . . . . . . . . . . . . . . . . . . . . . . . . . . 9-5
■Trouble in the basic display state. . . . . . . . . . . . . . . . . . . . . . . . . . . . . . . 9-5
■Trouble in the parameter setup state . . . . . . . . . . . . . . . . . . . . . . . . . . . . 9-8
■Trouble in the program setup state . . . . . . . . . . . . . . . . . . . . . . . . . . . . . 9-8
9-4 Motor Adjustment is Impossible . . . . . . . . . . . . . . . . . . . . . . . . . . . . . . . . . . . 9-11
■Normal wiring for direct motor rotation . . . . . . . . . . . . . . . . . . . . . . . . . 9-12
■Normal wiring for reverse motor rotation. . . . . . . . . . . . . . . . . . . . . . . . 9-12
■Alarm display caused by wrong wiring and causes . . . . . . . . . . . . . . . 9-12
9-5 When BAT LED Blinks . . . . . . . . . . . . . . . . . . . . . . . . . . . . . . . . . . . . . . . . . . 9-13
■BAT LED blinking . . . . . . . . . . . . . . . . . . . . . . . . . . . . . . . . . . . . . . . . . . . 9-13
■Replacing the battery. . . . . . . . . . . . . . . . . . . . . . . . . . . . . . . . . . . . . . . . 9-13
Chapter 10.
SPECIFICATIONS
10-1
Specifications . . . . . . . . . . . . . . . . . . . . . . . . . . . . . . . . . . . . . . . . . . . . . . . . . 10-1
■Accessories/option list . . . . . . . . . . . . . . . . . . . . . . . . . . . . . . . . . . . . . . 10-8
10-2
External Dimensions . . . . . . . . . . . . . . . . . . . . . . . . . . . . . . . . . . . . . . . . . . . 10-9
■DCP32 . . . . . . . . . . . . . . . . . . . . . . . . . . . . . . . . . . . . . . . . . . . . . . . . . . . . 10-9
■Soft dust-proof cover (sold separately) . . . . . . . . . . . . . . . . . . . . . . . . 10-10
■Hard dust-proof cover (sold separately) . . . . . . . . . . . . . . . . . . . . . . . 10-10
■Terminal cover set (sold separately) . . . . . . . . . . . . . . . . . . . . . . . . . . 10-10
Index

Conventions Used in This Manual
xi
The following conventions are used in this manual.
Handling Precautions
: Handling Precautions indicate items that the user should pay attention
to when handling the DCP32.
Note : Notes indicate useful information that the user might benefit by
knowing.
: Circled numbers indicate steps in a sequence or indicate corresponding
parts in an explanation.
»: Indicates the DCP32 state after an operation.
DISP + ↑keys : These icons represent keys on the DCP32's console.
FUNC + PROG keys : Key combinations like these indicate keys that must be pressed while
being held down together.
PA01, C21
: These represent indications on the upper and lower 7-segment
displays.

1-1
Chapter 1. GENERAL
1 - 1 Features
The DCP32 is:
• a general-purpose double-loop program controller for controlling temperature, pressure, flow rate and other
inputs
• a 2-loop program controller for controlling temperature and relative humidity.
On the DCP32, you can set up to 19 program patterns, and set up to 30 segments to each program pattern.
●High accuracy achieved by multi-range input
Multi-range input allows you to choose between the following input types:
thermocouple, resistance temperature detector (RTD), DC voltage and DC current.
Accuracy of ±0.1%FS±1 digit (±0.2%FS±1 digit for Input 2 only) and a sampling
cycle of 0.1 seconds ensures consistently high-precision control.
●Wide range of control output types
A wide range of models supporting various control output types are available:
relay time-proportional output, position-proportional output, current output,
voltage time-proportional output, and heat/cool output.
On models other than heat-cool control output, you can also choose neural net-
based auto-tuning and smart-tuning for inhibiting overshoot, in addition to 2
degrees of freedom PID.
●Enhanced compatibility with PLCs
12 external switch inputs (eight optional), three event outputs and five time event
outputs (optional) ensure compatibility with automating systems designed around
a PLC core.
●Easy operation Up to eight frequently changed parameter setups can be registered to the PARA
key, facilitating recall of item setups.

1-2
Chapter 1. GENERAL
1 - 2 Basic Function Blocks
4 External Switch Inputs
• RUN
• HOLD
• RESET
• ADV
* indicates options.
Inputs 1/2
• Thermocouple
• Resistance
• DC current
• DC voltage
8 External Switch Inputs
• Program No.
• FAST
• PV start
• AUTO/MANUAL
• AT start/stop
• G.Soak cancel
• Direct/reverse action
Key Operation
• Display selection
• Program No.
• RUN/HOLD
• RESET
• ADV
• FAST
• AUTO/MANUAL
• AT start/stop
• Program setup
• Parameter setup
MFB input
• Square root
extraction
•
• Bias
• Filter
Control Operation Block
• Mode transition
• PID control
• Auto-tuning
• Neuro & Fuzzy
• Forward/reverse action
• ON-OFF control
• SP limit
• SP bias
• Output change
limitter
• Upper/lower
limitter
• SP output
• Exchanging
MV1/MV2
Outputs 1/ 2/ 3
• Current
• Relay ( )
• Voltage
• Position-proportional ( )
• Heat-cool ( )
Event Outputs
• PV
• SP
• Deviation
• MV
• MFB
• Modes
• Alarm
Time Event Outputs
• Time event
• Segment code
Auxiliary Outputs
• PV
• SP
• Deviation
• MV
• MFB
CPL communications I/O
Loader communications I/O
*
*
*
Program
• 19 patterns x 30 segments
• Events
• Time events
• PID sets
• G.Soak
• PV start
• Cycle
• Pattern link
Parameters
• Variable parameters
• Event configuration
• PID parameters (8 sets)
• Setup
• Tables
• Constant-value operation
*
temperature detector
(input 1 only)
Lineariza-
tion table
approxima-
tion
( ) indicates output for
one loop only.

Data is made up of “parameters” that are used mainly for setting controller functions and “programs” that are used
for setting operation during program operation of the DCP32.
●Total of 19 program patterns
Up to 19 program patterns can be set.
1-3
Chapter 1. GENERAL
●Parameters Parameters are provided for six types of data: variable parameters, event
configuration data, PID parameters, setup data, table data and constant-value
operation data.
Note Variable parameters contain common parameters regardless of channels CH1 and
CH2.
Program No. = 19 Number of segments = 8
SP
Time
45678
Program No. = 3 Number of segments = 15
SP
Time
13
15
14
Program No. = 2 Number of segments = 19
SP
Time
18
19
Program No. = 1 Number of segments = 6
SP
Time
123
4
5
6
45678
13
15
14
18
19
123
45
6SP1
SP2
23
Variable parameters
Variable parameters 2
Event configuration data
PID parameter 1
PID parameter 2
Setup data
Table data
Constant-value operation data
1 - 3 Data Structure

1-4
Chapter 1. GENERAL
■System configuration by CPL communications
On DCP32 models supporting RS-485 communications (optional), DigitroniK
series controllers can be connected as slave stations on the CPL communications*
network.
Yamatake Corporation’s MA500 FA controller or MX200 machine controller can
be used as the host station in this case.
* “CPL communications” refers to standard host communications defined in
Yamatake CPD.
Handling Precautions
On a 3-lead wire RS-485 configuration, the Yamatake CMA50A105 cannot
be used as the converter for the master or slave station.
MA500 or MX200
RS-485
DCP32 (slave station)
Personal computer
DCP32 (slave station)
RS-232C
CMA50A105 or CMC410A102 (master station)
RS-485
1 - 4 System Configuration

1-5
Chapter 1. GENERAL
Basic
Model Output Function Power Option 1 Option 2 Additions Description
No.
P32A Digital Program Controller (2-loop
model)
0D Relay outputs + current output
2G Position-proportional output + current
output
5G Current output + current output
3D Heat-cool output (relay output + relay
output) + current output
5K Heat-cool output (current output +
current output) + current output
1 Input 2 channel
2 Temperature/humidity calculation
AS Free power supply (90 to 264 Vac)
00 No auxiliary output
01 1 auxiliary output
0 External switch inputs (4), time events
not supported, communications not
supported
1 External switch inputs (12), 5 time
events supported, communications not
supported
2 External switch inputs (12), 5 time
events supported, RS-485
communications supported
00 Additional treatment not supported
T0 Tropical treatment
K0 Antisulfide treatment
D0 Inspection Certificate provided
B0 Tropical treatment + Inspection
Certificate provided
L0 Antisulfide treatment + Inspection
Certificate provided
Y0 Traceability Certificate
Basic Model No. : P32A AS
Handling Precautions
• On 2G, 3D and 5K output models, only 00 (auxiliary output OFF) can be
designated for option 1.
• On current output models other than heat/cool output, you can choose
between use of the DCP32 as a controller or a programmer.
• Current output can be changed to voltage output (with current value
adjustment function).
• Relay output on 0D output models is time-proportional output.
• Relay output on 3D output models is either time-proportional output or
3-position control output.
• Voltage output is time-proportional output.
1 - 5 Model Numbers

2-1
Chapter 2. NAMES & FUNCTIONS OF PARTS
2 - 1 Structure
The DCP32 comprises a body, console, case, standard terminal base and add-on terminal base.
Case
Console
Body
Standard terminal base
Contains 7-segment display, LEDs,
operation keys and loader
connector.
Contains console and electrical
circuits.
Connectors for connecting power, input, output, event outputs, external
switch inputs (4) and auxiliary outputs (options).
Add-on terminal base
Terminal for connecting external switch inputs (8 options), time event outputs (options) and
CPL communications (options).
This base is not provided on models not supporting external switch inputs (8) and time event
outputs.
Key lock screw
Fixes the case to the body.
Key cover
Cover for preventing erroneous operation.

2-2
Chapter 2. NAMES & FUNCTIONS OF PARTS
2 - 2 Console
The console comprises keys for operating the DCP32, and displays and LEDs.
■Basic display state The “basic display state” is the state in which the DCP32 operating state is
displayed on the console.
When the power is turned ON, the DCP32 is in this state.
Key operation changes the DCP32 from the basic display state to one of the
parameter setup, program setup, program copy or general reset states. Key
operation also returns the DCP32 to the basic display state.
■Display
●Program No. display In the basic display state, this display indicates the currently selected program No.
In the program setup state, this display indicates the program No. currently being
set up.
During constant-value operation, this display goes out in the basic display state.
When an alarm occurs in the basic display state, alarm code “
AL
” is displayed.
●Segment No. display In the basic display state, this display indicates the currently selected segment No.
In the program setup state, this display indicates the segment No. currently being
set up.
During constant-value operation, this display goes out in the basic display state.
In the parameter setup state, this display indicates the item No.
When an alarm occurs in the basic display state, the alarm code No. is displayed.
Power ON
Parameter setup state
Program setup state Program copy state
General reset state
Basic display state
Program No. display
Mode indicator
LED lamps
Event LEDs
Segment No. display
Basic indicator LED lamps
Upper display
Lower display
Low battery voltage LED (BAT)
Control/output state LED
Profile display
Table of contents
Other Yamatake Controllers manuals
Popular Controllers manuals by other brands

Mitsubishi Electric
Mitsubishi Electric Q Series Reference manual

ASCON TECNOLOGIC S.r.l.
ASCON TECNOLOGIC S.r.l. TLK72 quick guide

Telwin
Telwin DRIVE 9000 instruction manual

Pyramid Time Systems
Pyramid Time Systems TIMETRAX SYNC CTPLATEBUZ instructions

Victron energy
Victron energy SmartSolar MPPT 100/50 manual

BFI Automation
BFI Automation CFC 1000L Original operating instructions

Bosch
Bosch Buderus Logamatic 5000 Series Guideline

maxon motor
maxon motor EPOS2 70/10 Hardware reference

Pickering
Pickering 60-981 user manual

Norac
Norac UC4+ End-user installation manual

JOVENTA
JOVENTA DAF.10 Series installation guide

Nord Drivesystems
Nord Drivesystems NORDAC LINK SK 155E-FDS Series user manual