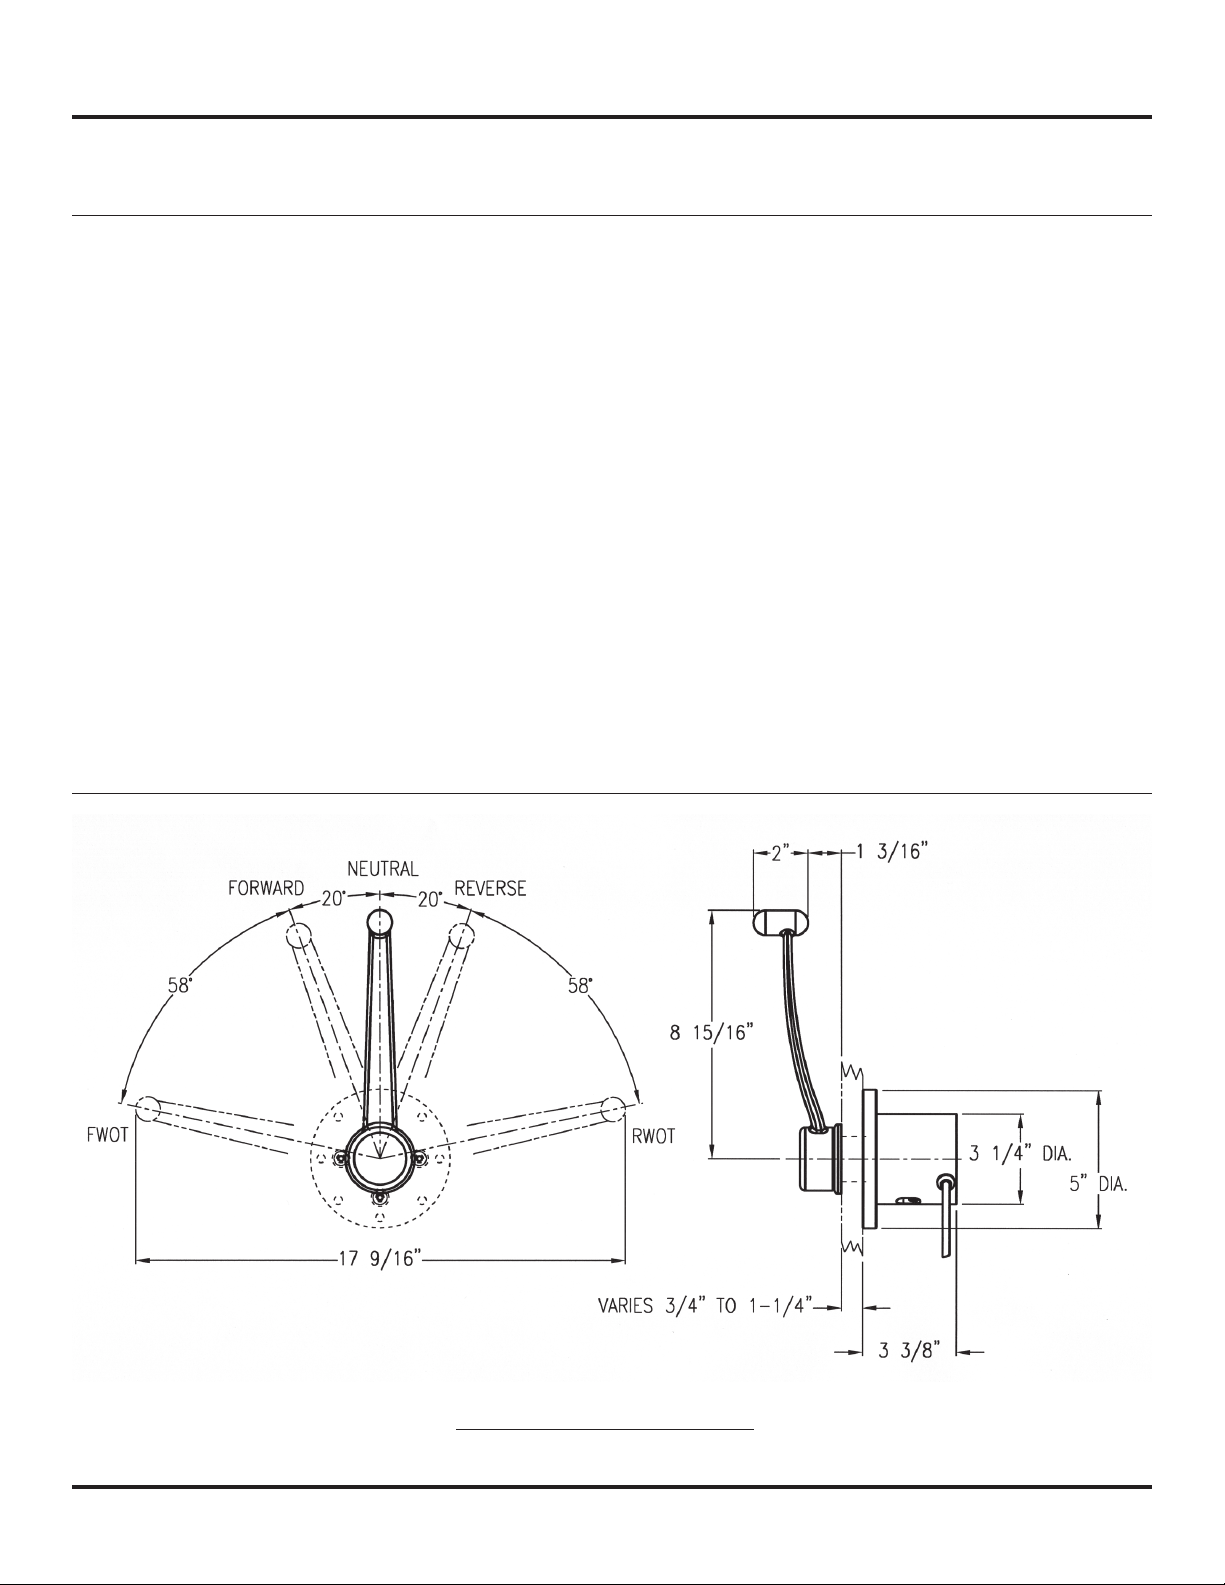
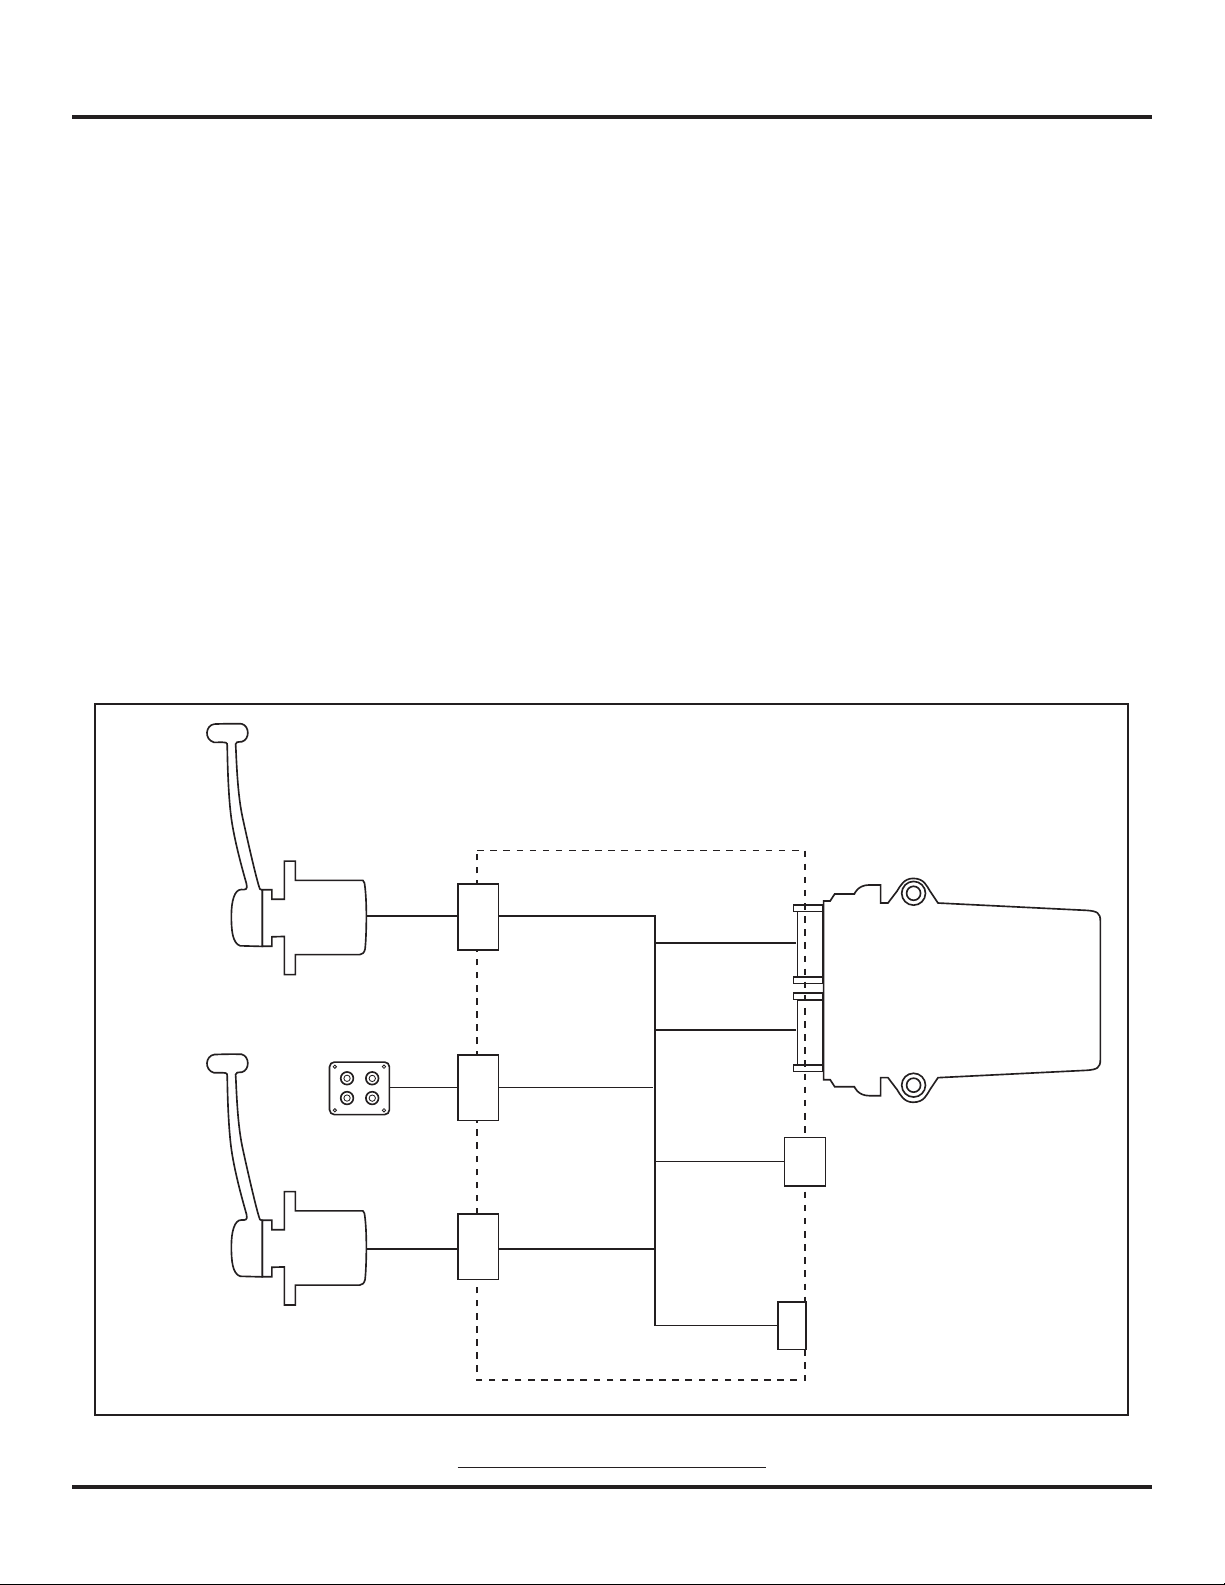
CH1900 Series Electronic Control Installation Manual
Page 2
Notice to Boat Manufacturer, Installer, and Consumer
Throughout this manual, warnings are used to alert the installer/operator to special instructions concerning a
particular service or operation that may be hazardous if performed incorrectly or carelessly. Observe these alerts
carefully!
These “safety alerts” alone cannot eliminate the hazards that they signal. Strict compliance to these special
instructions when performing installation, operation, and maintenance plus “common sense” operation are the
most effective accident prevention measures.
This device should not be used as a navigational aid to prevent collision, grounding, boat damage, or personal
injury. When the boat is moving, water depth may change too quickly to allow time for you to react. Always
operate the boat at very slow speeds if you suspect shallow water or submerged objects.
Disassembly and repair of this electronic unit should only be performed by authorized service personnel. Any
modication of the serial number or attempt to repair the original equipment or accessories by unauthorized
individuals will void the warranty. Handling and/or opening this unit may result in exposure to lead, in the form
of solder.
This product contains lead, a chemical known to the State of California to cause cancer, birth defects, and other
reproductive harm.
This product has been designed to be compliant with the above Directive.
Maximum performance, and compliance with the EMC Directive, can only be ensured by correct installation. It
is strongly recommended that the installation conforms with the following standards:
APPLICABLE STANDARDS
a) ISO 8846 Small Craft-Electrical Devices
Protectionagainstignitionofsurroundingammablegases.
b)ISO=InternationalStandardsOrganization
This device meets or exceeds the applicable ABYC, ISO, and USCG safe boating rules, regulations, standards,
and guidelines.
SAFE BOATING ON THE WEB
U.S. Coast Guard www.uscg.mil
U.S. Power Squadron www.usps.org
NMEA 2000®is a registered trademark of the National Marine Electronics Association.
The information contained in this manual is believed to be accurate at the time of going to print but no responsibility, direct or consequential, can be accepted for damage
resulting from the use of this information. The manufacturers reserve the right to make changes, without notice, to any of its products.
RECREATIONAL CRAFT DIRECTIVE 94/25/EC
Warning
Warning