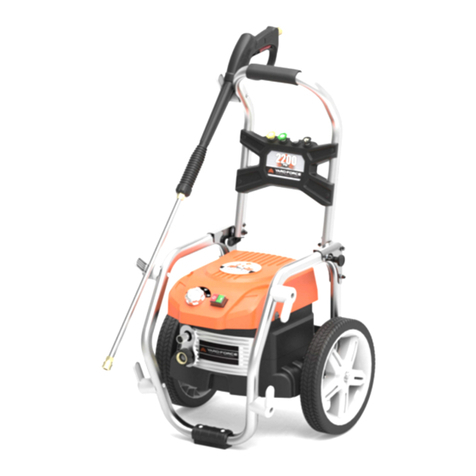
Yard force EW N15X User manual

READ & UNDERSTAND
INSTRUCTION MANUAL
Save all warnings and instructions for future reference.
EW N15X
Q1W-SP06-2300A
2500W HIGH PRESSURE WASHER
Original Instructions
GB

2 3
Read this manual carefully prior to assembling and
operating the pressure washer. It is dangerous to operate
this product without being familiar with these instructions.
Keep this manual in a safe place and have it ready for
future reference.
A
1
2
7
8
9
B
a
b
c
d
f
h
g
e
j
m
n
o
lk
3
4
5
6

4 5
CD
GH
EF
KL
O
Q
MN
P
R
<40oC(104oF)
1
2
IJ

6 7
INTENDED USE
The machine is intended for cleaning the the outside walls, facades, terraces, footpaths,
garden equipment, machinery, vehicles and tools.
If required, you can also use the machine with added household cleaning agents.
The machine is to be used only for its prescribed purpose. Any other use is deemed to be a
case of misuse. The user/operator and not the manufacturer will be liable for any damages or
injuries of any kind caused as a result of misuse.
Please note that our equipment has not been designed for use in commercial, trade or
industrial applications. Our warranty will be voided if the machine is used in commercial,
trade or industrial businesses or for equivalent purposes.
EW N15X Original Instruction
CONTENT
Intended use 07
General safety warnings 07
Product safety warnings 10
Symbols 16
Technical data 19
Description of product 20
Installation 21
Operation 23
Maintenance and storage 25
Troubleshooting 26
CE declaration 28
GENERAL SAFETY WARNINGS
Read the following safety instructions to prevent
damage or injury to persons or property.
IMPORTANT SAFETY INSTRUCTIONS
READ ALL INSTRUCTIONS BEFORE USING THIS
APPLIANCE
WARNING: When using this product basic
precaution should always be followed, including the
following:
• Machines should not be used by children. Children
should be supervised to ensure that they do not play
with the machine.
• This machine can be used by people with reduced
physical, sensory or mental capabilities or lack of
experience and knowledge only if they have been
given supervision or instruction concerning use of the
machine in a safe way and understand the hazards
involved.
• If the supply cord is damaged, it must be replaced by
the manufacturer, its service agent or similarly qualied
persons in order to avoid a hazard.

8 9
• The electric supply connection should be made by a
qualied electrician and comply with IEC 60364-1. It is
recommended that the electric supply to this machine
should include either a residual current device that
will interrupt the supply if the leakage current to earth
exceeds 30 mA for 30ms or a device that will prove
the earth circuit.
• WARNING: This machine has been designed for use
with the cleaning agent supplied or recommended by
the manufacturer. The use of other cleaning agents
or chemicals may adversely affect the safety of the
machine.
• WARNING: High pressure jets can be dangerous if
subject to misuse. The jet must not be directed at
other people, electrical equipment or the machine
itself.
• WARNING: Do not use the machine within range of
people unless they are wearing protective clothing.
• WARNING: Do not direct the jet against yourself or
others in order to clean clothes or footwear.
• WARNING: Risk of explosion - Do not spray
ammable liquids.
• WARNING: High pressure cleaners should not be
used by children or untrained personnel.
• WARNING: High pressure hoses, ttings and
couplings are important for the safety of the machine.
Use only hoses, ttings and couplings recommended
by the manufacturer.
• WARNING: To ensure the machine is safe, use only
original spare parts from the manufacturer or approved
by the manufacturer.
• WARNING: Water that has owed through backow
preventers is considered to be non-potable.
• WARNING: The machine should be disconnected
from its power source during cleaning or maintenance
and when replacing parts or converting the machine
to another function by removing the plug from the
socket-outlet.
• WARNING: Do not use the machine if a supply cord
or important parts of the machine are damaged, e.g.
safety devices, high pressure hoses or the trigger gun.
• WARNING: Inadequate extension cords can be
dangerous. If an extension cord is used, it should be
suitable for outdoor use and the connection must be
kept dry and off the ground. It is recommended that
this is accomplished by means of a cord reel which
keeps the socket at least 60 mm above the ground.
• WARNING: Always switch off the mains connecting
switch when leaving the machine unattended.
• WARNING: Always wear appropriate personnel
protection equipment (PPE) when using the machine,
e.g. safety boots, safety gloves, safety helmets with
visors, hearing protection.
• WARNING: The new hose set supplied with the
appliance is to be used. Old hose-sets should not be
reused.
• WARNING: In the event detergent spills or makes
contact with skin, wash with water. If liquid makes
contact with eyes, seek medical help.
SAVE THESE INSTRUCTIONS FOR FUTURE
REFERENCE
GENERAL SAFETY WARNINGS GENERAL SAFETY WARNINGS
10 11
PRODUCT SAFETY WARNINGS PRODUCT SAFETY WARNINGS
WARNING! When using the product, the safety
rules must be followed. For your own safety and
that of others please read these instructions before
operating the product. Please keep the instructions
safe for later use.
Training
• Read the instructions carefully and ensure that you
are familiar with the controls and the proper use of the
product.
• Never allow people unfamiliar with these instructions
or children to use the product. Local regulations can
restrict the age of the operator.
• Keep in mind that the operator or user is responsible
for accidents or hazards occurring to other people or
their property.
• WARNING: Water that has owed through backow
preventers is considered to be non-potable.
• WARNING: Risk of explosion – Do not spray
ammable liquids.
• Do not use the equipment near ammable liquids or
gases, this will reduce the risk of re or explosion.
Preparation
• Never operate the product while other people,
especially children and pets are nearby.
• WARNING: Do not use the machine within range
of other people unless they are wearing protective
clothing.
• WARNING: Inadequate extension cords can be
dangerous. If an extension cord is used, it should be
of watertight construction and the connection should
be kept dry and off the ground. It is recommended that
this is accomplished by means of a cord reel which
keeps the socket at least 60 mm above the ground.
• WARNING: The appliance is not designed for
connecting to tap water. If necessary, please use only
with a backow water preventer or inlet hose-set
approved by IEC 61770.
• Use a fabric reinforced water hose with a commercially
available coupling. Minimum diameter 13mm (1/2
inch); minimum length 7.5M.
• WARNING: High pressure hoses, ttings and
couplings are important for the safety of the machine.
Use only hoses, ttings and couplings recommended
by the manufacturer.
Operation
• Use the product only in daylight or good articial light.
• Never operate the product if the supply cord, safety
devices, hoses, switch or trigger gun is damaged
• High-pressure jets can be dangerous if subject to
misuse. The jet must not be directed at persons,
animals, electrical equipment or the appliance itself.
• Before use, check the controls and proper use of the
product.
• Before using the product and after any impact, check
for signs of wear or damage and repair as necessary.
• WARNING: This machine has been designed for use
with the cleaning agent supplied or recommended by
the manufacturer. The use of other cleaning agents
or chemicals may adversely affect the safety of the
machine.

12 13
• Always disconnect the product from the power supply:
- When leaving the product unattended.
- Before clearing a blockage.
- Before checking, cleaning or working on the
product.
- When the cord becomes damaged or tangled.
- Whenever the product starts vibrating abnormally.
• WARNING: Do not direct the jet against yourself or
others in order to clean clothes or footwear.
• Vehicle tyres/tyre valves are susceptible to damage
from the high-pressure jet and may burst. The rst
indication for this is a discolouration of the tyre.
Damaged vehicle tyres/tyre valves are perilous. Keep
a minimum jet distance of 30cm during cleaning.
• WARNING: Risk of explosion - Do not spray
ammable liquids.
• WARNING: There is a risk of kickback and sudden
torque load against the jet spray when the spray gun
is opened. Ensure that you have stable footing and
that you are holding the gun securely, otherwise you
could injure yourself or other people.
• Never use replacement parts or accessories not
provided or recommended by the manufacturer.
• WARNING: Do not use the appliance if the supply
cable or any other important parts of the appliance are
damaged, e.g. safety devices, high-pressure hoses or
the trigger gun.
• Avoid using the product in bad weather conditions
especially when there is a risk of lightning.
• If the cord becomes damaged during use, disconnect
the cord from the supply immediately. DO NOT
TOUCH THE CORD BEFORE DISCONNECTING THE
SUPPLY.
• Do not use the product if the cord is damaged or
worn.
• Do not expose the product to rain.
Maintenance and storage
• Disconnect the product from the power supply (i.e.
remove the plug from the power supply or the battery
pack) and check for damage after use.
• Disconnect the product from the power supply (i.e.
remove the plug from the power supply or the battery
pack) before carrying out maintenance or cleaning
work.
• Leave the hose connected to the machine and spray
gun while the unit is pressurised. It is dangerous to
detach the hose while the unit is pressurised.
• Use only the manufacturer’s recommended
replacement parts and accessories.
• Inspect and maintain the product regularly. Have the
product repaired only by an authorised service centre
or similar qualied specialist.
• When not in use, store the product out of the reach of
children.
Vibration and noise reduction
To reduce the impact of noise and vibration emission,
limit the time you use the machine, use low-vibration and
low-noise operating modes as well as wearing personal
protective equipment.
PRODUCT SAFETY WARNINGS PRODUCT SAFETY WARNINGS

14 15
Take the following points into account to minimise the
vibration and noise exposure risks:
• Only use the product as intended by its design and
these instructions.
• Ensure that the product is in good condition and well
maintained.
• Keep a tight grip on the handles/gripping surface.
• Maintain this product in accordance with these
instructions and keep it well lubricated (where
appropriate).
• Plan your work schedule to spread any high vibration
tool use across a longer period of time.
ATTENTION
Familiarise yourself with the use of this product by
means of this instruction manual. Memorise the
safety directions and follow them to prevent risks and
hazards.
• Always be alert when using this product, so that
you can recognise and handle risks early. Fast
intervention can prevent serious injury and damage to
property.
• Switch off and disconnect from the power supply if
there is any malfunction. Have the product checked
by a qualied specialist and repaired if necessary,
before the next use.
Residual risks
Even if you are operating this product in accordance
with all the safety requirements, potential risks of
injury and damage remain. The following dangers can
arise in connection with the structure and design of
this product:
• Health defects resulting from vibration emission if the
product is being used over long periods of time or not
adequately managed and properly maintained.
• Injuries and damage to property due to broken
application tools or the sudden impact of hidden
objects during use.
• Danger of injury and property damage caused by
ying objects.
WARNING! This product produces an
electromagnetic eld during operation! This eld
may under some circumstances interfere with
active or passive medical implants! To reduce the
risk of serious or fatal injury, we recommend people
with medical implants to consult their doctor and
the medical implant manufacturer before operating
this product!
CAUTION: Safety installations serve the protection
of the user and may not be modied or bypassed.
Appliance switch
The appliance switch prevents unintentional operation of
the appliance.
Lock trigger gun
This lock locks the trigger gun lever and prevents the
inadvertent start of the appliance.
PRODUCT SAFETY WARNINGS PRODUCT SAFETY WARNINGS
16 17
Safety symbols
The purpose of safety symbols is to bring your attention
to possible dangers. The safety symbols and explanations
require your careful attention and full understanding. The
symbol warnings do not, by themselves, eliminate any
danger. The instructions and warnings are not substitute
to accidents prevention measures.
WARNING: Be sure to read and understand all
safety instructions in this operator’s manual,
including all safety alert symbols such as
“DANGER”, “WARNING”, and “CAUTION” before
using this tool. Failure to follow all instructions
listed below may result in electric shock, re and/or
serious personal injury.
SAFETY ALERT SYMBOL: Indicates DANGER,
WARNING, or CAUTION. May be used in conjunction
with other symbols or pictographs.
Symbol meaning
This page depicts and describes safety symbols that may
appear on this product. Read, understand and follow
all instructions on the machine before attempting to
assemble and operate.
To reduce the risk of injury, user must read
instructions manual carefully.
WARNING: Never direct discharge stream
at persons, animals, the unit or any other
electric components.
Overow valve with pressure switch
The overow valve prevents the permissible working
pressure from being exceeded. If the lever on the trigger
gun is released the pressure switch turns turns the pump
off and the high-pressure washer stops. If the lever is
pulled the pump is turned on again.
Flow monitors
DO NOT alter the original diameter of the spray head
nozzle - HAZARDOUS ALTERATION OF OPERATING
PERFORMANCE.
Attention!
Connecting to mains power supply.
Connecting the high pressure washer to a supply
system,the max allowed impedance is 0.371 OHM.
Consult with the supply authority that the equipment is
connected only to a supply of that impedance or less.
SYMBOLS
PRODUCT SAFETY WARNINGS SYMBOLS

18 19
Disconnect the mains plug immediately if the
cable is damaged, has been badly twisted or
is completely cut through. Also disconnect the
mains plug when the machine is left unattended.
Appliance not suitable for connection to the
potable water mains (kitchen tap).
Water that has own through backow preventers
is non-potable.
The appliance is not intended to be connected to
an indoor tap. If necessary, please use only with
a backow water preventer or an inlet hose-set
approved by IEC 61770.
Waste Disposal and Environmental Protection!
Recycle the tool, accessories and packaging
at a recycling centre in line with local recycling
regulations.
Electrical appliances do not belong in domestic
waste.
Guaranteed sound power level value in 93 dB.
Conforms to relevant UK regulatory requirements
TECHNICAL DATA
Input voltage rating 220-230 V~, 50 Hz
Input power 2500 W
Max pressure 14.5 MPa
Flow rate 420 l/h
IP number IPX5
Inlet pressure 0.6 MPa
Supply water temperature (max.): 40 oC
Measured sound pressure level (LpA) 76.7 dB(A)
Measured sound power level (LwA) 90.2 dB(A)
Guaranteed sound power level (LwA) 93 dB(A)
Vibration < 2.5 m/s2
Weight 21.4 kg
The sound values have been determined according to the noise test code given in EN 60335-
2-79, using the basic standards EN ISO 11203 and EN ISO 3744.
The sound intensity level for the operator may exceed 80dB(A) and ear protection measures
are necessary.
The declared vibration value has been measured in accordance with a standard test method
(according to EN 60335-2-79) and may be used for comparing one product with another. The
declared vibration value may also be used in a preliminary assessment of exposure.
WARNING: Depending on how the product is actually used, the vibration values
can differ from the declared total! Adopt proper measures to protect yourself against
vibration exposures. Take the whole work process, including times the product is
running under no load or switched off, into consideration. Proper measures include,
among others, regular maintenance and care of the product and its attachments,
keeping hands warm, regular breaks and proper planning of work processes.
SYMBOLS
93

20 21
DESCRIPTION OF PRODUCT
Parts description (Fig. A)
1. Spray gun
2. Gun holster
3. Water intake
4. ON/OFF switch
5. High pressure hose
6. Hand cranks
7. Carrying handle
8. Detergent bottle
9. Needle
Check the delivery parts (Fig. B)
Remove the machine from its packaging carefully and make sure that the following parts are
present:
a. Hand cranks
b. Gun holster
c. High pressure washer
d. Detergent bottle
e. Spray gun
f. Lance
g. High pressure nozzle
h. Turbo nozzle
i. Coupling element for water connection
j. User manual
k. Triangle brush
l. inlet adaptor
m. Patio Cleaner
n. Extension lance
o. Rotary brush
WARNING: If any parts are damaged or missing, do not operate this tool until these
parts are replaced. Failure to heed this warning could result in serious personal
injury.
NOTE: Always recycle the packaging in accordance with local recycling guidelines.
INSTALLATION
WARNING: Pull out mains plug before carrying out any work on the equipment and
use only original parts.
Before starting any cleaning task, it is important to inspect the area for objects
that could create a hazard. Remove any objects from the work area that could be
tripped over, such as toys or outdoor furniture. Ensure that all doors and windows
are closed tightly.
Attach hand cranks. (Fig. C)
Fix hand crank onto the hose reel.
Assemble gun holster and cord bracket. (Fig. D)
Assemble the gun holster onto pressure washer.
Connect the hose and spray gun.
Install the high pressure hose rmly onto the spray gun. (Fig. E)
1. Press and hold the button near the trigger.
2. Insert the high pressure into the spray gun.
Then install the tip lance and selected nozzle onto the spray gun. (Fig. F)
Fitting the wash brush (FIg. G)
The wash brush is suitable for cleaning surfaces delicately.
In the process, the high-pressure jet is used to operate the wash brush; the water strikes the
surface to be cleaned only at lower pressure.
The rotating wash brush head achieves the cleaning effect and the removed dirt is washed
away with the water.
1. Put the wash brush onto the spray gun.
2. To x the wash brush, push it slightly downwards and turn it clockwise at the same time.
Fitting the Patio cleaner (FIG. H)
- Push the extension tube onto the pivoting connector of cleaner, then rotate to the xing
position.
NOTE: Before operation, make sure no obstacle (etc. stone) has blocked the rotation device
below.
- When cleaning horizontal surfaces, move nozzle wand from side to side.
- When cleaning building interiors or exteriors , work from top to bottom. This will help
eliminate streaks.

22 23
OPERATION
WARNING: Wear suitable clothing, ear and eye protection when working with the
equipment. Ensure that the equipment is functional before each use. Ensure that the
mains voltage value matches the label on the equipment. Check the condition of the
machine:
– Check machine for visual defects.
– Check that all parts of the machine have been securely tted.
– Check that the water connector and the high-pressure hose are tight.
Starting and stopping
NOTE: Put the high pressure washer on an area of at ground. Stand in a secure
and stable position.
Starting:
1. Open the water inlet valve.
2. To switch the machine on, set the ON/OFF switch to ON. (Fig. M)
3. Unlock the safety trigger on the spray gun and press the trigger until there is a steady
stream of water. (Fig. N)
Stopping:
1. Release the trigger. Lock the safety trigger on the spray gun.
2. To switch the machine off, set the ON/OFF switch to OFF.
3. Close the water inlet valve.
CAUTION: Risk of machine damage!
Never operate the machine without water inlet as dry running may damage the
pump. Use a water lter if the inlet water is contaminated.
Working with the electric high pressure washer
Risk of fatal injury!
Use special care when cleaning tyres. Vehicle tyres/tyre valves may become damaged or
burst when handled improperly. The rst sign of damage is discolouration. Damaged vehicle
tyres/tyre valves pose a life-threatening risk. Keep the jet at a distance of at least 30 cm!
Risk of fatal injury!
The high-pressure jet may be dangerous when handled improperly. The jet must not be
directed towards living beings (people, animals), live equipment or the machine itself.
Application
High pressure working. (Fig. O)
WARNING: Be prepared for the recoil force of the emitted water jet! Ensure that you
are standing rmly and that you are holding the gun securely, otherwise you could
injure yourself or other people.
Assemble inlet adapter. (Fig. I)
Attach the inlet adapter to the machine’s water inlet. Hand tighten only.
Connect garden hose and inlet adapter. (Fig. J)
Attach a hose with a quick connect coupling (not included) to the high pressure washer.
Connect to water supply (Fig. K)
In keeping with current regulations a pressure washer must never be operated
from the drinking water mains supply without a controllable backow preventer. A
suitable backow preventer in conformity with EN 12729 type BA must be used.
Water that has passed through a backow preventer is classied as non-potable.
NOTE: A backow preventer is available from specialist retailers.
Attach garden hose to water supply and turn water valve on fully on position.
Connect socket. (Fig. L)
Insert the mains plug into the socket.
INSTALLATION

24 25
Hold the hand-held spray gun and the jet tube rmly with both hands. Unlock the safety
button and press the trigger on the handheld spray gun.
The high-pressure pump starts running as soon as you operate the hand-held spray gun.
The high-pressure pump stops running as soon as you release the trigger on the hand-held
spray gun.
CAUTION: Jet spray adjustment is very aggressive. Do not adjust while spraying.
If there is still air in the equipment, please proceed as follows:
Bleed the supply hose:
1. Remove the quick connection for the garden hose adapter on the water connection and
open the water tap until water with no bubbles emerges.
2. Close the water tap.
3. Connect the supply hose to the equipment with the aid of the quick connection for the
garden hose adapter
4. Fully open the water tap.
Bleed the equipment:
1. Switch on the equipment at the on/off switch until the pressure has built up.
2. Switch off the equipment at the on/off switch.
3. Depress the start lever on the spray gun until the pressure is released.
4. Please repeat steps 5-7 several times until there is no further air in the equipment.
Using the detergent bottle. (Fig. P)
1. Stop the machine.
2. Add detergent to the bottle.
OPERATION MAINTENANCE AND STORAGE
Overview of cleaning
1. Clean the machine. Wipe the unit with a slightly damp cloth. Do not clean the machine
using a high-pressure water jet.
- Clean the high-pressure nozzle with needle. (Fig. Q)
The pressure washer is equipped with a water lter to protect the pump. If the lter is not kept
clean, the water ow to the machine will be restricted and the pump may be damaged.
1. To clean water lter, remove transfer adapter and take out lter.
2. Rinse lter until it is free of debris and blockages.
3. Replace the lter and inlet adapter.
Storing
Store the machine in a dry and well ventilated area.
When the machine is not going to be used for an extended period of time, ensure to remove
the cleaning agent and drain all remaining water from the hose.
Transport
Daily use
- Pull out the transport handle until it audibly snaps into place. Pull the appliance by its
transport handle. (FIG. R)
If shipping, use the original packaging wherever possible.
Disposing of the machine
This machine must not be disposed of in household rubbish. You must dispose of such old
electrical and electronic appliances separately.
Please check with your local authority how to correctly dispose of your old machine.
Disposing of the packaging
The packaging consists of cardboard and correspondingly marked sheets that should be
recycled. Ensure to recycle this packaging in line with local recycling guidelines.

26 27
TROUBLESHOOTING
WARNING: Before performing any repair work, always ensure that the mains power
cable has been unplugged.
WARNING: Always wear heavy duty gloves when adjusting or cleaning, especially
when handling sharp objects.
Symptom Cause Solution
Motor does
not run when
“ON” ( I ), fully
connected
and trigger
depressed.
ON/OFF switch is in the “OFF”
(O) position. Turn switch to the “ON” (I) position.
Power cord is not plugged in. Plug in power cord.
Electrical outlet does not
supply adequate power. Try a different outlet.
Tripped pressure washer
thermal protector. Allow to cool and restart unit.
Unit does not
reach high
pressure.
Water supply is restricted. Check garden hose for kinks, leaks and
blockage.
Not enough water supply. Open water source fully.
Water inlet lter is clogged. Remove lter and rinse in warm water.
Nozzle is in low pressure Adjust the nozzle to high pressure position.
Pump is sucking air.
Check that hoses and ttings are airtight.
Turn OFF machine and purge pump by
squeezing trigger gun until a steady ow of
water emerges through the nozzle.
Not enough inlet water supply. Turn water on fully. Check garden hose for
kinks, leaks or blockage.
Output
pressure varies
ON/OFF switch
is in the “OFF”
(O) position.
Pump is sucking air.
Check that hoses and ttings are airtight.
Turn OFF machine and purge pump by
squeezing trigger gun until a steady ow of
water emerges through the nozzle
Water inlet lter is clogged. Remove lter and rinse with warm water.
Discharge nozzle is obstructed. Blow out or remove debris with a ne
needle.
Calcied gun, hose or power
nozzle.
Run distilled vinegar through detergent
tank.
TROUBLESHOOTING
Symptom Cause Solution
Detergent is
not working.
Detergent container is empty. Add more detergent.
Detergent bottle or suction
tube not properly connected. Check connections.
Detergent is too thick. Dilute detergent.
Filter on detergent suction tube
is clogged.
Run warm water through lter to remove
build-up.
Damaged or clogged detergent
suction tube.
Remove obstruction or replace detergent
suction tube.
Nozzle is in high-pressure
position. Use low pressure (black) tip.
Discharge nozzle is obstructed. Blow out or remove debris with a ne
needle.
Loose ttings. Tighten ttings.
Garden hose
connection
leaks.
Missing / worn rubber washer. Insert new washer.
Spray nozzle not properly
attached.
Ensure quick-connect wand is attached
securely.
Ensure spray tip is clicked in securely.
Spray wand,
extension, or
nozzle leaks.
Broken O-ring or plastic insert. Call the customer service centre.
Pump is sucking air.
Check that hoses and ttings are airtight.
Turn off machine and purge pump by
squeezing trigger gun until a steady ow of
water emerges through the nozzle.
Pump is noisy. Water lter is clogged. Remove water lter and rinse in warm
water.
Loose ttings. Check that all ttings are tight.
Motor buzzes
but fails to run.
System has residual pressure.
Turn unit OFF, squeeze trigger on spray
wand to release pressure and then turn unit
ON.
Voltage loss due to extension
cord.
Unplug any extension cords attached and
plug the unit directly into the outlet.
Pressure washer not used for
long periods. Call the customer service centre.
Motor buzzes
but fails to run.
(continued)
Residual friction among
components. Unit might hum.
Disconnect water supply and power ON for
2 to 3 seconds, repeat or until the motor
starts.
Water supply is OFF. Turn ON water supply.
No water. Kink in the garden hose. Remove kink in garden hose.

28 29
DECLARATION OF CONFORMITY
To the provisions of Council Directives
We
SUMEC UK
Unit A&B Escrick Business Park Escrick, York YO19 6 FD
United Kingdom
Declare that the product:
Machine Description: 2500W High Pressure Washer
Q1W-SP06-2300A / EW N15X
Function: Clean the walls of buildings etc.
Complies with essential health and safety requirements of the following
directives:
Supply of Machinery (Safety) Regulations 2008
Electromagnetic Compatibility Regulations 2016
The Restriction of the Use of Certain Hazardous Substances in Electrical and Electronic
Equipment Regulations 2012
Noise Emission in the Environment by Equipment for use Outdoors Regulations 2001
Conformity Assessment Procedure as Per Annex V
Measured Sound Power Level: 90.2 dB (A)
Declared Guaranteed Sound Power Level: 93 dB(A)
Standards and technical specication referred to:
EN60335-1: 2012+A11: 2014 EN60335-2-79: 2012
EN55014-1: 2017 EN55014-2: 2015
EN61000-3-2: 2019 EN61000-3-11: 2000
EN61000-3-3: 2013+A1:2019
EN62233: 2008
EN50581: 2012
Authorized Signatory
Date: 11.10.2021
Signature:________________________
Place: York
Name: Mariana Hall
General Manager
SUMEC UK
Unit A&B Escrick Business Park Escrick
York YO19 6 FD, United Kingdom
To the provisions of Council Directives
We
SUMEC France Sarl
59 bis Rue du Mûrier
37540 Saint Cyr Sur Loire, France
Declare that the product:
Machine Description: 2500W High Pressure Washer
Q1W-SP06-2300A / EW N15X
Function: Clean the walls of buildings etc.
Complies with essential health and safety requirements of the following
directives:
Machinery Directive 2006/42/EC
Electromagnetic Compatibility Directive 2014/30/EU
RoHS Directive 2011/65/EU *)
Noise Emission in the Environment by Equipment for Use Outdoors Directive
2000/14/EC amended by 2005/88/EC
Conformity Assessment Procedure as Per Annex V
Measured Sound Power Level: 90.2 dB (A)
Declared Guaranteed Sound Power Level: 93 dB(A)
Standards and technical specication referred to:
EN60335-1: 2012+A11: 2014 EN60335-2-79: 2012
EN55014-1: 2017 EN55014-2: 2015
EN61000-3-2: 2019 EN61000-3-11: 2000
EN61000-3-3: 2013+A1:2019
EN62233: 2008
EN50581: 2012
Authorized Signatory
Date: 11.10.2021
Signature:________________________
Place: Saint Cyr Sur Loire
Name: Rodolphe Dubois
General Manager
SUMEC France Sarl
59 bis Rue du Mûrier
37540 Saint Cyr Sur Loire, France
DECLARATION OF CONFORMITY
This manual suits for next models
1
Table of contents
Other Yard force Pressure Washer manuals

Yard force
Yard force EW U19 User manual

Yard force
Yard force YF2200LC User manual

Yard force
Yard force AQUAJET User manual

Yard force
Yard force YF1800LR User manual

Yard force
Yard force Q1W-SP04-2200 User manual

Yard force
Yard force YF3100ES-R User manual

Yard force
Yard force AQUAJET 2 User manual

Yard force
Yard force EW U15 User manual

Yard force
Yard force YF4050PB User manual

Yard force
Yard force EW N16 User manual