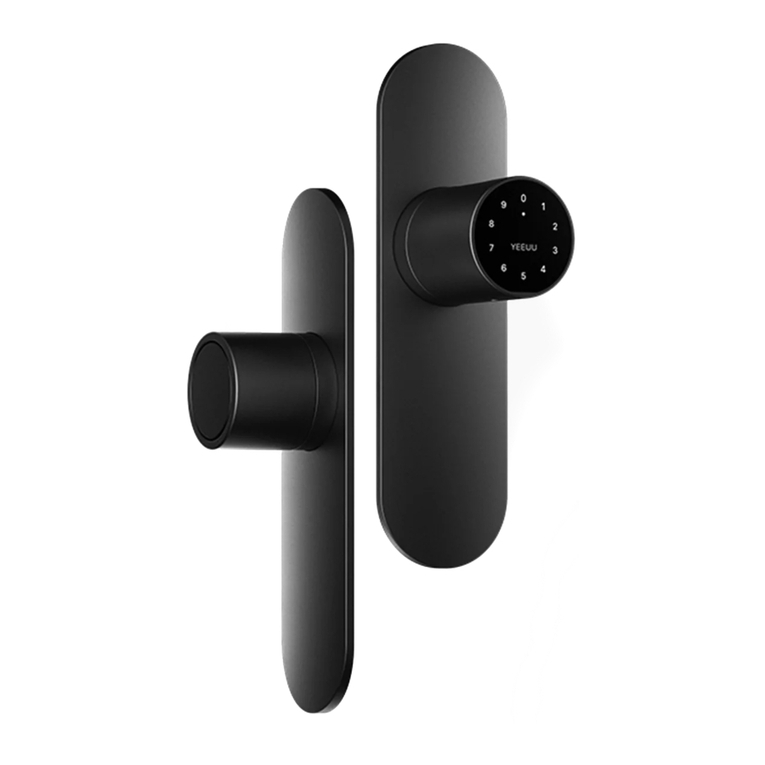
Smart Fingerprint Lock R2
Quick Start Guide
Please follow us on YouTube channel: YEEUU
or visit our website: YEEUU.com
to get more info of operation manual.
Lock Show
1
1
3
2
2
4
3
4
Front Lever Back Lever
Indicator Light
Door Card Identification Area (for Access Card Version)
Battery Cover
Fingerprint Identification Area
Basic Parameters
Door Opening Method: Fingerprint, Card (for Access Card Version), APP
Storage Capacity: 100PCS of Door Cards/Fingerprints
Working Voltage: 2 x No.7 AAA alkaline dry batteries
Battery Life: Up to 1 year (unlock 10 times a day)
Working Temperature: -20°C ~ 70°C
Working Humidity: 40%RH ~ 80%RH
Door Thickness: 30mm-80mm
Door Prep: 54mm diameter face hole &25mm diameter latch hole
Daily Maintenance
· Installation Environment: Requires at least a canopy, do not keep
the lock completely exposed in open air
· Please do not scratch the fingerprint identification area with a
sharp object
· Please exchange both two batteries at the same time, do · not use
new batteries with old ones
· Please adjust the door or door frame in time if it deforms, other-
wise the latch will not enter the door frame hole position smoothly
Instructions
Note: Please install 2 x No.7 AAA alkaline dry batteries before use.
Download APP:
Log in AppStore/GooglePlay to search “YEEUU” and download the APP.
Add device:
Register and log in “YEEUU” account; click “Add Device” or click symbol
“+” at the upper right corner on “Home page”; select “Auto Scan” to start
searching; after the device is searched, click “next” to connect the lock to
be added.
Add/use fingerprint to open the door:
Log in “YEEUU” APP; select the device and enter “Settings” page; click
“Fingerprint Management” to enter the page; click “Add Fingerprint” at
the upper right corner and put the finger on the fingerprint identification
area for admission.
Add/use door card to open the door (for Access Card Version):
Log in “YEEUU” APP; select the device and enter “Settings” page; click
“Door Card Management” to enter the page; click “Add Door Card” at the
upper right corner and then put the door card on the card identification
area for admission.
Use APP to open the door:
Log in “YEEUU” APP; select the page for the device to be entered, click
the icon at the page center after your APP is connected with the lock; turn
the handle to open the door when the green light flashes.
View records:
Log in “YEEUU” APP; select the page for the device to be entered; after
your APP is connected with the lock, click “Opening Record/Alarm” to
enter the page to view opening/alarm records.
Reset/unbind the door lock:
Reset the door lock: recharge the device and it will enter a countdown of
20 seconds; after the fingerprint of the administrator is identified suc-
cessfully, press and hold the fingerprint until the white light start to flash
to reset the door lock.
Unbind the door lock: [Remove Device] button shows up when a non-ad-
ministrator user performs the above mentioned operations, click it and
follow the prompt to unbind.
Low Voltage Alarm:
Yellow light flashes 2 times
Operation Failed:
Red light flashes 2 times, buzzing 2 times
Error Lock:
Red light flashes 5 times
Turn on “Stay Unlock” mode:
After the fingerprint is recognized successfully, press and hold the finger-
print identification area for 8 seconds until the white indicator light starts
to flash, and then keep the white light on for 2 seconds more to turn on
the “Normal Open” function. White light indicates in the normal fingerprint
identification under “Normal Open” mode.
Turn off “Stay Unlock” mode:
Please press and hold the fingerprint identification area for 8 seconds
until the green indicator light starts to flash, and then keep the green light
on for 2 seconds more to turn off the “Stay Unlock” function. Green light
indicates in the normal fingerprint identification under “Stay Unlock”
mode.
Frequently Asked Question
Opening door by mobile phone fails.
Check whether the batteries are loaded and working properly; Check the
networking status of mobile phone and perform operation again; Remove
the batteries and re-load.
Opening door by card fails.
Check whether the batteries are loaded and working properly; Confirm
whether the card has been added; Remove the batteries and re-load.
Opening door by fingerprint fails.
Check whether the batteries are loaded and working properly; Confirm
whether the fingerprint has been added; Remove the batteries and
re-load; Ensure that the finger is dry.
Yellow light flashes when opening the door.
Low power, please replace 2 No.7 batteries in time.
Red light flashes 5 times when opening the door.
Error lock, please try to unlock the door by fingerprint/door card/pass-
word 1 minute later, or use the APP to unlock it.
No response when opening the door.
Please check if the batteries are loose; If the batteries are dead, please
replace the batteries.
Login/registration cannot be performed normally.
Please check whether the network is running properly.


