Yezz Andy A5 User manual

Contents
Get started .............................................................................1
Key and parts ........................................................................3
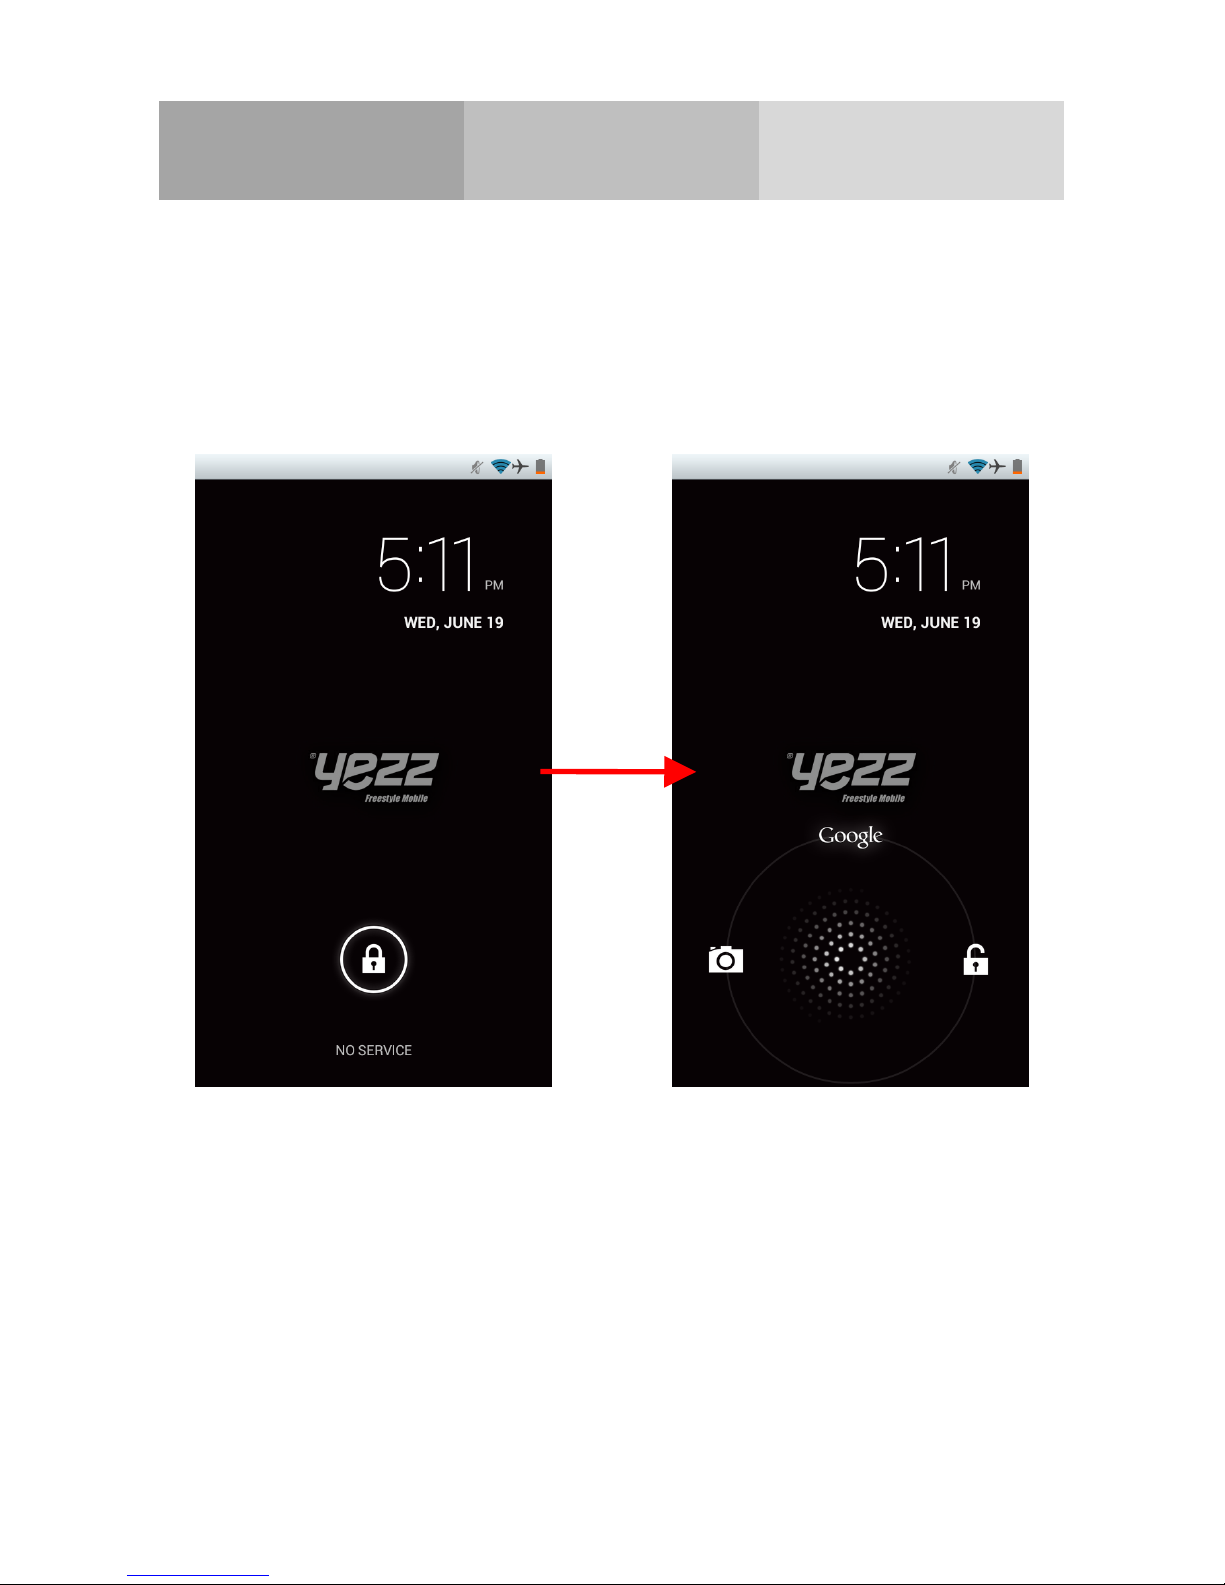
Lock and Unlock the screen ................................................4
Make it yours .........................................................................5
Add Widgets and more icons ..............................................6
to Home Screen.....................................................................6
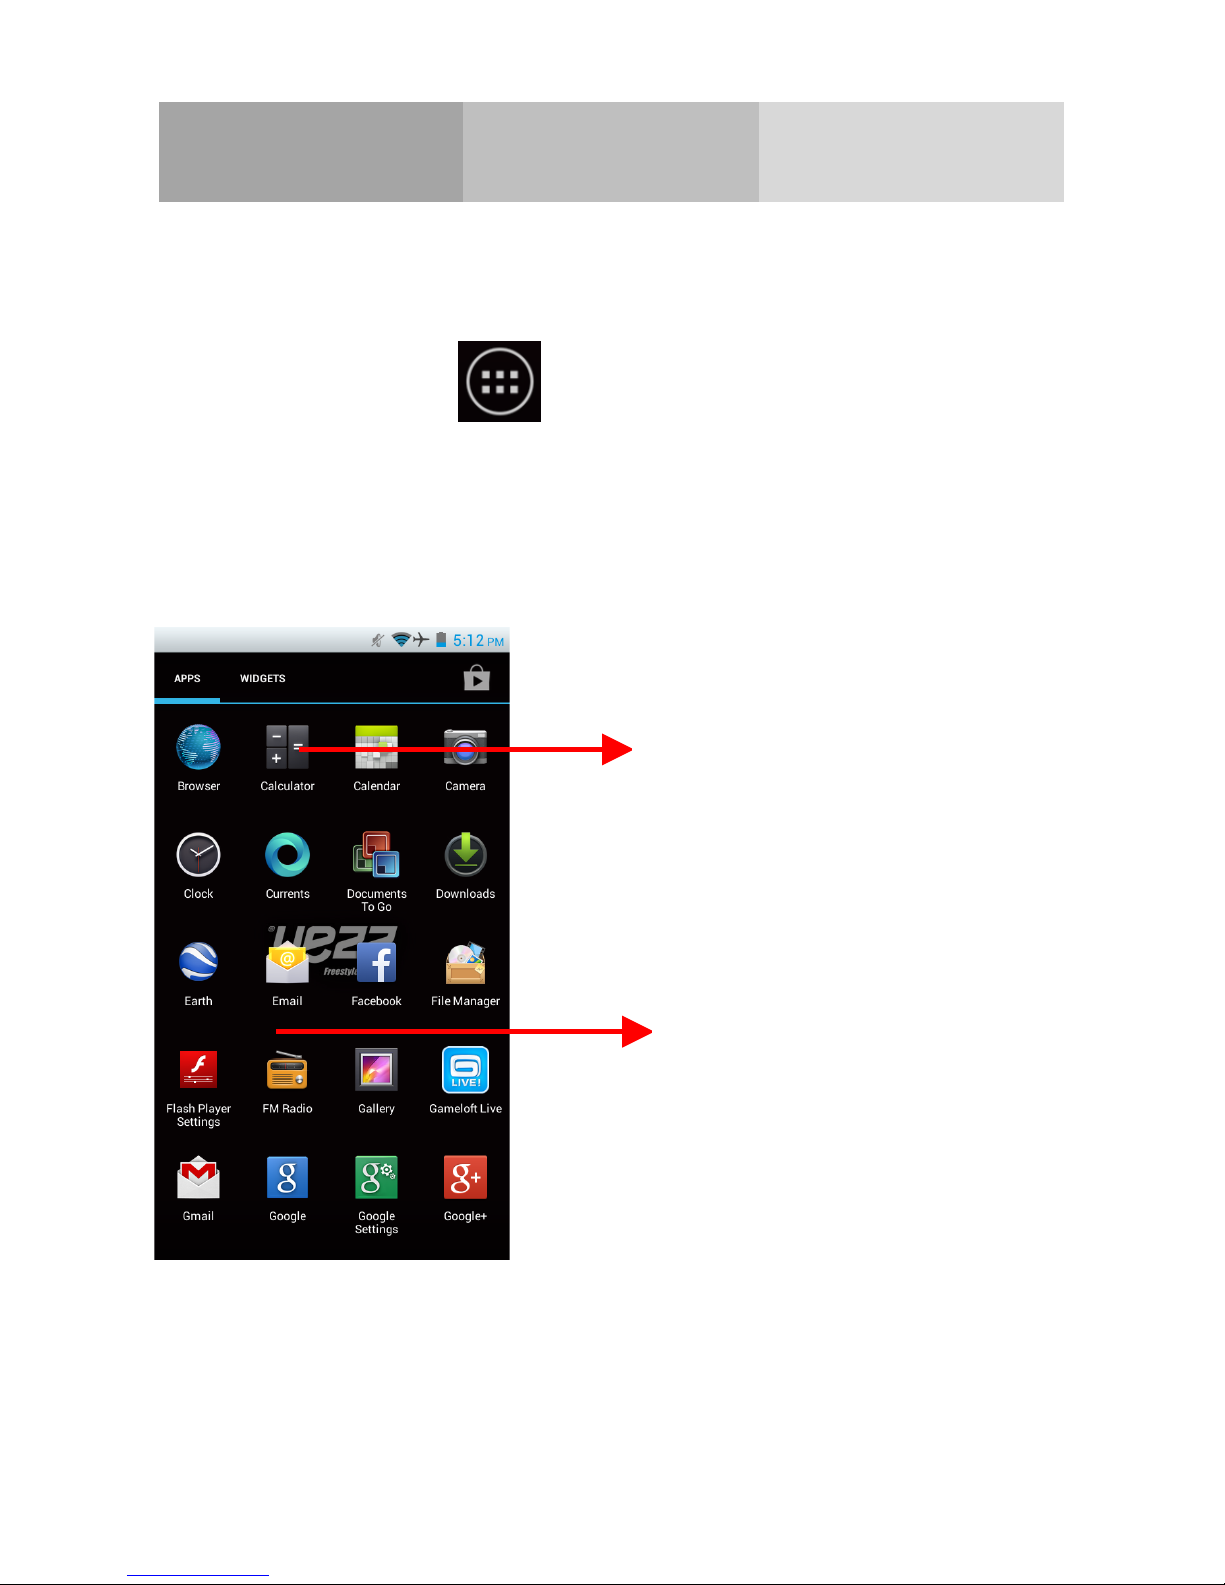
Enter launcher.......................................................................7
Make a call .............................................................................9
Call log .................................................................................10
Reject a call by SMS ........................................................... 11
Add a contact ......................................................................12
Send and Receive message(s) ..........................................13
Browser the Web.................................................................15
Enjoy music.........................................................................16
Download applications.......................................................17
From android market..........................................................17
Manage Applications ..........................................................18
Important Safety Information.............................................19

Get started
Insert SIM card
The phone is a Dual SIM mobile phone allowing you to use
two different carriers.
To insert SIM card(s):
1. Turn off the mobile phone and remove the rear cover and
battery.
2. Insert the SIM card correctly in the card slot(s) (See figure
below)
Micro SD
SIM 2
SIM 1
1

3. Finally insert the battery and replace the rear cover of the
mobile phone.
Insert Memory card
1. Turn off the mobile phone and remove the rear cover and
battery.
2. Insert the Micro SD card into the slot.
3. Finally insert the battery and the rear cover of the mobile
phone.
Note: Use only compatible memory cards for this device.
Incompatible memory cards may damage the card or the
device and corrupt the data stored in the card.
Charge the Battery or Connect to a computer
You can charge your battery using the charger or connect the
USB cable (supplied with this phone) to the computer.
Note: Please use the specific battery, otherwise it may cause
explosion.
2

Key and parts
The smart phone gives you a great experience on Camera,
Video recorder, FM radio, Music and Sound recorder. Let you
install various APPs, games, and more (supports APK format)
by downloading it from Google Play Store.
Back
Home
Menu
Power
key
Volume
keys
3

Lock and Unlock the screen
Press power button to enter Sleep mode and meanwhile the
screen will be locked; press power button again to turn on the
mobile phone and then drag the icon to the right side to unlock
the screen.
4

Make it yours
1. Home screen: It is your starting point to access all the
features on your phone. It displays application icons, widgets,
shortcuts, and other features. Press and hold home screen to
modify wallpaper.
2. Notification Bar: At the top of the screen, the Status
Bar displays the time, status, and notifications. If there is a
new message, missed call or any new notification, you can
drag it down to open the notification panel and click the
desired one to look at it. When you finished, you can close it
by dragging the panel up or pressing “Back”.
5

Add Widgets and more icons
to Home Screen
Press and hold Home Screen to modify wallpaper, or enter
Launcher and press and hold an application till the screen
vibrates, and then release your finger.
Press and hold the widget or icon you want to move. Once the
phone vibrates, don’t release your hold on the icon. Drag the
widget or icon to a new location on the screen. Press and hold
on an icon till the phone vibrates, and drag the widgets or icon
to the trash to remove!
6

Enter launcher
Open and Switch Applications
At idle screen touch enter launcher.
The Launcher holds icons for all of the applications on your
phone, including any application that you downloaded from
Android Market or other sources
Press Home icon or Back icon to close the Launcher.
Slide the Launcher
left or
right to bring
more icons
Touch an application
to
open it
7

Switch to Recently Used Application
Press home key and hold the icon for a few seconds.
Touch an icon to
open an
application
8

Make a call
Choose and enter a complete phone number to make a
call. Your phone supports smart search.
Touch to view call log, touch to enter
phonebook
Touch to view 2
more contacts
with digit number
“10086”.
9

Call log
Touch an icon to
Call, video call
Send message,
view contact
Press this point to
enter menu, you
can call, video call,
view contact etc.
10

Reject a call by SMS
While there is an incoming call, and you are not able to accept
the call, therefore you can send a message for rejecting the
call.
Drag this icon to select and send a SMS
11

Add a contact
Touch enter contact.
Touch to add new contact.
Click here for a contact and press menu key to enter menu
view, edit, delete contact, print contact, share contact,
associate SIM card.
12

Send and Receive message(s)
Touch enter messaging, touch compose new message
When you are composing a new text message, you can select
text to cut or copy. The selected text is highlighted in blue.
Touch once to capitalize the next letter you
type. Touch
and hold for caps.
Press space or a punctuation
mark to enter the highlighted
suggestion
.
Tap this icon to select
desired contact from
phonebook.
13

Tap to add an attachment, including Pictures, Videos,
Audios, to be send as a MMS.
When a new message comes, you can read it by dragging the
notification panel and clicking the message, or entering to
Message to read it directly.
Press and hold one of the all messages to delete.
14

Browser the Web
a. Set up Internet/Data connection
Enter Settings > More…, scroll down to find out Mobile
network, and then enter “Access Points Names”, choose the
desired WAP account.
b. Switch on Data connection or WiFi
To browse the web, you need to switch on Data connection. If
there is WiFi around, you can switch on WiFi to browse the
web.
Touch the icon in the
notifications bar to switch
on or off Data connection
15

Enjoy music
When you copy music to your SD card, the Music player
searches the card for music files and builds a catalog of your
music, based on information about each file that is stored in
the file itself.
Touch a tab to view your
library in one of
four ways
16

Download applications
from Google Play Store
1. Add Google account
2. Enter Play Store (Android Market) and download apps
17

Manage Applications
Enter Setting > App.
As you install downloaded Apps, you need to switch on
“Unknown sources” in application settings.
Select one app, you can uninstall, clear data, move to
phone/sd card
18

Important Safety Information
Access Codes
PIN code
The Personal Identification Number (PIN code) protects your
SIM card against unauthorized use. Your SIM card usually
supplies the PIN code. The password can be obtained from
your service provider. If the incorrect PIN code occurred three
times in succession, you may need to key in PUK code.
PUK code
The Personal Unlocking Key (PUK code) is required to change
a blocked PIN code. The PUK2 code is required to change a
blocked PIN2 code. The password can be obtained from your
service provider. If you key in an incorrect PIN2 code three
times in succession, you may need to key in the PUK2 code. If
an incorrect PUK or PUK2 code is used, the SIM card cannot
be used anymore and you might need to contact your service
provider for a new card.
Radio frequency energy
Your mobile phone is a radio transmitter and receiver. When
the phone is turned on, it receives and transmits radio
frequency (RF) energy. Depending on the type of mobile
phone you posses, it operates on different frequency ranges
and employs commonly used modulation techniques. The
system handles your call when you are using your phone and
it also controls the power level at which your phone transmits.
Specific Absorption Rate (SAR) information.
19
This manual suits for next models
2
Table of contents
Languages:
Other Yezz Cell Phone manuals