manuals.online logo
Brands
  1. Home
  2. •
  3. Brands
  4. •
  5. YOODA
  6. •
  7. Transmitter
  8. •
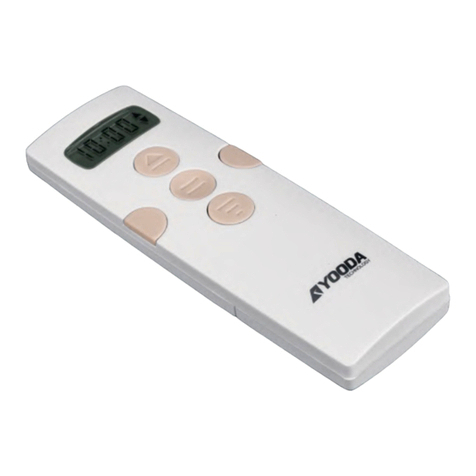
  9. YOODA MAGNETIC DELUXE YSH Series User manual

YOODA MAGNETIC DELUXE YSH Series User manual

5-channel MAGNETIC Deluxe YSH remote control with display
and timer (MAGNETIC Deluxe_5RT YSH)
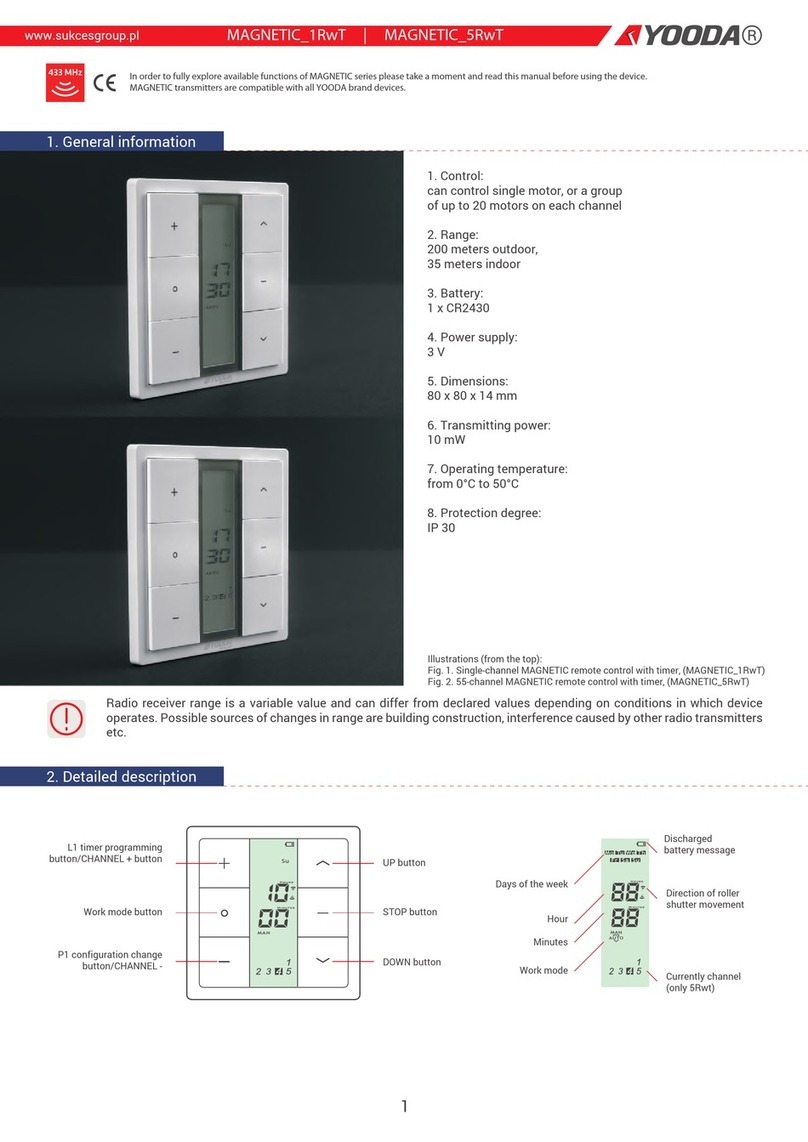
1. Control:
can control single motor, or a group
of up to 20 motors on each channel
2. Range:
200 meters outdoor,
35 meters indoor
3. Battery:
CR2450
4.Power supply:
3 V
5. Dimensions:
130 x 45 x 10 mm
6. Transmitting power:
10 mW
7. Operating temperature:
from 0°C to 50°C
8. Protection degree:
IP 30
Radio receiver range is a variable value and can differ from declared values depending on conditions in which device
operates. Possible sources of changes in range are building construction, interference caused by other radio transmitters
etc.
1
2. Detailed description
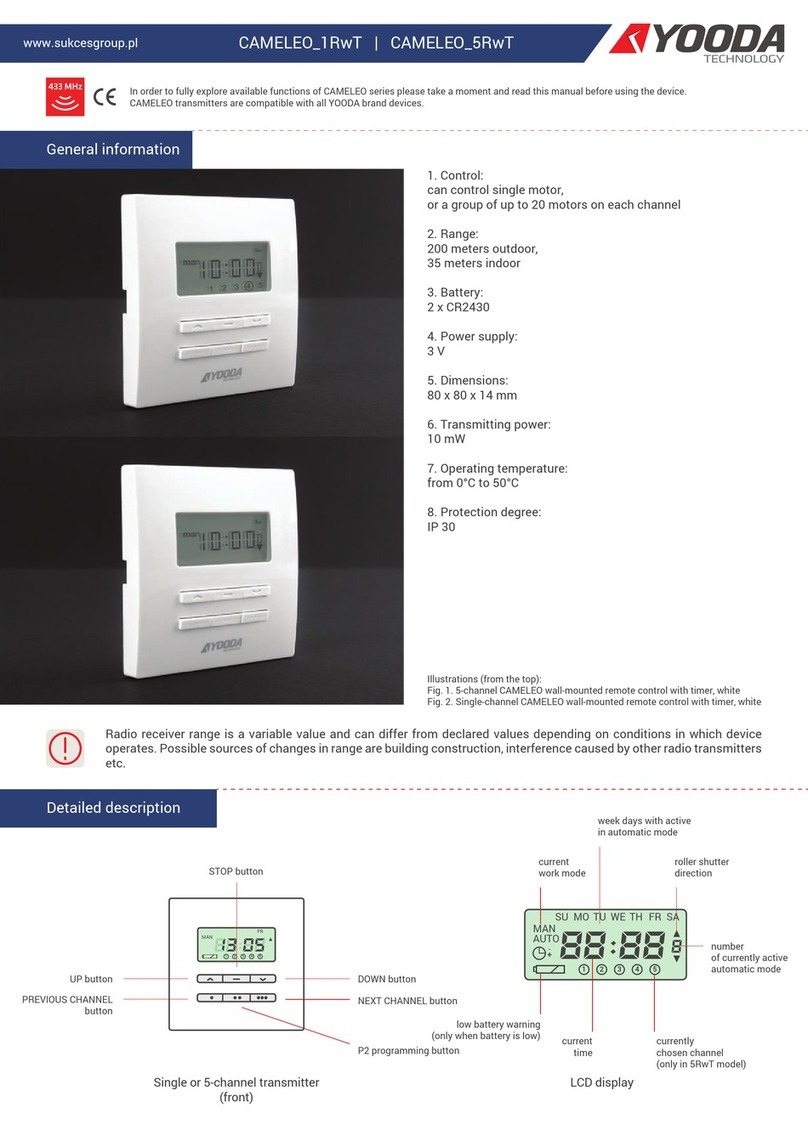
UP button
LCD display
STOP button
DOWN button
CHANNEL + (P1 +) buttonCHANNEL - (P1 -) button
days of week
minutes
UP
DOWN
low battery
message
time change
button
P2
programming button
work mode
button
C
R
2
4
5
0
5-channel transmitter with timer
(front)
5-channel transmitter with timer
(back)
In order to fully explore available functions of MAGNETIC DELUXE YSH series please take a moment and read this manual before using the device.
MAGNETIC DELUXE YSH transmitters are compatible with all YOODA SMART HOME brand devices.
MAGNETIC Deluxe YSH transmitters are dedicated to two-way communication.
MAGNETIC_Deluxe_5RT YSH
1. General information
selected channel
work mode
hour
2
1.To control all receivers by the transmitter run the channel group. The group channel is on when all channels are
highlighted.
2. For devices that are programmed on all channels operate at the programmed time, you should select a group channel
on the transmitter and set the automatic mode.
3. Estimated battery lifespan is 1 year if the device runs 4 commends a day in average.
4. Batteries should be changed when receiving device stops reacting to commands.
5. When replacing the battery, pay attention to the correct polarity.
Batteries contain substances that may be hazardous to health and may pollute the environment. Used batteries should
be disposed of properly.
1. Manual working mode (symbol MAN appear on the display) normal working mode, without timer function.
2. Automatic working mode (symbol AUTO appear on the display) normal working mode with timer function.
3. Random working mode (symbol appear on the display) time controlled work with random opening/closing time
(up to 15 minutes difference to preset opening/closing time).
4. Working mode is changed for all channels.
1.Time can be set only when device is in manual working mode.
2. Longer than 60 seconds pause between series of button clicks during programming will cause device to switch off
from programming mode without saving any changes.
1. Each channel can be activated or deactivated in the automatic mode. If the channel is inactive, the transmitter will not
control the receiver in this mode.
2. The channel is inactive if number of this channel is flashing.
3. Activating channels in automatic mode
4. Changing work mode
5. Setting current time
Press WORK MODE
button to set the
automatic mode.
Use the P1- or P1 +
buttons to set
the channel.
Press and hold the
P1 + button
for 3 seconds.
The number of the selected channel starts flashing,
which means that the channel is inactive in the automatic
mode. Repeating the procedure activates the channel.
Every working mode change results in
switching between the modes.
Press
WORK MODE button
to set the manual
working mode.
Press
WORK MODE button
to set the manual
working mode.
Press and hold
TIME CHANGE button
for about 3 seconds.
Current time flashes
on the screen.
Press
WORK MODE button
to set the automatic
working mode.
Press
WORK MODE button
to set the random
working mode.
Press P1+ button
to switch between
setting hour, minutes
or days of week.
Using UP and DOWN
buttons set current time.
Press TIME CHANGE
button to start the clock .
Pressing and holding the TIME
CHANGE button for 3 seconds we
confirm the changes (the time on
the display will stop flashing).
1. Closing and opening time change is possible only in automatic mode.
2. The automatic closing and opening time should be set separately on each channel.
3. Longer than 60 seconds pause between successive presses of the button will automatically exit the change mode.
4. In order for the transmitter to control roller shutters, the group channel must be turn on. This applies to all working
modes of the transmitter.
5. At the time of the day, the symbol "- -: - -" means the time is not active in an automatic mode.
5. When setting the automatic closing and opening time, the symbol "- -: - -" means that the hour is not active in automatic
mode.
6. Setting the automatic closing and opening time is possible in one of three options:
a) another hour for each day of the week,
b) one hour from Monday to Friday and another hour from Saturday to Sunday,
c) one hour for the entire week.
1. The function buttons lock prevents accidental operation of two buttons used when programming motors or radio
receivers.
2. This function is factory disabled. To on / off the function, follow the procedure below.
1. The transmitter can operate in one of two modes:
a) two-way
b) one-way
2. The transmitter factory operates in two-way mode.
6. Setting automatic time of closing and opening
7. Function buttons lock
8. Selection of the transmitter's operating mode
Press
WORK MODE button
to set the automatic
working mode.
Remove the battery
from the transmitter.
Press programming
button P2.
Press and hold
TIME CHANGE button
for about 3 seconds.
Day of the week flashes
on the display.
Press P1 or P2 button to change
the programming option of
automatic time. Confirm by
pressing the STOP button.
When "L" symbol will appear on
the display the function is on.
When "U" symbol will appear on
the display the function is off.
When "1" number will appear on
the display transmitter is on
two-way mode.
When "2" number will appear on
the display transmitter is on
one-way mode.
When holding the P2
programming button,
insert the battery.
Press and hold STOP button
for about 15 seconds.
Press the P1 + button to select the
change option hours
or minutes of automatic closing or
opening time on selected days.
Pressing and holding
the TIME CHANGE button
for 3 seconds confirms
the changes
(the time on the display
will stop flashing).
Using UP and DOWN
buttons set
appropriate time.
3
C
R
2
4
5
0
C
R
2
4
5
0
3
1. Way of programming first transmitter depends on type of radio receiver. When programming first transmitter please
follow instruction of the device that is going to be controlled by the transmitter.
2. Longer than 6 seconds pause between series of button clicks during programming will cause device to switch off from
programming mode without saving any changes.
3. If the end positions aren't set, the programming of the first transmitter will delete all existing transmitters from memory.
4. Choosing ‘0’ group channel means remote controls all programmed devices on all channels at the same time. No
programming functions can be performed on group channel. All devices programmed to any other channel can be controlled
on group channel without additional programming.
4. Programming first transmitter to EV/S-type motors
Turn on power supply
or press programming
button on motors head (for
2 sec.) when power is on.
Motor will make a sound.
Roller shutter will make
an up/down move.
Press STOP button
for a 2 seconds
on the remote.
Roller shutter
will makean up/down
moveand the motor will
make a few short sounds.

This manual suits for next models

1

Other YOODA Transmitter manuals

YOODA BESH 1RT User manual

YOODA

YOODA BESH 1RT User manual

YOODA MAGNETIC Deluxe 1Rw User manual

YOODA

YOODA MAGNETIC Deluxe 1Rw User manual

YOODA MAGNETIC PRO YSH User manual

YOODA

YOODA MAGNETIC PRO YSH User manual

YOODA MAGNETIC Series User manual

YOODA

YOODA MAGNETIC Series User manual

YOODA MAGNETIC Deluxe-15Rw User manual

YOODA

YOODA MAGNETIC Deluxe-15Rw User manual

YOODA MAGNETIC PRO YSH User manual

YOODA

YOODA MAGNETIC PRO YSH User manual

YOODA CAMELEO_1RwT Configuration guide

YOODA

YOODA CAMELEO_1RwT Configuration guide

YOODA MAGNETIC-PRO-15Rw YSH User manual

YOODA

YOODA MAGNETIC-PRO-15Rw YSH User manual

Popular Transmitter manuals by other brands

Gill Electronics Teslink WPT503CM Installation information

Gill Electronics

Gill Electronics Teslink WPT503CM Installation information

Klipsch Flexus TRANSPORT 100 quick start guide

Klipsch

Klipsch Flexus TRANSPORT 100 quick start guide

Listen Technologies LT-84 quick start guide

Listen Technologies

Listen Technologies LT-84 quick start guide

ClearSounds QLINK operating manual

ClearSounds

ClearSounds QLINK operating manual

Deceptively Simple Cue Command Instructions guide and user manual

Deceptively Simple

Deceptively Simple Cue Command Instructions guide and user manual

Audio Limited TX2040 user guide

Audio Limited

Audio Limited TX2040 user guide

Novus NV-202VIP user manual

Novus

Novus NV-202VIP user manual

PR electronics 4116 product manual

PR electronics

PR electronics 4116 product manual

BNF SPMR6655 instruction manual

BNF

BNF SPMR6655 instruction manual

Nitek Etherstretch ET1500U quick start guide

Nitek

Nitek Etherstretch ET1500U quick start guide

KLAY-INSTRUMENTS 2000-SAN Series Safety manual

KLAY-INSTRUMENTS

KLAY-INSTRUMENTS 2000-SAN Series Safety manual

Lightware DVI-OPT-TX110 quick start guide

Lightware

Lightware DVI-OPT-TX110 quick start guide

STC MRDI Technical bulletin

STC

STC MRDI Technical bulletin

HumanTechnik Lisa A-2466-0 Operation instructions

HumanTechnik

HumanTechnik Lisa A-2466-0 Operation instructions

Gear4 CarDock FM user manual

Gear4

Gear4 CarDock FM user manual

Easy wave RTS03 operating instructions

Easy wave

Easy wave RTS03 operating instructions

Rosemount 8732 Series Reference manual

Rosemount

Rosemount 8732 Series Reference manual

Cables to Go TV AVS 815 manual

Cables to Go

Cables to Go TV AVS 815 manual

manuals.online logo
manuals.online logoBrands
  • About & Mission
  • Contact us
  • Privacy Policy
  • Terms and Conditions

Copyright 2025 Manuals.Online. All Rights Reserved.