7. Brake Operat on & Brake Ma ntenance
RUNNING HANDBRAKES
1. To apply the running brakes, squeeze the brake levers in an upwards direction. (A as n photo 3).
PARKING BRAKES– TO BE OPERATED BY HAND.
1.
To apply the parking brakes, push the black handle by hand towards the front of the wheelchair (C as n photo 4).
. To release the parking brake, pull the black handle by hand back towards the rear of the wheelchair
(B as n photo 4).
NOTE:Always use the park ng brakes when the wheelcha r/occupant are n a stat onary pos t on.
Always park the wheelcha r on a level ground.
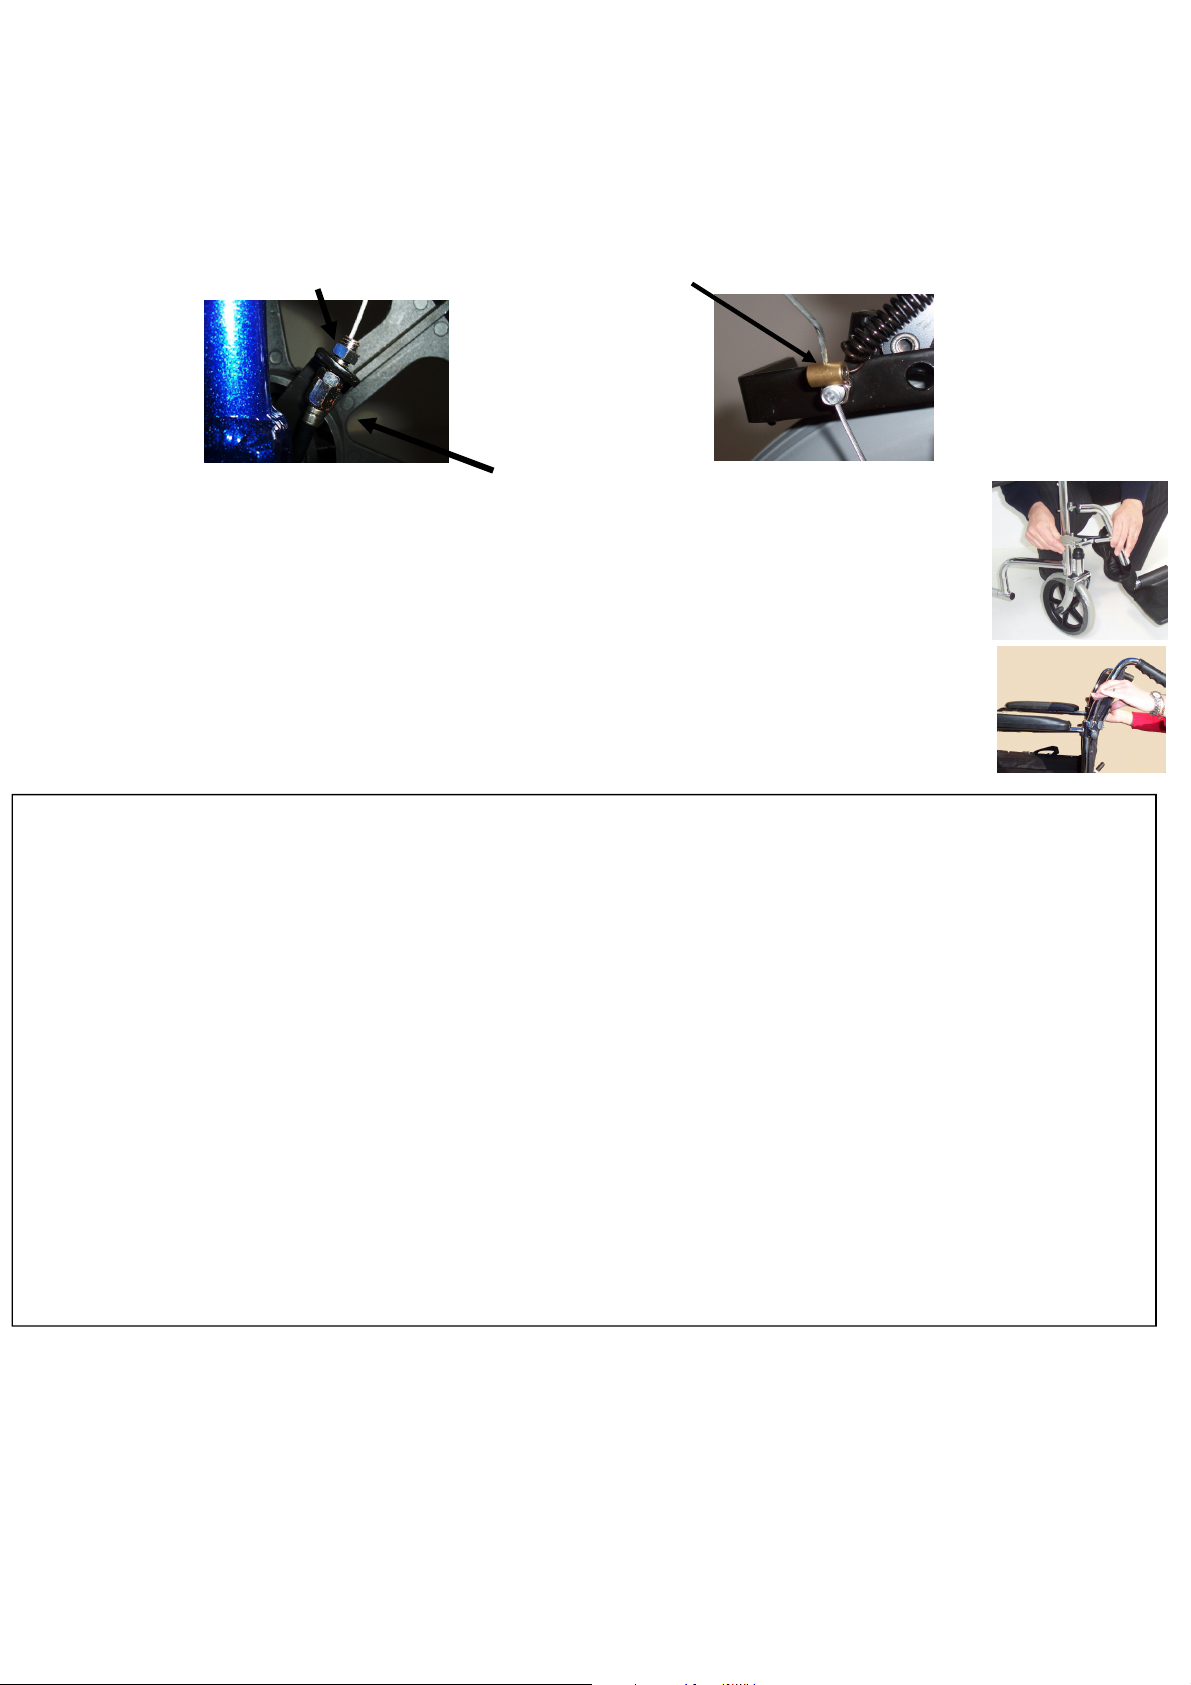
MAINTENANCE
The runn ng and park ng brakes are factory preset, they should only need adjust ng due to wear and tear.
1. To adjust the whole of the brake unit, slacken off the two allen key bolts (D n photo 5) and slide the unit
downwards until the parking brake arm and the attendant brake arm is 3.5mm — 5mm away from the wheel
(photo 6). Then tighten up the two allen key bolts. (Also see po nt 3 n th s sect on for runn ng handbrake
adjustment).
6. Assembl ng the Wheelcha r
1. Remove all packaging from the wheelchair.
. Fold out the wheelchair by standing at the front of the chair, put both hands onto the seat upholstery and push
down until the seat is completely open.
3. Lift up the folding back and click into position.
4. To install footrests place left/right footrest over left/
right pegs at a 90
0
angle to the frame, turn for-
ward 90
0
to lock footrests (photos 1 & 2).
5. Legrest adjustment—for optimum comfort it is important to attain the correct leg position. The footrests have
been designed so that they can be extended into a number of positions. Sit the user in the wheelchair whilst
adjustment is carried out. Release the bolt at the base of the legrest, slide down until a comfortable length has
been found for the user, then tighten up the bolt to secure position. A suggested comfortable position is when
the upper leg is resting comfortably on the seat whilst the footrest is supporting the weight of the lower leg.
6. Kerb lifter—use the kerb lifter to raise the front castors. Mount ng a kerb: Approach the kerb head on,
attendant to push down on the tube with a foot to raise front castors, lower front castors onto the raised
kerb. Finally attendant to push wheelchair forward, lifting it up slightly to mount kerb with rear wheels.
Down a kerb: Line up the front castors with the edge of the kerb. The attendant uses the kerb lifter to
raise the front castors, tip the occupant slightly back. Keeping the castors raised, slowly lower the wheel-
chair down the kerb. Do not raise the front castors by pushing down on the push handles as this could result
in damage to the wheelchair.
7. Lap Belt– to be used to restrain the wheelchair occupant during normal daily use. Belt must be worn low
across the front of the pelvis. Belt restraints must be adjusted as tightly as possible consistent with user
comfort and should be straight not twisted. Belt restraints must not be held away from the body by any
wheelchair components such as armrests.
IMPORTANT: Under no circumstances should this wheelchair be used as a seat in a motor vehicle. The
wheelchair occupant should transfer to a normal vehicle seat & the wheelchair should be stored safely
away. This wheelchair has not been designed to be used as a seat in a motor vehicle, and failure to follow the
above instructions could result in injury.
C
B
A
PHOTO 3 PHOTO 4
PHOTO 1 PHOTO 2
PHOTO 5
D
PHOTO 6
3.5mm—5mm
3.5mm—5mm
Oct 2013