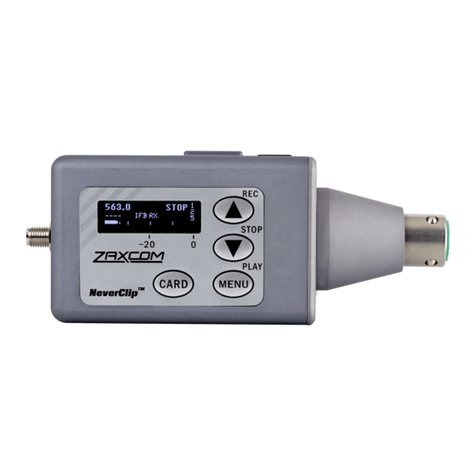
Zaxcom IFB200 User manual

3998 FAU Blvd. Suite 310 Boca Raton, FL 33431 Tel: 561-961-5585 Fax: 561-961-5587
Certification Exhibit
FCC ID: PR6IFB
IC: 12755A-IFB
FCC Rule Part: 15.247
IC Radio Standards Specification: RSS-210
ACS Project: 15-2006
Manufacturer: Zaxcom, Inc.
Model: IFB200
User Manual

1
USER MANUAL
Published April 2015
IFB200
ZaxNet Remote Control. Reinvented

2
Table of Contents
TABLE OF CONTENTS .......................................................................................................................... 2
KNOWING YOUR IFB-200 ..................................................................................................................... 4
HOME SCREEN ........................................................................................................................................ 6
ALTERNATE HOME SCREEN ......................................................................................................................................6
HOME SCREEN OPERATIONS....................................................................................................................................7
MAIN MENU ............................................................................................................................................. 8
NAVIGATING THE MAIN MENU ................................................................................................................................8
REMOTE GAIN ADJUST.............................................................................................................................................8
UNIT CODE SELECT .................................................................................................................................................8
REMOTE FREQUENCY ADJUST ..................................................................................................................................8
REMOTE POWER MODE ...........................................................................................................................................9
........................................................................................................................................................................... 1
PLAYBACK CONTROL ............................................................................................................................................10
TIMECODE ROUTING .............................................................................................................................................10
TIMECODE FRAME RATE SELECT ...............................................................................................................................1
IFB AUDIO MIX .......................................................................................................................................................1
LOCK PAGE ...........................................................................................................................................................12
EXTENDED MENU .................................................................................................................................13
NAVIGATING THE EXTENDED MENU......................................................................... ERROR!BOOKMARK NOT DEFINED.
EXITING THE EXTENDED MENU ................................................................................ ERROR!BOOKMARK NOT DEFINED.
1K NOTCH FILTER.................................................................................................................................................13
RECORD FORMAT..................................................................................................................................................13
IFB TRANSMIT POWER .............................................................................................. ERROR!BOOKMARK NOT DEFINED.
POWER ROLL.........................................................................................................................................................15
IFB MODE..............................................................................................................................................................14
IFB VOTING ENABLE ................................................................................................. ERROR!BOOKMARK NOT DEFINED.
ZAXNET IFB FREQUENCY......................................................................................... ERROR!BOOKMARK NOT DEFINED.
IFB DROPOUT COMPENSATOR ..............................................................................................................................15
POWER-UP MODE .................................................................................................................................................17
FORMAT MICRO SD CARD.....................................................................................................................................17
TIME CODE JAM MODE ............................................................................................. ERROR!BOOKMARK NOT DEFINED.
TIME CODE SOURCE ..............................................................................................................................................18
GROUP CODE SELECT............................................................................................................................................19
AUDIO INPUT SELECT ............................................................................................................................................19
MINIMUM FREQUENCY ...........................................................................................................................................19
MAXIMUM FREQUENCY ..........................................................................................................................................19
ERX SOFTWARE UPDATE.......................................................................................................................................20
RECORD ON BOOTUP...........................................................................................................................................20
INPUT PHASE INVERT .............................................................................................................................................20
HOME SCREEN TIMECODE DISPLAY ........................................................................................................................21
BACKLIGHT TIMER .................................................................................................... ERROR!BOOKMARK NOT DEFINED.
ENCRYPTION MENU...............................................................................................................................................21
ENCRYPTION CODE...............................................................................................................................................22
3
MEDIA ......................................................................................................ERROR! BOOKMARK NOT DEFINED.
MEDIA CAPACITY...................................................................................................... ERROR!BOOKMARK NOT DEFINED.
............................................................................................................................ Error! Bookmark not defined.
RECORDING FORMAT ............................................................................................... ERROR!BOOKMARK NOT DEFINED.
FIRMWARE .............................................................................................ERROR! BOOKMARK NOT DEFINED.
UPDATING IFB-200 FIRMWARE ................................................................................. ERROR!BOOKMARK NOT DEFINED.
WIRING DIAGRAMS ..............................................................................................................................25
Balanced Line Level Analog In –...................................................................................................................... 25
AES Digital in –................................................................................................................................................ 25
AUDIO OUT ..........................................................................................................................................................25
12 Volt DC power –........................................................................................................................................25
SPECIFICATIONS ...................................................................................................................................26
PRODUCT SUPPORT.............................................................................................................................27
ZAXCOM WARRANTY POLICY AND LIMITATIONS .....................................................................28

4
Knowing your IFB-200
1. INC Key
•Increases the parameters of a menu item.
•From the home screen will change the transport commands of the corresponding transmitter.
2. LCD Display
3. Menu Key
•Press it to access the menu and to advance to the next menu item..
•Holding it while powering up will take you into the Extended Menu
4. DEC / Stop Key
•Decreases the parameters of the menu items.
•From the home screen will change the transport commands of the corresponding transmitter.
5. Micro SD Card Slot
6. Power Switch
7. Antenna Connector – ZaxNet
8. * Antenna connector type is RSMA
4 5 6 7
1 2 3

5
1. Audio In Connector - TA5M
This connector will be used to input both analog and digital audio.
•Analog audio is two channels balanced line level.
•Digital audio is an AES pair.
2. Audio Out - 3.5mm (summed to mono on tip of a TRS)
•When in playback the playback audio from the card will be outputted.
•When in transmit mode the inputted audio with be outputted.
•When in receive mode the ZaxNet received audio will be outputted. If there is no ZaxNet
audio present the inputted audio will be outputted.
•When recording the inputted audio will be outputted. When recording in receive mode the
ZaxNet received audio will be outputted.
3. Time code IN/OUT - BNC –
The BNC is menu selectable to be used as a time code input or output.
4. DC Power Input - Switchcraft 761 connector.
5. Analog input trim adjust - Channel 1 ( Left )
6. Analog input trim adjust - Channel 2 ( Right )
7. Audio out level adjust
1 2 3 4
5 6 7

Zaxcom IFB200
Home Screen
6
Home Screen
Frequency
This is the ZaxNet transmit / receive frequency that the IFB200 is operating on.
Recorder Status
This displays the transport status of the internal recorder. When a valid time code signal is being received
this will flash “JAM”. When a formatted card is inserted the approximate record time left on the card will
also flash.
ZaxNet TRX Transport Status
This displays the transmit commands being sent to the transmitters. When in RX mode this will become
the status of the internal recorder.
•REC - TRX record commands will be sent.
•- - - - - Is displayed when the IFB200 is not sending any commands.
•STOP - TRX Recording / Playback is stop commands will be sent.
•PLAY - TRX playback commands will be sent.
Please note that this is the order of the commands as they appear in the IFB200. So for example to go
from REC to PLAY you would need to press the DEC key 3 times and to go from PLAY to STOP you would
need to press the INC key once.
Input Audio Meter
This displays the modulation of the inputted audio signal.
•When the record format is set to MONO you will see one meter.
•When in receive mode the meter will display the received audio.
Alternate Home Screen
If the HOME TC DISPLAY menu is set to ON then the frequency will be replaced with the timecode and the
record status is moved to the lower left corner.
Home Screen with time code
2.404
STOP
STOP
ZaxNet Recorder ZaxNet TRX
Frequency Status Status
Input Audio Meter
Meter Indications
-20, -10, 0 dBFS
01:02:34:01 - - - -
STOP I I I

Zaxcom IFB200
Home Screen
7
Home Screen Operations
From the home screen pressing the INC or DEC key will cycle through the TRX control commands in order. If a
formatted card is inserted the internal recorder will follow this sequence. For example if you send a record
command to the TRX the internal recorder will go into record as well.
The IFB200 will boot up to “- - - -“ mode where no command is being sent. Press INC you will see REC
displayed and a record command will be sent to the TRX and put the internal recorder into record mode. To
stop, press the DEC key twice. You will cycle through “- - - -“ then to STOP. Playback would be one more press
of the DEC key.

Zaxcom IFB200
Main Menu
8
Main Menu
Navigating the Main Menu
•Press the MENU Button to enter the menu.
•To advance to the next menu press the MENU Button again.
Remote Gain Adjust
This menu will only appear if IFB mode is set to TX.
The remote gain menu adjusts the gain, via ZaxNet, of the TRX transmitter that has the same group and unit
code displayed if “ALL” is selected for the unit code each TRX transmitter in that group will be adjusted
simultaneously. If the TRX is not in range of the ZaxNet signal, the gain command will have to be repeated
once the transmitter comes back into range
Adjusting the transmitter gain
•Press the INC key to increase the gain. The display will show”++” in the top right hand corner as the
gain is being adjusted.
•Press the DEC key decrease the gain. The display will show”- -” in the top right hand corner as the
gain is being adjusted.
•Each key press will alter the gain by 2dB.
Unit Code Select
Each TRX transmitter can be assigned a specific unit code. That unit code allows for a specific transmitter to
be controlled individually from the IFB200. This menu allows for the unit code to be changed so each
transmitter can be individually adjusted from the IFB200. If “ALL” is selected multiple transmitters, in the
same group, can be adjusted at the same time.
So when the unit code number selected in this menu matches the unit code on a TRX transmitter that
transmitter can be remotely controlled that transmitter(s).
The unit code can be set to any number from 1 to 200 or “ALL” can be selected - to control all transmitters
at the same time.
Please note that If the unit code is changed pressing the MENU key will navigate back to the Remote Gain
Menu. If no changes are made to the unit code pressing the MENU key will advance the IFB200 to the next
menu item.
Remote Frequency Adjust
This menu will only appear if IFB mode is set to TX.
REMOTE GAIN
GROUP 01 UNIT001
REMOTE CONTROL
UNIT CODE = ALL

Zaxcom IFB200
Main Menu
9
The frequency adjust menu is where the frequency of the transmitter that are being controlled is changed
from.
If the unit code is set to “ALL” the IFB200 will display “WARNING” and the frequencies cannot be changed.
This is because if “ALL” is selected all transmitters will be re-tuned to the same frequency.
•Pressing the INC key will increase the frequency.
•Pressing the DEC key will decrease the frequency.
•Pressing the INC or DEC key will increase or decrease the frequency by .1 MHz
•Pressing and holding INC or DEC the key will increase or decrease the frequency by 1MHz.
Remote Power Mode
The remote power mode menu allows for the power setting of the TRX transmitters to be adjusted.
The TRX transmitter have three selectable power settings:
•NORMAL - The transmitters are at full transmitting power.
•WAKE - If the TRX transmitter is set to REMOTE STANDBY it will power up to a non-transmitting super
low power mode. A TRX transmitter in this state will use approximately 25% of the power of full
operations. This may be helpful if you have to mic someone who will not be on set for a while and you
want to conserve battery life.
To use this feature set the TRX menu set the BOOT UP MODE to REMOTE STANDBY. When in REMOTE
STANDBY the TRX, when powered up, will remain in standby mode until it receives the wake
command from the IFB200 to wake it. Once the TRX is awoken the only way the TRX will go back into
this mode is with a power cycle.
So when “WAKE” is selected in this menu the TRX transmitter will go to full power.
•LOW 2-Low 2 disables the RF power amplifier, RF board and microphone pre-amp on the TRX
transmitter. In LOW 2 mode the TRX will use approximately 50% of the power of normal operations
which will extend the battery life of the transmitter.
The TRX transmitter can be put into or taken out of LOW 2 mode when selected in this menu. The TRX
transmitter can be put into, and taken out of, Low 2 mode as often as you like.
Settings:
•0: POWER=ON – Normal operation - the TRX will be fully powered ON
•1: POWER=ON – Normal operation (same as 0) filler to prevent accidental power setting adjustment.
•2: POWER=ON – Normal operation (same as 0) filler to prevent accidental power setting adjustment.
•3: POWER=ON – Normal operation (same as 0) filler to prevent accidental power setting adjustment.
•4: POWER=ON – Normal operation (same as 0) filler to prevent accidental power setting
adjustment.
•5: POWER=WAKE – This would be select to wake a TRX transmitter to full power when the boot up
mode is set to remote standby.
REMOTE CH 548.0
UNIT CODE = 1
REMOTE POWER MODE
0: POWER = ON

Zaxcom IFB200
Main Menu
10
•6: POWER=LOW2 – This setting will put the TRX transmitter into and out of a low power setting.
You can come in and out of LOW 2 mode as needed. When you are in LOW 2 mode “LOW 2” will be
displayed on the TRX’s home screen. Note LOW 2 will not disable recording but it will be muted.
Once you have reduced the TRX power to Low 2 you can power down your TRX900CL. Once you
power up the IFB200 all TRX’s being controlled will automatically come up to full power since after a
power cycle the IFB200 will always boot up to the 0 Power setting.
Please note if the TRX transmitter is not in range of the ZaxNet signal, the power setting command will have
to be repeated once the transmitter comes back into range.
Playback Control
Recorded files can be played back from this page.
The top line displays the current mode of the recorder: REC, PLAY or STOP followed by the time code.
The bottom line contains the current segment number and the audio level.
Playing back from the transport page:
•Pressing the INC key while stopped will play the segment that is displayed.
•Pressing the INC key while in play mode will fast forward.
•Pressing the DEC key while playing back will stop the playback.
•Holding the DEC key while playing back will take you to the start of that segment.
•Pressing the DEC key while stopped will rewind.
Timecode Routing
The time code routing menu sets the function of the BNC time code connector.
•OUTPUT - TheIFB200 will output time code on the BNC connector.
•INPUT - The IFB200 will receive time code on the BNC connector.
Time Code Frame Rate Select
The time code frame-rate that will be recorded and transmitted over ZaxNet is set from this menu.
The IFB200 will lock to and transmit all standard time code frame rates.
•23.98, 24, 25, 29.97DF, 29.97DF, 30 DF, 30 NDF
IFB Audio Mix
TIMECODE 23.98
GEN 01:02:34:01
IFB TX MIX:
LEFT AND RIGHT
TC CONNECTOR:
OUTPUT
PLAY 01:02:34:01
001

Zaxcom IFB200
Main Menu
11
The IFB audio mix sets what audio will be transmitted from the IFB200 via ZaxNet.
•RIGHT ONLY - Right inputted audio only.
•LEFT ONLY - Left inputted audio only.
•LEFT AND RIGHT - Both Left and right audio will be summed to mono and transmitted.

Zaxcom IFB200
Main Menu
12
IFB200 Lock Page
This page enables a lock function to prevent any accidental key presses.
When you land on this page a countdown clock will begin. After 5 seconds the transmitter will lock and
the display will indicated that it is LOCKED followed by the time code.
If you exit this screen before the 5 seconds is up the IFB200 will not lock.
To unlock the IFB200
•Simultaneously press the MENU and INC keys.
Or
•Powering down the unit will clear the lock.
Countdown clock starting at 5 seconds
After the transmitter locks
LOCK 5
LOCKED 01:02:34:01

Zaxcom IFB200
Extended Menu
13
Extended Menu
Entering and Navigating the Extended Menu
•Press and hold the MENU key while powering up the unit.
•Pressing the MENU key will advance you to the next menu item.
Exiting the Extended Menu
•Hold down the MENU key to get back to the extended menu home page then press the INC key.
Or
•Cycle the power
1K Notch Filter
This menu enables/disables the 1K notch filter.
The 1K notch filter is used to eliminate the 1K tone from being outputted to an ERX receiver.
Record Format
This menu adjusts the record format. Please note that any changes to the record format will require the
IFB200 to be rebooted.
•US MONO - The IFB200 will record both inputs summed to mono.
•STEREO -The IFB200 will record both inputs independently.
•US MONO-R -This setting is not applicable on the IFB-200
IFB Transmit Power
This menu will only appear if IFB mode is set to TX.
This menu sets the transmit power of the IFB200 ZaxNet transmitter.
Power range is 0 through 5 with 5 being the highest
1K NOTCH FILTER
OFF
RECORD FORMAT:
STEREO
IFB TX POWER: 5

Zaxcom IFB200
Extended Menu
14
IFB Mode
This menu sets if the IFB200 will be a ZaxNet transmit or ZaxNet receiver. Please note that is the IFB200 is set
to receive the TRX transmitter control items in the main menu will not be available.
•RX - The IFB200 will receive ZaxNet IFB audio and time code.
•TX - The IFB200 will send ZaxNet commands, IFB audio and time code.
ZaxNet Receive Frequency Set
This is where the ZaxNet receive frequency is set.
The ZaxNet receive frequency is the frequency that the ZaxNet receiver will get its wireless time code and
remote control commands on. This frequency will need to match the frequency of the corresponding ZaxNet
transmitter. There are 71 choices of frequencies from 2.403GHz – 2.473GHz
ZaxNet Transmit Frequency Set
This menu is where the ZaxNet transmit frequency is set.
The ZaxNet transmit frequency is the frequency that ZaxNet will broadcast remote commands, time code and
ZaxNet audio on. The ZaxNet transmission from the IFB200 can be received by ERX receivers, Nomad, or a
QRX receiver with an IFB option board installed. A TRX transmitter or ZFR recorder can also receive and jam
its time code and receive its remote commands on this frequency. There are 71 choices of frequencies from
2.403GHz – 2.473GHz
Transmitter Remote Roll Enable
This menu enables the TRX transmitters to follow the record and stop commands of the IFB200.
IFB MODE: TX
When the TRX is receiving a ZaxNet signal you will see:
ZaxNet receive frequency and RX shows that ZaxNet is being received
ZaxNet signal strength meter
Signal strength
RXFREQ: 2.403 RX
SIGNAL: 28
RXFREQ: 2.403
IFB TX CH: 2.420
TRANSMIT TPMODE
ON

Zaxcom IFB200
Extended Menu
15
If this is set to ON and you start recording on the IFB200 all TRX transmitters that are being controlled via
ZaxNet from the IFB200 will begin to roll.
Power Roll
Power Roll allows a TRX transmitter to stay at lower transmit power setting to conserve battery power. Then
when you begin to record the transmitter will increase its output power.
•OFF – Power roll is disabled.
•DIVA TRIGGER – When a Zaxcom Deva or Fusion begins to record the ZaxNet information that
is embedded in the time code will cause the corresponding transmitter to go to full transmit power. The
IFB-200 would need to be hard wired to the Deva or Fusion’s time code out. The TRX transmitter can stay
in record mode and change power level when the Deva or Fusion goes into record.
•RECORD TRIGGER – When the IFB-200 receives running time code, in a record run situation,
the
oIFB-200 will send a command to the TRX transmitter to go to full power.
Please note the TRX transmitter needs to have the power roll feature, and enabled, for the power level to
change when going into record.
IFB Voting Enable
This menu will only appear if IFB mode is set to RX.
This menu allows you to enable / disable the IFB Voting function when the IFB200 is being used to receive
ZaxNet.
The purpose of IFB voting is to allow the ZaxNet receiver to choose, and switch to, the stronger signal from
two different ZaxNet transmitters. One purpose of this is if you are on a large set you can place a second IFB
transmitter at a different location and the ZaxNet receiver will choose the stronger signal.
Please not that you need to set the second ZaxNet transmitting frequency to exactly 2MHz higher than the
first ZaxNet transmitter.
IFB Dropout Compensator
This menu will only appear if IFB mode is set to RX.
This menu allows you to enable /disable the ZaxNet IFB drop out compensator.
IFB DROPOUT
COMPENSATOR ON
IFB VOTING
NORMAL (OFF)
POWER ROLL:
OFF

Zaxcom IFB200
Extended Menu
16
When the drop out compensator is enabled, and if there is a brief drop out in the received ZaxNet audio, the
drop out compensator will replace the drop out with a bit of the surrounding audio so the audio will match
and there will be no audible drop out.

Zaxcom IFB200
Extended Menu
17
Power-Up Mode
This menu sets what happens to the keys on the IFB200 after boot-up.
•LOCKED – After boot-up has completed, the transmitter will automatically go into
lock mode and the keys will be locked to prevent accidental changes to the settings.
•UNLOCKED – After boot-up the keys will remain unlocked. If you are using this mode
you can always lock the keys by going in to the lock screen in the main menu and wait 5 seconds.
To unlock the keys at any time - simultaneously press the MENU and INC keys.
SD Card Format
This menu will only appear if a card was inserted prior to booting up
The Micro SD card is erased and formatted from this menu. Please note that even though many cards are sold
preformatted, you must format the card in the IFB200 prior to any recording. Only cards formatted in the TRX
will work properly.
Before formatting the card, you may want to name the transmitter. When you name the transmitter that
name is included in the recorded file names. By naming the transmitter it makes it easier to differentiate files
from different recorders. So for example you can name the card with the talents name or any other unique
identifier. The card name menu is located at the end of the extended menu. The factory default name is the
transmitter’s serial number.
To Format an SD Card:
1. With the power off, insert the memory card into the media slot with the card label to the back of the
unit. Press the card all the way in until it “clicks”.
2. Power up the transmitter while holding the menu key to enter the extended menu.
3. Press the INC key until this menu appears.
4. Press the INC key 5 times.
5. You will see “FORMATTING FAT 32” displayed on the screen.
6. After about a minute the TRX will displays “SUCCESS” or “FORMAT FAILED ERROR”.
7. If “SUCCESS” appears power cycle the TRX.
8. If the TRX displays “FORMAT FAILED ERROR” try to re-format the card, if it fails again it is not advised to
use that card in the transmitter.
POWER UP MODE:
LOCKED
PRESS UP KEY 5X
TO ERASE CARD

Zaxcom IFB200
Extended Menu
18
TC Jam Mode Select
If record run time code is being used this menu controls if the IFB200 will automatically go into record when
it receives a record run time code.
•AUTO-JAM NORMAL– The IFB200 will continuously jam time code.
•AUTO-LOAD REC RUN – The IFB200 will continuously jam time code and will
start and stop the recording if the unit is receiving record run time code.
In this mode the IFB200 will go into record mode when it detects rolling time code. And will stop when the
time code stops. If time code is lost the unit will not stop but will continue in whatever state it was in until
the time code signal is restored.
Time Code Source
This menu selects how the IFB200 will receive its time code.
•IFB (RF) – The IFB200 will receive time code via ZaxNet being broadcast from another ZaxNet transmitter.
•BNC Connector– If BNC is selected and the TIME CODE CONNECTOR menu is set to “INPUT” the
IFB200, will receive time code via the BNC connector.
Mute Time Code Transmission Until Jammed
If this menu is set to ON the ZaxNet transmitter will not broadcast time code over ZaxNet until it receives
and jams its own internal time code generator. This prevents the ZaxNet from sending incorrect time code
to another device.
TC SOURCE:
BNC CONNECTOR
TC JAM MODE:
AUTO-JAM NORMAL
MUTE TC UNTIL
JAMMED: OFF

Zaxcom IFB200
Extended Menu
19
Group ID Select
This menu allows you to set your IFB200 to a ZaxNet “GROUP.” This is the group code that the IFB200 is
controlled in – not what group the IFB200 is controlling.
Group ID lets you set your IFB200 to a “GROUP” that will be controlled via ZaxNet.
So for example set to Group 1 will be controlled by a ZaxNet transmitter set to Group 1 and a group 2 will be
controlled by a Group 2 ZaxNet transmitter. This allows one group to be controlled without affecting others.
This will also help if two or more people on set are sending ZaxNet commands each person will be
independent and won’t interfere with each other. Most users leave this set to 1 on all of their Zaxcom
products. Group codes can be set from 1 to 99.
Audio Input Select
This menu sets the audio input type.
•ANALOG - This setting is used when the IFB200 will input an analog audio signal.
•DIGITAL L - This setting is used when Inputting a digital signal on pins 1, 2, 3 on the TA5 connector.
•DIGITAL R - This setting is used when inputting a digital signal on pins 1, 4, 5 on the TA5 connector.
Minimum Frequency
This menu sets the lowest UHF frequency that the IFB200 will cycle to when remote controlling TRX
transmitters. This eliminates having to cycle through frequencies that are out of the range that you are
working in.
Maximum Frequency
This menu sets the highest UHF frequency that the IFB200 will cycle to when remote controlling TRX
transmitters. This eliminates having to cycle through frequencies that are out of the range that you are
working in.
REMOTE CONTROL
GROUP CODE = 1
INPUT: ANALOG
MIN FREQ: 512.0
(TVCHAN MIN 21)
MAX FREQ: 698.0
(TVCHAN MIN 51)
Table of contents
Other Zaxcom Transmitter manuals

Zaxcom
Zaxcom ZMT3 User manual

Zaxcom
Zaxcom ZMT4 User manual

Zaxcom
Zaxcom TRXFB3 User manual

Zaxcom
Zaxcom TRX743 User manual

Zaxcom
Zaxcom TRXLA3 User manual

Zaxcom
Zaxcom ZMT3-FLEX User manual

Zaxcom
Zaxcom TRX900 User manual

Zaxcom
Zaxcom ZMT-421 User manual

Zaxcom
Zaxcom ZMT-267 User manual

Zaxcom
Zaxcom TRXLT3 User manual
Popular Transmitter manuals by other brands

M-system
M-system MXV instruction manual

Emerson
Emerson Incus GDU-01-TT quick start guide

Riken Keiki
Riken Keiki SD-1DEC operating manual

Prestige
Prestige Platinum APS 95 BT3 Transmitter programming

KLAY-INSTRUMENTS
KLAY-INSTRUMENTS 2000-SAN Series Safety manual

Audiovox
Audiovox Pursuit PRO-OE2B Programming guide