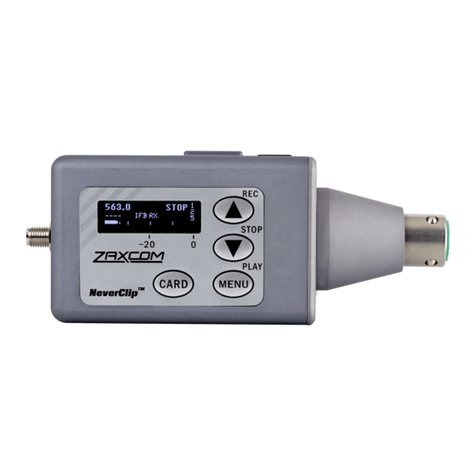
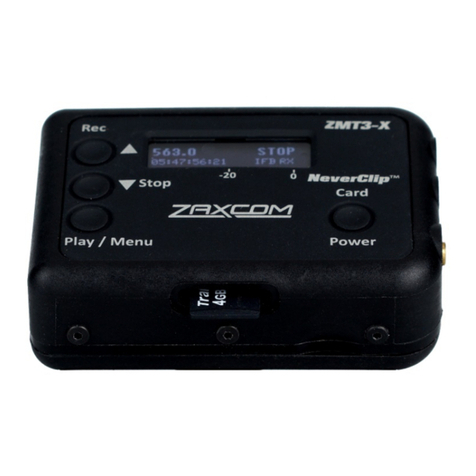
Zaxcom TRXFB3 User manual

1
USER MANUAL
Published March 2017
Firmware Version TFB1-58
TRXFB3
One Body Pack To Do Them All

2
TRXFB3 TRANSMITTER .................................................................................................................................. 4
HOME SCREEN .............................................................................................................................................. 6
MAIN MENU ................................................................................................................................................. 7
MICROPHONE GAIN SET ................................................................................................................................................................7
UHF TRANSMIT FREQUENCY SET.....................................................................................................................................................7
MONITOR AUDIO SET....................................................................................................................................................................7
SIDE TONE GAIN SET .......................................................................................................................ERROR!BOOKMARK NOT DEFINED.
TRANSMITTER LOCK PAGE ..............................................................................................................................................................8
SUB MENUS .................................................................................................................................................. 9
MENU GROUPS ............................................................................................................................................................................9
ACCESSING AND NAVIGATING THE MENU GROUPS ...............................................................................................................................9
ENTERING AND NAVIGATING A SUB MENU..........................................................................................................................................9
EXITING THE EXTENDED MENU.........................................................................................................................................................9
TIME CODE MENU........................................................................................................................................10
TIME CODE FRAME RATE SET........................................................................................................................................................10
TIME CODE SOURCE SELECT..........................................................................................................................................................10
TC JAM MODE SELECT ................................................................................................................................................................10
MUTE TIME CODE TRANSMISSION UNTIL JAMMED ...........................................................................................................................11
THIS IS NOT APPLICABLE IN THE TRXFB ...............................................................................................ERROR!BOOKMARK NOT DEFINED.
TIME CODE OUTPUT ...................................................................................................................................................................11
AUTO FRAME RATE ENABLE..........................................................................................................................................................11
TRANSMIT MENU.........................................................................................................................................12
UHF TRANSMITTER POWER LEVEL SET ...........................................................................................................................................12
UHF TRANSMIT MODULATION SET................................................................................................................................................12
POWER ROLL MODE ...................................................................................................................................................................12
TRANSMITTER DISABLE -RECORD ONLY MODE..................................................................................................................................13
RECORD MENU ............................................................................................................................................14
SD CARD FORMAT......................................................................................................................................................................14
PLAYBACK CONTROL....................................................................................................................................................................14
TIME LEFT ON CARD....................................................................................................................................................................15
AUTOMATIC RECORD AFTER BOOT UP.............................................................................................................................................15
RECORDING MODE SET................................................................................................................................................................15
LOW BATTERY STOP SET ..............................................................................................................................................................15
ZAXNET MENU.............................................................................................................................................16
ZAXNET MODE ..........................................................................................................................................................................16
ZAXNET RECEIVE FREQUENCY SET..................................................................................................................................................16
GROUP CODE SET.......................................................................................................................................................................16
UNIT CODE SET ..........................................................................................................................................................................16
ZAXNET VOTING ENABLE .............................................................................................................................................................17
ZAXNET DROPOUT COMPENSATOR ................................................................................................................................................17
AUDIO MENU...............................................................................................................................................18
HIGH PASS FILTER.......................................................................................................................................................................18
2K NOTCH FILTER.......................................................................................................................................................................18
TOP SWITCH..............................................................................................................................................................................18
DYNAMICS ................................................................................................................................................................................19
3
SETUP MENU ...............................................................................................................................................20
MONITOR AUDIO SET..................................................................................................................................................................20
SIDE TONE GAIN SET ...................................................................................................................................................................20
EARPIECE VOLUME CONTROL........................................................................................................................................................20
TEST TONE ................................................................................................................................................................................20
BATTERY TYPE SET ......................................................................................................................................................................21
KEY LOCK ON BOOT UP...............................................................................................................................................................21
QRX /ERX FIRMWARE UPDATE ...................................................................................................................................................21
LOW BATTERY STOP....................................................................................................................................................................22
OLED BRIGHTNESS ADJUST..........................................................................................................................................................22
OLED DISPLAY DIM....................................................................................................................................................................22
INVERT DISPLAY..........................................................................................................................................................................22
INFORMATION PAGE ...................................................................................................................................................................22
HIDE ENCRYPTION MENU.............................................................................................................................................................23
ENCRYPTION CODE SET................................................................................................................................................................23
HIDE TRANSMITTER NAME MENU .................................................................................................................................................23
TRANSMITTER NAME SET .............................................................................................................................................................24
RECORDING FORMAT ..................................................................................................................................................................25
FIRMWARE ..................................................................................................................................................26
UPDATING THE TRXFB3 FIRMWARE...............................................................................................................................................26
UPDATING QRX FIRMWARE WITH A TRXFB TRANSMITTER .................................................................................................................27
INPUTTING AUDIO .......................................................................................................................................28
RECOMMENDED MICROPHONES ..................................................................................................................28
WIRING DIAGRAMS......................................................................................................................................28
TWO WIRE MICROPHONE CONFIGURATION ......................................................................................................................................28
THREE WIRE MICROPHONE CONFIGURATION.....................................................................................................................................28
BALANCED LINE LEVEL AND TIME CODE INPUT ...................................................................................................................................28
OPERATING FREQUENCIES............................................................................................................................29
ZAXNET -REMOTE CONTROL AND TIME CODE .................................................................................................................................29
UHF -AUDIO ............................................................................................................................................................................29
PRODUCT SUPPORT .....................................................................................................................................31
SPECIFICATIONS...........................................................................................................................................32
ZAXCOM WARRANTY POLICY AND LIMITATIONS...........................................................................................34

Zaxcom TRXFB3 Transmitter Layout
4
TRXFB3 Transmitter
1. SSMA Antenna Connector
2. OLED Display
3. Star Key
4. Headphone / Time Code Out (Locking 3.5mm)
Can be set to output audio or time code.
5. Microphone Input Connector (3 Pin Lemo)
6. INC / Record Key
Increases the parameters of a menu item.
When in the home screen pressing INC with the CARD key will put the transmitter into record.
When in the transport control screen while not recording will cause the transmitter to playback.
Pressing while playing back will advance playback, multiple presses will cause playback to advance in
larger increments.
Press and hold while in the transport control screen will advance to the next segment.
Press it while in the home screen will display the group and unit code and the time left on the card.
7. DEC / Stop Key
Decreases the parameters of the menu items.
When in the home screen pressing DEC with the CARD key will stop the recording.
When playing back in the transport control screen will cause the transmitter to stop playback.
Press and hold while in the transport control screen will jump back to the previous segment.
Pressing it three times quickly while in the home screen will access the sub menu.
8. Menu / Play Key
Press it to access the next menu item.
Press it with the CARD key to playback a segment.
9. Future Expandability Jack
Locking 3.5mm
8
3
6
7
1
5
2
4
9

Zaxcom TRXFB3 Transmitter Layout
5
1. Power Switch
2. SSMA Antenna Connection
3. Programmable User Key
4. Microphone / Input connector (3 pin Lemo)
5. ZaxNet Receive Antenna (2)
6. Media Slot Media Slot
Inserting a Micro SD card:
With the back of the transmitter facing you, turn the card so the finger contacts are facing away from
you and pointing down toward the slot. Insert the card into the slot and press it down until you here a
slight click. To remove it, press the card in until you hear the same click again.
7. Battery Compartment
TRXFB3 uses 2 AA batteries. Alkaline, Lithium or NiMH batteries can be used.
1
2
3
4
6
5
7

Zaxcom TRXFB3 Home Screen
6
GROUP:1 UNIT:1
TIME LEFT 24H
TC: 09:18:05:00
23.98 FPS (AUTO)
Home Screen
Frequency - This is the transmit frequency of the TRXFB3.
If the TRXFB3 is being used in RECORD ONLY mode “NOTX” will be displayed.
ZaxNet Status
IFB RX - The TRXFB3 is receiving ZaxNet.
IFB TX - The TRXFB3 is transmitting ZaxNet.
Transport Status –Displays the current mode of the recording feature.
STOP - Recording / Playback is stopped
LREC - TRXFB3 is recording in LOOP RECORD mode.
REC - TRXFB3 is recording in NON-LOOP RECORD mode.
PLAY - TRXFB3 is playing back a recorded audio file.
Power Level - Displays the transmit power level.
Battery - This displays the selected battery chemistry type as well as a battery meter which shows an
approximate percentage of remaining power.
Audio Meter - Displays the modulation of the inputted audio signal.
If using a stereo transmitter in stereo mode both the left and right audio levels will be shown.
SEG - Displays the number of recorded segments on the micro SD card. Please note that regardless of
the size of the card it is limited to 500 segments.
Gain - “G” Appears when the transmitter is receiving change of gain commands via ZaxNet.
Group and Unit Code - Pressing the INC key while in the
home screen will display the group and unit code and the
record time remaining on the card.
Time Code and Frame Rate - Pressing the DEC key while in
the home screen will display the time code and frame rate of
the time code generator.
ZaxNet Status Transport Power
Frequency Modulation Status Level
Battery Level Audio Meter Gain
And Type Indicators at -20, -10, 0 dBFS
543.2 STOP 5
NIMH IFB RX SEG 001
G

Zaxcom TRXLT3 Main Menu
7
Main Menu
To cycle through the main menu press the MENU key.
Microphone Gain Set
The microphone gain is adjusted from this menu. This menu displays the gain setting in decibels and a meter
indicating the audio signal. The meter is displayed horizontally from left to right.
UHF Transmit Frequency Set
This menu is where the UHF transmit frequency is set.
Short presses of the INC or DEC key causes the value to change by 0.1 MHz
Holding the INC or DEC key causes the value to change by 0.5 MHz
Monitor Audio Set
IFB MIX ALL
This menu is where the audio that is sent to the headphone jack on the left side of the TRXFB3 is set.
REC / PLAY - Only the audio from the microphone / playback audio from the internal card will be outputted
to the headphone jack.
IFB + REC / PLAY - A mix of the microphone / audio being played back and ZaxNet received audio will be
outputted to the headphone jack. Please note that side tone gain needs to be on to add live / playback audio
to the IFB feed. The side tone gain will adjust the level of the live / playback audio. If side tone gain is set to
off only IFB audio will be heard.
Side Tone Gain Set
When the monitor audio is set to IFB + REC / PLAY the listener can adjust the level of their microphones audio /
playback audio into the mix. This menu adjusts the gain of the microphones / playback audio sent to the
headphone jack. The gain can be set to OFF, 6dB, 12dB, 18dB and 24dB.
GAIN 20 dB
TXFREQ 543.2
MONITOR AUDIO:
IFB + REC / PLAY
SIDE TONE GAIN:
OFF

Zaxcom TRXLT3 Main Menu
8
Transmitter Lock Page
This page enables a key lock function.
When a transmitter is locked the front keys will not be operational, this is to prevent any accidental key
presses. Pressing the INC and DEC key when the transmitter is locked will display additional information.
When the lock page is landed on a countdown clock will begin. After 5 seconds the transmitter will lock
and the display will indicated that it is LOCKED followed by some of the transmitters parameters.
If the screen is exited before the 5 seconds is up the transmitter will not lock.
To lock the transmitter before the 5 seconds press and hold the DEC key.
If the OLED brightness setting is set to “2” the screen will blank out when the transmitter is locked. The
only thing that will be displayed is a small character displaying the status of the internal recorder.
S - The recorder is stopped, R - The transmitter is recording, L - The transmitter is recording in loop mode
and P - The recorder is playing back.
To unlock the transmitter
Simultaneously press the MENU and INC keys 5 times.
Or
Powering down and reboot the transmitter.
Countdown clock starting at 5 seconds
After the transmitter locks
LOCKED 20 dB
09:18:05:02
23.98
IFB RX
LOCK 5

Zaxcom TRXFB3 Menu Navigation
9
Sub Menus
Menu groups
The TRXFB3 has six sub menu groups
Time Code - Changes the time code parameters of transmitter.
Transmit - Changes the parameters of the UHF transmitter.
Record - Changes the parameters of the on-board recorder.
ZaxNet - Changes the parameters of the ZaxNet transceiver.
Audio - Changes the parameters of the transmitted and recorded audio.
Setup - Changes the parameters of the general operation on the transmitter.
Accessing and navigating the menu groups
From in the home screen press the STAR key three times, or hold the MENU key while booting up, to access the
six menu groups. Then pressing the INC or DEC key will cycle between the menu items.
Entering and navigating a sub menu
When landing on the desired menu group press the MENU key to enter that menu.
To return to the top of the menu press the MENU key to cycle to the top or press and hold the MENU key for 1.5
seconds.
Exiting the extended menu
Press the STAR key three times quickly. Or press the MENU key to cycle through the sub menu items until
HOME MENU is displayed, then press the MENU key or cycle the power.

Zaxcom TRXFB3 Time Code Menu
10
TIME CODE MENU
Time Code Frame Rate Set
The time code frame rate menu is where the time code frame rate is set.
The TRXFB3 will lock to and record all standard time code frame rates.
23.98, 24, 25, 29.97DF, 29.97DF, 30 DF, 30 NDF
Time Code Source Select
The time code source menu selects how the transmitter will receive its time code.
ZAXNET (RF) - The TRXFB3 will receive time code via ZaxNet from a Nomad, a QRX235, IFB100/200,
TRX900CL or another TRX transmitter or a ZFR recorder that is transmitting ZaxNet time code.
AUDIO INPUT - The TRXFB3, with a proper cable, will receive time code via the microphone input.
When time code is connected, it takes the TRXFB3 approximately three seconds to recognize the TC. The
screen will display TIME CODE followed by JAM when it is recognized. Please note that when using the
microphone input connector, the audio level of the time code signal needs to be between -30 and -10 dBFS
on the unit’s meter. Any level above -10 may cause clipping, which will prevent proper reading of time code.
TC Jam Mode Select
This menu controls if the TRXFB3 will go into record when it receives a record run time code.
AUTO-JAM NORMAL - The TRXFB3 will continuously jam time code via ZaxNet and will go into record when
receiving a record command via ZaxNet or if the unit is put into record manually by pressing the CARD and
INC keys simultaneously.
AUTO-LOAD REC RUN - In Auto-Load mode the TRXFB3 will go into record when it detects rolling time code,
and will stop when the time code stops. If time code is lost because the IFB signal is too weak the unit will
not stop but will continue in whatever state it was in until the time code signal is restored.
TIMECODE 23.98
GEN 09:18:05:02
____
TC SOURCE:
ZAXNET (RF)
TC JAM MODE:
AUTO-JAM NORMAL

Zaxcom TRXFB3 Time Code Menu
11
Mute Time Code Transmission Until Jammed
If the mute time code is set to ON the TRXFB will not output time code until it receives time code and jams its
own internal time code generator. This prevents the TRXFB from sending incorrect time code to another
device.
Time Code Output
This menu enables the TRXFB3 to output time code from the 3.5mm headphone connector on the left side of
the unit. The TRXFB3 can be set to output time code at (.001V, .002V, .005V, .010V, .031V, .062V, .125V,
.250V, .500V. 1.0V, 2.0V or 3.0V) . Please note when enabling time code the TRXFB3 will no longer output
audio.
Auto Frame Rate Enable
When turned ON the TRXFB3 will automatically set its frame rate to the frame rate that is being transmitted
from the ZaxNet transmitter that is feeding the TRXFB3. If auto frame rate is set to OFF the frame rate will
need to be adjusted manually. Please note that auto frame rate will only work when the time code is being
received over ZaxNet and will not work when time code is being received via the audio input.
MUTE TC SEND
UNTIL JAMED: OFF
AUTO FRAME RATE
ON (23.98)
TC OUTPUT LEVEL:
OFF

Zaxcom TRXFB3 Transmit Menu
12
TRANSMIT MENU
UHF Transmitter Power Level Set
The UHF transmit power of the TRXFB3 is set from this menu. The transmit power can be adjusted to
output 25, 50 or 100mW. The higher the power setting the more battery power will be required.
UHF Transmit Modulation Set
The UHF transmission modulation is the way the TRXFB3 sends audio to the receiver. The modulation format is
set from this menu. Please note if the transmission format that is set here, and the format set on the receiver
do not match, the receiver will be unable to decode the audio from the transmitter. Also note that after any
change to the transmit format the TRXFB3 will need to be rebooted by pressing the card key before the new
format takes effect.
STEREO
MONO
XR
ZHD 96
ZHD 48
Modulation Bandwidth
200 kHz
200 kHz
200 kHz
96 kHz
48 kHz
Minimum Channel to Channel Spacing
400 kHz
400 kHz
400 kHz
200 kHz*
100 kHz**
6 MHz TV Channel Capacity
15
15
15
30
60
Latency
6ms
3.5ms
6ms
6ms
18ms
Compatibility with a 200 Series Receiver
2 Transmitters
2 Transmitters
2 Transmitters
2 Transmitters
1 Transmitter
Compatibility with a 300-96 Receiver
NO
NO
NO
1 Transmitter
1 Transmitter
Compatibility with a 300-48 Receiver
NO
NO
NO
NO
1 Transmitter
* When used with a QRX300-96 receiver –the minimum spacing is 300 kHz when using all other receivers.
**When used with a QRX300-48 receiver –the minimum spacing is 200 kHz when using all other receivers.
Power Roll Mode
Power roll will allow the transmitter to stay in a lower transmit power setting to conserve battery power, and
then when triggered the transmitter will increase the output power.
OFF - Power roll is disabled and the TRXFB3 will remain at the set power level.
DIVA TRIGGER - A command from a Zaxcom recorder will cause the TRXFB3 to go to full power.
RECORD TRIGGER - When the transmitter goes into record either manually or from an AUTO-LOAD trigger
the TRXFB3 will go to full power.
TX POWER: 50MW
TX FORMAT:
ZHD96
PRESS CARD TO REBOOT
POWER ROLL:
OFF

Zaxcom TRXFB3 Transmit Menu
13
Transmitter Disable - Record only mode
Record Only Mode - Will set the TRXFB3 to act as a standalone recorder and will not transmit any audio over
UHF. This will conserve battery power since the transmitter is disabled.
Normal TX Mode - Will allow the TRXFB3 to both transmit audio and record on its internal SD card.
TX DISABLE :
NORMAL TX MODE

Zaxcom TRXFB3 Record Menu
14
RECORD MENU
SD Card Format
This menu will only appear if a card was inserted prior to booting up
The Micro SD card is erased and formatted from this menu. Please note that all cards need to be formatted in a
3 series transmitter prior to recording.
Before formatting the card, the transmitter can optionally be renamed (see set up menu). When a transmitter
is named that name is included in the recorded file names. By naming the transmitter it makes it easier to
differentiate files from different recorders, so for example the card can be identified with the talents name, or
any other unique identifier. The card name menu is located at the end of the set up menu. The factory default
name is the transmitter’s serial number.
Partial Format
If the card’s FAT32 file structure gets corrupt while doing a file transfer, and the card is no longer recognized by
the transmitter or by ZaxConvert, a partial format can be done. The partial format rewrites the FAT32 file
structure and leaves the recorded audio untouched. To do a partial format from this menu press the DEC key 9
times “PARTIAL FORMAT” will then be displayed.
Playback Control
Recorded files can be played back from this page.
The top line displays the current mode of the recorder: REC, PLAY or STOP followed by the time code.
The bottom line contains the current segment number and the audio level.
Playing back from the transport page:
Pressing the INC key while stopped will play the segment number that is displayed.
Pressing the DEC key while playing back will stop the playback.
Pressing the DEC key while stopped will jump back.
Holding the INC key will jump ahead one segment.
Holding the DEC key will jump back one segment.
Pressing the INC key while in play mode will cause the playback to jump ahead, repeated quick presses will
cause playback to advance in larger increments.
PRESS UP KEY 5X:
TO ERASE CARD
STOP 09:18:05:02
SEG 001
____

Zaxcom TRXFB3 Record Menu
15
Time Left on Card
This menu will only appear if a card was inserted prior to booting up
This page displays the remaining record time left on the card as well as the time already recorded on the card.
Automatic Record after Boot up
Record on boot up allows the onboard recorder to automatically start recording after the transmitter boots up.
ON - The onboard recorder will automatically start to record after the TRXFB3 boots up.
OFF - The onboard recorder will wait for a ZaxNet command or a manual record trigger to start recording.
Recording Mode Set
Record mode sets what the recorder will do after the card is full. Please note regardless of this setting the card
will only record 500 files.
NON-LOOP RECORD - Once the card is full the recording will stop and FULL will be displayed. This setting
prevents over-writing any portion of the audio.
LOOP RECORD - Once the card is full, the new audio will begin over-writing the oldest audio on the card.
Low Battery Stop Set
Low battery stop will set the amount of time, after a low battery warning occurs, the on-board recorder will
close the current file and stop recording.
This is to prevent possible file corruption if the unit constantly powers off and on due to a dead battery.
NEVER STOP - The onboard recorder will not stop recording unless it is manually stopped by a key press, or
when it receives a stop command via ZaxNet or if the battery dies.
Any interval from 1 to 99 minutes - Once the battery indicator starts blink a low battery warning the
onboard recorder will continue to record for the time set here - then it will close the file and stop recording.
TIME LEFT 20 H
TIME USED 4 H
____
RECORD ON BOOTUP
OFF
RECORD MODE:
LOOP RECORD
LOW BATT STOP:
NEVER STOP

Zaxcom TRXFB3 ZaxNet Menu
16
ZAXNET MENU
ZaxNet Mode
This menu sets the mode of the ZaxNet receiver.
OFF - The ZaxNet receiver is disabled. The TRXFB3 will not receive ZaxNet commands or time code.
RX - The ZaxNet receiver will receive ZaxNet commands and time code.
This screen will display what ZaxNet data is being received by the TRXFB3. Including total received
information packets, ZaxNet TC received and remote control commands received. This information is used
for debugging purposes.
ZaxNet Receive Frequency Set
This menu will only appear if the TRXFB3 is set to receive (RX) mode
The ZaxNet receive frequency is the frequency that the TRXFB3 will get its IFB audio, wireless time code and
remote control commands on. This frequency will need to match the frequency of the corresponding ZaxNet
transmitter. The ZaxNet transmitter can be a QRX with QIFB, Nomad, TRX900CL or IFB100/200. The TRXFB3 can
also receive ZaxNet time code from another TRX transmitter or a ZFR recorder that is transmitting ZaxNet on
this frequency. Please keep in mind that the range will be limited when receiving ZaxNet from a TRX or ZFR.
When the TRXFB3 is receiving a valid ZaxNet signal the signal strength will be shown as well as signal strength
meter - two lines that run vertically on the far right side of the screen.
Group Code Set
This menu is where the TRXFB3 is assigned to a group. The group code allows transmitters to be grouped
together so they can be controlled via ZaxNet without affecting others.
So for example a TRXFB3 set to Group 1 will be controlled by a ZaxNet transmitter set to Group 1 and a TRXFB3
assigned to group 2 will be controlled by a Group 2 ZaxNet transmitter. This is helpful if two or more people on
set are sending ZaxNet commands. Therefore the different group codes allow each person to be independent
and not interfere with each other. Most users leave the group set to 1 on all of their Zaxcom products. Group
codes can be set from 1 to 99.
Unit Code Set
ZAXNET MODE: OFF
RX FREQ : 2.403 RX
SIGNAL : A28 B27
REMOTE CONTROL
GROUP CODE = 1
REMOTE CONTROL
UNIT CODE = 001

Zaxcom TRXFB3 ZaxNet Menu
17
This menu is where the TRXFB3 is assigned a unit code. The unit code is a unique number used to identify each
TRXFB3 within a particular group. This allows individual transmitters within the same group to be independently
controlled. Each transmitter should have a different unit code.
Unit codes can be assigned any number from 1 to 200.
ZaxNet Voting Enable
This menu will only appear if the TRXFB3 is set to receive (RX) mode
The purpose of voting is to allow the ZaxNet receiver in the TRXFB3 to choose, and switch to, the stronger
signal from two different ZaxNet transmitters. One purpose of this is if on a large set a second IFB transmitter
can be placed at a different location so the ZaxNet receiver in the TRXFB3 can choose the stronger signal.
Please note that the second ZaxNet transmitting frequency must be set 2MHz higher than the first ZaxNet
transmitter.
ZaxNet Dropout Compensator
This menu enables the ZaxNet dropout compensator. When the TRXFB3 is receiving ZaxNet audio and there is a
brief dropout the IFB dropout compensator looks at the received audio surrounding that dropout and replaces
the lost audio a few samples of audio essentially masking the dropout.
ZAXNET VOTING:
NORMAL (OFF)
ZAXNET DROPOUT
COMPENSATOR ON

Zaxcom TRXFB3 Audio Menu
18
AUDIO MENU
High Pass Filter
The high pass filter is turned on and adjusted from this menu.
The high pass filter range is 70Hz to 220Hz in 10Hz increments.
2K Notch Filter
The 2K notch filter is useful in removing digital RF interference that can be introduced into some microphones.
Top Switch
The user assignable top key functionality is assigned from this menu.
Disabled -the tip key has no additional functionality.
Push to Mute -The microphone is muted when the top key is pressed. Please note the recorded audio is
also muted.
Push to Talk - The microphone is muted until the top key is pressed. Please note the recorded audio is also
muted until the top key is pressed.
HIGH PASS FILTER:
90Hz
____
2K NOTCH FILTER
ON
TOP SWITCH:
DISABLED

Zaxcom TRXFB3 Audio Menu
19
Dynamics
The dynamics is a soft knee compressor that is located after the analog to digital converter which will limit
the dynamic range to prevent clipping during occurrences of loud audio. Dynamics is comprised of both a
compressor and an expander, which operate jointly. The compressor in the dynamics can set to mild or
extreme compression and features a soft knee for more transparent operation.
To enter the Dynamics Menu
Press the INC or DEC key - “PARMS” (parameters) will be displayed on the right.
To move to the next parameter, press the MENU key.
To exit this page, hold the MENU key for 1 second.
Dynamics Parameters
Link L-R: OFF / ON: If using a stereo unit links the left and right signal so if one side of the signal needs
compressing / expansion the other side will do the same to match.
SPEED (Decay Speed) : SLOWEST / SLOW / NORMAL / FAST / FASTEST
Sets how gradual the signal level decreases after a signal reaches the threshold setting. This is typically set
to FAST.
ATTACK (Attack Speed) : SLOWEST / SLOW / NORMAL / FAST / FASTEST
Sets the speed in how fast the gain is reduced once the signal exceeds the threshold setting. This is typically
set to FAST.
CMP RATIO (Compressor Ratio):Valid range: 1.0: to 5.0:1, in 0.1 steps.
The amount of gain reduction is determined by the compressor ratio setting.
A compressor ratio for example of 2.0:1 means for every 1 dB above the compressor threshold the gain will
be reduced 2dB. A higher ratio setting makes the compressor more aggressive.
CMP THRESH (Compressor Threshold): Valid range: 0 to –96dB, in 1dB steps.
This sets the level in which gain reduction occurs.
CMP KNEE: (Compressor Soft Knee): Valid range: 0 to 20dB, In 1dB steps.
Sets the compressor's soft knee. A soft knee reduces “softens” the audible change from uncompressed to
compressed, this is useful especially for higher ratios where the changeover is more noticeable
EXP RATIO (Expansion Ratio):Valid range: 1:1.00 to 1:4.00, In 0.01 steps
Sets the expansion ratio. For example a 1:2.0 expansion ratio means for every 1 dB below the expansion
threshold the gain will be reduced 2dB.
EXP THRESH (Expansion Threshold):Valid range: 0 to –96dB, in 1dB steps.
Sets the threshold above which gain reduction occurs.
REDUCE (Expander Gain Reduction):Valid range: 0 to –36dB, in 1dB steps.
This sets the limit on the amount of gain reduction caused by the expander.
GAIN (Make-up Gain):Valid range: 0 to 30dB, In 1dB steps.
Gain is used to compensate for the gain reduction caused by the compressor. Because the compressor is
reducing the gain (or level) of the signal, the ability to add a fixed amount of make-up gain at the output is
provided so that an optimum level can be reached.
DYNAMICS

Zaxcom TRXFB3 Setup Menu
20
SETUP MENU
Monitor Audio Set
IFB MIX ALL
This menu is where the audio that is sent to the headphone jack on the left side of the TRXFB3 is set.
REC / PLAY - Only the audio from the microphone / playback audio from the internal card will be outputted
to the headphone jack.
IFB + REC / PLAY - A mix of the microphone / audio being played back and ZaxNet received audio will be
outputted to the headphone jack. Please note that side tone gain needs to be on to add live / playback audio
to the IFB feed. The side tone gain will adjust the level of the live / playback audio. If side tone gain is set to
off only IFB audio will be heard.
Side Tone Gain Set
When the monitor audio is set to IFB + REC / PLAY the listener can adjust the level of their microphones audio /
playback audio into the mix. This menu adjusts the gain of the microphones / playback audio sent to the
headphone jack. The gain can be set to OFF, 6dB, 12dB, 18dB and 24dB.
Earpiece Volume Control
ON - Will allow the user to adjust the IFB earpiece volume from both the home screen and the lock screen.
The INC key will increase the IFB volume and the DEC key will decrease the volume.
OFF - The IFB volume will be locked at its current level and will not be adjustable.
Test Tone
The TRXFB3 has an internal tone generator which will generate tone so the signal chain can be properly gain
staged. From this menu pressing the INC key will enable the tone generator. The TRXFB3 can be set to
generate tone at (500Hz at -20dBFS, 1000Hz at -20dBFS or 500Hz at full scale).
MONITOR AUDIO:
IFB + REC / PLAY
SIDE TONE GAIN:
OFF
HOME / LOCK SCREEN
VOLUME CTL: ON
TEST TONE: ON
I I I
Table of contents
Other Zaxcom Transmitter manuals

Zaxcom
Zaxcom HM3-HM User manual

Zaxcom
Zaxcom TRXLT3 User manual

Zaxcom
Zaxcom ZMT User manual

Zaxcom
Zaxcom ZMT-284 User manual

Zaxcom
Zaxcom TRXLA3 User manual

Zaxcom
Zaxcom ZMT-421 User manual

Zaxcom
Zaxcom ZMT3-FLEX User manual

Zaxcom
Zaxcom TRX900 User manual

Zaxcom
Zaxcom TRXLA5 User manual

Zaxcom
Zaxcom IFB200 User manual
Popular Transmitter manuals by other brands

Belkin
Belkin F8V3080 - TuneCast II Mobile Transmitter user guide

Lucoro Broadcast
Lucoro Broadcast FMTX50M user manual

Suntex
Suntex PC-3310 Operation manuals

Flowserve
Flowserve LRGT 16-1 installation instructions

Lectrosonics
Lectrosonics WM/E01 instruction manual

Shure
Shure AXIENT DIGITAL ADX2FD user guide