Wireless Handheld Gun Type 2D Image Reader
vi
USER’S MANUAL
Table of Contents
Important Notice..................................................................................................................ii
General Handling Precautions..............................................................................ii
Guidance for Printing ...........................................................................................ii
For CE-Countries..................................................................................................iii
Power Supply ......................................................................................................iii
Wireless Communication ....................................................................................iv
Introduction .........................................................................................................................1
Product Overview ........................................................................................................2
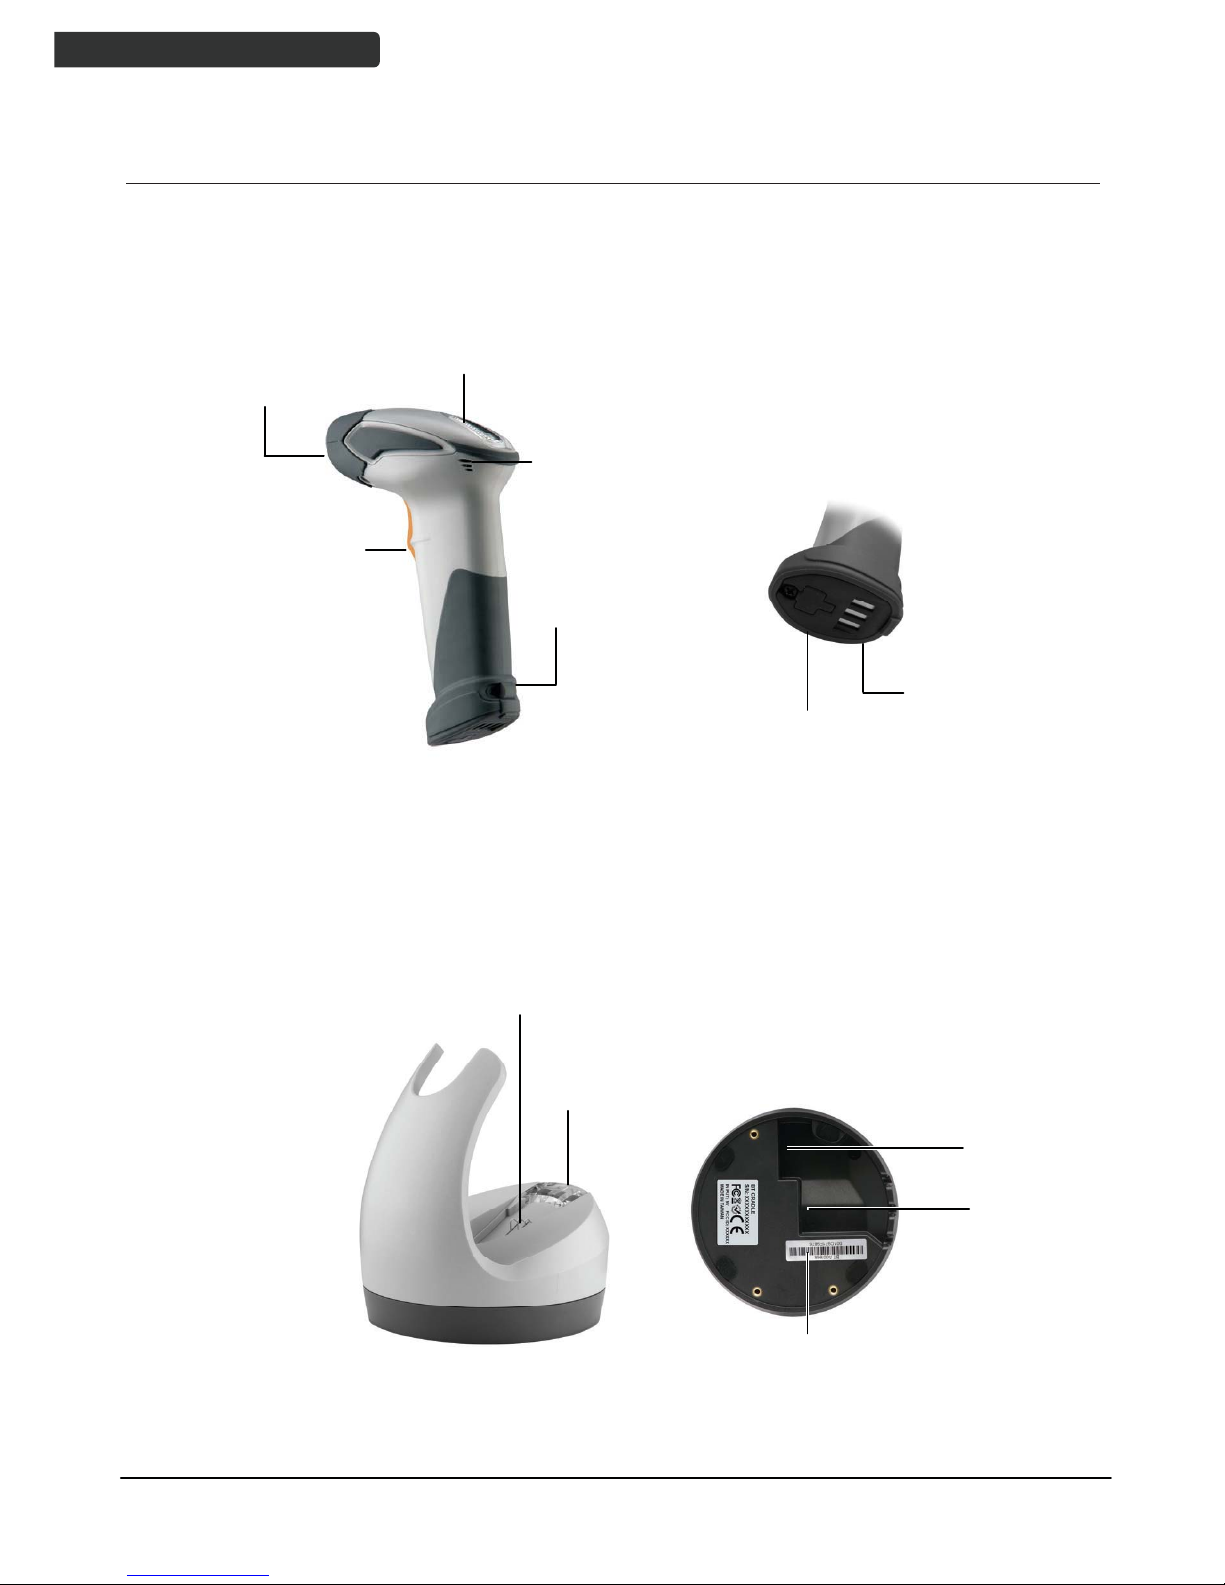
Scanner ................................................................................................................2
Cradle ...................................................................................................................2
Scanner and Accessories..............................................................................................3
Battery Installation.......................................................................................................4
Installing Cable Clip ......................................................................................................5
Connecting the Cradle..................................................................................................6
Connecting the Cradle..................................................................................................7
Charging the Battery ....................................................................................................8
Power on the Scanner..................................................................................................9
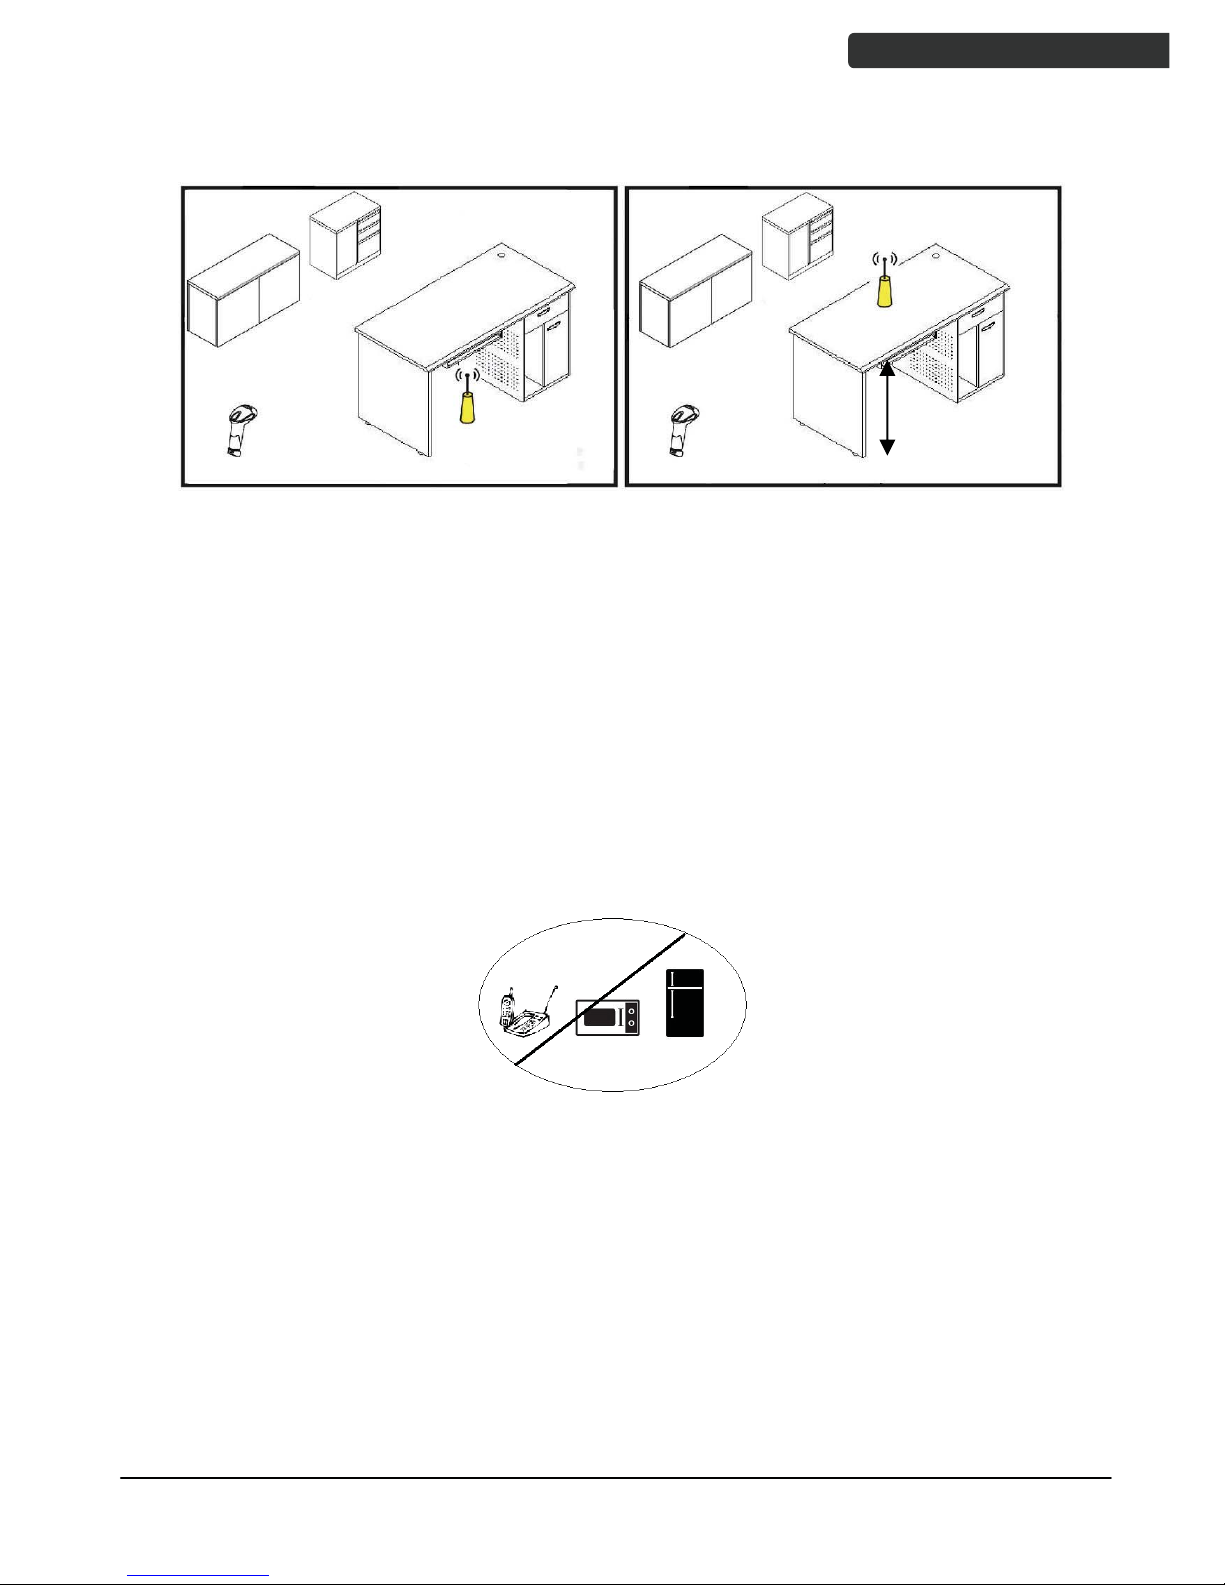
How to Scan ...............................................................................................................10
Radio Communication Host Type...............................................................................11
Cradle Host Mode ..............................................................................................11
SPP Mater/SPP Slave Mode................................................................................11
HID Mode ...........................................................................................................11
Paging the Scanner.....................................................................................................12
Scanner USB online to Host .......................................................................................12
USB Online Mode...............................................................................................12
Visible Indicators ........................................................................................................13
Scanner ..............................................................................................................13
Cradle .................................................................................................................14
Sound Indicators ........................................................................................................14
ACK/NAK Protocol or Frame Packing..........................................................................15
Scanner to Remote Application..................................................................................16
Pin-out Configuration.................................................................................................18
Cable Pin-out..............................................................................................................19
Programming Guide ...........................................................................................................20
Connecting to a Host..................................................................................................24
Cradle Host Mode ..............................................................................................25
Wireless Mode ...................................................................................................26
Data Transnit Method ........................................................................................31
System Function Settings ...........................................................................................34
Data Editing........................................................................................................90
Appendix 1: USB Virtual COM Driver Installation ..............................................98
Appendix 2: Barcode Length Setting ..................................................................99