Mount the unit to the wall.
1. Hold the cabinet at the desired position
on wall. NOTE:Make sure cabinet is level.
2. Mark locations for the screws on the
hanging rail. (We recommend mounting
the cabinet directly into studs.) See Fig. 1.
3. Drill marked spots on hanging rail.
4. Hold the cabinet body up in final
location. (NOTE: Make sure unit is
level.)
5. Mark locations on wall through drilled
holes in hanging rail.
6. Drill marked spots on wall. If screws
will not be going directly into studs,
insert wall anchors (not included).
7. Attach cabinet body to wall, using
appropriate mounting hardware (not
included).
8. Insert adjustable shelf (B),
using the shelf clips (A). See Fig.
2.
9. Attach door knob (C) to door,
using
knob screw (D) provided.
See Fig.
2.
Monte la unidad a la pared.
1. Sostenga el gabinete en la
ubicación deseada en la pared. NOTA:
Asegúrese de que el gabinete se
encuentre a nivel.
2. Marque las ubicaciones para los
tornillos en el riel para colgar. (Le
recomendamos montar el gabinete
directamente en los soportes de pared).
Consulte la Fig. 1.
3. Taladre las marcas señaladas en el
riel para colgar.
4. Sostenga el cuerpo de gabinete arriba
en la ubicación final. (NOTA: Asegúrese
de que la unidad se encuentre a nivel).
5.
Marque las ubicaciones en la pared
a
través de los orificios
taladrados en el
riel para colgar.
6. Taladre las marcas señaladas
en la
pared. Si los tornillos no irán directamente
en los soportes de pared, inserte anclas
para pared (no incluidas).
7. Fije el cuerpo de gabinete a la pared
utilizando los herrajes de montaje
apropiados (no incluidos).
8.
Inserte las repisa ajustable
(B)
utilizando los sujetadores para repisas
(A). Consulte la Fig. 2.
9.
Fije las perilla (C) a las puertas,
utilizando los tornillo (D) proporcionado.
Consulte la Fig. 2.
Montez le meuble au mur.
1. Placez le placard à la position
désirée contre le mur. REMARQUE :
assurez-vous que le placard est de
niveau.
2. Indiquez l'emplacement des vis sur le
rail de suspension. (Il est recommandé
de monter l'armoire directement dans
des poteaux muraux.) Voir figure 1.
3.
Percez aux endroits indiqués
sur le
rail de suspension.
4. Placez l'armoire contre le mur en
position. (REMARQUE : assurez-vous
qu'elle est à niveau.)
5. Indiquez l'emplacement des vis
sur le
mur, à travers les trous percés
dans le rail
de suspension.
6. Percez aux endroits indiqués sur le
mur. Si les vis ne sont pas introduites
directement dans des poteaux
muraux, utilisez des
chevilles murales
(non incluses).
7. Fixez le bâti du placard au mur à
l'aide des pièces de montage
appropriées (non incluses).
8.
Placez les tablette amovible
(B)
sur les
attaches (A).
Voir figure 2.
9.
Fixez les bouton (C) aux portes à
l'aide des vis (D) fournie.
Voir figure 2.
Pg 2of 3
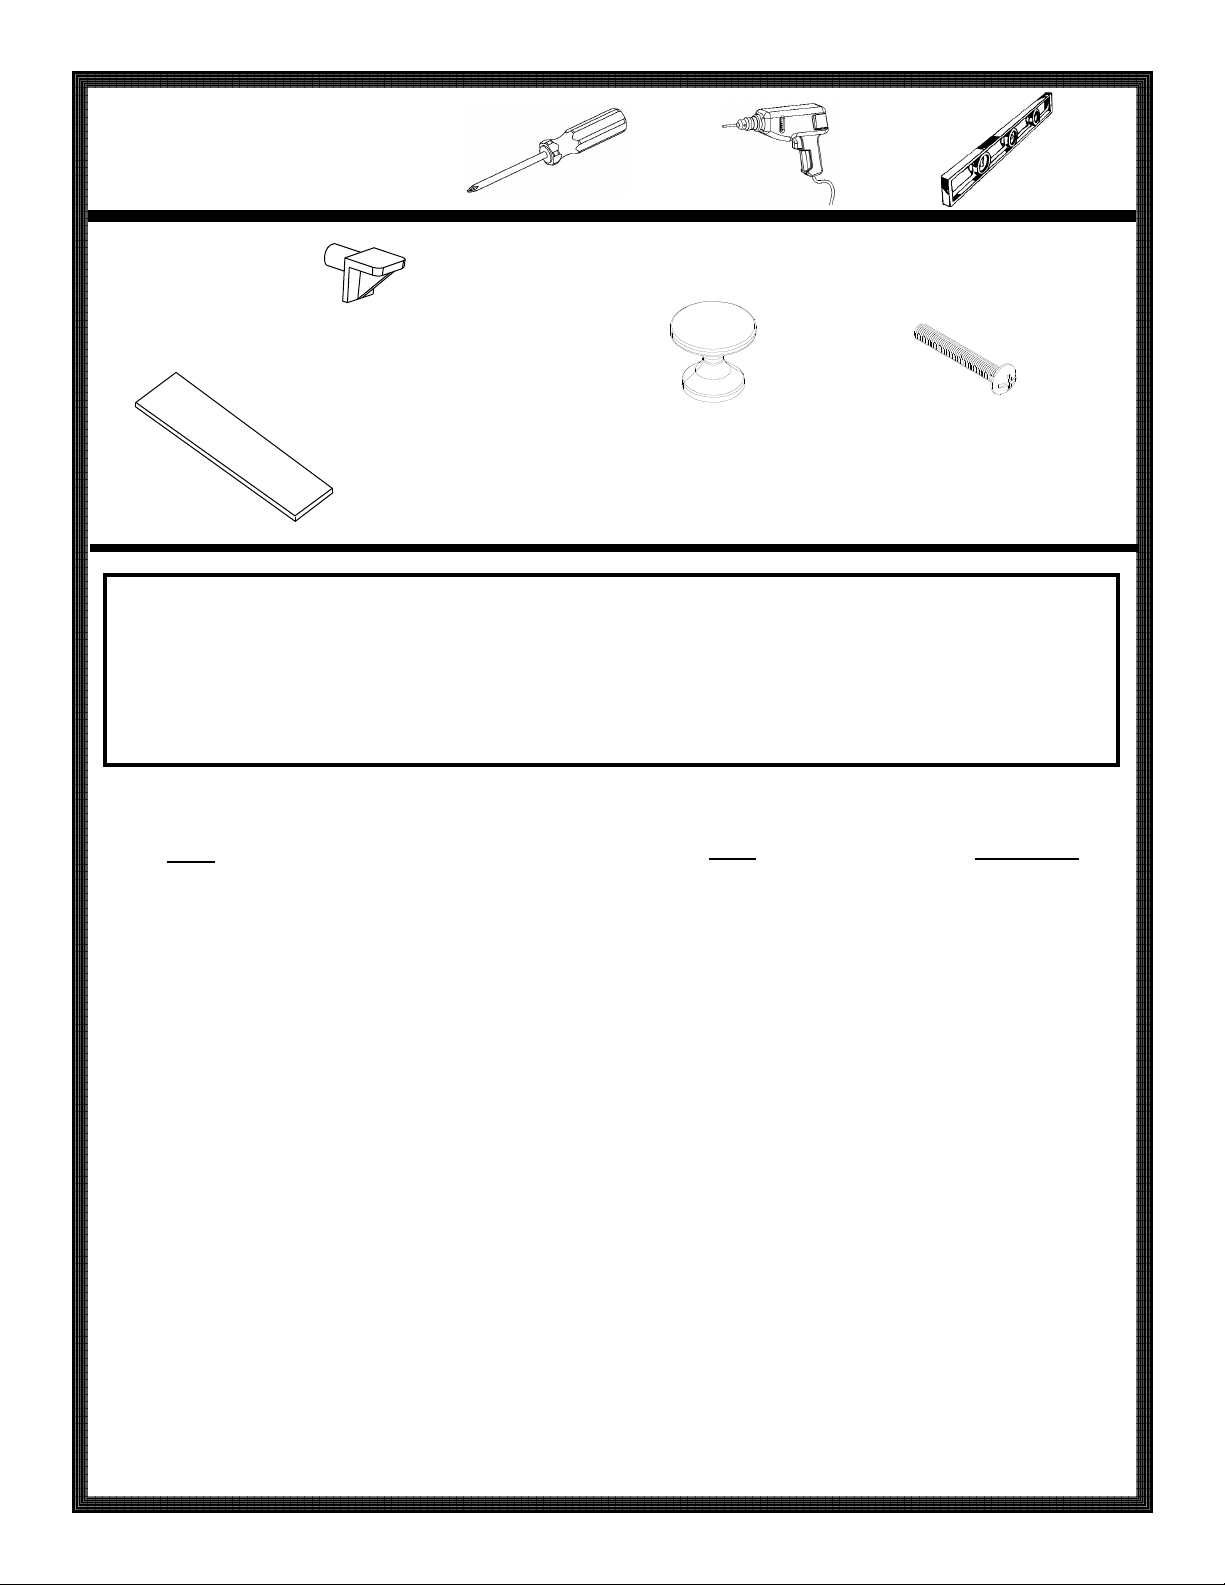
Tools Needed:
Herramientas Necesarias:
Outils nécessaires :
IS9918
(A) 4 Shelf Clips
4 Sujetadores para repisa
4 attaches d’étagères
(B) 1 Adjustable Shelf
1 Repisa Ajustable
1 étagère amovible
List of Parts:
Lista de Partes:
Liste des pièces :
(C) 2 Door Knobs
2 Perillas para puertas
2 boutons de portes
(D) 2 Knob Screw
2 Tornillos para perillas
2 vis pour boutons
WARNING:
Before cutting, drilling or hammering into
any wall surface, verify the location of
electrical, plumbing and gas lines. Cutting
any of these may cause serious injury. If
needed, contact your electrician, plumber or
service person.
ADVERTENCIA:
Antes de cortar, taladrar o martillar en alguna
superficie de pared, verifique la ubicación
de las líneas eléctricas, de plomería y de
gas. Cortar cualquiera de estas líneas
puede causar una lesión grave. Si es
necesario, comuníquese con su electricista,
plomero o técnico de servicio.
AVERTISSEMENT :
Avant de couper ou percer toute surface
murale, ou d’y enfoncer quoi que ce soit,
vérifiez l’emplacement des canalisations
électriques, sanitaires et de gaz. Des
blessures graves pourraient survenir si l'une
de ces canalisations était sectionnée. Au besoin,
contactez votre électricien, votre plombier ou
votre dépanneur.


