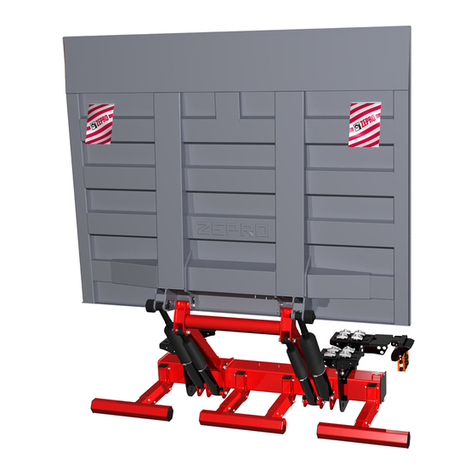
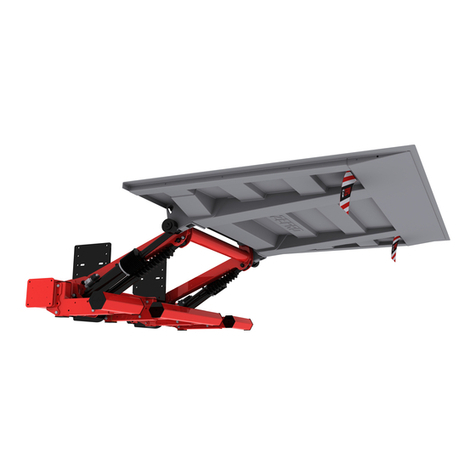
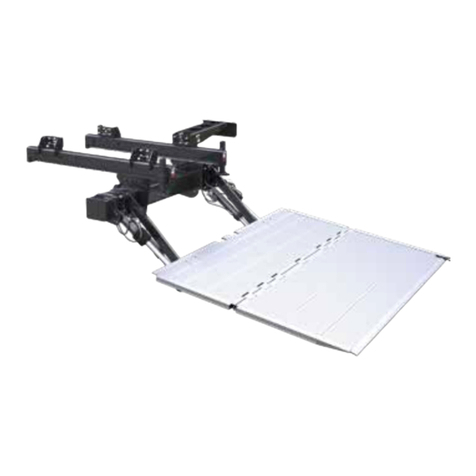
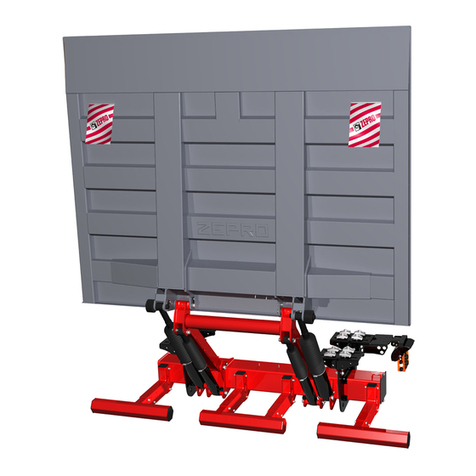
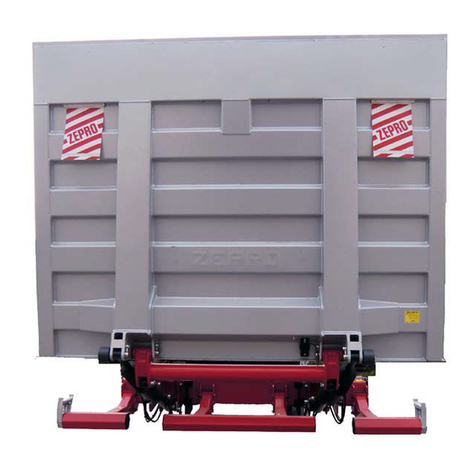
Zepro Z 10 User manual

ZEPRO
Tel.: +46 (0)10-459 05 00
55757TL
2021-03-26
Installation Instructions
Tail Lift
Z 10/15/20


Z 10/15/20Contents
3www.zepro.com
Contents
1 Introduction ...................................................................................................... 5
1.1 Important ................................................................................................ 5
1.2 CE marking............................................................................................. 6
1.3 Product approval ................................................................................... 6
1.4 Hydraulic oil ............................................................................................ 6
1.5 Guarantee............................................................................................... 6
1.6 Identication ........................................................................................... 7
2 Safety rules ....................................................................................................... 8
2.1 Repainting .............................................................................................. 8
2.2 Transport plug......................................................................................... 9
2.3 Moving parts - free movement................................................................ 9
1.1 Third-party equipment must not be attached........................................ 10
2.4 Installation ............................................................................................ 10
3 Installation workflow...................................................................................... 11
3.1 Installing the support frame .................................................................. 11
3.2 Electrical connections........................................................................... 11
3.3 Installing the platform ........................................................................... 11
3.4 Installing the cylinders .......................................................................... 11
3.5 Attaching stickers ................................................................................. 11
4 Calculating the installed dimensions ........................................................... 12
4.1 C dimension ......................................................................................... 12
4.2 D dimension ......................................................................................... 12
4.3 A dimension .......................................................................................... 12
4.4 H dimension.......................................................................................... 12
5 Rear member cut-outs ................................................................................... 15
6 Installation ..................................................................................................... 16
6.1 Support frame....................................................................................... 16
6.2 Control power cable.............................................................................. 19
6.3 Controllers ............................................................................................ 20
6.4 Warning lighting/foot controls ............................................................... 21
6.5 Main power cable ................................................................................. 23
6.6 Installation of main fuse on vehicles without connection point ............. 24
6.7 Underrun protection.............................................................................. 25
6.8 Armstops .............................................................................................. 28
6.9 Sealing strip (horizontal)....................................................................... 28
6.10 Sealing strip (vertical) ........................................................................... 28
6.11 Platform ................................................................................................ 29
6.12 Purging the cylinders ............................................................................ 33
6.13 Transport lock....................................................................................... 33
7 Hydraulic unit ................................................................................................. 34

Z 10/15/20
4
Contents
www.zepro.com
8 Electrical
and
hydraulic drawings................................................................. 35
8.1 Z 10/15/20 ............................................................................................ 35
8.2 Z 10/15/20 hydraulic autotilt ................................................................. 36
8.3 Connection to circuit board, 4 – button operation................................. 37
8.4 Connecting Open Platform Alarm ......................................................... 38
8.5 Connecting warning lighting and foot controls...................................... 39
8.6 Connecting controllers.......................................................................... 40
9 Marking............................................................................................................ 41
9.1 Loading diagram................................................................................... 42
9.2 Identicationplate................................................................................ 43
9.3 Work area ............................................................................................ 43
9.4 Warning tape ....................................................................................... 43
9.5 Controller sticker................................................................................... 44
9.6 Danger area ......................................................................................... 45
9.7 Warningags....................................................................................... 45
10 Lubrication and fluid level check.................................................................. 46
10.1 Lubrication ............................................................................................ 46
10.2 Oil level check ...................................................................................... 46
11 Testing and verification ................................................................................. 47
11.1 Static load test ...................................................................................... 47
11.2 Dynamic load test. ................................................................................ 49
11.3 Test of safety functions......................................................................... 50
12 Disassembly ................................................................................................... 51
13 Specifications ................................................................................................ 52
13.1 Weights ................................................................................................ 52
13.2 Maximum power consumption - Minimum recommended
conductor cross sectional area............................................................. 53
13.3 Battery maintenance............................................................................. 53
13.4 Loading diagram................................................................................... 54
13.5 Centres of gravity ................................................................................. 55
13.6 Tightening torque.................................................................................. 56

Z 10/15/20Introduction
5www.zepro.com
1 Introduction
1.1 Important
The following “warning markings” appear in the installation instructions and are intended to draw your atten-
tion to circumstances potentially causing unwanted situations, near misses, personal injury or damage to the
product, etc.
Take care.
Risk of damage to the product.
NOTE.
Take extra care. Risk of personal injury or damage to the product and the surroundings.
WARNING!

Z 10/15/20
6
Introduction
www.zepro.com
1.2 CE marking
ZEPRO tail lifts for sale on the European market are CE marked (Conformité Européenne). The manufacturer
guarantees that the product complies with the EU Machinery Directive.
Followtheinstallationinstructionscarefully.Modicationsnotapprovedinwritingbythemanufacturerarenot
permitted. Welding is not permitted.
1.3 Product approval
Properly assembled, this product meets relevant requirements according to EN 1756-1:2001 + A1:2008.
1.4 Hydraulic oil
If the hydraulic oil needs to be replenished, only the oil recommended by ZEPRO is permitted to be used.
Hydraulicsystemswithhydraulicoiltankswithoutlabellingareonlypermittedtobelledwithhighlyrened
mineral oil (art. no. 21963, 1 litre).
Hydraulicsystemswithhydraulicoiltanksmarkedwithaspecicationforthehydraulicoilareonlypermitted
tobelledwiththeoilspeciedonthelabel.
1.5 Guarantee
Afterinstallation,testingandverication,thetaillift’sdeliverycardmustberegisteredfortheguaranteetobe
valid.

Z 10/15/20Introduction
7www.zepro.com
1.6 Identication
E.g. Z 15 - 130 S
_ _ _ _ _ _ - _ _ _ _ _
Z = Standard model
ZL = Wide frame, wide 1st boom
Max. lifting capacity x 1 (kg)
Max. lifting height -130 = 1300 mm
-150 = 1500 mm
Cylinder model S = Single acting Single speed Tilt
Single acting Single speed Lift

Z 10/15/20
8
Safety rules
www.zepro.com
2 Safety rules
2.1 Repainting
Piston rods and cylinder covers must not be
painted. Painting could damage the cylinder
gaskets.
Boots,
hydraulic hoses and cables must not be
painted as the solvent in the paint could damage
hoses/cablesandsignicantlyimpairdurability.
NOTE.
Image 1. Piston rods, cylinder covers
and boots must not be painted
Image 2. Hydraulic hoses must not be painted
Image 3. Cables must not be painted

Z 10/15/20Safety rules
9www.zepro.com
2.2 Transport plug
When the lift is installed, the transport plug in the
hydraulic unit must be removed and replaced with
the normal tank cap supplied with the hydraulic
unit.
NOTE.
54
8
5
3
2.3 Moving parts - free movement
Whenthenalinspection*takesplace,the
space occupied by the moving cylinders must
be cleared and made safe. There is a risk of
collision between the cylinder and the following
items: subframe, truck chassis, beam for rear light
(number plate) and the chassis bracket of the lift
(with a short overhang).
*Thenalinspectionmustbecarriedoutwiththe
platformatthevehicleoorandtilteddown10°.
The clearance from the closest part of the cylinder
must be at least 40 mm.
WARNING!
The platform must not be tilted down more than
max.10°from
horizontal when people are on the
platform.
WARNING!
min. 40 mm
10º
10º
Image 4. Replace the transport
plug with the normal tank cap
Image 5. Clearance to the closest part of
the cylinder must be at least 40 mm
Image 6. The platform must not be tilted
down more than 10° from the horizontal

Z 10/15/20
10
Safety rules
www.zepro.com
1.1 Third-party equipment must not be attached
You must not attach equipment (electric or hydraulic) to Zepro tail lifts that has not been approved.
Attaching unapproved equipment may interfere with the lift system and its safety functions. Risk of
injuryanddamage.Ifitisnecessarytoinstallotherequipment,checkthevehiclemanufacturer’sbody
instructions and use the attachment features on the vehicle.
WARNING!
2.4 Installation
The platform must not be installed so it cannot reach ground level.
WARNING!
Zepro tail lifts are only approved for installation with Zepro assembly kits.
WARNING!
Allspeciedtorquevaluesapplyforusewithascreworimpactwrenchwithtorquecontrol.Torquedistribu-
tion max ± 5%.
NOTE!

Z 10/15/20Installationworkow
11www.zepro.com
3 Installation workow
3.1 Installing the support frame
• Calculating the installed dimensions
• Attaching the mounting jig to the rear beam
• Aligning the support frame
• Mounting chassis brackets
• Detaching the mounting jig
3.2 Electrical connections
• Installing the controller
• Installing the controller cables
• Installing the main power cable
3.3 Installing the platform
• Installing the platform
• Installing seals and end stops
• Installing the armstops
3.4 Installing the cylinders
• Adjusting the tilting cylinder
• Testing
3.5 Attaching stickers

Z 10/15/20
12
Calculating the installed dimensions
www.zepro.com
4 Calculating the installed dimensions
For easier installation, it is useful to calculate and specify the necessary dimensions in advance. Determine
theCdimensionrst,thenobtaintheotherdimensionsfromtherelevanttable.Youshouldtrytoplacethe
liftashighaspossiblewithinthespeciedCdimensioninthetable.
4.1 C dimension
TheCdimensionisthedistancebetweenthetopofthesupportframeandthevehicleoorlevel.Thisdimen-
sion governs how far the lift
needs to be installed under the vehicle body (D dimension) and the space there will
bebetweenthe1stboomsintheupperpositionandthevehicleoorlevel(Adimension).
4.2 D dimension
The D dimension is the space the lift needs, measured from the rear edge of the body to the front edge of the
support frame (in the direction of the vehicle). Once the C dimension is determined, the D dimension can be
obtained from the table.
4.3 A dimension
The A dimension is the space provided for the rear member, i.e. the space there will be between the 1st
boomandthevehicleoorwiththeliftintheraisedposition.TheAdimensiondependsontheCdimension
4.4 H dimension
TheHdimensionistheheightfromtheground(unloaded)tothevehicleoorlevel.TheHdimensionmust
not be greater than the maximum lifting height of the lift. The platform must always be able to reach ground
level.

Z 10/15/20Calculating the installed dimensions
13www.zepro.com
Image 7. Z 10/15/20 - 130
Image 8. Z 10/15/20 - 150
194
C
40
D
1300
max
min
685 max
A
C A D
615 188 608
550 158 689
500 142 738
450 130 779
400 120 814
350 111 843
300 103 867
285 101 873
194
C
40
D
1500
max
min
785 max
A
C A D
715 192 674
650 163 757
600 150 809
550 138 853
500 128 891
450 119 924
400 112 952
350 105 976
325 102 987

Z 10/15/20
14
Calculating the installed dimensions
www.zepro.com
Image 9. Z 10/15/20
Image 10. Z 10/15/20
1836
min. 740 - max. 930
2425
958
336
340
617-817
133-301

Z 10/15/20Rear member cut-outs
15www.zepro.com
5 Rear member cut-outs
It is often necessary to create cut outs in the rear beam to provide space for the platform arms when the
platform is in the uppermost position. The size of the cut outs depends on the calculated installed dimension
“A”, see illustration below.
1. Measure and mark the location and depth of the cut outs on the rear beam. The
two cut outs must be
centred on the rear beam, i.e. both cut outs must be an equal distance from the mid-point of the beam
.
2. Cut along the markings.
3. Grind away any burrs or sharp edges.
Image 11. Z 10/15/20
1030
240
Amax
240

Z 10/15/20
16
Installation
www.zepro.com
6 Installation
Zepro tail lifts are only approved for installation
with Zepro assembly kits.
WARNING!
6.1 Support frame
1. Measure and mark the midpoint of the rear
member of the vehicle. See Image 12.
2. Bolt or spot-weld the mounting jig
to the rear
beam, so that both
mid-points are aligned, see
Image 13.
3. Position the support frame under the vehicle frame.
4. Raise the 1st booms to their highest position.
5. Attach the 1st booms to the eye of the jig, see
Image 14.Usethesteelplatform’snormalpiv-
ots.
6. The support frame should be positioned as high
aspossiblewithinthespeciedCdimension.
Adjust the frame to the ideal height under the
chassis. A car jack is useful. The frame must be
positionedparallelwiththeoorofthevehicle
body and must not be in contact with the vehicle
frame; there must be a few millimetres of play.
If necessary, adjust the angle of the arms by
carefully operating the lift.
7. Install the brackets on the support frame so that
its opening is facing towards the front of the
vehicle, and adjust the position of the frame so
they are in contact with the vehicle frame.
8. InstalltheU-prolewithassociatedwashersand
nuts, but do not tighten them. Screw the nuts
alternatelyuntiltheU-proleisalignedincontact
with the frame, see Image 15
Alsoconsultthevehiclemanufacturer’sbody
instructionsandZepro’sOperator'sManual
before installation.
NOTE.
Image 12. Measure and mark the midpoint
of the rear beam of the vehicle
Image 13. Bolt or spot-weld the mounting jig to the
rear member part. no. 51724TL for Z 10/15/20
Image 14. Mounting jig.
Image 15. Install the U-profile with
associated washers and nuts

Z 10/15/20Installation
17www.zepro.com
9. InstalltheU-prolewithassociatedwashersand
nuts, but do not tighten these. Screw the bolts al-
ternatelyuntiltheU-proleisalignedincontactwith
the frame, see "Image15.InstalltheU-prolewith
associated washers and nuts" on page 16.
10. When installing on a frame without pre-drilled holes
,
installrstwithascrewinthebrackets’slot-shaped
holes. On the
markthemiddleofthebrackets’slot-
shaped holes and then drill
Ø14 mm. holes in the
frame; see "Image 17. Install the frame bracket with
at least 6x M14x45 10.9 bolts" on page 17
11. Bolt the brackets securely on the outside of the
vehicle chassis. U
se M14x45
bolts and install the as-
sociated washer and nut on the inside of the vehicle
chassis. Install the bolts but do not tighten.
12. Checkandperformneadjustmentregardingthe
position of the lift. Then tighten the bolts with a
torque wrench.
Tightening torque: 120 Nm.
13. Using a torque wrench, tighten the bolts holding the
U-proles.Tightening torque: 280 Nm.
14. D
rill holes in the vehicle chassis for mounting bolts,
Ø14 mm. Drill in the outer holes of each bracket.
Use M14x45 bolts and install the associated
washer and nut on the inside of the vehicle chas-
sis. Installation must be performed with at least 6
bolts in the outer holes. The bolt that was installed
initially in the slot-shaped hole may not be included
inthisgure.Ifnecessary,thisboltcannowbe
moved to one of the outer holes, see illustration.
Then tighten the bolts with a torque wrench.
Tightening torque: 120 Nm.
15. Remove the mounting jig.
Note that the frame bracket needs a free space of
at least 35 mm between the vehicle frame and the
support frame, see Image 16.
NOTE.
Min. 260
Min. 20
Min. 180
35 mm
Min. 20
Min. D
D
Min. 6 pcs.
M14x45 10.9
120 Nm
New hole
Image 16. Note that the frame bracket needs
a free space of at least 35 mm between
the vehicle frame and the support frame
Image 17. Install the frame bracket
with at least 6x M14x45 10.9 bolts
When installing on chassis with pre-drilled holes, go
directly to point 16.

Z 10/15/20
18
Installation
www.zepro.com
16. Bolt the brackets securely on the outside of the
vehicle chassis. Install in the slot-shaped holes
with at least 6 screws. Use suitable bolts (dura-
bility equivalent to M14 10.9 or higher) and install
the associated washer and nut on the inside of
the vehicle chassis. Install the bolts but do not
tighten. See Image 18.
17. Checkandperformneadjustmentregardingthe
position of the lift.
Then tighten the bolts with a
torque wrench.
Tightening torque: Standard for
selected screw.
18. Using a torque wrench, tighten the bolts holding
theU-proles.Tightening torque: 280 Nm.
19. D
rill holes in the vehicle chassis for mounting
boltsineachbracket’stwoupperroundholes.
Use suitable bolts (durability equivalent to M14
10.9 or higher) and install the associated washer
and nut on the inside of the vehicle chassis.
See Image 18. Tighten the bolts with a torque
wrench. Tightening torque: Standard for se-
lected screw.
20. Remove the mounting jig.
Welding is not permitted on the chassis brackets.
Do not move the lift all the way to the armstops
orwiththeplatformttedbeforealltheboltsare
fully tightened against the chassis.
Do not place the lift under load until:
· the correct number of bolts have been in-
stalled and torque-tightened.
· the vehicle body is installed to reinforce the
truck chassis.
NOTE.
Image 18. Installing the chassis bracket on
vehicle chassis with pre-drilled holes
When installing on chassis with pre-drilled holes

Z 10/15/20Installation
19www.zepro.com
6.2 Control power cable
Seealsotherelevantvehiclemanufacturer’s
electrical instructions
NOTE.
1. If the control power cable is not pre-routed, e.g.
VDHH, route the control power cable from the
driver’scabtothelift.
The cable must be protected with rubber grom-
mets when it passes through beams or walls.
Position any quick connectors so they are well
protected from moisture and dirt.
NOTE.
2. Connect the control power cable to the cab
switch (CS) on the vehicle instrument panel.
Connect to the on-board electrical system via
a 10 A (24 V), 15 A (12 V) fuse according the
customer’swishes.Seetheconnectiondiagram
"8.6 Connecting controllers" on page 40.
Image 19. Quick connectors must be well protected

Z 10/15/20
20
Installation
www.zepro.com
6.3 Controllers
If the vehicle is equipped with two-handed grip, it
means that the operator must use both hands to be
able to operate the loading platform, while it protects
the operator from pinch and crush injuries.
1. Fit the controllers in the desired locations. They
must be positioned so that the operator is in the
safest possible location with a clear view of the
load, tail lift and surrounding area.
2. The distance between the rear edge of the
vehicle and the centre of the controllers must be
betwen 300-600 mm. See Image 20
.
All cable inlets must be pointing downwards.
NOTE.
3. The controller cable connects to the control card.
See section "8.6 Connecting controllers" on page
40.
Image 20. Installing controllers
Acontrollermustalwaysbettedonthesidethatis
facingawayfromtracinmotion.Therefore,ifthereis
a need for a controller on the opposite side, a further
controllermustbetted.Fittinganyotherwayinvolves
increased risk of injury.
WARNING!
Image 21. Installing controllers
300 - 600 mm
This manual suits for next models
2
Table of contents
Other Zepro Lifting System manuals

Zepro
Zepro Z 45-90 User manual

Zepro
Zepro ZN 2500-130 User manual

Zepro
Zepro Z 2500-130 User manual

Zepro
Zepro Tail lift User manual

Zepro
Zepro ZHD 1500 Original operating manual

Zepro
Zepro Z 150-135 User manual

Zepro
Zepro ZT MK2 User manual

Zepro
Zepro ZHD-1500-MA-DA User manual

Zepro
Zepro ZHZ 500 User manual

Zepro
Zepro Z 2500-130 Series User manual