manuals.online logo
Brands
  1. Home
  2. •
  3. Brands
  4. •
  5. Zoeller
  6. •
  7. Water Pump
  8. •
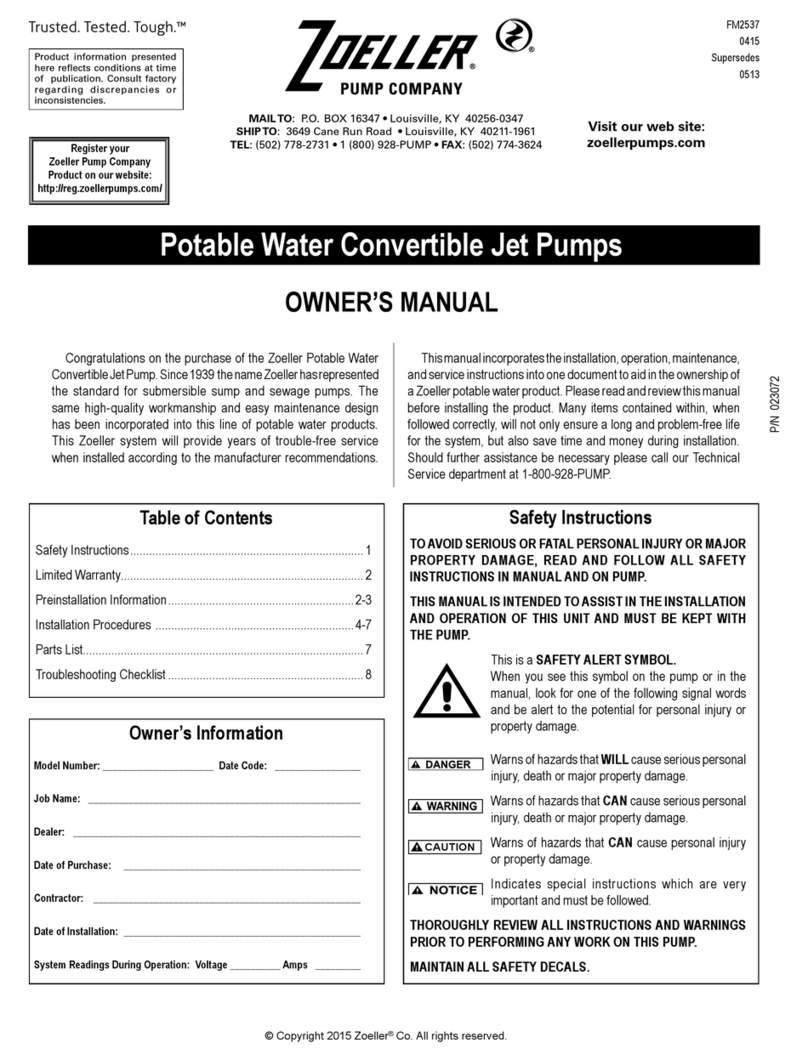
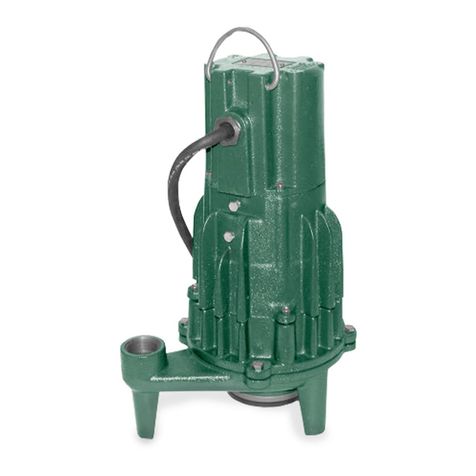
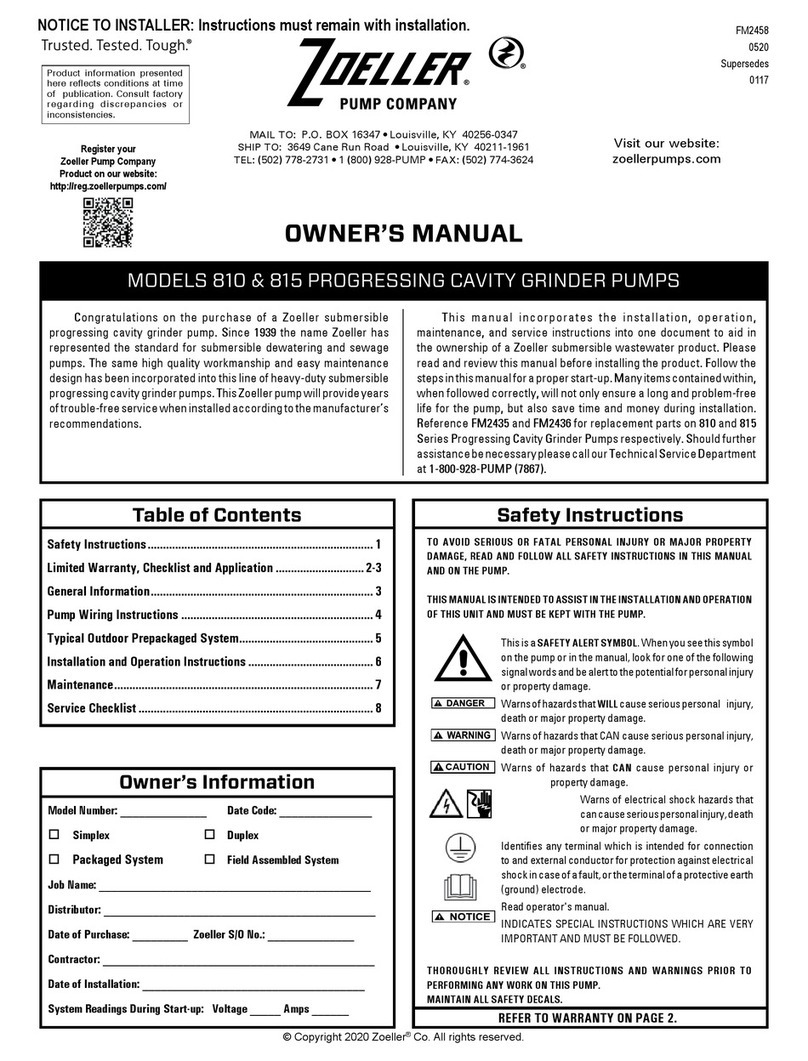
  9. Zoeller 7020 User manual

Zoeller 7020 User manual

1
© Copyright 2020 Zoeller®Co. All rights reserved.
SECTION: Z4.10.310
ZM2607
0620
Supersedes
0318
NOTICE TO INSTALLER: Instructions must remain with installation.
Model Number: ______________ Date Code: _______________
Simplex  Duplex
Packaged System Field Assembled System
Job Name: ____________________________________________
Distributor: ____________________________________________
Date of Purchase: _________ Zoeller S/O No.: ______________
Contractor: ____________________________________________
Date of Installation: ____________________________________
System Readings During Start-up: Voltage _____ Amps ______
OWNER’S MANUAL
MODELS 7020 & 7021 PROGRESSING CAVITY GRINDER PUMPS
This manual incorporates the installation, operation, main-
tenance, and service instructions into one document to aid in the
ownership of a Zoeller submersible wastewater product. Please
read and review this manual before installing the product. Follow
thestepsinthismanualforaproperstart-up.Manyitemscontained
within, when followed correctly, will not only ensure a long and
problem-free life for the pump, but also save time and money
during installation. Reference ZM2637 (model 7020) and ZM2638
(model 7021). Should further assistance be necessary please call
our Product Support Department at 1-800-928-PUMP (7867).
Owner’s Information
Congratulations on the purchase of a Zoeller submersible
progressing cavity grinder pump. Since 1939 the name Zoeller
has represented the standard for submersible dewatering and
sewage pumps. The same high quality workmanship and easy
maintenance design has been incorporated into this line of
progressing cavity grinder pumps. This Zoeller pump will provide
years of trouble-free service when installed according to the
manufacturer’s recommendations.
Table of Contents
Safety Instructions.......................................................................... 1
Limited Warranty, Checklist and Application ............................. 2-3
General Information......................................................................... 3
Pump Wiring Instructions ............................................................... 4
Typical Outdoor Prepackaged System............................................ 5
Installation and Operation Instructions ......................................... 6
Maintenance..................................................................................... 7
Service Checklist ............................................................................. 8
MAIL TO: P.O. BOX 16347 • Louisville, KY 40256-0347
SHIP TO: 3649 Cane Run Road • Louisville, KY 40211-1961
(502) 778-2731 • 1 (800) 928-PUMP • FAX (502) 774-3624
Visit our website:
zoellerengineered.com
Product information presented
here reects conditions at time
of publication. Consult factory
regarding discrepancies or
inconsistencies.
Register your
Zoeller Engineered Product
on our website:
http://reg.zoellerengprod.com/
Safety Instructions
REFER TO WARRANTY ON PAGE 2.
TOAVOIDSERIOUSORFATALPERSONALINJURYORMAJORPROPERTY
DAMAGE, READ AND FOLLOW ALL SAFETY INSTRUCTIONS IN THIS
MANUAL AND ON THE PUMP.
THIS MANUAL IS INTENDED TO ASSIST IN THE INSTALLATION AND
OPERATION OF THIS UNIT AND MUST BE KEPT WITH THE PUMP.
This is a SAFETY ALERT SYMBOL. When you see this symbol
on the pump or in the manual, look for one of the following
signal words and be alert to the potential for personal injury
or property damage.
Warns of hazards that WILL cause serious personal injury,
death or major property damage.
Warns of hazards that CAN cause serious personal injury,
death or major property damage.
Warns of hazards that CAN cause personal injury or
property damage.
Warns of electrical shock hazards that can cause serious
personal injury, death or major property damage.
Identies any terminal which is intended for connection to
and external conductor for protection against electrical
shock in case of a fault, or the terminal of a protective
earth (ground) electrode.
Read operator's manual.
INDICATES SPECIAL INSTRUCTIONS WHICH ARE VERY
IMPORTANT AND MUST BE FOLLOWED.
THOROUGHLY REVIEW ALL INSTRUCTIONS AND WARNINGS PRIOR TO
PERFORMING ANY WORK ON THIS PUMP.
MAINTAIN ALL SAFETY DECALS.
CAUTION
2
© Copyright 2020 Zoeller®Co. All rights reserved.
etc. in all pumping applications. The warranty set out in the paragraph above is
in lieu of all other warranties expressed or implied; and we do not authorize any
representative or other person to assume for us any other liability in connection
with our products.
Contact Manufacturer at, 3649 Cane Run Road, Louisville, Kentucky 40211,
Attention: Customer Support Department to obtain any needed repair or
replacement of part(s) or additional information pertaining to our warranty.
MANUFACTURER EXPRESSLY DISCLAIMS LIABILITY FOR SPECIAL,
CONSEQUENTIAL OR INCIDENTAL DAMAGES OR BREACH OF EXPRESSED
OR IMPLIED WARRANTY; AND ANY IMPLIED WARRANTY OF FITNESS FOR A
PARTICULAR PURPOSE AND OF MERCHANTABILITY SHALL BE LIMITED TO THE
DURATION OF THE EXPRESSED WARRANTY.
Some states do not allow limitations on the duration of an implied warranty, so
the above limitation may not apply to you. Some states do not allow the exclusion
or limitation of incidental or consequential damages, so the above limitation or
exclusion may not apply to you.
This warranty gives you specic legal rights and you may also have other rights
which vary from state to state.
LIMITED WARRANTY
Manufacturer warrants, to the purchaser and subsequent owner during the
warranty period, every new product to be free from defects in material and
workmanship under normal use and service, when properly used and maintained,
for a period of 24 months from date of purchase (proof of purchase required)
or from the date of start up when a Zoeller authorized start up report is on le
with Zoeller Company. Parts that fail within the warranty period that inspections
determineto be defectivein material orworkmanship will berepaired, replaced or
remanufacturedat Manufacturer's option, provided however,that byso doing we
will not be obligated to replace an entire assembly, the entire mechanism or the
complete unit. No allowance will be made for shipping charges, damages, labor
or other charges that may occur due to product failure, repair or replacement.
This warranty does not apply to and there shall be no warranty for any material
or product that has been disassembled without prior approval of Manufacturer,
subjectedtomisuse,misapplication,neglect,alteration, accident or uncontrollable
act of nature; that has not been installed, operated or maintained in accordance
with Manufacturer's installation instructions; that has been exposed to outside
substances including but not limited to the following: sand, gravel, cement, mud,
tar, hydrocarbons, hydrocarbon derivatives (oil, gasoline, solvents, etc.), or other
abrasive or corrosive substances, wash towels or feminine sanitary products,
1. Zoeller Progressing Cavity Grinder Pumps are designed for grinding
and pumping sanitary sewage from submersible lift stations. The
pump is intended to grind and pump reasonable quantities of items
normally found in sanitary sewage applications.
2. Zoeller 7020 and 7021 Progressing Cavity Grinder Pumps can be
installed in new applications or as a replacement for another
grinder pump of like size and capacity.
3. The 7020 and 7021 can be installed in a Prepackaged Job Ready
System or may be used in a Field Assembled basin package. Page
5 shows a couple of the Prepackaged Systems. Field Assembled
Systems are discussed on page 3.
4. Zoeller 7020 and 7021 Grinder Pumps can be retrotted to existing
positive displacement pump installations.
APPLICATIONS
PREINSTALLATION CHECKLIST
1. Inspectyour progressingcavitygrinder pump.If theunithasbeendamaged
in shipment, contact your dealer before installing. Do Not remove the
test plugs in the cover or the motor housing.
2. Carefully read all literature tofamiliarizeyourself with details regarding
installation and use. Retain materials for future reference.
1. Make sure pump connection contains a ground terminal. The power cord
on all Zoeller Progressing Cavity Grinder Pumps contains a green
conductor for grounding to help protect you against the possibility of
electric shock.
2. Make certain the electrical service is within reach of the power supply cord.
3. Makesureanypanelsandbranchcircuitsareequippedwithpropersize fuses
and circuit breakers. An independent power circuit is recommended,
sized according to the National Electrical Code, for the current shown
on the grinder pump nameplate.
4. For your protection, always disconnect the power source to the grinder
pump before handling. All grinder pumps must be properly grounded
and wired in accordance with the “National Electrical Codes” and all
local codes and ordinances.
5. Installation of electrical hardware and checking of control panels
and circuits should be performed by a qualied licensed electrician.
6. Risk of electrical shock - These pumps have not been investigated for
use in swimming pool areas.
7. Prop65 Warning for California residents:
: Cancer and Reproductive Harm-
www.P65Warning.ca.gov.
1. Make sure the power source is capable of handling the electrical
requirements of the grinder pump, as indicated on the nameplate.
2. A disconnect switch should be installed in the circuit bringing electrical
power to the pump.
3. The progressing cavity grinder pumps are operated by variable level
oat control switches. It is the responsibility of the installing party to
see that oat control switches will not hang up on the grinder pump
or other pit peculiarities and are secured so that the grinder pump
will shut off. It is recommended to use rigid pipe and ttings and the
pit be at least 24" in diameter for simplex systems and 36" or larger in
diameter for duplex systems.
4. Grinder installations should be checked yearly for debris and/or build
up which may interfere with the “ON” or “OFF” positions of variable
level oat control switches. Repair and service, other than cutter
assembly maintenance, should be performed by a Zoeller Authorized
Service & Warranty Center or Customer Care Center.
5. Maximum operating temperature must not exceed 130 °F (54 °C).
6. Do not operate an unsubmerged progressing cavity pump. Dry pump
operationmaydamage the hydraulic stator due tolackoflubrication.
Do not run dry.
7. To ensure proper pump operation, a swing or flapper style check valve
must be installed in the pump discharge line. A faulty or non-functional
check valve when combined with a pressure sewer may prevent the pump
from starting.
Do not attempt to turn the cutter blades
locatedonbottom of the unit withfingers.Use a wrench
when checking or removing the cutter.
CAUTION
SEE BELOW FOR
LIST OF CAUTIONS
SEE BELOW FOR
LIST OF WARNINGS
Progressing cavity grinder pumps are designed for
pressure sewer applications. A UL listed and CSA certified pressure relief
valve must be installed in the system to prevent excessive pressure buildup.
In instances where property damages are incurred as a result of an alleged product failure, the property
owner must retain possession of the product for investigation purpose.
3
© Copyright 2020 Zoeller®Co. All rights reserved.
RECOMMENDED LIMITS OF APPLICATION FOR
PROGRESSING CAVITY GRINDER PUMPS
Simplex Station Duplex Station
Model HP Homes GPD Homes GPD
7020 1 1 400 2 800
7021 2 1 400 2 800
These recommended application limits are for pump stations pumping to a gravity main. Low-pressure collection systems should be designed with
a pump located at each house. For applications where a lift station would handle more than 2 homes, consider the model 7011 or 71 Series grinder
pump. For applications where a lift station would handle more than 60 homes, a solids handling type pump should be considered.
GENERAL INFORMATION
FIGURE 1
Progressing Cavity
Grinder Pump Description
1. Pumps are constructed of cast iron protected with powder coated
epoxyfor longlife whenpumpingsewage insubmersible applications.
The cutter assembly is comprised of stainless steel components
hardened to a value of 55-60 on the Rockwell C scale; a cutter and a
precision ground at disk. Cutting action takes place with the rotation
of the cutter blades at 1750 RPM against the stationary cutter plate
(see page 7).
2. The cutter mechanism on the model 7020 & 7021 is single directional.
3. Pump motors are single phase. Single phase motors require a run
capacitor, which is mounted in the the upper cap of the pump (ref.
page 4). The units have an internal thermal overload.
4. The 7020 & 7021 progressing cavity grinder pumps are single seal.
5. Thepressure reliefvalve providesmotorprotectionunderinadvertent
shut-off head condition.
6. A progressing cavity grinder pump is an intermittent duty pump
designed for pumping sanitary sewage. It is not a dewatering or trash
pump.
018330ZEP
0
2 4 6 8 10 12 14 16
0
20
40
60
80
100
120
140
160
180
200
260
PUMP PERFORMANCE CURVE
MODEL 7020/7021
8
16
24
32
40
48
56
64
GALLONS
LITERS
METERS
FEET
TOTAL DYNAMIC HEAD
FLOW PER MINUTE
220
240
72
20 40 60
10
20
30
40
50
60
70
80
90
100
110
0
PSIG
TOTAL DYNAMIC HEAD
2 HP
1 HP
LOW PRESSURE SEWER
TYPICAL
OPERATING
RANGE
DESIGN PRESSURE (150 FT OR LESS)
TOTAL DYNAMIC HEAD/FLOW
PER MINUTE
MODEL
Feet
7020
Meters Gal. Liters
MODEL
7021
5
10
20 6.1
3.0
1.5 14.6 55
40
60 18.3
12.2
80
100 30.5
24.4
120 36.6
140
150 45.7
42.7
55
53
50
47
44
41
38
36
34
14.4
14.0
13.2
12.5
11.7
10.9
10.1
9.4
9.0
160 48.8
180 54.9
200 61.0
220 67.1
240 73.2 5.5
33
30
27
24
21
8.6
7.8
7.0
6.3
Field Assembled Installation
1. Installation and piping instructions are included with the control
panel, rail system and basin instructions. If pump is being retrotted
to an existing rail system, accessory parts may be required. Consult
the factory and advise make and model of rail system being used.
2. Refer to the appropriate Indoor/Outdoor prepackaged instructions
for more information on system installation.
3. All electrical connections including pump to control box and power
supply to control panels must comply with the “National Electrical
Code” and applicable local codes. Conduit and panel enclosure
openingsmusthaveagas-tightseal. Installation of electrical panels
and connections should be made by a qualied licensed electrician.
4. A properly sized disconnect switch, supplied by others, shall be
installed on the service side of the pump and control panel.
5. When used in a pressure sewer, install an anti-siphon valve (see
Fig. 5A).
4
© Copyright 2020 Zoeller®Co. All rights reserved.
PUMP WIRING INSTRUCTIONS
FOR YOUR PROTECTION, ALWAYS DISCONNECT THE PUMP FROM ITS POWER SOURCE BEFORE HANDLING.
All electrical connections must be wired and grounded in accordance with the National Electrical Code and all applicable local codes
and ordinances.
Risk of electrical shock. Do not remove the power supply cord and strain relief or connect conduit directly to pump.
Installation and checking of electrical circuits and hardware should be performed by a qualied, licensed electrician.
254 mm (10") MAX.
127 mm (5") MIN.
FIGURE 2 Pump Control Switch Installation
Use the diagram above to secure the oat switch properly and obtain the proper tether to customize the on-off cycle to each application. Note
the minimum off level shown above. On Prepackaged Systems, the tether length is set at 5”.
NOTE: Failure to keep within proper tether
limits may prevent reliable switch operation.
NOTE: Cable must be mounted in horizontal
position.
Determining Pumping Range
in Inches (1 inch - 2.5 cm)
Use only as a guide. Due to weight of
cable, pumping range above horizontal
is not equal to pumping range below
horizontal. Ranges are based on testing
in nonturbulent conditions. Range may
vary due to water temperature and cord
shape. As tether length increases, so
does the variance of the pumping range.
Tether Length (inches) 5 10
Pumping Range (GPM) 9 13.5
min. max.
SK305D
SK2651
ALARM FLOAT
PUMP CONTROL
FLOAT TREE
FLOAT
406 mm (16")
MIN. OFF
Electrical Data
Amps KVA
Code
Winding
Resistance
Line-to-Line
Model BHP RPM Voltage Phase Hertz Full Load Shut Off Locked
Rotor
E7020 1 1750 230 1 60 7.0 7.0 24.5 G 2.3 / 2.0*
E7021 2 1750 230 1 60 10.5 10.5 44.0 B 1.80 / 1.60*
RE & RWD7020 1 1750 230 1 60 7.0 7.0 24.5 G **
RE & RWD7021 2 1750 230 1 60 10.5 10.5 44.0 B **
I7021 2 1750 200 1 60 12 12 49.5 B 1.4 / 1.3*
RI & RWH7021 2 1750 200 1 60 12 12 49.5 B **
* Line to line reading from the electrical load will only reect the run winding resistance. Start winding resistance can only be measured after removing the cover.
** Start and run winding resistance can only be measured after removing the cover and checking at through wall terminal.
FIGURE 3A Models E7020,
E7021 and I7021
Wiring Diagram
002397
RUN
O.L.
MOTOR
(3)
BLUE RED
WHITE
BLACK
GREEN
L1 L2
STA RT
(1) (2)
YELLOW
BLUE RED
CAPACITOR
(WHITE) (BLACK)
(BROWN)
FIGURE 3B Models RE7020,
RE7021 and RI7021 Wiring Diagram
(6932 Replacement Grinder
Assembly w/ Manual Run)
152554
RUN
O.L.
MOTOR
(3)
BLUE RED
GREEN
START
(1) (2)
YELLOW
BLUE RED
CAPACITOR
(WHITE) (BLACK)
WHITE
BLACK
RED
YELLOW
BLUE
ORANGE
R
RELAY
4
60
1
R
2
64
5
GE RELAY
(BROWN)
1)
NOTES:
INSULATORS REQUIRED ON GE RELAY TERMINALS 2 & 5;
OMRON RELAY TERMINALS 1 & 4.
FIGURE 3C Models RWD7020,
RWD7021 and RWH7021 Wiring
Dagram (6932 Replacement
Grinder Assembly W/ Integral
Pump And Alarm Floats W/ Manual
Run)
153381
RUN
O.L.
MOTOR
(3)
BLUE RED
STA RT
(1) (2)
YELLOW
(WHITE) (BLACK)
(BROWN)
SWITCH
PUMP
SWITCH
ALARM
R
4
60
1
R
2
64
5
GE RELAY
BLUE RED
CAPACITOR
WHITE
BLACK
RED
RELAY
YELLOW
BLUE
GREEN
ORANGE
BLUE
WHITE
BLACK
BLACK
WHITE
BLUE
RED
BLACK
WHITE
1)
NOTES:
INSULATORS REQUIRED ON GE RELAYTERMINALS 2 & 5;
OMRON RELAY TERMINALS 1 & 4.
5
© Copyright 2020 Zoeller®Co. All rights reserved.
All installations must comply with all applicable electrical and plumbing codes, including but not limited to the National Electrical Code, local, regional
and/or state plumbing codes, etc.
TYPICAL OUTDOOR GRINDER PUMPING SYSTEM INSTALLATIONS
FIGURE 4A - PACKAGED SYSTEM WITH
FLEXIBLE HOSE DISCONNECT
SK2540 SK3091
FIGURE 4B - PACKAGED SYSTEM WITH
Z-RAIL®DISCONNECT SYSTEM
SK2533
6-5/8” (143 mm)
8-3/8”
(213 mm)
5-1/4”
(133 mm)
4-3/8”
(111 mm)
10-1/2”
(267 mm)
DIA.
22-3/8” (568 mm)
4” (103 mm)
FIGURE 5
1-1/4" NPT
ANTI-SIPHON
VALVE
1-1/4" NPT CHECK VALVE
DISCONNECT
1-1/4" SHUT OFF VALVE
(HOME OWNER)(JWA)
CURB/VALVE
BOX
CHECK VALVE
SHUT OFF
VALVE
MAIN
OPTIONAL LOCATION
1-1/4" NPT ANTI-SIPHON
VALVE
POSITIVE DISPLACEMENT
GRINDER PUMP
1-1/4" DISCHARGE LINE
FIGURE 5A
SK2810
24" (60.9 cm)
MINIMUM
ANTI FLOATATION RING
1-1/4" NPT BRASS CHECK VALVE
SHUT-OFF BALL VALVE
ALARM FLOAT
PUMP CONTROL FLOAT
12" (30.4 cm) MIN. OFF LEVEL
FIBERGLASS BASIN
1/8" (3 mm) 302 STAINLESS
STEEL LIFTING CABLE
1-1/4" FLEXIBLE
DISCONNECT FITTING
1-1/4" BULK HEAD
DISCHARGE FITTING
24" (60.9 cm)
SOLID FIBERGLASS
COVER
GROMMET SEAL
4" INLET W-SEAL
(FIELD INSTALLED)
MINIMUM
60" (152 cm)
DISCHARGE HOSE
HIGH WATER ALARM
(NOT INCLUDED)
WATERTIGHT "QWIK BOX"
(NOT INCLUDED)
FLOAT TREE
48" (122 cm)
72" (183 cm)
1-1/4" SCH 80 PVC PIPE
BRASS ANTI-SIPHON VALVE
1-1/4" MALE NPT THREAD X SLIP FITTING
1-1/4" MALE NPT THREAD X
SLIP FITTING
2" PVC ELECTRICAL PIPE
R
LOUISVILLE, KY
PIPE SEAL
24" MIN.
4" RUBBER INLET
(FIELD INSTALLED)
ANTI-FLOTATION
FIBERGLASS
DISCHARGE FITTING
1-1/4" BULK HEAD
ALARM FLOAT
1-1/4" CHECK VALVE
1-1/4" DISCHARGE PIPE
HIGH LEVEL
1-1/4" BALL VALVE
FIBERGLASS BASIN
"ON - OFF" FLOAT
PUMP CONTROL
PIPE AND FITTINGS
1-1/4" PVC SCH 80
FLOAT TREE ASSEMBLY
STEEL LIFTING CABLE
1/8" 302 STAINLESS
1-1/4" PVC PIPE
FLANGE
3/4" GUIDE RAIL
ANTI-SIPHON VALVE (OPTIONAL)
1-1/4" H X 1-1/4" Z-RAIL
DISCONNECT SYSTEM, EPOXY
COATED DUCTILE IRON
2" TO 1-1/4" REDUCER
SIMPLEX CONTROL PANEL
(FIELD INSTALLED)

This manual suits for next models

1

Other Zoeller Water Pump manuals

Zoeller SHARK 800 Series User manual

Zoeller

Zoeller SHARK 800 Series User manual

Zoeller SRS 109-0005 User manual

Zoeller

Zoeller SRS 109-0005 User manual

Zoeller 81 Series User manual

Zoeller

Zoeller 81 Series User manual

Zoeller SHARK Series Installation and maintenance instructions

Zoeller

Zoeller SHARK Series Installation and maintenance instructions

Zoeller 611 User manual

Zoeller

Zoeller 611 User manual

Zoeller X611 User manual

Zoeller

Zoeller X611 User manual

Zoeller X800 Series User manual

Zoeller

Zoeller X800 Series User manual

Zoeller X61 HD Series User manual

Zoeller

Zoeller X61 HD Series User manual

Zoeller Mighty Mover 311 User manual

Zoeller

Zoeller Mighty Mover 311 User manual

Zoeller 6355 User manual

Zoeller

Zoeller 6355 User manual

Zoeller LM44 User manual

Zoeller

Zoeller LM44 User manual

Zoeller X161 User manual

Zoeller

Zoeller X161 User manual

Zoeller Basement Sentry 507 User manual

Zoeller

Zoeller Basement Sentry 507 User manual

Zoeller 1263-0001Q User manual

Zoeller

Zoeller 1263-0001Q User manual

Zoeller 98 Series User manual

Zoeller

Zoeller 98 Series User manual

Zoeller 810 User manual

Zoeller

Zoeller 810 User manual

Zoeller 2701-0005 User manual

Zoeller

Zoeller 2701-0005 User manual

Zoeller 1463-0006 User manual

Zoeller

Zoeller 1463-0006 User manual

Zoeller QWIK JON ULTIMA 203 User manual

Zoeller

Zoeller QWIK JON ULTIMA 203 User manual

Zoeller 915 User manual

Zoeller

Zoeller 915 User manual

Zoeller ProPak 507 User manual

Zoeller

Zoeller ProPak 507 User manual

Zoeller 109 Series User manual

Zoeller

Zoeller 109 Series User manual

Zoeller X161 User manual

Zoeller

Zoeller X161 User manual

Zoeller Qwik Jon Ultima 204 User manual

Zoeller

Zoeller Qwik Jon Ultima 204 User manual

Popular Water Pump manuals by other brands

Watershed Innovations HYDRAPUMP SMART FLEX Instructional manual

Watershed Innovations

Watershed Innovations HYDRAPUMP SMART FLEX Instructional manual

Graco Modu-Flo AL-5M instructions

Graco

Graco Modu-Flo AL-5M instructions

Messner MultiSystem MPF 3000 operating instructions

Messner

Messner MultiSystem MPF 3000 operating instructions

Xylem Bell & Gossett WEHT0311M Installation, operation and maintenance instructions

Xylem

Xylem Bell & Gossett WEHT0311M Installation, operation and maintenance instructions

WilTec 50739 Operation manual

WilTec

WilTec 50739 Operation manual

Franklin Electric Little Giant 555702 HRK-360S instruction sheet

Franklin Electric

Franklin Electric Little Giant 555702 HRK-360S instruction sheet

Ingersoll-Rand PD02P Series Operator's manual

Ingersoll-Rand

Ingersoll-Rand PD02P Series Operator's manual

VS ZJ Series Operating	 instruction

VS

VS ZJ Series Operating instruction

Flotec FPZS50RP owner's manual

Flotec

Flotec FPZS50RP owner's manual

SKF Lincoln FlowMaster II User and maintenance instructions

SKF

SKF Lincoln FlowMaster II User and maintenance instructions

Xylem Lowara LSB Series Installation, operation and maintenance instructions

Xylem

Xylem Lowara LSB Series Installation, operation and maintenance instructions

Water Duro Pumps DCJ500 Operating & installation instructions

Water

Water Duro Pumps DCJ500 Operating & installation instructions

Action P490 Operating instructions & parts manual

Action

Action P490 Operating instructions & parts manual

Flo King Permacore Reusable Carbon Bag Disassembly. & Cleaning Instructions

Flo King

Flo King Permacore Reusable Carbon Bag Disassembly. & Cleaning Instructions

ARO ARO PD15P-X Operator's manual

ARO

ARO ARO PD15P-X Operator's manual

Pumptec 112V Series Operating instructions and parts manual

Pumptec

Pumptec 112V Series Operating instructions and parts manual

Virax 262070 user manual

Virax

Virax 262070 user manual

Neptun NPHW 5500 operating instructions

Neptun

Neptun NPHW 5500 operating instructions

manuals.online logo
manuals.online logoBrands
  • About & Mission
  • Contact us
  • Privacy Policy
  • Terms and Conditions

Copyright 2025 Manuals.Online. All Rights Reserved.