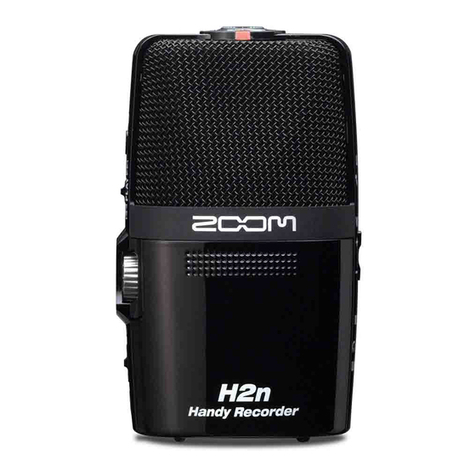
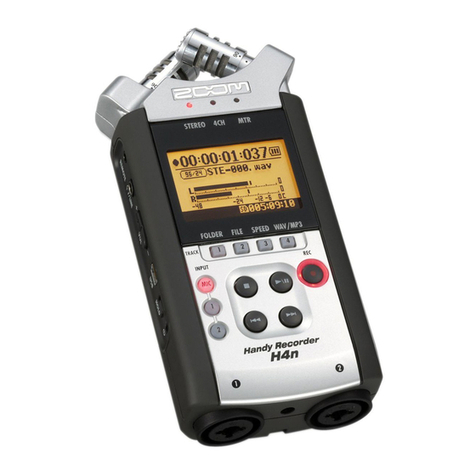
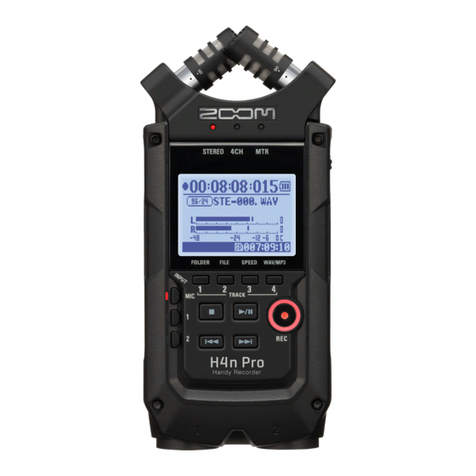
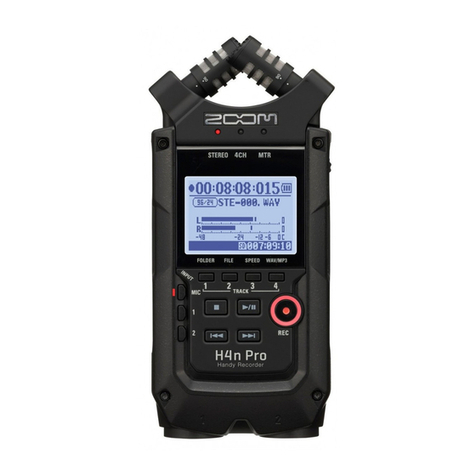
Zoom H4N User manual

Zoom H4n QuickStart
Thrown together by David Tamés, https://kino-eye.com/contact/
(v.5, September 29, 2020)
Part 1 walks you through using the Zoom H4n recorder for the rst time using the built-in stereo microphone; Part 2 covers
recording with an external mono microphone for the rst time; Part 3 covers recording with an external stereo microphone
for the rst time. Refer to the Zoom H4n Manual (PDF) manual for more details on the operation and conguration of the
recorder. In this guide we will stick to the essential for location
sound recording, which is probably all you will need.
Warnings: The Zoom likes to consume batteries, so always have a
backup set of AA batteries available. The Zoom is a treacherous
device with a confusing menu structure and indicator system; as a
result, it’s easy to do things like record mono when you want stereo
(and with the stereo light on!). The steps in this guide will help you
avoid these problems.
Part 1: Recording with the built-in stereo
microphone
1. In the battery compartment, set the Stamina switch to OFF.
When it’s ON the range of conguration options is limited
and the menus are different, but we’re going to to use some
features that require Stamina mode to be turned off.
2. Insert two fresh AA batteries in the battery compartment,
the door slides on and off, be careful with the battery door
since it is fragile, if you have a broken door secure it with a
piece of gaffer tape (not just any sticky tape).
3. Insert an SD card into the SD card slot (on the right side
panel) if a card is not already inserted. Before inserting the
card make sure the“write protect” tab is disabled, otherwise
you will not be able to format and write to the card.
4. Power on the recorder (switch is located on the left side
panel), slide it towards the power icon, do this again when
you want to turn offthe recorder, holding the switch for a
couple of seconds, otherwise the recorder will not turn off.
5. Check the battery level indicator on the LCD display to make sure you're
starting with fresh batteries, if not, you should nd an extra pair in the
kit (make sure of this when you check out the gear).
6. If the recorder is reporting “No card”try removing and replacing the
card. The H4n can be nicky with SD cards. Repeated removal and
insertion should resolve the issue. Make sure the contacts on the SD card
are clean and free of contaminants.
7. If the recorder is reporting “Card protected”then the write-protect tab
on the card is set to not allow recording, remove the SD card and disable
the write-protect tab.
8. Select MENU => SD CARD => FORMAT to format the SD card, it will ask if
you are sure just in case, this wipes out what was there so you can start with a fresh, empty
card. It’s a good idea to always format prior to using the recorder so you don’t have to deal
with other people’s recordings on the device. This also reduces the chance of problems due to
a corrupt le system.
9. Select MENU => REC SETTINGS => REC FORMAT to set the recording format WAV 48KHz 16-
bit (WAV le format, 48KHz sampling rate, 16 or 24 bit-depth, in other words, you want
to record uncompressed audio following the digital video standard); Note: the decision
to record 16-bit or 24-bit depends on factors beyond the scope of this guide, in most
cases, either one is ne.
10. Select MENU => REC SETTINGS => FILE NAME => DEFAULT so that le names will start
with “STE” for stereo les and “MONO” for mono les; since it’s easy with this recorder to
record in mono by mistake, le names on the LCD called STE provide conrmation you
are recording in stereo.

Zoom H4n QuickStart v.5 /2 3
11. Select MENU => MODE => STEREO to set the recorder to Stereo Mode so that it will
record two track audio les. This does not, in and of itself, mean it will record in
stereo, the next step is very important.
12. Select MENU => INPUT SETTINGS => MONO MIX to OFF in order to record in stereo,
otherwise you’ll be recording MONO even though the recorder is in stereo mode.
The STEREO light indicates Stereo Mode, not that it will actually record in stereo. The
only way to conrm if you are recording in stereo is when the recorder is creating le
names that start with “STE” (if le names start with “MONO” you are not recording in
stereo.
13. Select MENU => INPUT SETTINGS => 1/2 LINK to ON, with this mode ON, the
recorder will set both channels 1 and 2 to the same level, which is usually what you
want when recording in Stereo.
14. Select MENU => INPUT SETTING => LIMITER to ON, the Comp 1 setting is ne.
You want to enable the limiter so that when a peak gets close to 0dBFS it will be
attenuated to avoid distortion in your recording.
15. Select MENU => INPUT SETTING => LOW CUT — Set this to ON for most
recording, unless low frequencies are important for the sound effects you are
recording, however, for dialogue recording it’s good to have the low cut
enabled to reduce rumble and plosives.
16. To enable the built-in microphone, press the MIC button on the front panel, it
will light up red, if 1 and 2 buttons are selected then the recorder is recording
from the external microphone inputs (and for this rst part of the QuickStart,
we’re assuming you want to record with the built-in microphone.
17. Connect a pair of headphones to monitor your recording; always monitor your
recordings! Adjust the headphone levels using the VOLUME buttons (on the left
side panel)
18. Now you're nally ready to record, press the RECORD button, it will blink red, this
is called Recording Standby Mode, check your levels, you’re not actually
recording yet
19. Adjust sound levels as needed using the REC LEVEL buttons (on the left side
panel), you want a healthy signal, too low, and the signal is lost in the noise oor,
too loud and the peaks will distort. The limiter will catch errant peaks, but don't
count on it constantly. Adjusting levels is crucial and takes some practice, set high
enough (with peaks sometimes over -6dB but rarely over -3dB) so you have a
healthy signal and only in rare occasions should you have a peak for which the
limiter needs to kick in and deal with the peak for you.
20. Press RECORD, to start recording! Always check for ascending timecode numbers
on the display to conrm you’re actually recording and not still in Record Standby
Mode!
21. Press the STOP button to stop recording, a new le is created for each recording
and the le name is displayed on the LCD while recording or in record-standby
mode.
22. To review the most recently recording, press PLAY. Review your other recordings
by pressing the FILE button and then selecting the le you want to listen to using
the scroll wheel/button, press play or other transport controls as needed.
23. Keep a log. The recorder shows you the le name it is recording to with makes it
easy to match recordings to sound log entries. Make a note of the le name, date,
place, and other details in your sound log. It’s a good idea to SLATE your take
(adding a verbal description of what you’re recording at the beginning of the
recording) which helps in identication of les without having to listen to the
whole thing.
24. When recording in STEREO mode, the recorder will save les to one of the ten
sub-folders of the STEREO folder. In the menu you can select with subfolder the
le will go into, but default it goes into “FOLDER 01”You can change the folder by
pressing the FOLDER button
25. When you are done with your recording, copy the contents of the SD card using
Zoom H4n QuickStart v.5 /3 3
an SD card reader to a unique folder in your media folder inside your project folder. The
iMacs in Shillman 205 and 225 have card readers on the back.
26. It’s a good idea to name your media folders with a consistent naming scheme, for
example, consider using a date (year.month.day) and name of event in your naming
scheme, this results in folder names like “2020.10.12 Atom Egoyan Interview” so it’s
easier to nd things in the future and the folder names sort chronologically.
Part 2: Recording with an external mono microphone
Follow these additional steps when using an external microphone connected to the XLR-3F
connectors:
1. Make sure you are using the right cables (see sidebar).
2. Connect the microphone cable to the XLR inputs connector on the bottom of the
recorder, when using a single mic, the convention is to connect to input channel 1.
3. If the microphone requires Phantom Power, Select the MENU => INPUT SETTING =>
PHANTOM => +48V to enable phantom power, the recorder will now provide power to
the microphone.
4. If the microphone has a built-in LOW CUT FILTER use that instead of the lter in the
recorder, to disable the LOW CUT, select MENU => INPUT SETTING => LOW CUT =>
OFF.
5. Select MENU => INPUT SETTINGS => MONO MIX to ON in order to record dual mono, in
this mode the recorder will create a WAV le with identical audio on both channel 1 and
channel 2. This will streamline editing of the audio le, since you will avoid having to
manually map channel 1 to both channels 1 and 2 on the timeline for each clip..
6. Press the 1 buttons on the front panel, it will light up red letting you know that the
external input is selected.
7. You are ready to record, everything else is pretty much the same as part 1, except now
you are recording using an external microphone.
Part 3: Recording with an external stereo microphone
Follow these additional steps when using an external stereo microphone connected to the
XLR-3F connectors:
1. Connect the microphone cables to the XLR inputs connector on the bottom of the
recorder, when using a single mic, the convention is channel 1/Left and channel 2/
Right.
2. If the microphone requires Phantom Power, Select the MENU => INPUT SETTING =>
PHANTOM => +48V to enable phantom power, the recorder will now provide power to
the microphone.
3. If the microphone has a built-in LOW CUT FILTER use that instead of the lter in the
recorder, to disable the LOW CUT, select MENU => INPUT SETTING => LOW CUT =>
OFF.
4. Select MENU => INPUT SETTINGS => MONO MIX to ON in order to record stereo, in this
mode the recorder will create a WAV le with audio from input channel 1 on channel 1
of the WAV le and audio from input channel 2 on channel 2 of the WAV le. This will
streamline editing of the audio le, since you will avoid having to manually map
channel 1 to both channels 1 and 2 on the timeline for each clip.
5. Select MENU => INPUT SETTINGS => 1/2 LINK to ON, with this mode ON, the recorder
will set both channels 1 and 2 to the same level, which is usually what you want when
recording in Stereo.
6. Press the 1 and 2 buttons on the front panel, it will light up red letting you know that
the external input is selected.
7. You are ready to record, everything else is pretty much the same as parts 1 and 2,
except now you are recording using an external stereo microphone.
Microphone cables and
connectors
There are two types of
balanced microphone cables in
common use: mono cables
(with XLR-3 connectors) and
stereo cables (with XLR-5
connectors). You want to make
sure you have the right cables
and adapters.
Mono microphones have an
XLR-3M connector on the end
and mono mic cables have a
XLR-3F connector on one end
and a XLR-3M on the other.
Stereo microphones have a
XLR-5M connector on the end
and stereo mic cables have an
XLR-5F connector on one end
and a XLR-5M on the other.
Mixers, cameras, recorders
usually have one XLR-3F
sockets for each input channel,
1/L and 2/R is the convention.
Y cables are used to adapt
between stereo and mono:
they have a XLR-5F connector
on one end that goes to the
mic or mic cable from the mic
and two short cables with
XLR-3M connectors on the
ends for connecting to the
inputs on a recorder, mixer, or
camera.
Balanced wiring (two
conductors and one ground for
each signal plus special
circuitry on each end) is used in
professional production
because it is less susceptible to
electromagnetic interference
(EMI) and also allows for longer
cable runs. Consumer wiring
with only one conductor and
one ground and is very
susceptible to interference. For
a technical explanation how
this works, see What’s the
Difference Between Balanced
and Unbalanced? (Aviom blog).
Other manuals for H4N
9
Other Zoom Measuring Instrument manuals

Zoom
Zoom H1essential Mounting instructions

Zoom
Zoom ZF8N User manual

Zoom
Zoom F6 Mounting instructions

Zoom
Zoom Handy REcorder H1 User manual

Zoom
Zoom H6 Handy Recorder User manual

Zoom
Zoom F3 User manual

Zoom
Zoom H4N User manual

Zoom
Zoom F8n Pro User manual

Zoom
Zoom H5 User manual

Zoom
Zoom F4 Instructions and recipes

Zoom
Zoom F6 Instructions and recipes

Zoom
Zoom H4n Pro User manual

Zoom
Zoom R4 User manual

Zoom
Zoom Handy Recorder H8 Mounting instructions

Zoom
Zoom F8 User manual

Zoom
Zoom h1n User manual

Zoom
Zoom H2next User manual

Zoom
Zoom H1essential User manual

Zoom
Zoom MULTISTOMP MS-50G+ User manual

Zoom
Zoom F2 User manual