2N D7A User manual

2N® IP Phone D7A
Quick Guide
ord. 1120102
2N Telekomunikace a.s. | www.2n.com | Modřanská 621 | Prague 4, 143 01
EN
CZ
DE
ENFR
ES
RU
IT
............................................... 2
............................................... 6
............................................... 10
............................................... 14
............................................... 19
............................................... 23
............................................... 27

2
Package Contents
EN
Camera Insertion
Cable Connection
IP phone Handset Handset cable Ethernet cable (2 m) Quick Guide
Stand Wall holder Power adapter CAM50 camera
PC Internet DC5V
PC Internet DC5V
OPTIONAL - NOT INCLUDED
Aperture switch
setting
Camera angle setting

IP Phone Basic Functions
3
3.
4.
5.
6.
7.
8.
9.
15.
16.
17.
14.
13.
12.
2.
1. 10.
11.
Putting in Operation
18.
To put the device in operation, you need to:
• connect the IP phone (connect cabling and power supply)
• 2N® IP Phone D7A – insert the camera
• perform basic IP phone settings (save the configuration data obtained from your IP provider into the
phone system memory)
• Language setting: Menu >Basic > Language > English
Device Connection
1. The phone can be connected to the Internet by an Ethernet cable or Wi-Fi.
a) Using an Ethernet cable, connect the “Internet” socket on the IP phone directly to the Internet
providing device (modem/router, cable modem, Wi-Fi).
b) Using Wi-Fi – having connected your phone to the power adapter and turned the phone on,
interconnect the “PC” socket on the IP phone backside with your PC. Thus, your PC will be connected
to the Internet via the IP phone again. With multiple PCs, you can use an external switch or HUB for the
PC – phone connection.
2. Power supply – connect the adapter to the DC5V socket on the phone backside.
Caution
Never use the power source and PoE supply simultaneously! This may damage the device.
10. Camera LED indicator
11. Camera
12. Power LED sensor
13. Touch display
14. Headset button
15. Mute button
16. REDIAL button
17. Speaker button
18. USB 2.0 on phone backside
1. Aperture switch
2. Camera lens
3. Fork switch – holder
4. Speaker
5. Transfer button
6. Hold button
7. MESSAGE
8. VOLUME button
9. Dial

4
Administration Settings via Web Interface
By default, the IP phone is set in such a manner that it receives the IP address from your LAN DHCP server. Know the
current IP address simply using your phone menu: Settings > Status > Network > Ipv4 status. Enter the IP address
into the web browser. Make sure that the PC and phone are connected to one and the same LAN. The default user
name is “admin” and the password is “2n”. After logging in for the first time, you will be prompted to change your
default password for security reasons.
3. The IP phone initialization will be performed automatically. Now make basic phone settings using the provider’s
data.
If there is a DHCP server in the network, the phone will obtain the IP address from the server automatically. If the
DHCP server is absent or inactive, set the static IP address in the phone via the phone menu as follows: Settings
> Advanced Settings (password protected) > Network > WAN port > IPv4. Having entered the IP address, subnet
mask, default gateway DNS server, press OK in the right-hand upper corner for confirmation. Nevertheless, we
recommend that the basic IP phone settings are made using the web management.
Directory
Add phone contact:
1. Press the Directory button in the idle state and select the required group.
2. Press + to add a contact.
3. Enter a unique name into the Name field and the phone number into the respective field.
4. Press OK in the right-hand upper corner for confirmation.
Edit phone contact:
1. Press the Directory button in the idle state and select the required group.
2. Press the pencil symbol to select the required contact.
3. Edit the phone contact.
4. Press OK in the right-hand upper corner for confirmation.
Delete phone contact:
1. Press the Directory button in the idle state and select the required group.
2. Press the pencil symbol to select the required contact, select the contact and press the recycle bin symbol.
3. Press OK for confirmation.
Note: You can also add contacts from the call log easily. Refer to Call History above.
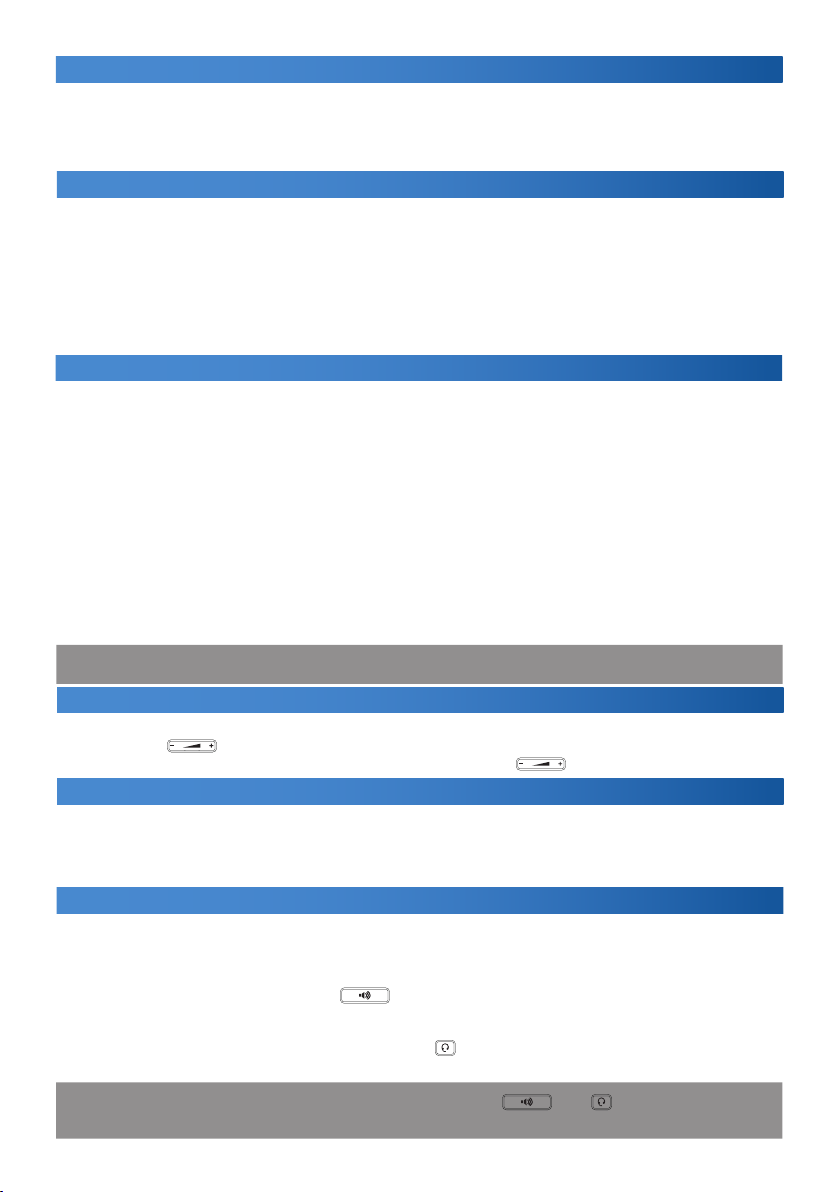
Volume Settings
• To set the call volume in the handset, speaker or headset, press during the call.
• To set the ring tone volume, press in the idle state.
Call History
1. Press the Historybutton in the idle state. Choose one of the Missed, Outgoing,
Received or Forwarded Calls options. You can browse through the list.
2. Select a list item to make further operations:
• Press the number dialing contact button.
• Press the pencilsymbol at a contact and the recycle bin symbol to delete an item
from the list.
• Select Call to dial a call.
• Select Add to add a number to the phonebook.
• Select Blacklist to add a number to the Blacklist
Ring Tones
1. In the idle state, make the selection using the menu:
Basic Settings >Sounds >Ring Tones >General.
2. Press a ring tone to select it.
3. Press OK in the right-hand upper corner for confirmation.

5
Call Answering
Using the handset:
Pick up the handset.
Using the speakerphone:
Press the button.
Using a headset:
Press the button.
Note: Press Reject to reject a call.
End of Call
Using the handset:
Hang up the handset or press End Call.
Using the speakerphone:
Press or End Call.
Using a headset:
Press End Call.
Redial – Last Call Redial
• Press to enter the list of Outgoing calls, then click the contact to select the required number or press .
• In the idle state, press twice to redial the last called number.
Call Mute and Mute Cancel
• Press during a call to turn o the microphone.
• Press again to cancel mute.
Call Hold and Release
Call Setup during Hold: Press or the Hold button during a call.
To continue a call, perform the following: If just one call is being held, press or the Continue button.
Call Transfer
Transfer without consult (blind)
1. Press or the Transfer button during a call. The call will be held.
2. Select the number to which the call is to be transferred.
3. Press or the Transfer button.
Transfer with consult
1. Press or the Transfer button during a call. The call will be held.
2. Select the number to which the call is to be transferred and press #SEND.
3. Press or the Transfer button.
Call Setup
Using the handset:
1. Pick up the handset.
2. Dial a number and press Call.
Using the speakerphone:
1. Press in the idle state.
2. Dial a number and press Call.
Using a headset:
1. Connect the headset and press to activate the headset call.
2. Dial a number and press Call.
Note: The modes can also be switched during calls by pressing or by picking the handset.

6
Speed Dial
To configure the speed dial buttons:
1. Press the Call button in the idle state and then click the DSS key button found via the menu: Settings > Properties
> DDS Keys. All of the 27 configurable buttons can be seen here.
2. Select the required DSS key and move to the Modify option to open the key configuration.
3. Select Speed dial from the Type field, select an account from the Account field and enter a number into
the Value field.
4. Press OK in the right-hand upper corner for confirmation.
Device Parameters
Dimensions: 259.4 x 220 x 215 mm
Weight: 1275 g
Temperature range for proper operation: 0–40 °C
Relative humidity: 10–95 %
Obsah balení
IP telefon telefonní sluchátko kabel ke sluchátku ethernetový kabel (2 m) návod ke snadné
obsluze
stojánek držák na stěnu napájecí adaptér CAM50 kamera
VOLITELNÉ - NENÍ SOUČÁSTÍ BALENÍ
CZ
Call Forwarding
To turn on call forwarding:
• Press in the idle state.
To turn on call forwarding:
1. Settings > Properties > Forwarding.
2. Select the required forwarding type.
Always – incoming calls are always forwarded.
On busy – incoming calls are forwarded when the line is busy.
On no answer – incoming calls are forwarded when not answered within a timeout.
a) Enter the number for forwarding. Select the ringing time for On no answer before forwarding.
b) Press OK in the right-hand upper corner for confirmation.
Conference Call
1. Press the Conference button during a call. The call will be held.
2. Select the other user or select a phonebook contact and press the Conference button.
3. Once the other user answers, press the Conference button again. Now all the users are parties to the conference.
4. Hang up the handset to disconnect all the participants.

7
Základní funkce IP telefonu
Zprovoznění zařízení
Pro zprovoznění přístroje je potřeba provést:
• zapojení IP telefonu (připojení kabeláže a napájení)
• 2N® IP Phone D7A – vložení kamery
• základní nastavení IP telefonu (uložení konfiguračních údajů obdržených od vašeho IP poskytovatele do
systémové paměti telefonu)
• nastavení češtiny: Menu > Basic > Language > Česky
Vložení kamery
PC Internet DC5V
PC Internet DC5V
nastavení
přepínače clony
nastavení úhlu kamery
10. LED indikátor kamery
11. Kamera
12. Power LED senzor
13. Dotykový displej
14. Tlačítko nahlávka
15. Tlačítko ztlumení
16. Tlačítko REDIAL
17. Tlačítko reproduktor
18. USB 2.0 na zadní straně telefonu
1. Přepínač clony
2. Čočka kamery
3. Vidlicový spínač – úchytka
4. Reproduktor
5. Tlačítko přepojení
6. Tlačítko přidržení
7. Tlačítko ZPRÁVA
8. Tlačítko HLASITOST
9. Číselník
3
Zapojení zařízení
1. Telefon lze k internetu připojit buď ethernetovým kabelem, nebo bezdrátově pomocí Wi-Fi.
a) Ethernetovým kabelem propojte zdířku “Internet” na IP telefonu s vaší počítačovou sítí přímo k
zařízení zajišťujícímu připojení k internetu (modem/router, kabelový modem, Wi-Fi).
b) Pomocí Wi-Fi – po připojení telefonu k napájecímu adaptéru a zapnutí telefonu propojte zdířku “PC”
na zadní straně IP telefonu s počítačem. Počítač tak bude přes IP telefon opět připojen k internetu. V
případě zapojení více počítačů můžete mezi počítačem a telefonem použít ještě externí switch nebo HUB.
2. Napájecí zdroj – adaptér připojte do telefonu konektorem do zdířky DC5V na zadní straně telefonu..
3. Automaticky proběhne inicializace IP telefonu. Je třeba provést základní nastavení telefonu pomocí údajů od
operátora. Pokud je v síti DHCP server, telefon získá IP adresu automaticky ze serveru. Pokud není přítomen nebo
není aktivní, je potřeba na telefonu nastavit statickou IP adresu, a to následovně přes menu v telefonu: Nastavení >
Pokročilé nastavení (možné po zadání hesla) > Síť > WAN port > IPv4. Po zadání IP adresy, masky podsítě, výchozí
brány a DNS serveru potvrďte OK v pravém horním rohu.
Přesto doporučujeme provést základní nastavení IP telefonu pomocí web managmentu.
Upozornění
Nikdy nekombinujte napájení napájecího zdroje a napájení PoE současně! Může dojít k poškození
přístroje.

8
Nastavení administrace přes webové rozhraní
IP telefon je nastaven standardně tak, aby přijal IP adresu z DHCP serveru z vaší sítě. Aktuální IP adresu lze zjistit
jednoduše přes menu telefonu: Nastavení > Stav > Síť > Ipv4 stav. IP adresu zadejte do webového prohlížeče.
Počítač i telefon musí být připojeny do stejné lokální sítě. Výchozí uživatelské jméno je „admin“ a heslo je „2n“. Po
prvním přihlášení budete z bezpečnostních důvodů vyzváni ke změně výchozího hesla.
Adresář
Přidání tel. kontaktu:
1. Při nečinnosti stiskněte tlačítko Adresář a vyberte požadovanou skupinu.
2. Stiskněte tlačítko + pro přidání nového kontaktu.
3. Do políčka Jméno zadejte unikátní jméno a do patřičných políček pak telefonní číslo.
4. Pro uložení změn potvrďte tlačítkem OK v pravém horním rohu.
Úprava tel. kontaktu:
1. Při nečinnosti stiskněte tlačítko Adresář a vyberte požadovanou skupinu.
2. Vyberte požadovaný kontakt stisknutím symbolu tužky.
3. Upravte telefonní kontakt.
4. Pro uložení změn potvrďte tlačítkem OK v pravém horním rohu.
Smazání tel. kontaktu:
1. Při nečinnosti stiskněte tlačítko Adresář a vyberte požadovanou skupinu.
2. Vyberte požadovaný kontakt stisknutím symbolu tužky, označte vybraný kontakt a stiskněte symbol koše.
3. Tlačítkem OK potvrďte smazání vybraného kontaktu.
Poznámka: Můžete jednoduše přidávat kontakty i z výpisu historie volání. Viz výše Historie volání.
Historie volání
1. Ve stavu nečinnosti stiskněte tlačítko Historie. Pak je možné volit z kategorií Zmeškané, Odchozí
hovory, Přijaté nebo Přesměrované hovory. V seznamu je možné listovat.
2. Vybráním položky ze seznamu lze provádět další operace:
• Stiskněte příslušné tlačítko kontaktu pro vytočení hovoru.
• Stiskněte symbol tužky u příslušného kontaktu a symbol koše pro vymazání položky ze seznamu.
• Vyberte Volat pro vytočení hovoru.
• Vyberte Přidat pro přidání čísla do telefonního seznamu.
• Vyberte Zakázaná čísla pro přidání čísla do zakázaných čísel.
Nastavení hlasitosti
• Nastavení hlasitosti hovoru ve sluchátku, reproduktoru nebo náhlavní soupravy: během hovoru
stiskněte tlačítko .
• Nastavení hlasitosti vyzvánění: při nečinnosti telefonu stiskněte tlačítko .
Vyzváněcí tóny
1. Při nečinnosti vyberte přes menu:
Základní nastavení > Zvuky > Vyzváněcí tóny > Obecný.
2. Výběr uskutečníte stiskem na tón.
3. Pro uložení výběru potvrďte tlačítkem OK v pravém horním rohu.
Uskutečnění hovoru
S použitím sluchátka:
1. Zvedněte sluchátko.
2. Zvolte volané číslo a stiskněte tlačítko Volat.
S použitím reproduktoru:
1. Při nečinnosti stiskněte tlačítko .
2. Zvolte volané číslo a stiskněte tlačítko Volat.
S použitím náhlavní soupravy:
1. Připojte náhlavní soupravu a stiskněte tlačítko pro aktivaci hovoru s náhlavní soupravou.
2. Zvolte volané číslo a stiskněte tlačítko Volat.
Poznámka: Režimy lze přepínat i během hovoru pomocí tlačítek nebo, případně
zvednutím sluchátka.

9
Přijetí hovoru
S použitím sluchátka:
Zvedněte sluchátko.
S použitím reproduktoru:
Stiskněte tlačítko .
S použitím náhlavní soupravy:
Stiskněte tlačítko .
Poznámka: Hovor může být odmítnut pomocí tlačítka Odmítnout.
Ukončení hovoru
S použitím sluchátka:
Zavěste sluchátko nebo stiskněte tlačítko Konec hovoru.
S použitím reproduktoru:
Stiskněte tlačítko nebo Konec hovoru.
S použitím náhlavní soupravy:
Stiskněte tlačítko Konec hovoru.
Redial – vytáčení poslední volaného čísla
• Stiskněte tlačítko pro vstup do seznamu Odchozích hovorů, pak stisknutím na kontakt vyberte požadované
číslo nebo stiskněte tlačítko .
• Při nečinnosti stiskněte dvakrát tlačítko po vytočení posledního volaného čísla.
Ztišení hovoru a zrušení ztišení
• Během hovoru stiskněte tlačítko pro vypnutí mikrofonu.
• Stiskněte tlačítko znovu pro zrušení ztišení.
Přidržení hovoru a pokračování hovoru
Uskutečnění nového hovoru během přidržení: Během hovoru stiskněte tlačítko nebo tlačítko Podržet.
Pro pokračování hovoru je třeba provést následující:
Pokud je přidržený pouze jeden hovor, stiskněte tlačítko nebo tlačítko Pokračovat.
Přepojení hovoru
Přepojení bez konzultace (naslepo)
1. Během hovoru stiskněte tlačítko nebo tlačítko Přepojit. Hovor bude přidržen.
2. Zvolte číslo, na které chcete hovor přesměrovat.
3. Stiskněte tlačítko nebo tlačítko Přepojit.
Přepojení s konzultací
1. Během hovoru stiskněte tlačítko nebo tlačítko Přepojit. Hovor bude přidržen.
2. Zvolte číslo, na které chcete hovor přesměrovat, a stiskněte tlačítko #SEND.
3. Stiskněte tlačítko nebo tlačítko Přepojit.
Přesměrování hovoru
Zapnutí přesměrování hovorů:
• Při nečinnosti stiskem tlačítka .
Zapnutí přesměrování hovorů:
1. Nastavení > Vlastnosti > Přesměrování.
2. Vyberte požadovaný typ přesměrování:
Vždy – Příchozí hovory jsou přesměrovány vždy.
Při obsazeno – Příchozí hovory jsou přesměrovány, pokud je obsazeno.
Při nedostupnosti – Příchozí hovory jsou přesměrovány, pokud nikdo na hovor neodpoví po zadaném
časovém intervalu.
a) Zadejte číslo pro přesměrování. Pro položku Při nedostupnosti ještě zvolte délku zvonění
před přesměrováním.
b) Pro uložení změn potvrďte tlačítkem OK v pravém horním rohu.

10
Rychlá volba
Konfigurace tlačítek rychlé volby:
1. Při nečinnosti stiskněte tlačítko Volat a poté stiskněte tlačítko DSS klávesy, které najdete přes menu: Nastavení >
Vlastnosti > DSS klávesy. Zde lze vidět všech 27 konfigurovatelných tlačítek.
2. Vyberte požadovanou DSS klávesu a poté se přesuňte na volbu Upravit. Ta tak vyvolá konfiguraci klávesy.
3. Z políčka Typ vyberte položku Rychlá volba, vyberte požadovaný účet z pole Účet a v poli Hodnota zadejte číslo.
4. Pro uložení změn potvrďte tlačítkem OK v pravém horním rohu.
Použití tlačítek rychlé volby:
Stiskněte tlačítko rychlé volby pro vytočení požadovaného čísla.
Parametry zařízení
Rozměry: 259.4 x 220 x 215 mm
Hmotnost: 1275 g
Teplotní rozmezí pro správné fungování IP telefonu: 0–40 °C
Vlhkost: 10–95 %
Konferenční hovor
1. Během hovoru stiskněte tlačítko Konference. Hovor bude přidržen.
2. Zvolte dalšího účastníka nebo vyberte kontakt z adresáře a stiskněte tlačítko Konference.
3. Po odpovědi druhé strany stiskněte znovu tlačítko Konference. Všechny strany jsou nyní součástí konference.
4. Pro odpojení všech účastníků zavěste sluchátko.
Lieferumfang
IP-Telefon Telefonhörer Kabel zum Hörer Ethernet-Kabel (2 m)
Einfache
Bedienungsanleitung
Ständer Ladeadapter Wandhalterung Kamera CAM50
WAHLWEISE – NICHT ENTHALTEN
DE
Einsetzen der Kamera
PC Internet DC5V
PC Internet DC5V
Einstellung des Umschalters
der Blendes
Einstellung des Kamerawinkels

11
Anschluss der Kabel
Grundlegende Funktionen des IP-Telefons
10. LED-Anzeige der Kamera
11. Kamera
12. Power LED-Sensor
13. Touchscreen
14. Taste für das Headset
15. Taste für das Stummschalten
16. Taste WAHLWIEDERHOLUNG
17. Taste für den Lautsprecher
18. USB 2.0 an der Rückseite des Telefons
1. Umschalter der Blende
2. Linse der Kamera
3. Gabelschalter – Halterung
4. Lautsprecher
5. Taste für das Verbinden
6. Taste für das Halten
7. Taste NACHRICHT
8. Taste LAUTSTÄRKE
9. Nummernfeld
3
Inbetriebnahme des Geräts
Für die Inbetriebnahme müssen Sie:
• das IP-Telefon anschließen (Verkabelung und Stromanschluss),
• 2N® IP Phone D7A – die Kamera einstecken,
• die Grundeinstellung des IP-Telefons durchführen (Speichern der Konfigurationsdaten, die Sie von Ihrem
IP-Anbieter im Systemspeicher des Telefons erhalten haben)
• Einstellung der Sprache: Menu > Basic > Language > Deutsch
Anschluss des Geräts
1. Das Telefon kann entweder per Ethernet-Kabel oder kabellos mittels Wi-Fi ans Internet angeschlossen werden.
a) Ein Ende des Ethernet-Kabels verbinden sie mit der Buchse „Internet“ am IP-Telefon, und das andere
Ende verbinden Sie mit Ihrem Computernetz, indem sie es direkt in das Gerät stecken, das den
Internetanschluss sicherstellt (Modem/Router, Kabelmodem, Wi-Fi).
b) Mittels Wi-Fi – nach dem Anschluss des Telefons an den Netzadapter und dem Einschalten des
Telefons verbinden Sie die Buchse „PC“ an der Rückseite des IP-Telefons mit dem Computer. Der Computer wird so
über das IP-Telefon wieder mit dem Internet verbunden. Beim Anschluss mehrerer Computer können Sie zwischen
dem Computer und dem Telefon noch einen externen Switch oder HUB verwenden.
2. Stromquelle – schließen Sie den Adapter mit dem Stecker in der Buchse DC5V an der Rückseite des Telefons an.
Hinweis:
Verwenden Sie niemals die Versorgung über Stromanschluss und die Stromversorgung über
Ethernet (PoE) gleichzeitig! Es kann zur Beschädigung des Geräts kommen.

12
Einstellung der Administration über die Webschnittstelle
Das IP-Telefon ist grundsätzlich so eingestellt, dass es die IP-Adresse vom DHCP-Server aus Ihrem Netz übernimmt.
Die aktuelle IP-Adresse können Sie einfach über das Menü des Telefons feststellen: Einstellungen > Status> Netz
> Ipv4 Status. Geben Sie die IP-Adresse in den Webbrowser ein. Computer und Telefon müssen mit dem gleichen
lokalen Netz verbunden sein. Der voreingestellte Benutzername ist „admin“ und das Passwort ist „2n“. Nach der
ersten Anmeldung werden Sie aus Sicherheitsgründen zur Änderung des ursprünglichen Passworts aufgefordert.
3. Die Initialisierung des IP-Telefons erfolgt automatisch. Die Grundeinstellungen des Telefons müssen mittels der
Daten vom Netzanbieter durchgeführt werden.
Wenn ein DHCP-Server im Netz ist, erhält das Telefon die IP-Adresse automatisch vom Server. Wenn er nicht
vorhanden oder nicht aktiv ist, muss auf dem Telefon eine statische IP-Adresse eingestellt werden, und zwar wie
folgt über das Menü im Telefon: Einstellungen > Erweiterte Einstellungen (möglich nach Eingabe des Passworts)
> Netz > WAN Port > IPv4. Nach der Eingabe der IP-Adresse, der Subnetz-Maske, des Standardgateways und des
DNS Servers bestätigen Sie mit OK in der rechten oberen Ecke. Dennoch empfehlen wir, die Grundeinstellungen des
IP-Telefons mithilfe des Web-Managements durchzuführen.
Telefonbuch
Hinzufügen eines Kontakts:
1. Drücken Sie im Ruhezustand die Taste Telefonbuch und wählen Sie die gewünschte Gruppe aus.
2. Drücken Sie die Taste +, um einen neuen Kontakt hinzuzufügen.
3. In das Feld Name geben Sie einen einzigartigen Namen und in die entsprechenden Felder dann die
Telefonnummer ein.
4. Um die Änderungen zu speichern, bestätigen Sie mit der Taste OK in der rechten oberen Ecke.
Änderung eines Kontakts:
1. Drücken Sie im Ruhezustand die Taste Telefonbuch und wählen Sie die gewünschte Gruppe aus.
2. Wählen Sie den betreenden Kontakt aus, indem Sie auf das Symbol des Stiftes drücken.
3. Ändern Sie den Kontakt.
4. Um die Änderungen zu speichern, bestätigen Sie mit der Taste OK in der rechten oberen Ecke.
Löschen des Telefonkontakts:
1. Drücken Sie im Ruhezustand die Taste Telefonbuch und wählen Sie die gewünschte Gruppe aus.
2. Wählen Sie den betreenden Kontakt aus, indem Sie auf das Symbol des Stiftes drücken, kennzeichnen
Sie den gewählten Kontakt und drücken Sie auf das Symbol des Papierkorbs.
3. Bestätigen Sie durch die Taste OK das Löschen des ausgewählten Kontakts.
Note: Sie können auch Kontakte aus der Anrufliste ganz einfach hinzufügen. Siehe oben Anrufliste.
Einstellen der Lautstärke
• Einstellen der Gesprächslautstärke im Hörer, im Lautsprecher oder im Headset: drücken Sie während des
Gesprächs die Taste .
• Einstellen der Lautstärke des Klingeltons: drücken Sie im Ruhezustand des Telefons die Taste .
Anrufliste
1. Drücken Sie im Ruhzustand des Telefons auf die Taste Anruferliste. Dann können Sie aus den Kategorien Verpasste,
Ausgehende, Eingehende oder Weitergeleitete Anrufe auswählen. Sie können im Verzeichnis blättern.
2. Nach der Auswahl einer konkreten Zeile im Verzeichnis haben Sie folgende Möglichkeiten:
• Drücken Sie die entsprechende Taste des Kontakts, um die Nummer zu wählen.
• Drücken Sie das Symbol des Stiftes beim betreenden Kontakt und das Symbol des Papierkorbs, um
den Kontakt aus dem Verzeichnis zu löschen.
• Drücken Sie auf Anrufen, um die Nummer zu wählen.
• Drücken Sie auf Hinzufügen, um die Nummer im Telefonbuch zu speichern.
• Drücken Sie Blockierte Nummern, um die Nummer zu sperren.
Klingeltöne
1. Sie wählen die Töne im Ruhezustand des Telefons über das Menü aus:
Grundeinstellungen > Töne > Klingeltöne > Allgemein.
2. Die Auswahl führen Sie durch Drücken auf den Ton durch.
3. Bestätigen Sie die Auswahl durch die Taste OK in der rechten oberen Ecke.

13
Annahme eines Anrufs
Mit Verwendung des Hörers:
Heben Sie den Hörer ab.
Mit Verwendung des Lautsprechers:
Drücken Sie die Taste .
Mit Verwendung des Headsets:
Drücken Sie die Taste .
Anmerkung: Sie können ein Gespräch mithilfe der Taste Ablehnen abweisen.
Beendigung des Gespräches
Mit Verwendung des Hörers:
Legen Sie den Hörer auf oder drücken Sie die Taste Gespräch beenden.
Mit Verwendung des Lautsprechers:
Drücken Sie die Taste oder Gespräch beenden.
Mit Verwendung des Headsets:
Drücken Sie die Taste Gespräch beenden.
Wahlwiederholung – Wahl der zuletzt angerufenen Nummer
• Drücken Sie die Taste , um in das Verzeichnis der Ausgehenden Gespräche zu gelangen, dann wählen Sie durch
Drücken auf den Kontakt die gewünschte Nummer aus oder drücken die Taste .
• Drücken Sie im Ruhezustand des Telefons zweimal die Taste , um die zuletzt angerufene Nummer zu wählen.
Stummschalten des Gesprächs und Aufheben der Stummschaltung
• Drücken Sie während des Gesprächs die Taste , um das Mikrofon auszuschalten.
• Drücken Sie erneut die Taste , um die Stummschaltung aufzuheben.
Halten und Fortsetzen des Gesprächs
Führen eines anderen Gesprächs während des Haltens:
Drücken Sie während des Gesprächs die Taste oder die Taste Halten.
Um das Gespräch fortzusetzen, müssen Sie Folgendes tun:
Wenn nur ein Gespräch gehalten wird, drücken Sie die Taste oder die Taste Fortsetzen.
Weiterleiten eines Gesprächs
Weiterleiten ohne Anfrage (blind)
1. Drücken Sie während des Gesprächs die Taste oder die Taste Weiterleiten. Das Gespräch wird gehalten.
2. Wählen Sie die Nummer, an die Sie das Gespräch weiterleiten wollen.
3. Drücken Sie die Taste oder die Taste Weiterleiten.
Weiterleiten mit Anfrage
1. Drücken Sie während des Gesprächs die Taste oder die Taste Weiterleiten.
Das Gespräch wird gehalten.
2. Wählen Sie die Nummer, an die Sie das Gespräch weiterleiten wollen und drücken Sie die Taste #SEND.
3. Drücken Sie die Taste oder die Taste Weiterleiten.
Einen Anruf tätigen
Mit Verwendung des Hörers:
1. Heben Sie den Hörer ab.
2. Wählen Sie die gewünschte Nummer und drücken Sie auf die Taste Anrufen.
Mit Verwendung des Lautsprechers:
1. Drücken Sie im Ruhezustand die Taste .
2. Wählen Sie die gewünschte Nummer und drücken Sie auf die Taste Anrufen.
Mit Verwendung des Headsets:
1. Schließen Sie das Headset an und drücken Sie die Taste , um das Gespräch mit dem Headset zu aktivieren.
2. Wählen Sie die gewünschte Nummer und drücken Sie auf die Taste Anrufen.
Anmerkung: Die Modi können auch während des Gesprächs mittels der Tasten oder ggf. durch
Abheben des Hörers umgeschaltet werden.

14
Kurzwahl
Konfiguration der Schnellwahltasten:
1. Drücken Sie bei Untätigkeit die Taste Anrufen und danach die Taste DSS Tasten, die Sie über das Menü finden:
Einstellungen > Eigenschaften > DSS Tasten. Hier sind alle 27 Konfigurationstasten zu sehen.
2. Wählen Sie die gewünschte DSS Taste aus und gehen Sie dann auf die Wahl Ändern. Auf diese Weise rufen Sie die
Konfiguration der Taste auf.
3. Im Feld Typ wählen Sie Schnellwahl aus, im Feld Konto wählen Sie das gewünschte Konto aus und im Feld Wert
geben Sie die Nummer ein.
4. Um die Änderungen zu speichern, bestätigen Sie mit der Taste OK in der rechten oberen Ecke.
Gebrauch der Schnellwahltasten:
Drücken Sie die Schnellwahltaste, um die gewünschte Nummer zu wählen.
Parameter des Geräts
Abmessungen: 259.4 x 220 x 215 mm
*Gewicht: 1275 g
Temperaturspanne für das richtige Funktionieren des IP-Telefons: 0 – 40 °C
Feuchtigkeit: 10 – 95 %
Weiterleiten eines Gesprächs
Einschalten der Gesprächsweiterleitung:
• Im Ruhezustand durch Drücken der Taste .
Einschalten der Gesprächsweiterleitung:
1. Einstellungen > Eigenschaften > Weiterleiten.
2. Wählen Sie die gewünschte Art der Weiterleitung aus:
Immer – Eingehende Gespräche werden immer weitergeleitet.
Besetztzeichen – Eingehende Gespräche werden weitergeleitet, wenn besetzt ist.
Nichterreichbarkeit – Eingehende Gespräche werden weitergeleitet, wenn nach dem festgelegten
Zeitintervall niemand abhebt.
a) Geben Sie die Nummer für die Weiterleitung ein. Für den Modus Nichterreichbarkeit wählen Sie noch die Länge
des Klingelns vor der Weiterleitung aus.
b) Um die Änderungen zu speichern, bestätigen Sie mit der Taste OK in der rechten oberen Ecke.
Konferenzgespräch
1. Drücken Sie während das Gesprächs die Taste Konferenz. Das Gespräch wird gehalten.
2. Wählen Sie einen weiteren Gesprächsteilnehmer oder wählen Sie einen Kontakt aus dem Telefonbuch aus und
drücken Sie die Taste Konferenz.
3. Nach der Antwort der anderen Seite drücken Sie erneut die Taste Konferenz. Alle Seiten sind jetzt Teilnehmer
der Konferenz.
4. Legen Sie den Hörer auf, um die Konferenz für alle Teilnehmer zu beenden.
Contenu de l’emballage
Téléphone IP Écouteur Câble de combiné Câble ethernet (2 m) Guide d’utilisation
facile
Support de téléphone
Support de,
fixation murale
adaptateur
d’alimentation CAM50 caméra
EN OPTION, NON INCLUS DANS L’EMBALLAGE
FR

10. Témoin LED de la caméra
11. Caméra
12. Détecteur LED de puissance
13. Écran tactile
14. Bouton d’annonce
15. Bouton de sourdine
16. Bouton REDIAL
17. Bouton haut-parleur
18. USB 2.0 à l’arrière du téléphone
1. Commutateur d’ouverture
2. Objectif de la caméra
3. Interrupteur à fourche – poignée
4. Haut-parleur
5. Bouton de reconnexion
6. Bouton de mise en attente
7. Bouton MESSAGE
8. Bouton VOLUME
9. Cadran
3
Insérer une caméra
PC Internet DC5V
PC Internet DC5V
Réglage du commutateur
d’ouverture
Réglage de l’angle de la caméra
Fonctions de base du téléphone IP
Branchement des câbles
Mise en marche de l’appareil
Pour mettre l’appareil en marche, il convient de :
• Connecter le téléphone IP (connexion du câblage et de l’alimentation)
• 2N® IP Phone D7A - insertion de la caméra
• configuration de base du téléphone IP (stockage des données de configuration reçues de votre
fournisseur IP dans la mémoire système du téléphone)
• configuration de la langue: Menu > Basic > Language > Français
15

16
Connexion de l’appareil
1. Le téléphone peut être connecté à Internet soit par un câble Ethernet, soit sans fil par Wi-Fi.
a) Utilisez un câble Ethernet pour connecter la prise « Internet » du téléphone IP à votre réseau
informatique, directement au dispositif fournissant la connexion Internet (modem/routeur, modem câble, Wi-Fi).
b) En utilisant le Wi-Fi - Après avoir branché le téléphone à l’adaptateur d’alimentation et l’avoir allumé, connectez la
prise « PC » qui se trouve à l’arrière du téléphone IP à votre ordinateur. L’ordinateur sera alors à nouveau connecté à
Internet via le téléphone IP. Si plusieurs ordinateurs sont connectés, vous pouvez également utiliser un commutateur
externe ou un HUB entre l’ordinateur et le téléphone.
2. Connectez l’adaptateur – la source d’alimentation au téléphone à l’aide du connecteur DC5V situé à l’arrière du
téléphone.
Paramètres d’administration via l’interface web
Par défaut, le téléphone IP est configuré de manière à recevoir une adresse IP d’un serveur DHCP sur votre réseau.
L’adresse IP actuelle peut être trouvée simplement via le menu du téléphone: Paramètres > Etat > Réseau > État
Ipv4. Saisissez l’adresse IP dans votre navigateur Web. L’ordinateur et le téléphone doivent être connectés au même
réseau local. Le nom d’utilisateur par défaut est « admin » et le mot de passe « 2n ». Après la première connexion,
vous serez invité à changer votre mot de passe par défaut pour des raisons de sécurité.
3. Le téléphone IP est automatiquement initialisé. Il convient d’eectuer les réglages de base du téléphone en utilisant
les données de l’opérateur. Si un serveur DHCP se trouve sur le réseau, le téléphone obtiendra automatiquement
l’adresse IP à partir du serveur. Si elle n’est pas présente ou n’est pas active, vous devez définir une adresse IP
statique sur le téléphone, et ce comme suit via le menu du téléphone : Paramètres > Paramètres avancés (possible
après avoir saisi le mot de passe) > Réseau > Port WAN > IPv4. Après avoir saisi l’adresse IP, le masque de sous-
réseau, la passerelle par défaut et le serveur DNS, confirmez OK dans le coin en haut à droite. Cependant, nous
recommandons d’eectuer la configuration de base du téléphone IP en utilisant la gestion Web.
Avertissement:
Ne jamais combiner l’alimentation électrique et l’alimentation PoE en même temps ! L’appareil
risque d’être endommagé.
Répertoire
Ajout d’un contact téléphonique:
1. En mode veille, appuyez sur le bouton Répertoire et sélectionnez le groupe souhaité.
2. Appuyez sur le bouton + pour ajouter un nouveau contact.
3. Saisissez un nom unique dans le champ Nom et un numéro de téléphone dans les champs appropriés.
4. Pour enregistrer les modifications, confirmez avec le bouton OK dans le coin en haut à droite.
Modification d’un contact téléphonique:
1. En mode veille, appuyez sur le bouton Répertoire et sélectionnez le groupe souhaité.
2. Sélectionnez le contact souhaité en appuyant sur le symbole du crayon.
3. Modifiez le contact téléphonique.
4. Pour enregistrer les modifications, confirmez avec le bouton OK dans le coin en haut à droite.
Suppression d’un contact téléphonique:
1. En mode veille, appuyez sur le bouton Répertoire et sélectionnez le groupe souhaité.
2. Sélectionnez le contact souhaité en appuyant sur le symbole du crayon, mettez en surbrillance le
contact sélectionné et appuyez sur le symbole de la corbeille.
3. Appuyez sur le bouton OK pour confirmer la suppression du contact sélectionné.
Historique des appels
1. A l’état de veille, appuyez sur le bouton Historique. Il est ensuite possible de choisir parmi les catégories
Appels manqués, Appels sortants, Appels reçus ou Appels transférés. Il est possible de faire défiler la liste.
2. Il est possible d’eectuer d’autres opérations en sélectionnant un élément de la liste:
• Appuyez sur le bouton de contact correspondant pour composer un appel.
• Appuyez sur le symbole du crayon à côté du contact et sur le symbole de la corbeille pour supprimer
un élément de la liste.
• Sélectionnez Appeler pour composer un appel.
• Sélectionnez Ajouter pour ajouter un numéro au répertoire.
• Sélectionnez Numéros interdits pour ajouter un numéro aux numéros interdits.

17
Note: Vous pouvez ajouter facilement des contacts aussi à partir de la liste de l’historique des
appels. Cf. l’Historique des appels ci-dessus.
Réglages du volume
• Pour régler le volume de l’appel dans le combiné, le haut-parleur ou le casque: appuyez sur le bouton pendant
l’appel.
• Pour régler le volume de la sonnerie: appuyez sur lorsque le téléphone est en veille.
Sonneries
1. En mode veille, sélectionnez via le menu :
Paramètres de base > Sons > Sonneries > Général.
2. Pour eectuer une sélection, appuyez sur la tonalité.
3. Pour enregistrer votre sélection, confirmez avec le bouton OK dans le coin en haut à droite.
Passer un appel
En utilisant le combiné :
1. Décrochez le combiné.
2. Sélectionnez le numéro que vous souhaitez appeler et appuyez sur le bouton Appel.
En utilisant le haut-parleur :
1. Appuyez sur le bouton en mode veille.
2. Sélectionnez le numéro que vous souhaitez appeler et appuyez sur le bouton Appel.
En utilisant un micro-casque :
1. Connectez le micro-casque et appuyez sur pour activer l’appel avec le micro-casque.
2. Sélectionnez le numéro que vous souhaitez appeler et appuyez sur le bouton Appel.
Note: Les modes peuvent également être changés pendant un appel à l’aide des boutons ou, ou en
décrochant le combiné.
Réponse aux appels
En utilisant le combiné:
Décrochez le combiné.
En utilisant le haut-parleur:
Appuyez sur le bouton .
En utilisant un micro-casque:
Appuyez sur le bouton .
Note: Un appel peut être refusé à l’aide du bouton Refuser.
Appel raccroché
En utilisant le combiné :
Raccrochez le combiné ou appuyez sur le bouton Fin d’appel.
En utilisant le haut-parleur:
Appuyez sur le bouton ou sur Fin d’appel.
En utilisant un micro-casque:
Appuyez sur le bouton Fin d’appel.
Redial – recomposer le dernier numéro composé
• Appuyez sur le bouton pour accéder à la liste des Appels sortants, puis appuyez sur le contact pour sélectionner
le numéro souhaité ou appuyez sur le bouton .
• En mode veille, appuyez deux fois sur le bouton après avoir composé le dernier numéro composé.
Mettre un appel en sourdine et annuler une mise en sourdine
• Pendant l’appel, appuyez sur le bouton pour désactiver le microphone.
• Appuyez à nouveau sur le bouton pour annuler la mise en sourdine.

18
Mettre un appel en attente et reprendre un appel
Passer un nouvel appel pendant une mise en attente:
Pendant l’appel, appuyez sur le bouton ou sur le bouton Mettre en attente.
Pour poursuivre l’appel, il convient de procéder comme suit:
Si un seul appel est en attente, appuyez sur le bouton ou sur le bouton Continuer.
Commuter un appel
Commutation sans consultation (en aveugle)
1. Pendant l’appel, appuyez sur le bouton ou sur le bouton Commuter. L‘appel sera mis en attente.
2. Sélectionnez le numéro vers lequel vous souhaitez transférer l’appel.
3. Appuyez sur le bouton ou sur le bouton Commuter.
Commuter avec consultation
1. Pendant l’appel, appuyez sur le bouton ou sur le bouton Commuter. L‘appel sera mis en attente.
2. Sélectionnez le numéro vers lequel vous souhaitez transférer l’appel et appuyez sur la touche #SEND.
3. Appuyez sur le bouton ou sur le bouton Commuter.
Transférer un appel
Activer le transfert d’appels:
En mode veille, appuyez sur le bouton .
Activer le transfert d’appels:
1. Paramètres > Propriétés > Transférer.
2. Sélectionnez le type de transfert souhaité:
Toujours - Les appels entrants sont toujours transférés.
Lorsque occupé - Les appels entrants sont transférés lorsque la ligne est occupée.
Indisponible - Les appels entrants sont transférés si personne ne répond à l’appel après un intervalle de
temps spécifié.
a) Entrez le numéro pour le transfert. Pour le poste Indisponible, sélectionnez encore la durée de la sonnerie avant
le transfert.
b) Pour enregistrer les modifications, confirmez avec le bouton OK dans le coin en haut à droite.
Numérotation abrégée
Configuration des boutons de numérotation rapide:
1. En mode veille, appuyez sur le bouton Appeler, puis sur le bouton Touches DSS qui se trouve dans le
menu: Réglages > Propriétés > Touches DSS Vous pouvez voir ici les 27 boutons configurables.
2. Sélectionnez la touche DSS souhaitée, puis passez à Modifier. Cela fait apparaître la configuration de
la touche.
3. Sélectionnez Numérotation rapide dans le champ Type, sélectionnez le compte souhaité dans le
champ Compte et entrez un nombre dans le champ Valeur.
4. Pour enregistrer les modifications, confirmez avec le bouton OK dans le coin en haut à droite.
Utilisation des boutons de numérotation rapide:
Appuyez sur le bouton de numérotation rapide pour composer le numéro souhaité.
Paramètres de l’appareil
Dimensions: 259.4 x 220 x 215 mm
Poids: 1275 g
Plage de températures pour un bon fonctionnement du téléphone IP : 0–40 °C
Humidité : 10–95 %
Téléconférence
1. Pendant l’appel, appuyez sur le bouton Conférence. L‘appel sera mis en attente.
2. Sélectionnez un autre participant ou sélectionnez un contact dans le carnet d’adresses et appuyez sur le bouton
Conférence.
3. Après la réponse du correspondant, appuyez à nouveau sur la touche Conférence. Toutes les parties font désormais
partie de la conférence.
4. Raccrochez le combiné pour déconnecter tous les participants.

19
Contenido del paquete
Teléfono IP Auricular
del teléfono Cable del auricular Cable de ethernet (2 m) Manual para un
manejo fácil
Soporte Soporte para
la pared
Adaptador
de alimentación Cámara CAM50
OPCIONAL - NO FORMA PARTE DEL PAQUETE
ES
Introducción de la cámara
PC Internet DC5V
PC Internet DC5V
Ajuste del conmutador del
diafragma
Ajuste del ángulo de la cámara
Funciones básicas del teléfono IP
11. Cámara
12. Sensor Power LED
13. Pantalla táctil
14. Botón de auriculares
15. Botón de bajadade volumen
16. Botón de REDIAL
17. Botón de reproductor
18. USB 2.0 en la parte posterior del teléfono
1. Conmutador del diafragma
2. Lente de la cámara
3. Interruptor de horquilla – enganche
4. Reproductor
5. Botón de desvío
6. Botón de espera
7. Botón de MENSAJE
8. Botón de VOLUMEN
9. Cuadrante numérico10. Indicador LED de la cámara
3

20
Puesta en operación del dispositivo
Para poder poner el dispositivo en operación hay que realizar lo siguiente:
• conectar el teléfono IP (conectar el cableado y la alimentación)
• 2N® IP Phone D7A – introducir la cámara
• realizar la configuración básica del teléfono IP (guardar los datos de configuración obtenidos
de su proveedor IP en la memoria de sistema del teléfono)
• configuración del idioma: Menu > Basic > Language > Español
Conexión de los cables
Conexión del dispositivo
1. El teléfono se puede conectar a Internet utilizando el cable de ethernet o de forma inalámbrica mediante Wi-Fi.
a) Con el cable de ethernet conecte la ranura “Internet” en el teléfono IP con su red informática
directamente al dispositivo que proporciona la conexión a Internet (módem/router, módem de cable, Wi-Fi).
b) Mediante Wi-Fi – tras conectar el teléfono al adaptador de alimentación y tras encender el teléfono
conecte la ranura “PC” en la parte posterior del teléfono IP con el ordenador. De esta manera el ordenador estará
de nuevo conectado a Internet a través del teléfono IP. En el caso de conexión de varios ordenadores podrá además
utilizar entre el ordenador y el teléfono un switch externo o HUB.
2. Fuente de alimentación – conecte el adaptador al teléfono mediante el conector introducido en la ranura DC5V
en la parte posterior del teléfono.
Aviso:
¡Jamás combine a la vez la alimentación de la fuente de alimentación y la alimentación PoE! El
aparato puede resultar dañado.
3. Se realizará la iniciación automática del teléfono IP. Hay que realizar la configuración básica del teléfono utilizando
los datos del operador. En el caso de que en la red se encuentre un servidor DHCP, el teléfono obtendrá la dirección
IP directamente del servidor. En el caso de que no lo haya, o esté inactivo, hay que configurar en el teléfono la
dirección IP estática en el menú del teléfono de la siguiente manera: Configuración > Configuración avanzada
(posible tras introducir la contraseña) > Red > puerto WAN > IPv4. Tras introducir la dirección IP, máscara de la sub-
red, portal inicial y servidor DNS confirme OK en la esquina superior derecha. Sin embargo, recomendamos realizar
la configuración básica del teléfono IP a través del management web.
Configuración de la administración a través de la interfaz de web
El teléfono IP está configurado de forma estándar de manera que pueda recibir la dirección IP desde el servidor
DHCP de su red. La dirección IP actual se puede averiguar de manera sencilla a través del menú del teléfono:
Configuración > Estado > Red > Estado Ipv4. Introduzca la dirección IP en su explorador de web. El ordenador y
el teléfono deben estar conectados a la misma red local. El nombre de usuario inicial es „admin“ y la contraseña es
„2n“. Tras el primer inicio de sesión se le pedirá, por razones de seguridad, el cambio de contraseña inicial.
Other manuals for D7A
1
This manual suits for next models
1
Table of contents
Languages:
Other 2N IP Phone manuals