®
3Doodler 2.0
WARNINGS & NOTICES
ENGLISH
BURN HAZARD. The nozzle of the
3Doodler and the adjoining rubber tip can
become extremely hot. DO NOT touch the
nozzle or the adjoining rubber tip, the parts
near the nozzle or the parts near the
adjoining rubber tip, or any melted
plastic/filament, or you may be severely
burned! DO NOT allow the nozzle or the
adjoining rubber tip near or in contact with
flammable materials. Inform others in the
area that the unit is hot and should not be
touched. Unplug and set the slide switch to
OFF when not in use or before storing. After
use, allow the nozzle and the adjoining
rubber tip to cool completely before storing.
The hot nozzle or adjoining rubber tip may
damage painted surfaces, plastics and cloth
if left in direct contact with these materials.
BURN HAZARD. The Cleaning Tool can
become extremely hot. DO NOT touch the
metal part of the Cleaning Tool after using it
to clean your 3Doodler, or you may be
severely burned!
If the 3Doodler is emitting black or brown
smoke, cease using the pen immediately,
unplug the pen, allow the pen to cool, and
then store it away safely. Failure to do so will
increase the risk of fire. Please contact us
immediately at cs@the3Doodler.com in such
circumstances.
ADULT USE ONLY. KEEP OUT OF REACH
OF CHILDREN.
WARNING
•
•
•
•
The 3Doodler should only be used with
3Doodler approved filaments or materials.
Misuse of your 3Doodler and/or use of
non-approved plastics, filaments or other
materials may result in damage to your pen
or injury to you, and will void your warranty.
Injuries to the user may include, but are not
limited to, harm sustained from inhaling
substances that are not suitable for heating,
or burns from flammable materials used in
the 3Doodler.
WARNING: DO NOT use the 3Doodler near
bathtubs, showers, basins or other vessels
containing water. This could result in death
due to electric shock.
NOTICE
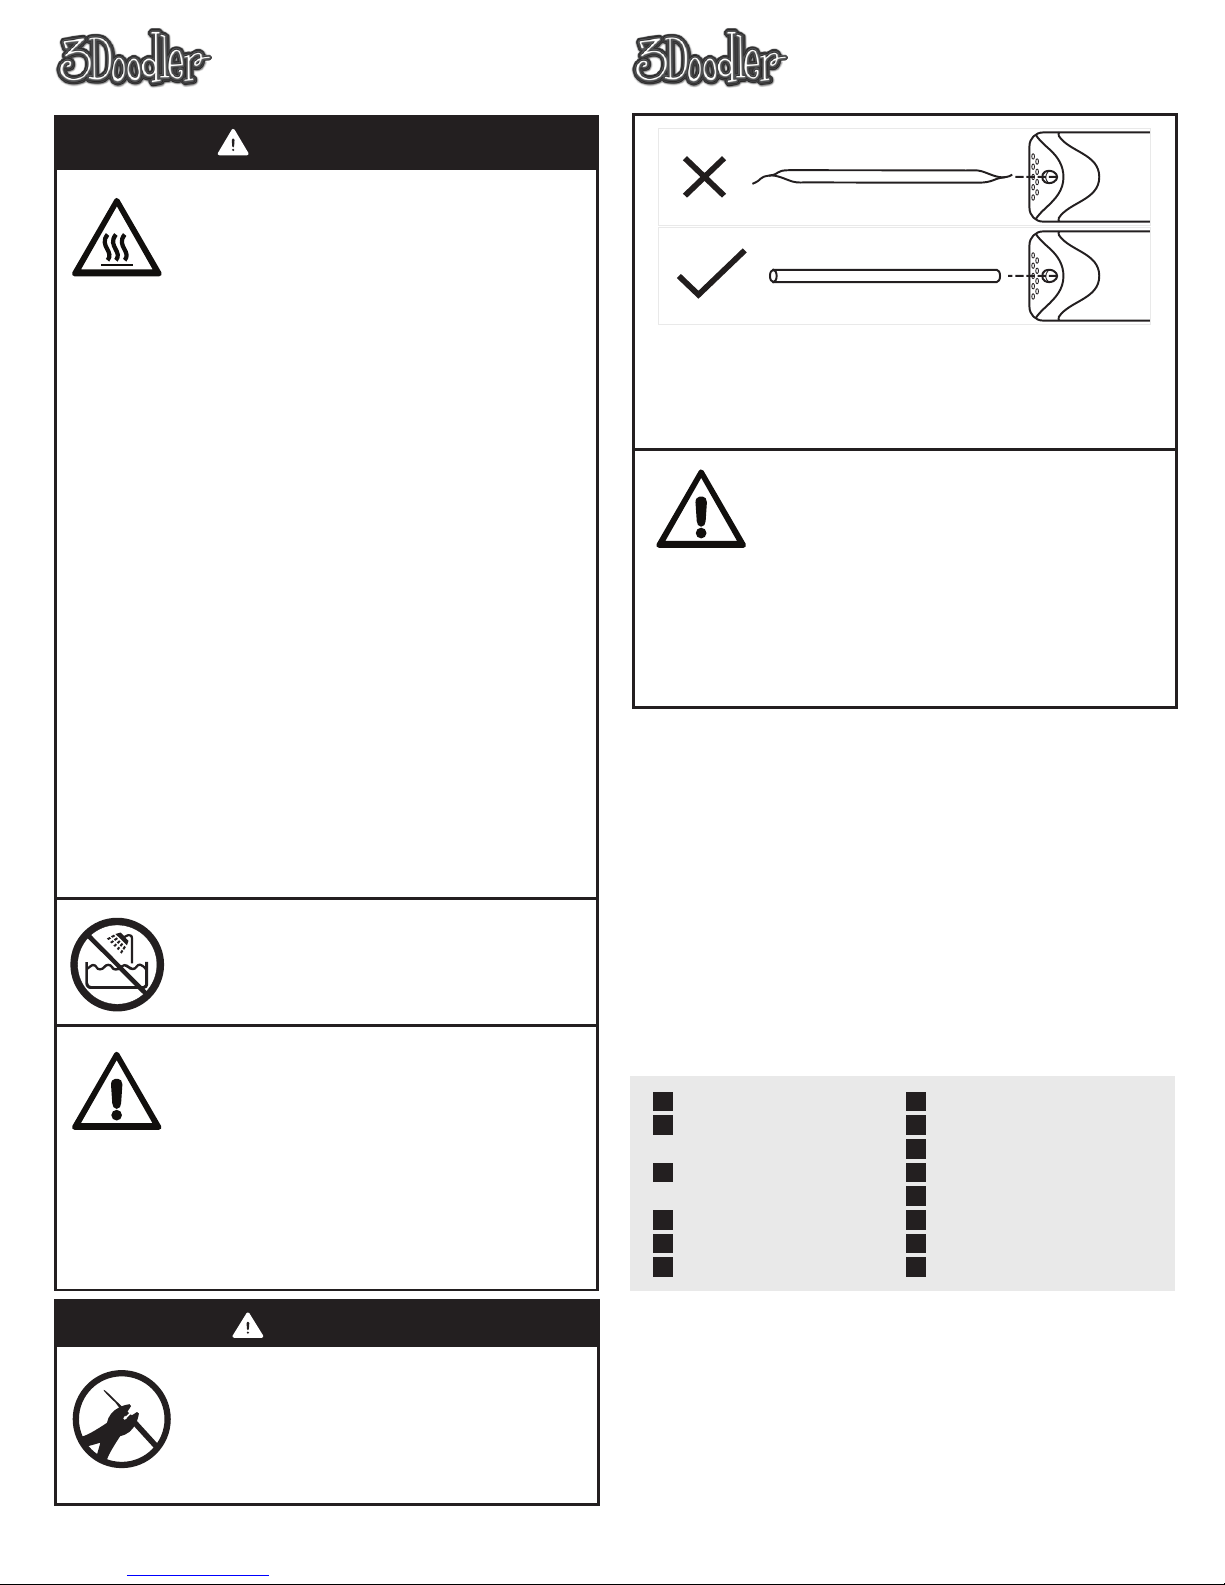
SNIP THOSE ENDS!
After removing a strand/filament from the
3Doodler, cut and remove any partially
melted material at the end of your strand
before re-feeding it into the 3Doodler. This
will reduce blockages or clogging issues.
®
3Doodler 2.0
WARNINGS & NOTICES
ENGLISH
#WhatWillYouCreate?TM
To find great ideas for what you can create, as well as tips, tricks &
free downloadable stencils, please visit our community website at:
www.the3Doodler.com/Community
For more information, customer service, repairs, or returns,
please contact us at cs@the3Doodler.com
IT’S TIME TO 3DOODLE!
You are now the proud owner of a 3Doodler 2.0. The 3Doodler puts
the power of creation in the palm of your hand and allows you to
draw objects in 3D quickly and easily!
7
8
9
10
11
12
13
14
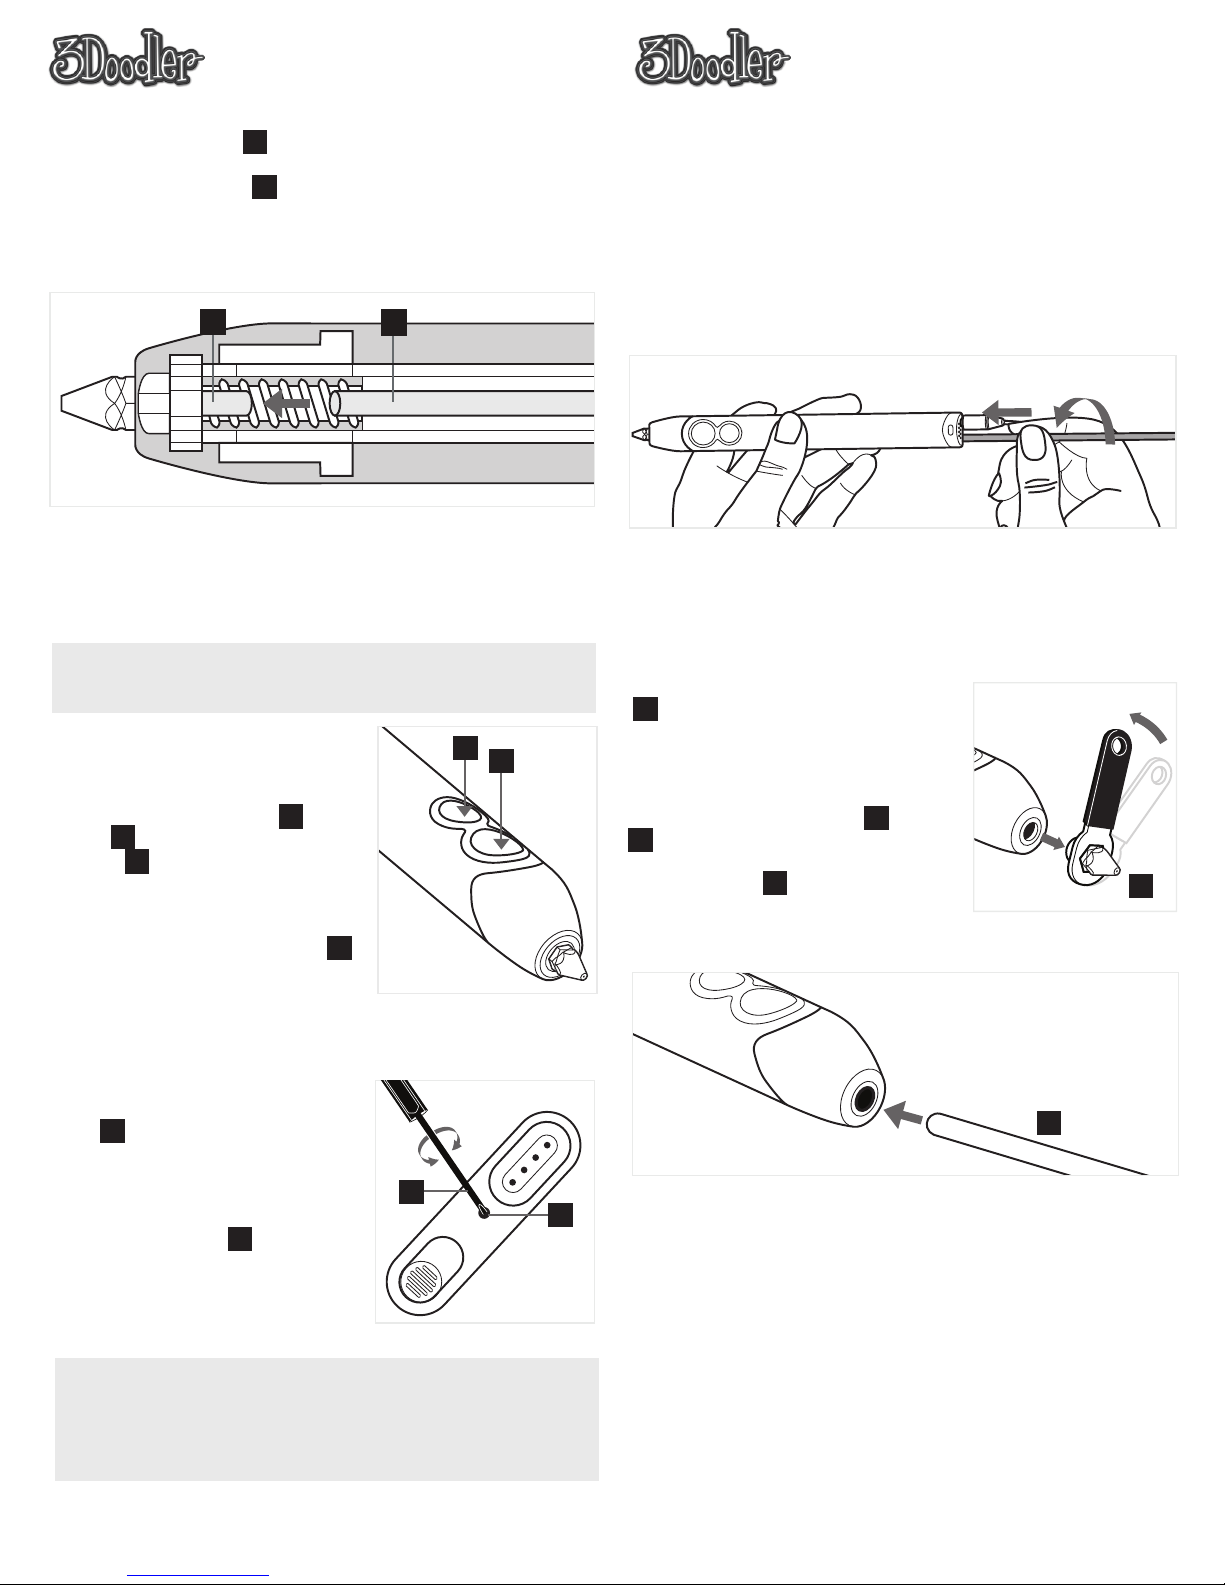
Nozzle
Extrusion Speed
Control (FAST)
Extrusion Speed
Control (SLOW)
Cooling Fan
LED Indicator
Power Cord
1
2
3
4
5
6
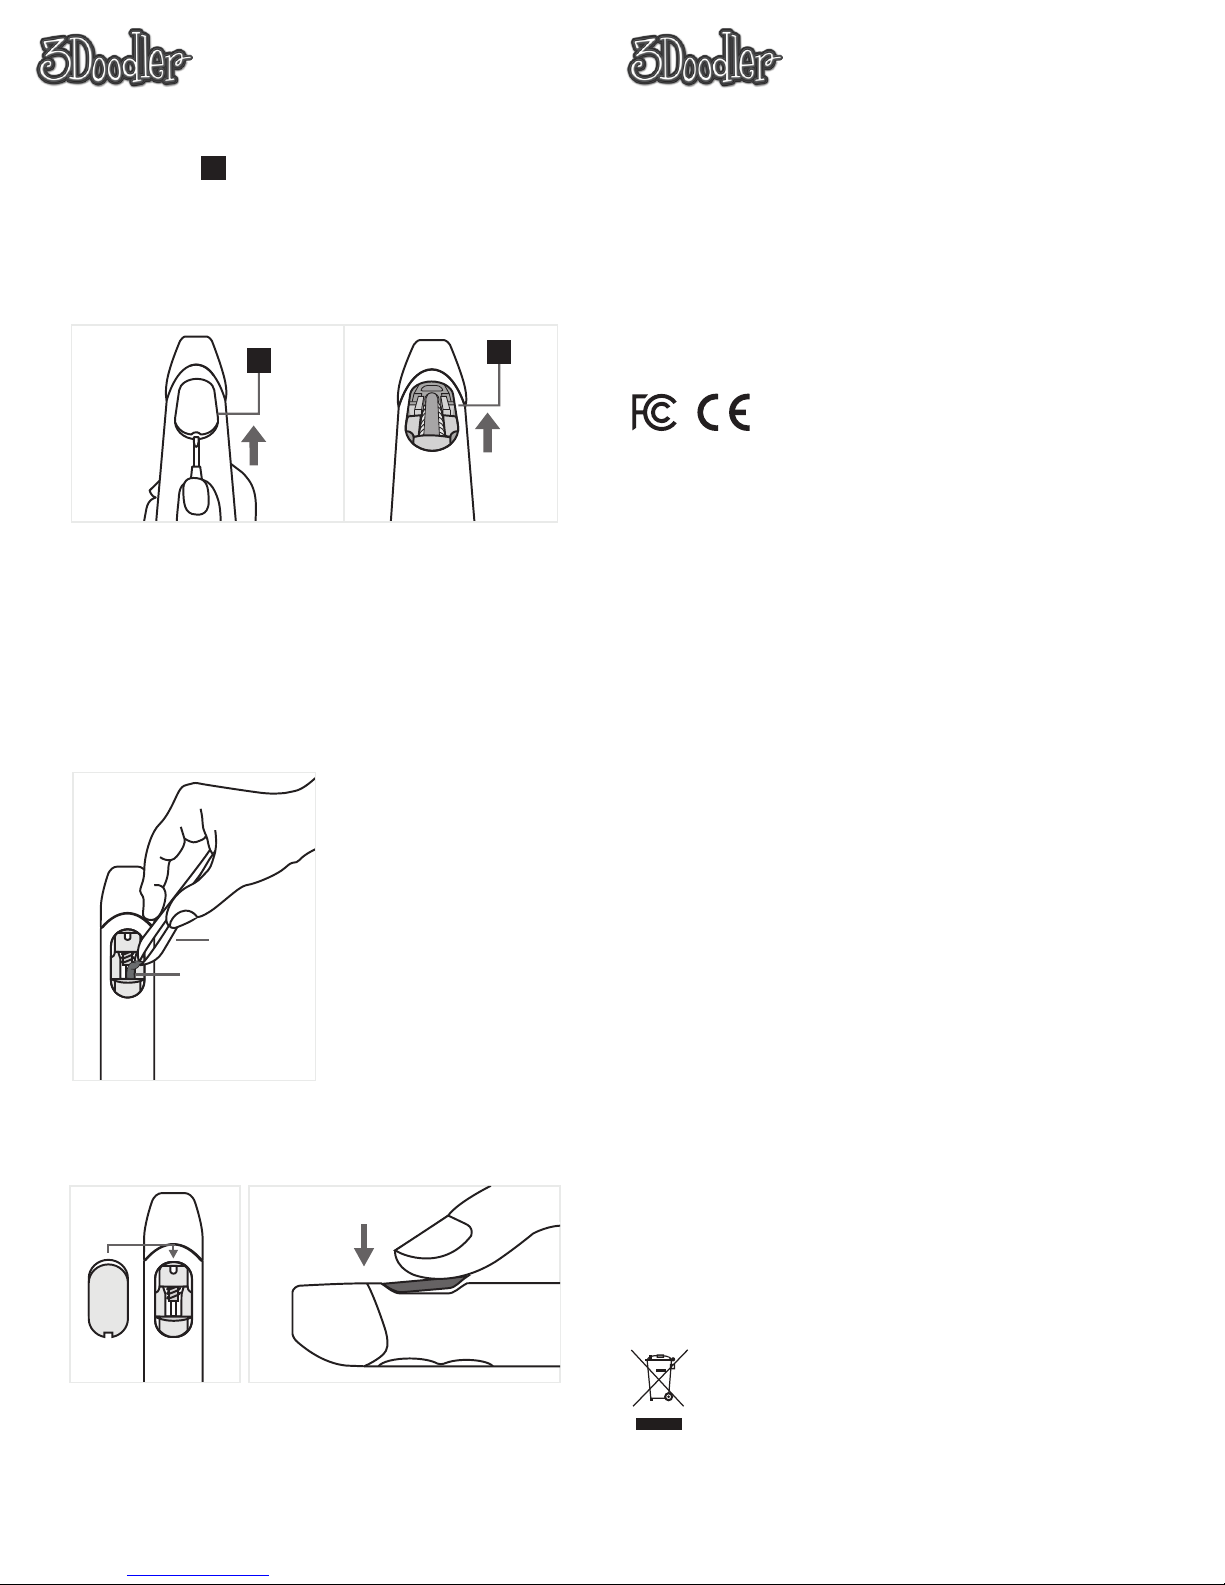
Maintenance Cover
Unblocking Tool
ON/OFF Switch & HI/LO
Temperature Adjuster
Control Port
Plastic/Filament Loader
Mini Screwdriver
Nozzle Removal Tool
ALWAYS 3DOODLE IN A WELL VENTILATED SPACE
If you wish to reverse your plastic/filament, please follow the
instructions on step 6.
DO NOT pull plastic/filament from the back of the 3Doodler
other than directed. This will result in damage to your pen
and will void your warranty.
When switching from lower temperature
plastic/filament (such as PLA or WOOD) to
higher temperature plastic/filament (such as
ABS or FLEXY), the presence of any
residual plastic/filament in the pen’s heating
chamber may cause a slight amount of
smoke to emit from the pen. This is due to
the application of a higher melting
temperature being applied to lower melting
temperature materials.
GETTING TO KNOW YOUR 3DOODLER