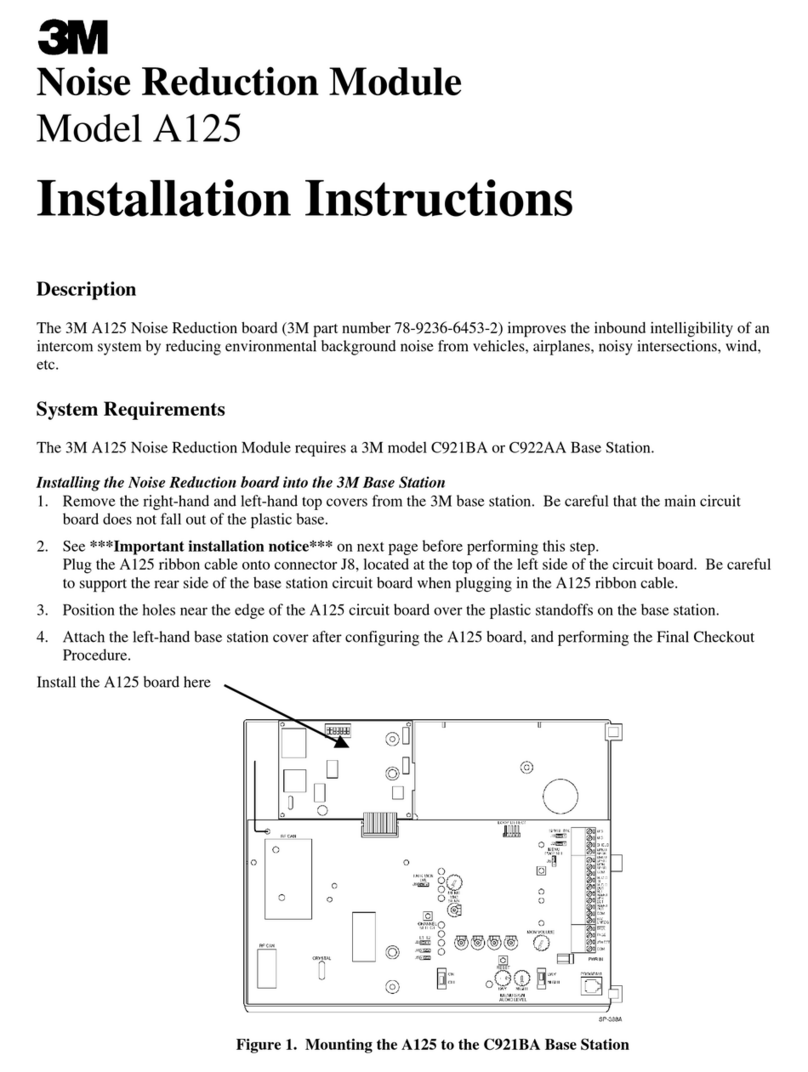
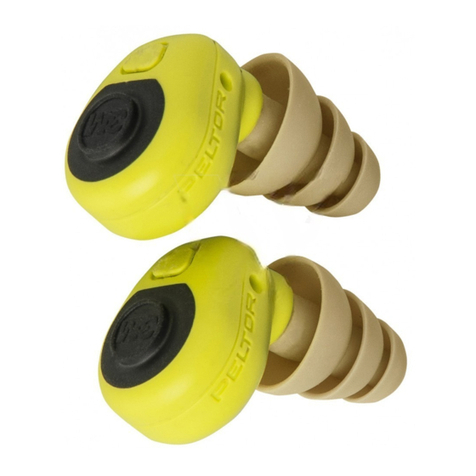
3M PELTOR Tactical Earplug TEP-200 User manual

1
Tactical Earplug, TEP-200
Level Dependent Earplug, LEP-200
Electronic Earplug, EEP-100
Bouchon d’oreille tactique, TEP-200
Bouchon d’oreille dépendant du niveau du bruit, LEP-200
Bouchon d’oreille électronique, EEP-100
Protector de oído táctico, TEP-200
Protector de oído dependiente de nivel, LEP-200
Protector de oído electrónico, EEP-100
User Instructions
Guide de l’usager
Instrucciones de uso
The Sound Solution

2
WARNING
This hearing protector helps reduce exposure to hazardous noise and other loud sounds.
Misuse or failure to wear hearing protection at all times when exposed to hazardous
noise may result in hearing loss or injury. For correct use, consult supervisor, User
Instructions or call 3M Technical Service. If your hearing seems dulled or you hear a ringing
or buzzing during or after any noise exposure (including gunfire), or for any other reason you
suspect a hearing problem, leave the noisy environment immediately and consult a medical
professional and/or your supervisor.
3M™ PELTOR™ Tactical Earplug, TEP-200, Level Dependent Earplug, LEP-200
and Electronic Earplug, EEP-100 User Instructions
Introduction
Congratulations and thank you for choosing 3M™ PELTOR™ Communication Solutions!
Welcome to the next generation of protective communication.
Intended Use
The TEP-200, LEP-200 and EEP-100 level dependent hearing protector helps provide hearing
protection in noisy environments while enabling environmental listening in quiet environments.
Important
Please read, understand, and follow all safety information in these instructions prior to use.
Retain these instructions for future reference. For additional information or any questions,
contact 3M Technical Services (contact information listed on the last page). For correct use,
consult supervisor, consult User Instructions, or call 3M.
WARNING
Failure to follow these instructions may result in serious injury or death:
a. Choking hazard – keep away from infants and small children.
b. If there is any drainage from your ear or you have an ear infection, consult a medical
professional before wearing earplugs.
c. Listening to music or other audio communication may reduce your situational awareness
and ability to hear warning signals. Stay alert and adjust the audio volume to the lowest
acceptable level.
d. To reduce the risks associated with igniting an explosion, do not use this product in a
potentially explosive atmosphere.
Failure to follow these instructions may reduce the protection provided by the product
and may result in hearing loss:
a. 3M strongly recommends individual fit testing of hearing protectors. If the NRR or SNR is
used to estimate typical workplace protection, 3M recommends that the noise reduction
value be reduced by 50% or in accordance with applicable regulations.
b. Ensure the hearing protector is properly selected, fit, adjusted, and maintained.
Improper fit of this device will reduce its effectiveness in attenuating noise.
Consult the enclosed instructions for proper fit.
c. Inspect the hearing protector before each use. If damaged, select an undamaged
hearing protector or avoid the noisy environment.
d. The output of the electrical audio circuit of this hearing protector may exceed the daily
limit sound level. Adjust the audio volume to the lowest acceptable level.
e. Only use approved and compatible 3M™ PELTOR™ Communications Eartips.

3
Note:
• When worn according to the User Instructions, this hearing protector helps reduce exposure
to both continuous noises, such as industrial noises and noises from vehicles and aircraft,
aswellasveryloudimpulsenoises,suchasgunre.Itisdifculttopredicttherequired
and/oractualhearingprotectionobtainedduringexposuretoimpulsenoises.Forgunre,
theweapontype,numberofroundsred,properselection,tanduseofhearing
protection, proper care of hearing protection, and other variables will impact performance.
To learn more about hearing protection for impulse noise, visit www.3M.com/hearing.
• Although hearing protectors can be recommended for protection against the harmful
effects of impulsive noise, the Noise Reduction Rating (NRR) is based on the attenuation
of continuous noise and may not be an accurate indicator of the protection attainable
againstimpulsivenoisesuchasgunre(wordingrequiredbyEPA).
Attenuation Data
3Mstronglyrecommendsttestingofhearingprotectors.TheNRRiscalculatedfrom
laboratory-based attenuation data. Research suggests that many users will receive less noise
reduction than indicated by the NRR. If NRR is used to estimate typical workplace protection,
3M recommends that it be reduced by 50% or in accordance with applicable regulations.
The Noise Reduction Rating (NRR) was obtained with the device powered off.
The level of noise entering a person's ear, when hearing protector is worn as directed,
is closely approximated by the difference between the A-weighted environmental noise
level and the NRR.
Example:
1. The environmental noise level as measured at the ear is 92 dB(A).
2. The NRR is 23 decibels (dB).
3. The level of noise entering the ear is approximately equal to 69 dB(A).
WARNING:3Mstronglyrecommendsttestingofhearingprotectors.
CAUTION: For noise environments dominated by frequencies below 500 Hz the
C-weighted environmental noise level should be used.
CAUTION
• Risk of explosion if battery is replaced by an incorrect type.
• With Lithium ion batteries, there is a risk of fire and burns. Do not open, crush, heat
above 60°C (140°F), or incinerate.
• For greater comfort and safety, remove eartips slowly with a twisting motion to gradually
break the seal.

4
LABORATORY ATTENUATION
Product Note
• Storage temperature (complete kit): -4°F to 122°F (-20°C to 50°C).
• Operating temperature earpiece: -4°F to 122°F (-20 to +50°C)
• Operating temperature charger: 32°F to 122°F (0 to +50°C)
Product Components: Earpiece
1. Power / Control Button (Fig. A:1)
2. Microphone (Fig. A:2)
3. Charging contacts (Fig. A:3)
4. Eartip stem (Fig. A:4)
5. Eartip (Fig. A:5)
125
36.3
5.3
250
35.7
5.5
500
39.8
5.5
1000
41.4
4.2
2000
40.4
3.4
3150
43.0
4.6
4000
41.9
3.5
6300
48.2
4.6
8000
46.0
4.2
AL30
Test frequencies (Hz) CSA
CLASS
NRR
Mean attenuation (dB)
Standard deviation (dB)
3MTM PELTORTM Skull ScrewsTM Communication Eartips (not included) ANSI S3.19-1974
Test frequencies (Hz) 125 250 500 1000 2000 3150 4000 6300
CSA
CLASS
NRR8000
Mean attenuation (dB)
Standard deviation (dB)
34.5
4.2
30.6
3.9
36.3
4.1
35.2
3.0
35.5
3.5
38.6
3.3
37.6
3.8
44.6
3.6
45.7
4.3
AL27
3MTM PELTORTM CCC-GRM-25 Communication Eartips ANSI S3.19-1974
Test frequencies (Hz) 125 250 500 1000 2000 3150 4000 6300
CSA
CLASS
NRR8000
Mean attenuation (dB)
Standard deviation (dB)
36.2
5.1
33.7
5.2
34.7
5.5
32.0
3.9
34.5
3.4
37.4
5.3
35.6
6.5
38.0
4.4
37.5
5.4
AL23
3MTM PELTORTM UltraFitTM Communication Eartips ANSI S3.19-1974
A:1
A:2
A:3
A:4
A:5
Fig. A

5
Charging Case for the TEP-200 / LEP-200
1. Battery compartment (Fig. B:1)
2. Retention cord storage posts (Fig. B:2)
3. Test / Status button (Fig. B:3)
4. Earpiece charging receptacle (Fig. B:4)
5. Indicator light (Fig. B:5)
6. Micro B USB charging port (Fig. B:6)
7. Latch (Fig. B:7)
Charging Case for the EEP-100
1. Earpiece charging receptacle (Fig.C:1)
2. Indicator light (Fig. C:2)
3. Micro B USB charging port (Fig. C:3)
4. Latch (Fig. C:4)
Charging
The 3M™ PELTOR™ TEP-200, LEP-200
and EEP-100 Earplugs should be charged
beforerstuse.
Note: To maximize battery life, always
store earbuds in the case.
• For the TEP-200 / LEP-200, the earpieces
are charged inside the charging case
using 3AA batteries or Micro B USB
cord (not provided). Charging time is
approximately 90 minutes, regardless
of charging method.
• For the EEP-100, the earpieces are
charged using a Micro B USB cord
(provided). Charging time is
approximately 180 minutes.
Charging by Battery for the TEP-200 / LEP-200
1. To insert the 3 AA batteries into the battery compartment
(Fig.B:1),openthechargingcasebyrmlyliftingupon
the latch (Fig.B:7).
2. Gently open the battery compartment door inside the
charging case.
3. Insert the batteries while ensuring (+)(-) poles are aligned
according to the diagram on the charging case.
4. Close the battery compartment door.
5. Locate and line up the charging contacts on both the
earpiece (Fig.A:3) and charging receptacle inside the
case (Fig.B:4). Insert the narrow end of the earpiece
rst(Fig.D:1),thengentlyrockandsnapitintothe
receptacle (Fig.D:2).
6. Repeat for second earpiece.
Fig. B
B:1
B:2
B:3
B:4
B:5 B:6
B:7
Fig. D:1
Fig. D:2
C:1 C:3
C:2
C:4
C:2
Fig. C

6
Important: Ensure the charging
contacts (Fig.A:3) on the earpiece
are pointed down so contact is
made with the charging points in
the receptacle. Push the test
status/button (Fig.B:3) to verify a
good connection is made between
the earpieces and the charging
points in the receptacle.
• For the TEP-200 / LEP-200, observe
the indicator light (Fig. B:5 and
Fig.D:3).
• For the EEP-100, observe the
indicator light (or light status)
(Fig. C:2 and Fig. D:4).
Charging by Micro B USB Port for
the TEP-200, LEP-200 and EEP-100
To charge the earpieces, follow below:
1. Plug the Micro B end of the USB cable
into the charging case (Fig.B:6 for
TEP-200 / LEP-200 or Fig. C:3 for
EEP-100) and the opposite end into a USB power source. The charger will automatically
detect the USB connection and draw power from it instead of from the AA batteries.
2. For TEP-200 / LEP-200, push the test/status button (Fig.B:3) to make sure a good
connection is made between the earpieces and the charging points in the receptacle
(Fig.B:4). Observe the indicator light (Fig.B:5) to ensure the earpieces are charging (Fig.D:3).
3. For charging the EEP-100, the lights will automatically activate once earpieces are in place
and USB cable connected to a power source.
Note:
1. The TEP-200, LEP-200 and the EEP-100 charging case are designed to prevent charging
in temperatures below 32°F and above 122°F (0 to +50°C).
2. Use only new alkaline, AA or LR6 type batteries (for TEP-200 / LEP-200).
3. If using an external power supply for charging the earplugs, only connect to a listed
powersupplycertiedtoIEC/UL/CSA60950-1oranequivalentlocalsafetystandard.
The power supply shall have a rated output of 5Vdc, 200mA (minimum).
Removing the Earpieces from the Charging Unit
To remove the earpieces from the charging unit, gently lift up on the earpiece while holding
on to the charging case.
Eartip Selection
Three 3M™ UltraFit™ Eartip sizes (small: 7-12mm; medium: 8-13mm; and large: 9-16mm)
are provided as well as a single size of the 3M™ PELTOR™ CCC-GRM-25 Eartips. To
choose the appropriate 3M UltraFit eartip size, begin with the medium size. Ensure that it is
smallenoughtopenetratetheearcanalandprovideasecuret,butisalsolargeenough
thatatleastoneangesealstheearcanalatthecanalentrance.Ifthemediumsizedoesnot
provideapropert,proceedwiththesmallorlargesizeeartipsastheseweredesignedtot
users for whom the medium size is not suitable. With the 3M CCC-GRM-25 Eartips and
3MSkullScrews(notincluded),onesizeisintendedtotmost.
LIGHT STATUS EARPIECE STATUS
Solid Red Charging
Blinking Red Not Charging
Fast Blinking Red Temperature Fault
Solid Yellow Charging - Low Battery
Blinking Yellow Not Charging - Low Battery
Solid Green Charging Complete
Fig. D:3
j
LIGHT STATUS EARPIECE STATUS
Bright Red Charging
Bright Green Charging Complete
Dim Red No Earpiece
No Light Temperature Fault or Not
Plugged In
Fig. D:4
j
7
WARNING: Do not use product if proper t cannot be obtained.
Attaching Eartips and Optional Retention Cord (not included with EEP-100)
Use only 3M™ PELTOR™ Eartips designed for use with this product. Do not insert the
earpiece directly into the ear without a correctly attached 3M PELTOR eartip.
Note: For the EEP-100, the retention cord may be purchased separately (see "Reorder").
1. To attach the optional retention cord, place one end of the retention cord onto the eartip
stem (Fig. A:4 and Fig. E:1).
2. Push eartips (Fig. A:5) onto the eartip stem (Fig. A:4 and Fig. E:2).
3. Fully seat the eartip at the base of the eartip stem (Fig. E:3).
Fitting 3MTM PELTORTM TEP-200, LEP-200 and EEP-100 Earplug
The earpiece should be powered off prior to insertion. Eartips should be clean and in good
conditionbeforetting.
1. Select a proper eartip size for your ear canal.
2. Hold the earplug with the eartip attached (Fig.F:1).
3. Insert eartip into ear canal while pulling the ear outward away from the head and upward
with the opposite hand (Fig.F:2).
4. Rotate the earplug toward the back of the head (Fig.F:3).
5. With the earplug powered off, check to ensure you have a good eartip t. Pull the earpiece
gently. It should not come out of ear easily. If it does, repeating insertion. Listen to steady loud
noise with eartips in both ears. The noise should sound softer. Cover ears with tightly cupped
hands. Noise should sound about the same whether or not ears are covered. If you cannot
obtainagoodt,tryadifferenttypeorsizeofeartip.
CAUTION: For greater comfort and safety, remove eartips slowly with a twisting motion to
gradually break the seal.
Fig. F:2 Fig. F:3
Fig. F:1
Fig. E:1 Fig. E:2 Fig. E:3

8
Using the TEP-200 / LEP-200 earplug
1. Power On: Turn the product on by pressing and holding the power/control button for
2 seconds (Fig. A:1). This is referred to as a “long” press. You may release the button when
you hear a tone. The earpiece should now be on and in the low volume setting. Repeat this
process for the other earpiece.
Note: Whentheearpieceisturnedonandproperlyttedinyourear,soundenteringyourear
shouldnotsounddistant,faint,ormufed.Ifitdoes,makesurethedeviceisturnedon.
2. Environmental Listening: When the earplugs are powered on, the user can adjust the
volume to a comfortable setting by quickly pressing and releasing the power/control button.
This is referred to as a “quick” press. When powered on, the earpieces allow sounds to pass
through in quiet environments while restricting the volume level in loud environments.
Upon power on, the TEP-200 / LEP-200 defaults to the low setting, which reproduces the
environmental sounds at a reduced level. Each setting is indicated by a unique tone.
• Additionally, audio levels are selectable by pressing the power/control button quickly.
This cycles through four audio levels: low, medium, high and microphone off.
Note: The microphone off setting allows the user to shut off the environmental microphones
without turning off the earpiece. This can be especially helpful when the earpieces are in the
"commsmode"andtheuserisexperiencingdifcultyhearingtheirradioorphonedueto
environmental noise. A quick press will cycle back through the volume settings.
3. Wireless Communication: (Requires neck loop accessory, sold separately)
a. Ensure the neck loop is worn and attached to a communications (Comms) product.
See instructions provided with neck loop.
b. To activate the wireless communications feature, a “medium” press is required. Press and
holdthepower/controlbuttonuntilthebeepplayedwhenthebuttonisrstpressedgoes
away. The user will hear a voice tag to announce either “Comms 1”, "Comms 2", or
“Comms Off”. "Comms 1" and "Comms 2" have different wireless gain settings. If you
experience interference, try the alternate setting.
c. When the wireless feature is activated, the user will hear the environmental sounds mixed
together with the sounds from the electronic device connected to the neck loop, unless the
user turns the environmental microphones off to maximize electronic communications via
phone or radio.
d. The volume control on the earpiece adjusts the environmental microphones while the
volume control for the attached communications product will adjust that volume.
4. Automatic Power Off: To conserve battery power, the earplugs will automatically shut off
if the Power/Control button has not been pressed for 2 hours. During the last 60 seconds
before shutoff, a verbal “timeout” message will repeat every 20 seconds. Reset the automatic
shutoff timer by pressing the Power/Control button.
5. Low Battery Tone: When less than
one hour of battery life remains, a tone
will be emitted and will repeat every
veminutes.
6. Power Off: Press and hold the
Power/Control button for two seconds,
until a double beep is heard. Then the
button can be released and the earpiece
is powered off. Repeat this process for
the other earpiece.
A:1
A:2
A:3
A:4
A:5
Fig. A

9
Note: Whenpoweredoffandproperlytintheearcanal,theearplugswillstillhelpprovide
hearing protection.
Using the EEP-100 earplug
1. Power On: Turn the product on by pressing and holding the power/control button for
2 seconds (Fig. A:1). This is referred to as a “long” press. You may release the button when
you hear a tone. The earpiece should now be on and in the low volume setting. Repeat this
process for the other earpiece.
Note: Whentheearpieceisturnedonandproperlyttedinyourear,soundenteringyourear
shouldnotsounddistant,faint,ormufed.Ifitdoes,makesurethedeviceisturnedon.
2. Environmental Listening: When the earplugs are powered on, the user can adjust the
volume to a comfortable setting by quickly pressing and releasing the power/control button.
This is referred to as a “quick” press. When powered on, the earpieces allow sounds to
pass through in quiet environments while restricting the volume level in loud environments.
Upon power on, the EEP-100 defaults to the low setting, which reproduces the environmental
sounds at a reduced level. Each setting is indicated by a unique tone.
• Audio levels are selectable by pressing the power/control button momentarily.
This cycles through three audio levels: low, medium, and high.
3. Power Off: Press and hold the Power/Control button for two seconds, until a double beep is
heard. Then the button can be released and the earpiece is powered off. Repeat this process
for the other earpiece (Fig. A).
Note: Whenpoweredoffandproperlytintheearcanal,theearplugswillstillhelpprovide
hearing protection.
Attach/Detach Windscreen (not included with EEP-100)
The windscreen may help minimize wind noise in high wind conditions.
Note: For the EEP-100, windscreens may be purchased (see, "Reorder).
1. Remove a disposable windscreen from the perforated windscreen sheet backing (Fig.G:1).
2. Locate the earplug microphone (Fig.G:2).
3. Carefully center the disposable windscreen over the microphone port and press the
adhesive backed windscreen to the microphone port (Fig.G:3).
4. To detach, remove the windscreen and dispose when necessary. To attach, follow steps 1-3.
Note: After storing and/or recharging the earplug in the charging case, it may be necessary to
remove the old disposable windscreen and replace with a new screen.
G:1
Fig. G G:2 G:3

10
Storage for TEP-200 / LEP-200 Charger Case
Remove the batteries when storing the charging case for extended periods of time.
Please refer to the storage temperature ranges listed in the “Product Note” section.
Cleaning and Maintenance
Charging Case
The interior of the charging case should be kept free from dust and debris. The charging
points must make direct contact with the charging contact on the earpiece to ensure charging.
Cleaning these contact points with a cotton swab or soft cloth is recommended if visual
inspection reveals debris or if the user experiences problems charging the earpieces.
To maintain water resistance capability, the perimeter of the charging case and seal ring must
be kept free of dirt and other materials that would prevent proper closing of the case and the
Micro B USB charging port cover must be closed.
TEP-200/LEP-200/EEP-100 Earpieces
Earpieces can be cleaned with a lightly damp cloth. Using a cotton swap to clean the charging
contacts may be required if debris is visible or if the user experiences problems charging the
earpieces.
Eartip Cleaning and Replacement
Remove and clean the ear tips routinely and more frequently for those who produce excess
ear wax.
3M™ UltraFit™ Eartips
Wash eartips with warm water and soap as needed. Look for tears or cracks under any of the
anges.Replaceasneeded.
3M™ Skull Screws™ Eartips and 3M CCC-GRM-25 Eartips
Clean by wiping with a clean, dry cloth. Replace if the eartip is damaged, detached from the
stem, or is not soft and pliable.

11
FCC and IC Information
This device complies with Part 15 of the FCC rules and Industry Canada’s Radio Standards
Specications.Operationissubjecttothefollowingtwoconditions:
(1) This device may not cause harmful interference, and (2) this device must accept any
interference received, including interference that may cause undesirable operation.
Note: This device has been tested and found to comply with the limits for a Class B digital
device, pursuant to part 15 of the FCC Rules. These limits are designed to provide reasonable
protection against harmful interference in a residential installation. This device generates, uses
and can radiate radio frequency energy and, if not installed and used in accordance with the
instructions, may cause harmful interference to radio communications. However, there is no
guarantee that interference will not occur in a particular installation. If this device does cause
harmful interference, which can be determined by turning the device off and on, the user is
encouraged to try to correct the interference by one or more of the following measures:
• Reorient or relocate the receiving antenna.
• Increase the separation distance between the two interfering devices.
• Consult 3M Technical Support.
CAN ICES-3 (B)/NMB-3(B)
Reorder: Product and Accessories
Replacement eartips are available from 3M. Navigate to 3M.com/PELTOR for additional
ordering information. To reorder additional eartips, use 3M ID/product codes.
3M Stock Number Product Number Description
70-0716-5628-7 TEP-200 3M™ PELTOR™ Tactical Earplug, TEP-200 Kit
70-0716-7700-2 LEP-200 3M™ PELTOR™ Level Dependent Earplug,
LEP-200 Kit
70-0717-3079-3 EEP-100 3M™ PELTOR™ Electronic Earplug, EEP-100 Kit
70-0716-7379-5 TEP-CORD 3M™ PELTOR™ Tactical Earplug Retention Cord
70-0716-5025-6 TEP-200E 3M™ PELTOR™ Replacement Earpiece
70-0716-5026-4 TEP-200C 3M™ PELTOR™ Tactical Earplug Replacement Case
70-0716-7374-6 370-TEPL-25 3M™ PELTOR™ UltraFit™ Communication Tips
Replacement, Large
70-0716-7373-8 370-TEPM-25 3M™ PELTOR™ UltraFit™ Communication Tips
Replacement, Medium
70-0716-7372-0 370-TEPS-25 3M™ PELTOR™ UltraFit™ Communication Tips
Replacement, Small
70-0716-1527-5 370-1019-10 3M™ PELTOR™ Skull Screw™ Communication
Tips Replacement
70-0716-7521-2 CCC-GRM-25 3M™ PELTOR™ CCC-GRM-25 Communication Tips
Replacement

12
Battery Disposal
The TEP-200, LEP-200 and the EEP-100 earplugs have a
non-replaceable lithium-ion battery. Many rechargeable
batteries are required to be recycled by local, state/province,
and national laws. To properly recycle/dispose of the battery,
always follow local solid waste disposal regulations.
Battery Note
Do not mix old and new batteries.
Do not mix alkaline, standard, or rechargeable batteries.
To properly dispose of the AA batteries, follow local solid waste disposal regulations.
No Modications:Modicationstothisdeviceshallnotbemadewithoutthewrittenconsentof
the3MCompany.Unauthorizedmodicationsmayvoidthewarrantyandtheauthoritygranted
under Federal Communications Commission rules permitting the operation of this device.
WARRANTY AND LIMITATION OF LIABILITY
WARRANTY: In the event any 3M Personal Safety Division product is found to be defective in
material,workmanship,ornotinconformitywithanyexpresswarrantyforaspecicpurpose,
3M’s only obligation and your exclusive remedy shall be at 3M’s option, to repair, replace or
refundthepurchasepriceofsuchpartsorproductsupontimelynoticationoftheissueby
you and substantiation that the product has been stored, maintained and used in accordance
with 3M’s written instructions. EXCEPT WHERE PROHIBITED BY LAW, THIS WARRANTY IS
EXCLUSIVE AND IS IN LIEU OF ANY EXPRESS OR IMPLIED WARRANTY OF MERCHANT-
ABILITY, FITNESS FOR A PARTICULAR PURPOSE OR OTHER WARRANTY OF QUALITY,
OR THOSE ARISING FROM A COURSE OF DEALING, CUSTOM OR USAGE OF TRADE,
EXCEPT OF TITLE AND AGAINST PATENT INFRINGEMENT. 3M has no obligation under this
warranty with respect to any product that has failed due to inadequate or improper storage,
handling, or maintenance; failure to follow product instructions; or alteration or damage to the
product caused by accident, neglect, or misuse.
LIMITATION OF LIABILITY: EXCEPT WHERE PROHIBITED BY LAW, IN NO EVENT SHALL
3M BE LIABLE FOR ANY DIRECT, INDIRECT, SPECIAL, INCIDENTAL OR CONSEQUEN-
TIAL LOSS OR DAMAGES (INCLUDING LOST PROFITS) ARISING FROM THIS PRODUCT,
REGARDLESS OF THE LEGAL THEORY ASSERTED. THE REMEDIES SET FORTH HEREIN
ARE EXCLUSIVE.
This manual suits for next models
2
Table of contents
Other 3M Accessories manuals

3M
3M PELTOR User manual

3M
3M MicroTouch DST2270DX Quick setup guide

3M
3M LEP-100 EU User manual

3M
3M 8686 User manual

3M
3M MODULE A125 User manual

3M
3M PELTOR TEP-200 EU User manual

3M
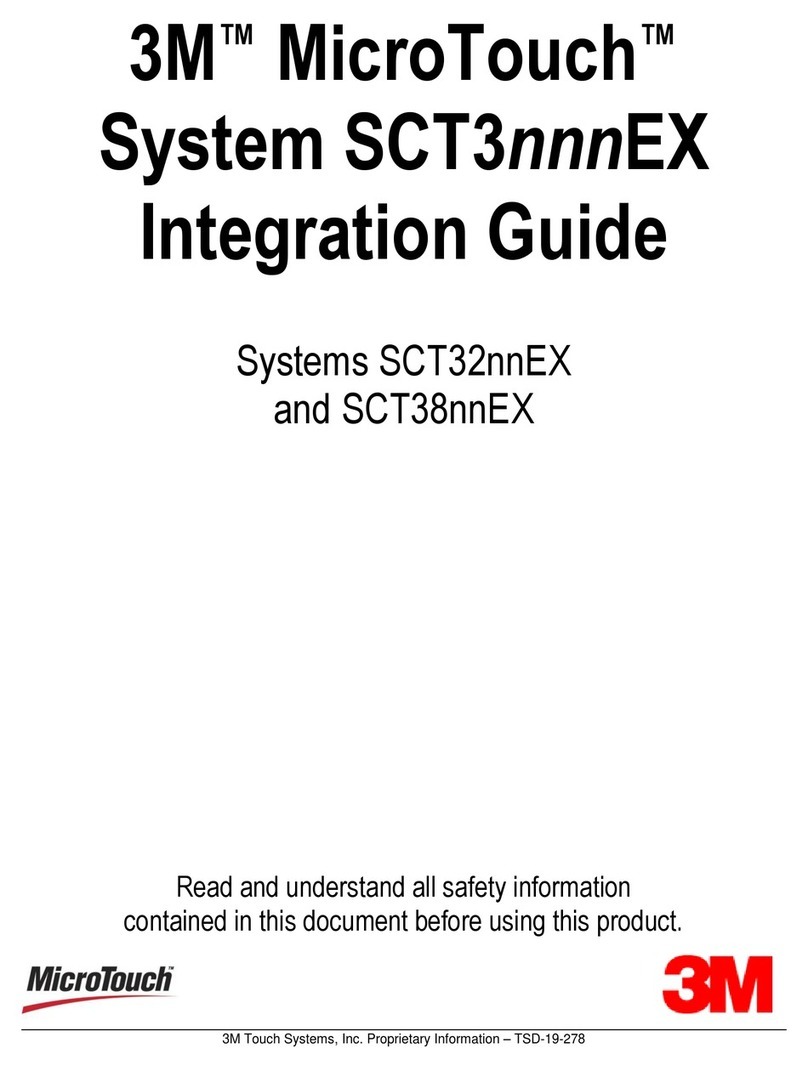
3M MicroTouch SCT32nnEX Quick setup guide

3M
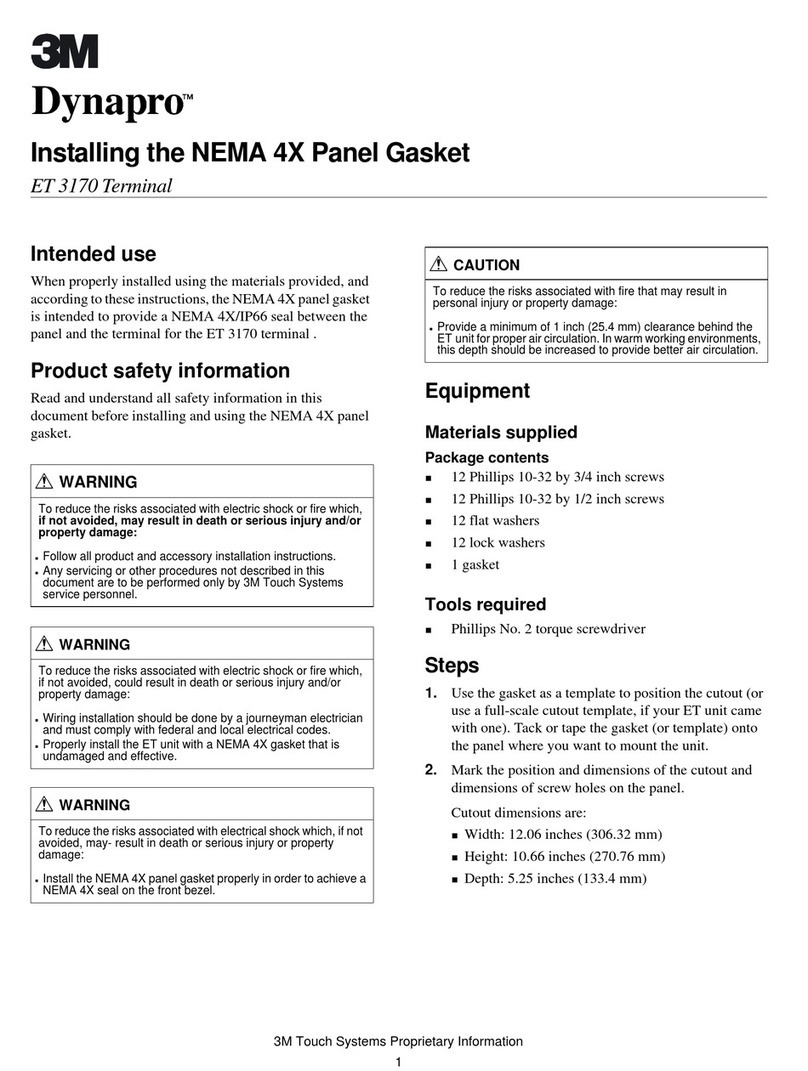
3M Dynapro ET 3170 Terminal Series B User manual

3M
3M PELTOR User manual

3M
3M 718 User manual