3M G5 Service manual

3M™ Drive-Thru Communication System G5
Technical Bulletin -#157
Optimizing InboundAudiovolumelevel
Overview:
The default (or Factory) settingson the basestation have been optimized to provide the bestInbound audiolevelfor a typical drive thru
operation. Every installation and store is unique and as such several factors affect thelevelof theinboundaudio. The purpose of this
technical bulletin isto explain the effectsof these factorsand understandhow to mitigate them.
Factors affectingInboundaudiolevel:
•Fitting of the headset.
•Volume setting on the headset.
•Settings on thebasestation (Microphone Preamp Gain, Inbound Volume and Inbound MicNoiseReduction)
•Ambient noiselevel at the order point.
•Where the speaker postis located in the drive thru lane
Recommendedsequence of stepsto optimizeInboundVolume(detailedinsub-sections below):
1. Make sure headsetis properlyfitted so thespeaker isseatedon the ear. –Checkforlevels
2. Raise volume on the headset –Check for levels
3. Raise the Inbound volume settingson the basestation –Checkfor levels
4. Raise MicrophonePreamp Gain in steps.–Checkfor levelsand ensure there isno echowhiletaking into theheadset mic.
5. Decrease InboundMicNoise Reduction setting –Check Inbound volumelevel,doesthesystempickupmorebackground noise?
6. Measure ambient noise atthe speaker post -1 meter away (~ 3 feet) on axis to the microphone.
If the Sound Meter measure more than 65dB,you mayhave to create a barrierbetweenthe speaker post andthe noise source.

Optimizing Inbound audio level:
1. Proper fitting of headset
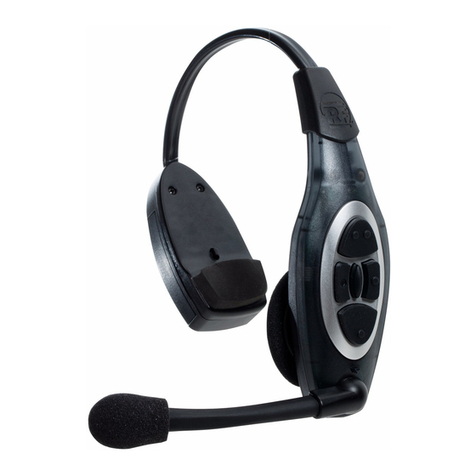
Make the following adjustments to the headset to make sure it isnot onlycomfortable, lesslikelyto fall offand easyfor you to hear
and speak clearly; but to also make sure the speaker on theheadset isproperly aligned toyour ear.
a) Adjust the size of the headband until theear pad rests against one ear and the comfort pad cushion rests just above the
other ear.
b) To create a tighter fit,hold the headset withone hand on the Pod areaand the other hand on theComfort Pad area.
Gently bring the two hands close to oneanother, then past one another. Slowly move one endback and forth.
c) This ensurespressureis applied equallyalongthe length ofthe headband. Applyingexcessive forcein one area alonewill
create a creaseon the headband.
d) Rotate the microphone boomup or down so its tip is in line with the corner ofyourmouth. Do notbend theboom.
e) Make sure the headset speaker foamcoversyour ear.
2. Volume setting on headset
Slide your finger up the Volume control area to raise the volumeon the headset.
Volume'Control

3. InboundVolume settingonbasestation
Changing the inboundmicrophone volume affects the sound volume comingfromthecustomer order point microphone. The range
is 0 (silent) to 20 (maximum). Thedefault factory setting for the Inbound Volume is at 17.
To turn up the inbound microphone volume:
•From the Run mode menu
•Enter your user passcode. (The defaultuser passcodeis 1234)
•Press Mode once to get to System Menu
The display willshowtheuser nameand IDnumber (e.g.,User1ID= 1).
•Now press Mode 2 timestoget toSystem Menu
•Select 01 Drivethru Volume. Then pressENTER.
•Navigate InboundMic Volume using the !, ", #, $keys
•Raise in stepsof 1,the value for Inbound Mic Volume until the
desired Inbound Volumelevel is achieved.
.
4. Microphone PreampGainsettingonbasestation
The Mic Preamp Gain is the first stage of amplification from the microphone in theorder point and can be adjusted to affects
achieve the desired quality and level of the inbound audiovolume.
You need to log into the basestation as an Installer to access to this setting. The basestation's Microphone PreAmp is factory set at
8 and can be changed to a maximum of 20. However, we do not recommendsetting thepre-amp beyond 10.
Raising the preamp setting too high can introduce echo into the systemand can be experienced on the OrderTaker’sheadsetwhile
conducting an active transaction.
To change the microphone preamp gain
•From the Run mode menu
•Enter your Installer passcode.
(The default Installer pa ssco de is 12345)
•Press Mode 3 times to get to System Menu
The display willshowtheuser nameand IDnumber (e.g.,Installer ID = 1).
•Select 01 Drivethru Volume. Then pressENTER.
•Navigate Mic Preamp Gain.(Installer Only!) <08> usingthe !, ", #, $keys
•Raise in stepsof 1,the value for Inbound Mic Volume until the
desired Inbound Volumelevel is achieved.
NOTE:
•This setting mustto be increased in steps.
•At each step you should check theinboundvolume level to determine if the desired volume level has been achieved
•At each step, make sure you open up the Outboundon a headset (by pressing theLane1 or Lane2 buttons) andobserve
for any echoes while speakinginto the headsetmicrophone.
•If you do experience an echo,drop the Preamp setting by1 and confirmthenew settingon the basestation by pressing
the ENTER key.

5. InboundMic Noise Reduction Level setting on basestation
The inbound microphonenoisereduction level setting helpsremove the background (ambient) noise that ispicked up bythe
microphone at the OrderPoint, when a customer is placing an order.Thebasestation’s noise reduction level is factory set to
Medium.
The way Noise Reduction workscanbe better understoodby imagining a conebeing presentin front ofthe microphone.
--- NR being set toOFFis akin to havingthe cone wide open.
This allows more ofthe ambient sound into the microphone andthus
--- NR being set toMAX issimilarto constricting thecone to a smallerangle
This limitstheangle towhere the customeris mostprobably located.A small amountof ambient noise maystill
make it’s wayinto the microphone. The system’snoise cancellation algorithmwill be able tominimize suchsmall ambient
noise.
A customer’s voicelevelis usually around ~62dB. If the ambient noise, measured at 1 meterfrom theaxis of the Order Point
microphone,is greater than,say65dB,there is verygood probability for the customer’s audio to be mixed in with the ambient noise.
In this event, you mayhave to reduce the Noise Reductionsetting so asto allow more ofthe audio intothe microphone, otherwise
the systemmayreduce the customer’s audio while trying to minimize the ambientnoise.
Perform the following steps to decreasethe noise reduction level.
•From the Run mode menu
•Enter your user passcode. (The defaultuser passcodeis 1234)
•Press Mode again. The display will show the user name and ID number (e.g., User1 ID = 1).
•Make a new selectionfor 05 Noise Reduction > Inbound Mic Noise Reduction Level.
Options are Off, Min, Low, Med, Hi, andMax.
You may need to experiment for a setting that works best foryour ambient noise environment.

5. Locationofthe speaker postviz-a-viz the drive thru lane
The ideal distance between themicrophone and the customer (in the car) is about 3 feet(on axis tothe microphone) .
A customer’s ability to park himself or herself right in front of the speaker post’s microphone, at the recommended distance,
depends on the following:
-Where the Speaker postis located on a drivethru and
-A car’s turn radius
It is recommended that the speaker post be located on thestraightedge ofa drivethru asillustratedbelowand NOT situatedon a
corner. While vehicleswith smaller turn radiusmaynot have much difficulty maneuvering toa correctpositionin frontof the speaker
post, vehicles withlarge turn radius tend to park
-- Ahead of the speaker post or
-- Short of the speaker post or
-- Away from the speaker post.
Recommended Speaker Post position Incorrect Speaker Post position

Technical Information:The t echnical inf orm ation, rec ommendat ions and other stat ement s cont ained in t his docum ent ar e bas ed upon tes t s or exper ience that 3M believes are reliable, but the accuracy or
completeness of such information is not guaranteed.
Product Use: Many f act or s bey ond 3M 's c ont r ol and uniquely wit hin u s er ' s k nowledge and c ont r ol can af fec t t he us e and per f ormanc e of a 3M product in a particular application. Given the variety of factors
that can affect the use andperformance of a 3M product, user is solely responsible forevaluating the 3M product and determining whether it is fit for user's particular purpose and suitable for user's method
of application.
Warran ty, L imi ted Remed y, and Di scl aimer: 3M warrants that its intercom products will be free from defects in material and manufact ure for the period indicated in product lit eratur e from t he dat e of
shipment to purchaser by 3M or its authorized dealer. 3M MAKES NOOTHEREXPRESS OR IMPLIED WARRANTIES, INCLUDING ANY IMPLIED WARRANTY OF MERCHANTABILITY OR FITNESS
FOR A PARTICULAR PURPOSE. If the 3M intercom product does not conformto this warranty, thesole and exclusiveremedy is, at 3M’s option, repair or replacement of the 3M product or refund of the
purchase price. This warranty does not cover: (1) the cost of shipping products to or from 3M for repair, (2) repair or replacement of existing cable or wiring, (3) product failure caused by misuse, abuse,
improper installat ion, or unapproved modif ications, or (4) intercom products t hat are installed or serviced by a non-3M authorized party. To obtain warranty service, please contact your authorized 3M dealer
or 3M Building & Commercial Services Division, 3M Center, Building 500-01-01, St. Paul, Minnesota 55144-1000.
Limitation of Liability: Except where prohibited by law, 3Mwill not be liable for any loss or damage arising from its intercom products, whether direct, indirect, special, incidental or
consequential, regardless of the legal theory asserted.
3M is a trademark of3M. Used under license in Canada
Please recycle. Printed in USA.
© 3M 2015. All righ ts reserved.
Contact your local dealer or 3M tolearn more
about how we canimprove your business.
1-800-328-0033
Commercial Solutions Division
3M Center, Building 220-12 E-04
St. Pa ul, MN 55144-10 00
www.3M.com/drivethru
6. Microphone angles inside the speakerpost
Inspect the speaker postto see if the microphone
-- The microphonehas moved outof position or
-- Any speaker post acoustic treatment material has slipped in front of themicrophone
-- The microphoneis angledin such as waythatit’sperpendicular axisis no longer in line with thecustomer in the vehicle.
In such cases,thedirectional microphone will be unable to pickup all of the customer’svoice.On thecontraryit maypickup more of
the ambient noise.
Perpendicular axis of
microphone Perpendicular axis of
microphone
Microphone
Speaker Post
Correct positioning of microphone Incorrect positioning of microphone
Other manuals for G5
7
Table of contents
Other 3M Conference System manuals