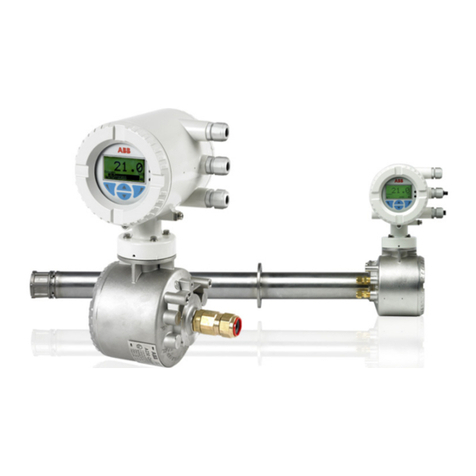
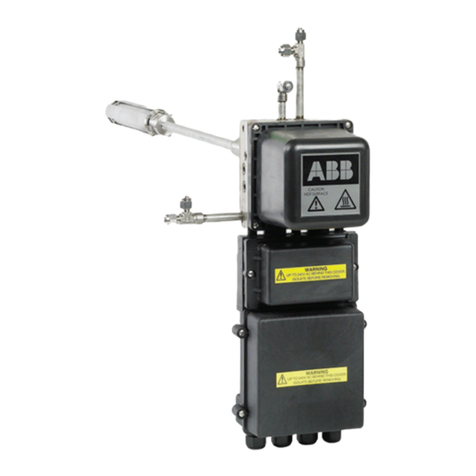
ABB ZDT Installation guide

ABB Instrumentation
Installation and
Operating Guide
High Temperature Version,
for use with ZGP2 Probes
ZDT
Oxygen Analyzer System Installation and
Operating Guide
High Temperature Version,
for use with ZGP2 Probes
ZDT
Oxygen Analyzer System Installation and
Operating Guide
High Temperature Version,
for use with ZGP2 Probes
ZDT
Oxygen Analyzer System Installation and
Operating Guide
High Temperature Version,
for use with ZGP2 Probes
ZDT
Oxygen Analyzer System

ABB INSTRUMENTATION
✶
Note.
Clarification of an instruction or additional information.
Information.
Further reference for more detailed information or
technical details.
AlthoughWarning hazardsare related topersonalinjury,andCaution hazardsareassociated with equipmentorproperty damage,
it must be understood that operation of damaged equipment could, under certain operational conditions, result in degraded
process system performance leading to personal injury or death. Therefore, comply fully with all Warning and Caution notices.
Information in this manual is intended only to assist our customers in the efficient operation of our equipment. Use of this manual
for any other purpose is specifically prohibited and its contents are not to be reproduced in full or part without prior approval of
Technical Communications Department, ABB Instrumentation.
The Company
ABB Instrumentation is an established world force in the design and manufacture of
instrumentation for industrial process control, flow measurement, gas and liquid analysis and
environmental applications.
As a part of ABB, a world leader in process automation technology, we offer customers
application expertise, service and support worldwide.
We are committed to teamwork, high quality manufacturing, advanced technology and
unrivalled service and support.
The quality, accuracy and performance of the Company’s products result from over 100 years
experience, combined with a continuous program of innovative design and development to
incorporate the latest technology.
The NAMAS Calibration Laboratory No. 0255 is just one of the ten flow calibration plants
operated by the Company, and is indicative of ABB Instrumentation’s dedication to quality
and accuracy.
Stonehouse, U.K.
Use of Instructions
Warning.
An instruction that draws attention to the risk of injury or
death.
Caution.
Aninstruction that draws attention tothe risk of damage to
the product, process or surroundings.
Health and Safety
To ensure that our products are safe and without risk to health, the following points must be noted:
1. The relevant sections of these instructions must be read carefully before proceeding.
2. Warning labels on containers and packages must be observed.
3. Installation, operation, maintenance and servicing must only be carried out by suitably trained personnel and in accordance with the
information given.
4. Normal safety precautions must be taken to avoid the possibility of an accident occurring when operating in conditions of high pressure
and/or temperature.
5. Chemicalsmustbestored awayfrom heat,protected fromtemperature extremesand powderskept dry.Normal safehandling procedures
must be used.
6. When disposing of chemicals ensure that no two chemicals are mixed.
Safety advice concerning the use of the equipment described in this manual or any relevant hazard data sheets (where applicable) may be
obtained from the Company address on the back cover, together with servicing and spares information.
0255
BS EN ISO 9001
St Neots, U.K. –Cert. No. Q5907
Stonehouse, U.K. –Cert. No. FM 21106
R
E
G
I
S
T
E
R
E
D
EN 29001 (ISO 9001)
Lenno, Italy –Cert. No. 9/90A
1
CONTENTS
Section Page
1 INTRODUCTION ..........................................................2
2 PREPARATION ............................................................3
2.1 Checking the Instrument Type ..........................3
3 MECHANICAL INSTALLATION ..................................4
3.1 Siting Requirements..........................................4
3.2 Overall Dimensions ...........................................5
3.3 Mounting............................................................5
4 CONNECTIONS ...........................................................6
4.1 Cable, Tubing and Gland Specifications...........6
4.2 Electrical Connections ......................................6
4.2.1 General ................................................6
4.2.2 Access to Terminals.............................7
4.2.3 Connections.........................................7
4.2.4 Relay Contact Protection and
Interference Suppression ....................8
4.3 Selecting the Mains Input Voltage ....................8
4.4 Replacing the Fuses .........................................9
4.5 Reference Air Supply ......................................10
5 CONTROLS AND DISPLAYS .................................... 11
5.1 Displays ........................................................... 11
5.2 Switch Functions ............................................. 11
Section Page
6 OPERATION...............................................................12
6.1 Instrument Start-up .........................................12
6.2 Operating Page ...............................................12
6.3 Operating Page Error Messages ....................12
7 PROGRAMMING........................................................13
7.1 Single-point Calibration...................................14
7.2 Two-point Calibration ......................................15
7.3 Preset Calibration............................................17
7.4 Access to Secure Parameters ........................18
7.5 Language Selection Page...............................18
7.6 Set Up Thermocouple Page............................19
7.7 Set Up Outputs Page ......................................20
APPENDIX A – ELECTRICAL CALIBRATION ..................22
A.1 Equipment Required .......................................22
A.2 Preparation......................................................22
A.3 Electrical Calibration Page..............................23
INDEX ..................................................................................24

2
1 INTRODUCTION
The ZDT Oxygen Analyzer is designed for continuous
monitoring of oxygen content in applications using 'in situ'
ZGP2 probes.
Operation and programming of the ZDT Analyzer is via four
tactile membrane switches and a digital display located on the
front of the instrument. Two l.e.d.'s on the front panel provide
local alarm indication.
In operation, the instrument can display measured % oxygen,
cell mV, or cell temperature. Set up of alarm, retransmission
and calibation parameters is achieved in programming mode,
where key parameters are protected by a five-digit security
code.
Measured %O2values can be retransmitted to remote
equipment using the retransmission output facility. The range
of values retransmitted can be set anywhere within the
instrument's display range of 0 to 25% O2, subject to limits
detailed in Section 7.7.
Fig. 1.1 Schematic Diagram
Remote alarm indication is provided by two relay outputs.
Relays are programmed to activate when the oxygen level
moves either above or below a pre-defined set point. The
second alarm relay can also be used as a 'general alarm'
which activates in the event of an instrument or system fault.
An optional external reference air unit is used to provide
reference air supply for the ZGP2 probe. If this unit is not
specified, reference air must be supplied to the probe from an
alternative source.
For full installation and operation details of the ZGP2 probe
refer to the operating manual,
IM/ZGP2
.
Retransmission
Output
Alarm
Power
Supply
% Oxygen
20.0
ZDT Oxygen Analyzer

3
2.1 Checking the Instrument Type – Fig. 2.1
2
Release the lower panel and remove
from the front of the instrument.
Check the instrument code
number against Table 2.1.
1
Fig. 2.1 Checking the Code Number
2 PREPARATION
Table 2.1 Instrument Identification
rezylanAnegyxOTDZ/TDZ XXXX
epyTeborP 2PGZ 1
epyTelpuocomrehT enoN KepyT RepyT SepyT
0
1
2
3
ylppuSriAecnerefeR enoN tuptuOlanretxE 0
1
egatloVsniaM zH06/05V032 zH06/05V011 0
1
Caution.
Both front panels are held in position by the front
panel screws only and are not otherwise captive.
When removing the panels, ensure they are
adequately supported.

4
3 MECHANICAL INSTALLATION
3.1 Siting Requirements – Fig. 3.1
The instrument is designed for wall mounting and weighs approximately 9kg (20lb).
F – Within Environmental Limits
E – Within Temperature Limits
IP66
(NEMA 4x)
Probe
Maximum
100m (330ft.)
A – Close to Oxygen Probe
B – At Eye Level
C – Avoiding Vibration
55°C
Max.
–5°C
Min.
D – Avoid Harmful Vapours and Dripping Fluids
Caution. Permanent
damage may occur if
contaminated liquid or vapour
is allowed to reach the probe.
Note. The retransmission
output operates to specification
within the range –20°C to +70°C.
Fig. 3.1 Siting Requirements

5
3 MECHANICAL INSTALLATION
3.2 Overall Dimensions – Fig 3.2
Fig. 3.3 Mounting Details
403 (15.9)
453 (17.8)
227 (8.9)
434 (17.1)
Dimensions in mm (in.) 150 (5.9)
5 (0.2) 133 (5.2)
4 x ø9.5 (
3
/8
) holes
for M8 fixing
Fi
x
i
ng
C
enters
Fixing Centers
252 (9.9)
Fig. 3.2 Overall Dimensions
3.3 Mounting – Fig. 3.3
Mark-out the fixing centers of the
four mounting holes – see Fig. 3.2.
12
3
Fix the instrument
securely to the wall.
Drill suitable holes for the type
of fixings to be used.

6
Table 4.2 Cable Colours
4 CONNECTIONS
Warning.
• Mains power – before making any connections, ensure that the power supply, any powered control circuits and high
common-mode voltages are switched off.
4.1 Cable, Tubing and Gland Specifications
Information.
• Five 22mm diameter cable entries are provided in the base of the terminal chamber. The cable entries accept M20 glands
(not supplied).
• External reference air connections are made via 1/4in. compression fittings.
Table 4.1 Cable References and Air Tubing Specification
4.2 Electrical Connections
4.2.1 General
Information.
•Earthing (grounding) – a stud terminal is fitted to the case bus-bar earth (ground) connection – see Fig. 4.1
•Cable routing – always route signal output cables and mains-carrying/relay cables separately, ideally in earthed metal
conduit. Twist the signal output leads together or use screened cable with the screen connected to the case earth stud.
Use only the cables and air tubing specified in Table 4.1.
Fit suitable cable glands into the entries to be used and blank-off any unused entries using the bungs supplied.
Ensurethat the cablesenter the instrument through the glands nearest theappropriate screw terminalsand are short and
direct. Do not tuck excess cable into the terminal compartment.
•Relays – the relay contacts are voltage-free and must be connected in series with a power supply and the alarm/control
device which they are to actuate. Ensure that the contact rating is not exceeded.
Refer also to Section 4.2.4 for relay contact protection details when the relays are to be used for switching loads.
•Retransmission output – Do not exceed the maximum load specification for the selected current retransmission range
(see the associated specification sheet, SS/ZDT/GP).
Theretransmission outputis isolated.Thereforethe –veterminal must be connected to earth (ground)if connectingto the
isolated input of another device.
ecnerefeRgnibuT/elbaCnoitpircseD
elbactuptuolleC htaehs.c.v.pllarevohtiwdiarbreppocniwteulbdnaderpudialmm2.0/61
elbacelpuocomrehT2.4elbaTeeS
)riAecnerefeR(gnibuTriA
1
/
4
x.d.o.ni
1
/
8
ebut.c.v.pronolyn,leetssselniats.d.i.ni
elpuocomrehTfoepyT
elbaCgnitasnepmoC
hsitirB 2591;3481SB namreG 41734NID naciremA 1.69CMIISNA
+– esaC+– esaC+– esaC
(lA-iN/rC-iN KepyT )nworBeulBdeRdeRneerGneerGwolleYdeRwolleY
(hR-tP/tP SdnaRsepyT )etihWeulBneerGdeRetihWetihWkcalBdeRdeR

7
4 CONNECTIONS…
4.2.2 Access to Terminals – Fig. 4.1 4.2.3 Connections – Fig. 4.2
1Mains:
Live to ‘L’
Neutral to ‘N’
Earth to ‘E’
2Retransmission Output (4 to 20mA):
Positive to ‘RTX +’
Negative to ‘RTX –’
3Relay outputs 1 and 2
‘N/C’ – normally closed
‘C’ – common
‘N/O’ – normally open
4Secure the probe conduit fitting in the appropriate gland
and make the following connections:
Cell output – red to ‘CELL +’
blue to ‘CELL –’
screen to ‘CELL SCR’
Thermocouple – see Table 4.2
1Unlock and remove the
lower panel from the
front of the instrument
– see Fig. 3.1
Undo the two retaining
screws and remove the
terminal shroud.
2
Note. Cable core colour is dependent on cable type – see Table 4.2
Fig. 4.2 Electrical Connections
N/C N/O N/C N/O
E
MAINS RELAY
1RELAY
2RTX HEATER
DRIVE
Probe (Signal)
Retransmission
Relays
Incoming
Power Supplies
CELL T/C
NL
CC
+HHE +-
SCR
-+-
BRAID
BLUE
RED
Spare
12
3
4
Not Used
Earth Stud
Caution.
Both front panels are held in position by the front
panel screws only and are not otherwise captive.
When removing the panels, ensure they are
adequately supported.
Fig. 4.1 Access to Terminals

8
…4 CONNECTIONS
4.2.4 Relay Contact Protection and Interference
Suppression – Fig. 4.3
To reduce the risk of instrument malfunction or incorrect
readings when switching inductive loads, suppression
components must be fitted across the relay contacts.
For a.c. applications, fit a 100R/0.022µF RC suppressor unit
(part no. B9303) as shown in Fig. 4.3A. If the instrument
malfunctions (incorrect readings) or resets (display shows
'88888') when the relays operate, a larger RC network is
required. Contact the manufacturer of the switched device for
details of the RC unit required.
For d.c. applications fit a diode, – see Fig. 4.3B. For general
applications use a 1N5406 type (600V peak inverse voltage at
3A – part no. B7363).
Note. For reliable switching the minimum voltage
must be greater than 12V and the minimum current
greater than 100mA.
Fig. 4.3 Relay Contact Protection
Fig. 4.4 Selecting the Mains Input Voltage
4.3 Selecting the Mains Input Voltage – Fig. 4.4
Input voltages (230V or 110V) for the main analyzer p.c.b. and
the probe heater supply p.c.b. are selected by two switches
located on their respective p.c.b.'s.
230
230V
115V
115
115V
230V
115
Unlock and carefully open the upper front
panel ensuring it is fully supported.
Disconnect the front
panel ribbon cable at
the main p.c.b. end.
Identify the selector switch
on the main p.c.b. and
select the required mains
voltage for the main p.c.b.
Replace the upper front panel and lock securely.
Identify the selector switch
on the probe heater
supply p.c.b. and select
the required mains
voltage.
Offer the front panel up to the enclosure and reconnect
the ribbon cable.
1
3
4
6
2
5
Caution.
Both front panels are held in position by the
front panel screws only and are not
otherwise captive. When removing the
panels,ensuretheyaresupportedadequately.
Caution. Set both switches to the
same position, otherwise permanent
damage to the instrument may occur.
NC C NO
External
AC Supply LN
R
e ay
C
ontacts
Load
RC
Suppressor
Unit
A – AC Applications
NC C NO
External
DC Supply +–
Relay Contacts
Load
Diode
B – DC Applications

9
4 CONNECTIONS…
4.4 Replacing the Fuses – Fig 4.5
Theinstrument is protectedby two fuseslocated on theprobe heatersupplyp.c.b. Inorderto replacethefuses, themain analyzer
p.c.b. must be removed for access as shown.
Unlock and carefully
remove the upper
enclosure cover.
1
Disconnect the front panel
ribbon cable at the main
p.c.b. end
2
Remove the screws securing the main
p.c.b.and carefully move it aside to gain
access to the fuses located on the probe
heater supply p.c.b.beneath
3
4Locate and replace the fuses
as required
Offer the cover up to the enclosure and reconnect the
ribbon cable
6
Refit the upper enclosure cover and lock securely
7
Relocate the main p.c.b. and secure with the screws
5
F2
115V
230V
ZDT-0203
-0200B
ISS.1
Fuse 1 – Probe Heater Supply Fuse 2 – Mains Supply
Note.
Fuse Part No: B10144
Rating: 2.5A
Size: 20mm
Type: Anti-surge
Caution. The upper enclosure cover
is not hinged or captive when unlocked.
Fig. 4.5 Replacing the Fuses

10
…4 CONNECTIONS
4.5 Reference Air Supply – Fig. 4.6
Table 4.3 Analyzer and Probe Compatibility
Information.Thelocation oftheAnalyzercode number isshown inFig. 2.1.Referto theprobe's operatinginstructions,
IM/ZGP2,
for information on locating the code number of the probe.
Fig. 4.6 External Reference Air Connections
Note. Permanent damage may occur if
contaminated air surrounding the instrument is
allowed to reach the probe head. If necessary,
to prevent contaminated air or water being
pumped via the analyzer to the probe head,
connect a length of suitable piping to the
reference air inlet gland and route to an
uncontaminated environment.
Connect the probe reference
air supply to the external
reference air output
Connect the
reference air
inlet tubing
flow
flow 1
2
rebmuNedoCrezylanATDZ ylppuSriAecnerefeR
11/TDZ 0X
.ylppusriaecnereferoN ehtotrefer–ecruosetarapesamorfdedivorpebtsumeborpehtotriaecnerefeR .eborpehthtiwdeilppussnoitcurtsnignitarepodnanoitallatsni
11/TDZ 1X
.noitcennoclanretxehtiwylppusriaecnerefeR .eborp2PGZynahtiwesuroF

11
5 CONTROLS AND DISPLAYS
5.1 Displays – Fig. 5.1
The display comprises a 5-digit, 7-segment digital upper
displayline anda 16-character dot-matrix lower displayline. In
operation, the upper display line shows actual values of %
oxygen, temperature, cell millivolts or alarm set points. In
programming mode it is used to display, programmable
parameters. The lower display line shows the associated units
and/or other programming information.
5.2 Switch Functions – Fig. 5.2
Fig. 5.2 Membrane Switches
Fig. 5.1 Location of Displays and Controls
A – Advancing to Next Page
Parameter 1
Parameter 2
Parameter 3
Parameter 4
Page 1 Parameter 1
Parameter 2
Parameter 3
Page 2
Advance to
next page
For majority
of parameters
or
B – Moving Between Parameters
C – Adjusting and Storing a Parameter Value
New value is
automatically stored
Parameter Value Adjust
D – Selecting and Storing a Parameter Choice
Parameter X
Y
ZSelect
or
New value is
automatically stored
or
Parameter 1
Parameter 2
Parameter 3
Page X
Parameter 4
Advance to
next parameter
% Oxygen 700°C
Alarm
L.E.D.'s
Upper
Display Line
Lower
Display Line
Membrane Switches
20.0

12
Alarm 2 Setpoint
Alarm 1 Setpoint
20.00
5.00
0.0
Cell milliVolts
20.9
% Oxygen 700°C
700
Cell Temperature
OXYGE CAL.
6 OPERATION
% Oxygen
The upper display indicates the measured oxygen value. If over or under
temperature is monitored, the upper display shows '------' and an error
message is displayed on the lower dot matrix display – see Section 6.3.
The lower display indicates the measured cell temperature in °C.
Cell Temperature (°C)
The upper display indicates the measured cell temperature in °C.
Cell Millivolts
The upper display indicates the measured cell millivolts.
Alarm 1 Set Point
The upper display indicates the alarm 1 set point, displayed as % oxygen. The
set point value and the relay/l.e.d. action is programmed in the Set Up Outputs
Page – see Section 7.7.
Alarm 2 Set Point
Note. This frame is not displayed if the Alarm 2 Action parameter has
been set to General Alarm – see Section 7.7.
The upper display indicates the Alarm 2 set point, displayed as % oxygen.
Press to return to the top of the Operating Page.
Press to advance to Oxygen Calibration Page.
6.1 Instrument Start-up
Ensure all electrical connections have been made correctly and apply power to the instrument.
6.2 Operating Page
The operating page is a general use page in which continuously updated measured values and preset parameters can be viewed
but not altered. To adjust or set a parameter refer to the programming pages in Section 7.
Note. If Alarm 2 has been programmed as a general system/instrument alarm, the associated front panel l.e.d. is
illuminated when the alarm is active and Relay 2 has de-energized.
6.3 Operating Page Error Messages
When an error has been detected, the following error messages appear in the Operating Page,in place of the % oxygen scroll.
egasseMrorrE esuaCelbissoP
RORREYROMEMV ehtyfitceroT.purewopgnirudyltcerrocdaerneebtonevahyromemelitalov-nonehtfostnetnocehT .ynapmoCehttcatnocstsisreptluafehtfI.niaganohctiwsdnasdnoces01tiaw,ffohctiws,tluaf
PUGIMRAWLLEC 006<(sgnidaerelbatiusniatbooterutarepmettneiciffusadehcaertonsaheborpehT °.)C
LIAFOITARBILAC .deliafnoitarbilactniop-owtro-elgnistsalehT
TIUCRICEPOC/T sierutarepmetelpuocomrehtehtrotiucricnepoerasnoitcennocelpuocomrehtehT 0021nahtretaerg °2912/C °0051ro)elpuocomrehtKepyt(F °2372/C °.)selpuocomrehtS&Repyt(F

13
7 PROGRAMMING
Operating
Parameters
Secure
20.9
% Oxygen
700
Cell Temperature
0.0
Cell milliVolts
20.00
Alarm 1 Setpoint
5.00
Alarm 2 Setpoint
Section 6.2, Page 12
-----
OXYGE CAL. SEQ.
0.0
Cell Constant mV
100.0
Span % of Theory
00000
Cal. User Code
Preset Cal.
One Point Cal.
-----
Two Point Cal.
0.0
Adjust Cell Zero
-----
Span Theory O
YES
Section 7.1, Page 14
Section 7.3, Page 17
20.95
00000
Security Code
Connect to Air
20.95
Calibrating Air
-----
Calibration Pass
Failed Constant
Failed Unstable
20.95
Connect to Air
20.95
Calibrating Air
1.00
Enter Span Gas
1.00
Connect Span Gas
1.00
Calibrating Span
-----
Calibration Pass
Failed Span
Failed Constant
Failed Unstable
Section 7.4, Page 18
Section 7.1, Page 14
Section 7.5, Page 18 Section 7.7, Page 20
YES
Section A.3, Page 23
Section 7.6, Page 18
Section 7.2, Page 15
xxxxx
English
-----
Deutsch
Français
Español
-----
SET UP OUTPUTS
-----
A1 Action EA
-----
A1 Setpoint
0.0
A2 Action EA
20.00
A2 Setpoint
-----
RTX Type 4-20
-----
Log Output O
25.00
Retrans Span
0.0
Retrans Zero
-----
Hold Outputs O
EB
EB
General Alarm
0-20
0-10
YES
YES
-----
ELECTRICAL CAL.
-----
Calibrate YES
xxxxx
mV Zero 1 -20mV
mV Span 1 180mV
xxxxx
mV Zero 2 10mV
xxxxx
mV Span 2 40mV
100.0
Test Retrans (%)
00000
Alter Sec. Code
00000
Alter Cal. Code
25.0
Adjust CJ Value
-----
Adjust RTX Zero
-----
Adjust RTX Span
K
-----
SET UP T/C
T/C TYPE O E
R
S
-----
700
Preset Temp
O
Fig. 7.1 Overall Programming Chart

14
…7 PROGRAMMING
Oxygen Calibration Sequence
Cell Zero mV
The upper display shows the millivolt offset of the oxygen probe from the last
successful calibration.
Span % of Theory
Avalue between 90 and 110% should be displayed. The display indicates the
oxygen probe output slope using parameters derived at the last successful
two-point calibration or the preset values.
Calibration User Code
[00000 to 19999]
If an incorrect value is entered, access to the calibration page is inhibited and
the display returns to the top of the oxygen calibration page.
One Point Calibration
Select one-point calibration sequence.
Connect to Air
Connect the air supply to the probe (refer to the probe's installation and
operating instructions,
IM/ZGP2
). The upper display indicates the measured %
oxygen.
Calibrating Air
The upper display indicates the measured % oxygen. When a stable reading is
detected the display advances automatically to the next frame. To abort
calibration, press either the or switch.
Calibration Pass/Fail
On completion a calibration status message is displayed:
Calibration Pass: Calibration sequence successful
Failed Constant: Cell offset >±10mV
(upper display shows cell mV output)
Failed Unstable: Cell output unstable (drifting).
Note. If the sensor calibration is unsuccessful then the Cell Zero mV and
Span % of Theory parameters are unaffected. The instrument continues to
operate using parameters stored during the last successful calibration.
Press to return to the top of the Oxygen Calibration Page.
Press to advance to the Secure Parameters Page.
Failed Unstable
Preset Cal.
Connect to Air
20.95
Calibrating Air
One Point Cal.
-----
Two Point Cal.
20.95
-----
Calibration Pass
Failed Constant
0000.0
Cal. User Code
-----
OXYGE CAL. SEQ.
0.0
Cell Constant mV
100.0
Span % of Theory
SECURITY CODE
Note.Before commencing a gas calibration procedure the analyzer and probe must be switched on and allowed to run
for at least one hour to allow the system to stabilize thermally.
7.1 Single-point Calibration
Calibration sequence involves standardizing the analyzer and the oxygen probe, using air as the test gas. Until a calibration
sequence has been completed successfully, the existing slope remains unaffected.

15
7 PROGRAMMING…
7.2 Two-point Calibration
Oxygen Calibration Sequence
Cell Zero mV
The upper display shows the millivolt offset of the oxygen probe from the last
successful calibration.
Span % of Theory
Avalue between 90 and 110% should be displayed. The display indicates the
oxygen probe output slope using parameters derived at the last successful
two-point calibration or the preset values.
Calibration User Code
[00000 to 19999]
If an incorrect value is entered, access to the calibration page is inhibited and
the display returns to the top of the oxygen calibration page.
Two Point Calibration
Select the two-point calibration sequence.
Connect to Air
Connect the air supply to the probe (refer to the installation and operating
instructions supplied with the probe). The upper display indicates the test gas
value in % oxygen.
Calibrating Air
The upper display indicates measured % oxygen. The display advances
automatically to the next frame when a stable reading is detected. To abort
calibration, press either the or switch to advance to the next frame.
Enter Span Gas
[between 0.10 and 10.00% O2]
Set the oxygen content of the gas used to calibrate the span.
Connect Span Gas
Connect the span gas to the probe (refer to the probe's installation and
operating instructions,
IM/ZGP2
). The upper display indicates the test gas
value in % oxygen.
Calibrating Span
The upper display indicates measured % oxygen. The display advances
automatically to the next frame when a stable reading is detected. To abort
calibration, press either the or switch to advance to the next frame.
Continued on next page.
Preset Cal.
Connect to Air
20.95
Calibrating Air
One Point Cal.
-----
Two Point Cal.
20.95
0000.0
Cal. User Code
-----
OXYGE CAL. SEQ,
0.0
Cell Constant mV
100.0
Span % of Theory
1.00
Enter Span Gas
1.00
Connect Span Gas
1.00
Calibrating Span

16
Failed Unstable
-----
Calibration Pass
Failed Constant
SECURITY CODE
Continued from previous page
Failed Span
…7 PROGRAMMING
…7.2 Two-point Calibration
Calibration Pass/Fail
On completion a calibration status message is displayed.
Calibration Pass: Calibration sequence successful
Failed Constant: Cell offset >±10mV
(upper display shows cell constant)
Failed Span %: Cell output <90% or >110% of slope
(upper display shows measured slope)
Failed Unstable: Cell output unstable (drifting).
Note. Ifsensorcalibration is unsuccessfulthenthe Cell Zero mV and Span
% of Theory parameters are unaffected. The instrument continues to operate
using parameters stored during the last successful calibration.
Press to return to the top of the Oxygen Calibration Page.
Press to advance to the Secure Parameters Page.

17
7 PROGRAMMING…
7.3 Preset Calibration
Oxygen Calibration Sequence
Cell Zero mV
The upper display shows the millivolt offset of the oxygen probe from the last
successful calibration.
Span % of Theory
Avalue between90 and 110% shouldbedisplayed. Ifthevalue isoutside these
limits then the oxygen probe must be checked.
Calibration User Code
Enter the required code number between 00000 and 19999, to gain access to
the calibration page. If an incorrect value is entered, access to the calibration
page is inhibited.
Preset Calibration
Select the preset calibration sequence.
Adjust Cell Zero
[0 to ±10mV]
The upper display shows the cell output (in mV) corresponding to a reading of
20.95 %O2. Adjust the reading to correspond with the probe.
Span Theory
SelectYES if the Span % of Theory parameter is to bereset to100%. Select O
to retain the existing value.
Press to return to the top of the Oxygen Calibration Page.
Press to advance to the Secure Parameters Page.
Preset Cal.
Adjust Cell Zero
-----
Span Theory O
One Point Cal.
-----
Two Point Cal.
0.0
0000.0
Cal. User Code
-----
OXYGE CAL. SEQ.
0.0
Cell Zero mV
100.0
Span % of Theory
YES
SECURITY CODE

18
…7 PROGRAMMING
7.4 Access to Secure Parameters
A 5-digit security code is used to prevent tampering with the secure parameters.
Security Code
[00000 to 199999]
If an incorrect value is entered, access to programming pages is inhibited.
Press to advance to the Language Selection Page.
-----
Security Code
English
7.5 Language Selection Page
Language Selection
Select the language in which all text is subsequently displayed:
English,
German,
French,
Spanish.
Press to advance to the Set Up Thermocouple Page.
Deutsch
English
-----
SET UP T/C
Français
Español
Table of contents
Other ABB Analytical Instrument manuals

ABB
ABB COMMANDER 1900 Series Operating instructions

ABB
ABB Endura AZ10 User manual

ABB
ABB Endura AZ40 User manual

ABB
ABB Z-MT Use and care manual

ABB
ABB Navigator ADS551 User manual

ABB
ABB Endura AZ30 series Operating instructions

ABB
ABB ZDT-FG Series Installation guide

ABB
ABB Navigator 550 Use and care manual