ABB ControlMaster CM10 Training manual

—
ABB MEASUREMENT & ANALYTICS | COMMISSIONING INSTRUCTION | CI/CM10-EN REV. C
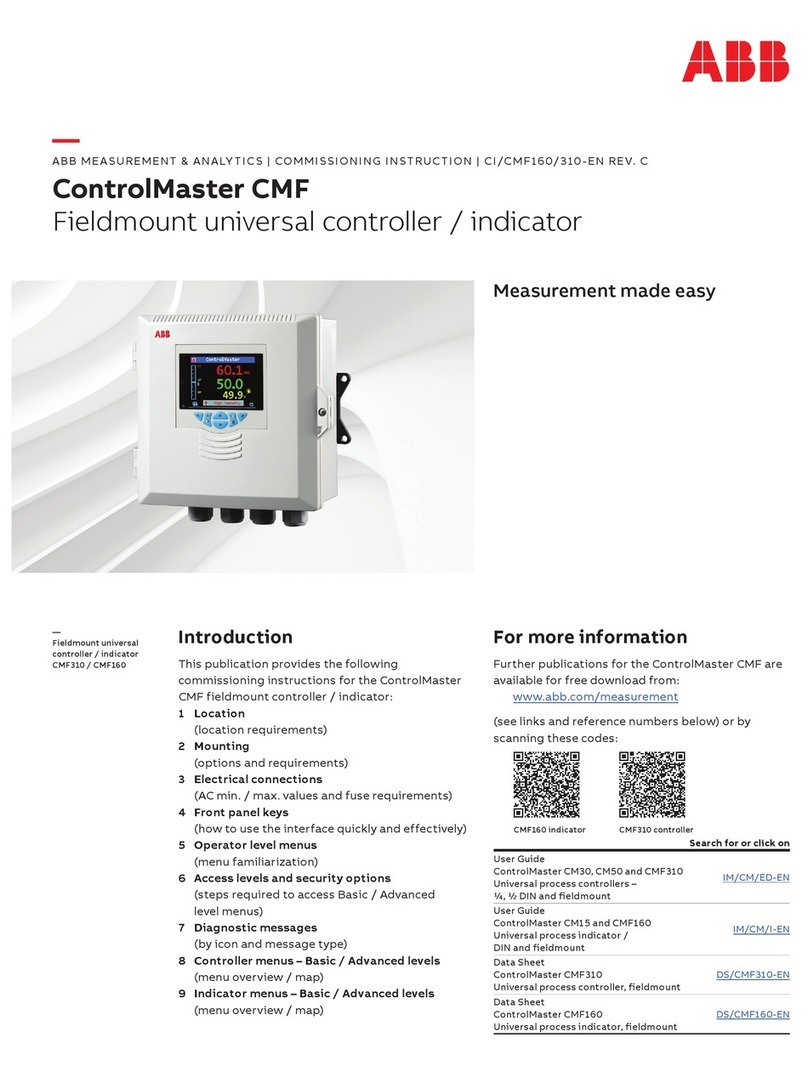
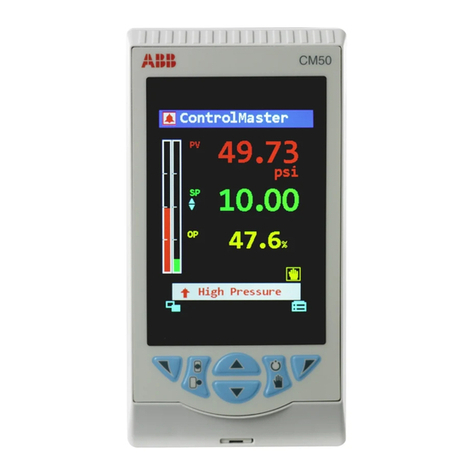
ControlMaster CM10
Universal process controller, DIN
Measurement made easy

For more information
Further publications for the ControlMaster CM10
controller are available for free download from:
www.abb.com/measurement
or by scanning this code:
Search for or click on:
Data sheet
User guide (basic functionality)
IM/CM/B-EN
User guide (standard functionality)
IM/CM/S-EN
Communications supplement
IM/CM/C-EN
To access the IAMA help & support portal please
scan the following code:

CONTROLMASTER CM10 | UNIVERSAL PROCESS CONTROLLER, DIN | CI/CM10-EN REV. C 3
Contents
1 Health & Safety ............................................................4
Document symbols .........................................................4
Safety precautions.......................................................... 4
Potential safety hazards................................................ 5
Electrical .................................................................... 5
Safety standards ............................................................. 5
EC Directive 89/336/EEC............................................... 5
End-of-life disposal ........................................................ 5
Cleaning ............................................................................. 6
Symbols.............................................................................. 6
Restriction of Hazardous Substances (RoHS) ......... 7
2 Specification................................................................8
3 Installation .................................................................10
Siting ................................................................................ 10
Mounting ..........................................................................11
4 Electrical connections..............................................13
Accessing the connection terminals ........................ 14
Standard analog inputs (1 and 2)............................... 16
5 Front panel keys ........................................................ 17
6 Operator level menus ...............................................18
7 Access levels and security options ........................19
Security options ............................................................ 19
8 Diagnostics messages ............................................ 20
9 Instrument menus.................................................... 24

4CONTROLMASTER CM10 |UNIVERSAL PROCESS CONTROLLER, DIN | CI/CM10-EN REV. C
1 Health & Safety
Document symbols
Symbols that appear in this document are explained
below:
WARNING
The signal word ‘WARNING’ indicates an imminent
danger. Failure to observe this information may
result in death or severe injury.
NOTICE
The signal word ‘NOTICE’ indicates potential
material damage.
Note.
‘Note’ indicates useful or important information about
the product.
Safety precautions
Be sure to read, understand and follow the instructions
contained within this manual before and during use of
the equipment. Failure to do so could result in bodily
harm or damage to the equipment.
WARNING
Installation and maintenance of this product must
only be conducted by personnel authorized to work
on electrical installations and in accordance with
relevant local regulations.

CONTROLMASTER CM10 | UNIVERSAL PROCESS CONTROLLER, DIN | CI/CM10-EN REV. C 5
Potential safety hazards
Electrical
WARNING
To ensure safe use when operating this equipment,
the following points must be observed:
• Up to 240 V AC may be present. Be sure to isolate
the supply before removing the terminal cover.
• Normal safety precautions must be taken to
avoid the possibility of an accident occurring
when operating in conditions of high pressure
and/or temperature.
Safety advice concerning the use of the equipment
described in this manual or any relevant Material
Safety Data Sheets (where applicable) can be
obtained from the Company, together with servicing
and spares information.
Safety standards
This product has been designed to satisfy the
requirements of IEC61010-1:2010 3rd edition 'Safety
Requirements for Electrical Equipment for
Measurement, Control and Laboratory Use' and
complies with US NEC 500, NIST and OSHA.
EC Directive 89/336/EEC
Electrical – In order to meet the requirements of the EC
Directive 89/336/EEC for EMC regulations, this
product must be used in an industrial environment.
End-of-life disposal
The controller contains a small lithium battery that
must be removed and disposed of responsibly in
accordance with local environmental regulations.
The remainder of the controller does not contain
any substance that causes undue harm to the
environment and must be disposed of in
accordance with the Directive on Waste Electrical
and Electronic Equipment (WEEE). It must not be
disposed of in Municipal Waste Collection.

6CONTROLMASTER CM10 |UNIVERSAL PROCESS CONTROLLER, DIN | CI/CM10-EN REV. C
…1 Health & Safety
…End-of-life disposal
ABB is committed to ensuring that the risk of any
environmental damage or pollution caused by any
of its products is minimized as far as possible. The
European Waste Electrical and Electronic
Equipment (WEEE) Directive that initially came into
force on 13 August 2005 aims to reduce the waste
arising from electrical and electronic equipment;
and improve the environmental performance of all
those involved in the life cycle of electrical and
electronic equipment.
In conformity with European local and national
regulations, electrical equipment marked with the
above symbol may not be disposed of in European
public disposal systems after 12th August 2005
Cleaning
The controller can be hosed down if it has been
installed to IP66/NEMA 4X standards. Warm water and
a mild detergent can be used.
Symbols
Symbols that appear on this product are shown below:
Protective earth (ground) terminal.
Both direct and alternating current supply.
This symbol, when noted on a product, indicates a
potential hazard that could cause serious personal
injury and/or death. The user must refer to this
commissioning instruction for operation and/or
safety information.
This symbol, when noted on a product enclosure or
barrier, indicates that a risk of electrical shock
and/or electrocution exists. Only individuals
qualified to work with hazardous voltages should
open the enclosure or remove the barrier.
Recycle separately from general waste under the
WEEE directive

CONTROLMASTER CM10 | UNIVERSAL PROCESS CONTROLLER, DIN | CI/CM10-EN REV. C 7
Restriction of Hazardous Substances (RoHS)
The European Union RoHS Directive and
subsequent regulations introduced in member
states and other countries limits the use of six
hazardous substances used in the manufacturing
of electrical and electronic equipment. Currently,
monitoring and control instruments do not fall
within the scope of the RoHS Directive, however
ABB has taken the decision to adopt the
recommendations in the Directive as the target for
all future product design and component
purchasing.

8CONTROLMASTER CM10 |UNIVERSAL PROCESS CONTROLLER, DIN | CI/CM10-EN REV. C
2 Specification
Mechanical data
Protection
• Front face IP66/ NEMA 4X
• Rear panel IP20
Dimensions
• Height – 97 mm (3.8 in)
• Width – 50 mm (2.0 in)
• Depth behind panel – 121 mm (4.8 in)
Materials of construction
Glass filled polycarbonate
Weight
0.38 kg (0.84 lb)
Electrical
Power supply ranges
• 100 to 240 V AC ±10 % (90 V min. to 264 V max.)
50/60 Hz
• 10 to 36 V DC (optional)
Power consumption
10 W max.
Inputs/Outputs
Analog inputs
• 1 universal
• 1 process
Analog outputs
• 1 standard
• 1 optional
• Galvanically isolated from the rest of the circuitry,
500V for up to 1 minute. Range programmable
@ 20 mA.
Relay outputs
• 1 standard
• 3 optional
• Fully programmable. Contacts rated at 5 A @ 240 V.
Standard relays are changeover. Optional relays are
selectable NO or NC by jumper.

CONTROLMASTER CM10 | UNIVERSAL PROCESS CONTROLLER, DIN | CI/CM10-EN REV. C 9
Digital inputs/outputs
2 optional, user programmable as input or output.
Minimum input pulse duration: 125 ms
Input
• Volt free
• 24 V DC (1 signal 15 to 30 V, 0 signal -3 to 5 V)
Output
• Open collector output
• 30 V, 100 mA max. switched
• Conforms to IEC 61131-2
Update Rate
125 ms
Environmental data
Ambient operating temperature
0 to 55 °C (32 to 131 °F)
Ambient operating humidity
5 to 95 % RH non-condensing
Storage temperature
–20 to 70 °C (–4 to 158 °F)
Approvals, certification & general safety
• EN-61010-1
• cULus
• Overvoltage class III on mains, Class II on
inputs and outputs
• Pollution category 2
• Insulation category 2
Emissions and Immunity
Meets the requirements of IEC 61326 for an industrial
environment

10 CONTROLMASTER CM10 |UNIVERSAL PROCESS CONTROLLER, DIN | CI/CM10-EN REV. C
3 Installation
• Locate the controller in a position where its operating temperature and humidity limits will not be exceeded and
ensure that it is suitably protected from direct sunlight, rain, snow and hail.
• Select a location away from strong electrical and magnetic fields. If this is not possible (particularly in
applications where mobile communications equipment is used), use screened cables within flexible, earthed
metal conduit.
Siting
At eye
level
Close to the sensor
Sensor
Avoid
vibration
Figure 1 Siting
Temperature limits Humidity limits
Use
screened
cable
IP66/NEMA4X
(front panel),
IP20 (rear)
0 to 95 % RH
55 °C
(131 °F)
max.
0 °C
(32 °F)
min.
Figure 2 Environmental requirements

CONTROLMASTER CM10 | UNIVERSAL PROCESS CONTROLLER, DIN | CI/CM10-EN REV. C 11
Mounting
ControlMaster CM10 is designed for panel mounting.
For NEMA4X protection, a panel thickness of 2.5 mm
(0.1 in) is required.
Referring to Figure 3:
1 Cut a hole of the correct size for the controller in the
panel.
2 Insert the controller into the panel cut-out.
121 (4.8)
141 (5.5)
50 (2.0)
20 (0.8)
14 (0.55)
≥30 (1.18)
45
(1.8 )
+0.6
–0
+0.02
–0
91.8
(3.6 )
+0.8
–0
+0.03
–0
91.8
(3.6)
97
(3.8)
Panel cut-out dimensions
Figure 3 Mounting dimensions

12 CONTROLMASTER CM10 |UNIVERSAL PROCESS CONTROLLER, DIN | CI/CM10-EN REV. C
…3 Installation
Referring to Figure 4:
1 Position one panel clamp Aat the top of the case
against the panel.
2 Locate the panel clamp anchor Bin slot C.
3 Tighten the panel clamp anchor screw Duntil
panel clamp Ais lightly touching the panel
4 Repeat steps 1 to 3 to fit the remaining panel clamp
Eand panel clamp anchor F
5 Torque tighten both panel clamp anchor screws to
0.1 N⋅m (0.9 lbf⋅in).
NOTICE
Do not over-tighten the screws.
Figure 4 Panel clamp assembly

CONTROLMASTER CM10 | UNIVERSAL PROCESS CONTROLLER, DIN | CI/CM10-EN REV. C 13
4 Electrical connections
WARNING
• The controller is not fitted with a switch
therefore a disconnecting device such as a
switch or circuit breaker conforming to local
safety standards must be fitted to the final
installation. It must be fitted in close proximity
to the controller within easy reach of the
operator and must be marked clearly as the
disconnection device for the controller. A fuse
must be fitted in accordance with Figure 6 on
page 15.
• Remove all power from the supply, relay and any
powered control circuits and high common
mode voltages before accessing or making any
connections.
• Use cable appropriate for the current loads:
3-core cable rated 3 A and 90 °C (194 °F)
minimum, that conforms to either IEC 60227 or
IEC 60245. The terminals accept cables from 0.8
to 2.5 mm2(18 to 14 AWG).
• The controller conforms to installation category
II of IEC 61010.
• All connections to secondary circuits must have
basic insulation.
• After installation there must be no access to live
parts, for example, terminals.
• Terminals for external circuits are for use only
with equipment with no accessible live parts.
• If the controller is used in a manner not specified
by the company, the protection provided by the
equipment may be impaired.
• All equipment connected to the controller’s
terminals must comply with local safety
standards (IEC 60950, EN601010-1)

14 CONTROLMASTER CM10 |UNIVERSAL PROCESS CONTROLLER, DIN | CI/CM10-EN REV. C
…4 Electrical connections
NOTICE
• Always route signal leads and power cables
separately, preferably in earthed (grounded)
metal conduit.
• Use screened cable for signal inputs and relay
connections.
• Replacement of the internal battery (type Varta
CR1620 3V lithium cell) must be carried out by an
approved technician only
Accessing the connection terminals
Referring to Figure 5, press terminal cover release
catch Aand pull the terminal cover Baway from the
controller body.
B
A
Figure 5 Removing terminal cover

CONTROLMASTER CM10 | UNIVERSAL PROCESS CONTROLLER, DIN | CI/CM10-EN REV. C 15
1
2
3
4
5
6
7
8
9
10
11
12
19
20
21
22
23
24
25
26
27
28
29
30
13
14
15
16
17
18
25
26
Rear view
Tx
PSU
NC
C
NO
**
C
**
C
**
C
**
C
Line ***
Neutral
100 to
240 V AC
10W
Analog input 1
Analog output 2
Digital output + external
Digital input/output 1
Digital input/output 2
Digital input/output –
Relay output 1
Relay output 2
Relay output 2
Relay output 3
Relay output 4
* Refer to the Communications Supplement (IM/CM/C-EN) for MODBUS
connection details
** N/O or N/C contact selection is made via internal jumper links.
N/O is the factory default setting.
*** 200 mA type T fuse (mains AC) or 2 A type T fuse (120 V DC max.) and
external isolating switch. For UL-marked controllers the fuse must be UL
recognized.
**** Provides 24 V digital output (observe + and – connections).
Analog input 2
Analog/digital output 1 ****
10 to
36 V DC
Comms *
Rear viewStandard connections Option board 1
Option board 1A
Figure 6 Electrical connections

16 CONTROLMASTER CM10 |UNIVERSAL PROCESS CONTROLLER, DIN | CI/CM10-EN REV. C
…4 Electrical connections
Standard analog inputs (1 and 2)
1
2
3
4
5
Tx
Tx
* Using internal transmitter power supply.
** Fit the CJ sensor supplied if analog input 1 or 2 are THC inputs.
Alternatively, it is possible to use an external fixed cold (reference) junction if the controller
is programmed for use with millivolt inputs and the appropriate thermocouple linearizer is
selected.
*** Analog input 2 can be used with THC inputs only if analog input 1 is also used as a THC input.
**** For mA input types, to ensure loop continuity when the controller is switched off, fit a 2V7
Zener diode as shown.
Note.
THC
THC***
Milliamps*
Milliamps*
Analog input 1
Analog input 2 mA****, mV, V
digital input
mA****,
mV, V
digital
input
Transmitter PSU
RTD+ RTD+
3rd lead
3-lead RTD
2-lead RTD
+ resistance
RTD–
RTD–
RTD–
CJ**
CJ sensor

CONTROLMASTER CM10 | UNIVERSAL PROCESS CONTROLLER, DIN | CI/CM10-EN REV. C 17
5 Front panel keys
Operation is performed using the keys on the front
panel. These enable local navigation and selection of
software options on all displays, acknowledgment of
alarms and error messages, monitoring and access to
all menus.
All diagnostics messages are displayed within the
Diagnostics View.
Prompts associated with active keys are displayed on
each screen. Diagnostic and display icon descriptions
are included in this document.
Key functions for the controller overlay are described
below:
ABC
ANavigation key (left)/operator level access key.
BUp/Down keys – navigate up/down menu items
and increase/decrease displayed values.
CNavigation key (right)/programmable soft key.
Note. When a soft key option is assigned to key C, the
Advanced Level (see page 19) must be accessed
using key A.

18 CONTROLMASTER CM10 |UNIVERSAL PROCESS CONTROLLER, DIN | CI/CM10-EN REV. C
6 Operator level menus
Autotune
Adjust
Setpoint Select
Alarm Acknowledge
Operator level menus are used to adjust setpoint(s) and output(s), select setpoints,
select the view and to enter Basic and Advanced modes (via the Access Level).
To access Operator Level menus:
1 From the Operator Page, press to view the available menus.
2 Use the and keys to scroll through the menus and menu options.
3 Press to expand menu levels and to select menu options or press to return
to the previous menu.
Autotune Used to start or stop an Autotune routine.
This menu is enabled only if Autotune mode is On.
Adjust Enables a value to be adjusted using the and keys.
The icon next to a value indicates the current adjustable selection.
Setpoint Select Selects the local setpoint to be used
(displayed only if more than 1 local setpoint is configured).
Alarm Acknowledge Acknowledges any active but unacknowledged alarms.
View Select Selects the Operator view to be displayed.
Enter Advanced Level Displays the Access Level selection views.

CONTROLMASTER CM10 | UNIVERSAL PROCESS CONTROLLER, DIN | CI/CM10-EN REV. C 19
7 Access levels and security options
Access Level
Logout
Read O nly
Basic
Advanced
Service
The access level menus are used to enter the Basic and Advanced menus, view all
parameters in read only mode and to logout (return to operator view mode).
To view Access Level menus:
1 From the operator view mode, press
OR
press to display the available operator menus and use the and keys
to scroll to Enter Config. Mode, then press . The Access Level menu is
displayed.
2 Use the and keys to scroll to the required/permitted level of access
(basic or advanced), then press .
Logout Displayed after basic or advanced level are accessed.
Logs the user out of basic or advanced level.
If passwords are set, a password must be entered to access the levels again after selecting log out.
Read Only Enables all parameter settings to be viewed.
Basic Enables access to the basic level and adjustment of totalizer count settings and alarm trip points.
Advanced Enables configuration access to all parameters.
Service Reserved for use by authorized personnel.
Security options
Passwords can be set to enable secure end-user access
at 2 levels: Basic and Advanced. The Service level is
password protected and reserved for factory use only.
Passwords are set, changed or restored to their default
settings at the device setup/security setup parameter.

20 CONTROLMASTER CM10 |UNIVERSAL PROCESS CONTROLLER, DIN | CI/CM10-EN REV. C
8 Diagnostics messages
The controller is programmed to display diagnostics
messages that provide information on servicing
requirements and any other conditions that develop
during operation.
When a diagnostics condition is detected, the
associated NAMUR Icon, together with the highest
priority diagnostics message are displayed in the
status bar when in operator view. A list of all currently
active diagnostic alarm states are displayed in the
diagnostic view.
Failure
Maintenance
Out of spec
Check function
Description of diagnostic or alarm tag.
The highest priority diagnostic or alarm
is displayed. Other active diagnostic/
alarm states can be viewed on the
Diagnostic View – see below.
High process alarm
Low process alarm
High latch alarm
High latch alarm
NAMUR (NE107) status icon
Hig h Tem p
PV1 Failed
Hig h Tem p
Alarm
icon
Diagnostic description/alarm tag
Other manuals for ControlMaster CM10
4
Table of contents
Other ABB Controllers manuals

ABB
ABB i-bus KNX User manual

ABB
ABB UMC100.3 User manual

ABB
ABB Relion 670 series Quick start guide

ABB
ABB ACS55-01E-01A4-2 User manual

ABB
ABB ACS800-01 User manual

ABB
ABB AC 800M Quick guide

ABB
ABB ACS150 series User manual

ABB
ABB UMC22-FBP Parts list manual

ABB
ABB ACS355 series Troubleshooting guide

ABB
ABB MotiFlex e180 User guide