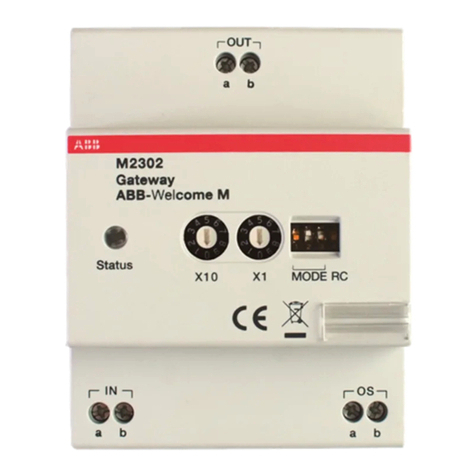
ABB Busch-Welcome User manual

1473-1-8354 │ 04.07.2013
Operating Instructions
Busch-Welcome®
Pos: 2 /#Neustruktur#/ Online-Dokumentatio n (+KNX)/Titelblät ter/Türkommunikatio n/Busch-Welcome II /Titelblatt - 83341 - ABB @ 36\mod_137093598 2690_15.docx @ 296874 @ @ 1
Busch-Welcome®
83341-500
IP gateway
=== Ende der Liste für Te xtmarke Cover ===

Operating Instructions
Busch-Welcome®
Operating Instructions | 1473-1-8354
— 2 —
Pos: 4 /#Neustruktur#/ Online-Dokumentatio n (+KNX)/Inhaltsver zeichnis (--> Für alle Dokument e <--)/Inhaltsverzeic hnis @ 19\mod_1320649044386_ 15.docx @ 109653 @ @1
1Information about the IP gateway ............................................................................................................................3
1.1 General information.................................................................................................................................3
1.2 Structure of the manual...........................................................................................................................3
1.3 Symbols in the manual............................................................................................................................4
2Safety.......................................................................................................................................................................5
2.1 Intended use ...........................................................................................................................................5
2.2 Improper use...........................................................................................................................................5
2.3 Target groups and qualifications.............................................................................................................5
2.4 Liability and warranty ..............................................................................................................................5
3Environment.............................................................................................................................................................6
4System requirements...............................................................................................................................................6
5Start-up....................................................................................................................................................................7
5.1 Commissioning with the Windows UPnP service....................................................................................8
5.2 DNS Server.............................................................................................................................................9
5.3 Manual configuration...............................................................................................................................9
5.4 Entering the IP address directly ............................................................................................................10
6Configuration..........................................................................................................................................................11
6.1 General buttons in the configuration .....................................................................................................11
6.2 Login.....................................................................................................................................................11
6.2.1 RESET..................................................................................................................................................12
6.3 Network information..............................................................................................................................13
6.4 "Network configuration" page................................................................................................................14
6.5 "Basic settings" configuration page.......................................................................................................16
6.6 "Change password" configuration page................................................................................................17
6.7 "User management" configuration page................................................................................................18
6.7.1 "Add user" configuration page...............................................................................................................19
6.7.2 Login with new user name ....................................................................................................................21
6.7.2.1 Change password.................................................................................................................................22
6.8 "Device settings" configuration page.....................................................................................................23
6.8.1 Add device ............................................................................................................................................24
6.9 "Associated ComfortTouch 2.x" configuration page..............................................................................25
6.10 "Upload / download configuration file" configuration page ....................................................................26
6.11 "Firmware Update" configuration page..................................................................................................27
6.12 "NTP settings" configuration page.........................................................................................................28
6.13 "Create a new certificate" configuration page .......................................................................................29
6.14 "Versions Information" configuration page ............................................................................................30
7Integrating mobile end devices with the Busch-Welcome®app .............................................................................31
7.1 Android version 4.0 or higher................................................................................................................31
7.2 iOS version 4 / 5 and iPad ....................................................................................................................32
8Integrating a Busch-ComfortTouch®3.0 or higher ................................................................................................33
9Technical data........................................................................................................................................................34
9.1 Overview table ......................................................................................................................................34
9.2 Device connection / circuit diagram ......................................................................................................35
9.3 Dimensions / dimensional drawing........................................................................................................36
10 Product overview ...................................................................................................................................................36
10.1 Device setup .........................................................................................................................................36
11 Installation and electrical connection .....................................................................................................................37
11.1 Requirements for the electrician ...........................................................................................................37
11.2 Mounting ...............................................................................................................................................37
=== Ende der Liste für Te xtmarke TOC ===
Operating Instructions
Busch-Welcome®
Information about the IP
gateway
Operating Instructions | 1473-1-8354
— 3 —
Pos: 6.1 /#Neustruktur#/ Online-Dokumentation(+ KNX)/Überschriften (--> Für alle Doku mente <--)/1. Ebene/G - L/Hin weise zum IP-Gate way @ 35\mod_1363611958376_15.doc x @ 288301 @ 1111 @ 1
1 Information about the IP gateway
Pos: 6.2.1 /#Neustruk tur#/Online-Dokumentation (+ KNX)/Überschrif ten( --> Für alle Dokumente <--)/2. E bene/A - F/Allgemeine Hinweise @ 30\mod_13484810241 26_15.docx @ 238505 @ 2 @ 1
1.1 General information
Pos: 6.2.2 /#Neustruk tur#/Online-Dokumentation (+ KNX)/Hinweise zum KNX Tec hnischen Handbuch ( --> Für alle Dokumente --<)/ Allgemeine Hinweise/Allge meine Hinweise - KNX Technisc hes Handbuch @ 30\mod_134847 9193040_15.docx @ 238433 @ 1111 @ 1
Please read this manual through carefully and adhere to the information listed. This will ensure reliable operation
and long service life of your product.
For reasons of clarity this manual does not contain all the detailed information on all the models of the product,
nor can it take into consideration all conceivable circumstances related to installation, operation and maintenance.
If additional information is required or problems arise that are not dealt with in this manual, the necessary
information can be requested from the manufacturer.
The product has been constructed according to the latest valid regulations governing technology and is
operationally reliable. It has been tested and left the factory in a technically safe and reliable state. To maintain
this state for the period of its operation the specifications of this manual must be observed and adhered to.
Modifications and repairs to the product must only be undertaken if the manual expressly permits this.
It is only the adherence to the safety instructions and all safety and warning symbols in this manual that will
ensure the optimum protection of the user and the environment as well as the safe and trouble-free operation of
the product.
Pos: 6.3.1 /#Neustruk tur#/Online-Dokument ation (+KNX)/Überschr iften (--> Für alle Dokumente < --)/2. Ebene/A - F/Aufbau des Handbuc hes @ 24\mod_1338552603 038_15.docx @ 215245 @ 222 @ 1
1.2 Structure of the manual
Pos: 6.3.2 /#Neustruk tur#/Online-Dokument ation (+KNX)/Hinweise z um KNX Technischen Handb uch/Türkommunika tion/Busch-Welcome II/Aufbau des H andbuches - 83341 @ 35\mod_136361198 4396_15.docx @ 288342 @ @ 1
(
• This manual provides you with the detailed technical information about the device, its installation and
configuration. The use of the device is explained by means of examples.
• The chapters "Information on the manual", "Safety", "Environmental information" and "Product overview"
contain general specifications and basic information as well as a description of functions.
• Chapters "Technical data" and "Mounting and electrical connection" describe the device technology and
installation, mounting and the electrical connections.
• Chapters "Commissioning" and "Configuration" contain instructions on commissioning and setting up or
integrating the device.
• Chapter "Maintenance" contains information about cleaning, fault condition diagnostics and repairing the
device.
Pos: 6.4 /#Neustruktur#/ Online-Dokumentatio n (+KNX)/Steuermod ule - Onlin e-Dokumentation (--> Für alle Dokumente < --)/++++++++++++Seitenumbruch++++++++++++@ 9\mod_1268898668093_ 0.docx @ 52149 @ 1 @ 1

Operating Instructions
Busch-Welcome®
Information about the IP
gateway
Operating Instructions | 1473-1-8354
— 4 —
Pos: 6.5.1 /#Neustruk tur#/Online-Dokument ation (+KNX)/Überschr iften (--> Für alle Dokumente < --)/2. Ebene/S - T/Symbole des Han dbuches @ 30\mod_1348481258296 _15.docx @ 238518 @ 1111 @ 1
1.3 Symbols in the manual
Pos: 6.5.2 /#Neustruk tur#/Online-Dokument ation (+KNX)/Hinweise z um KNX Technischen Handb uch (--> Für alle Dokumen te--< )/Symbole des Handbuches ( Vollständig - KNX THB)/Sy mbole des Handbuches (Vollst ändig - KNX THB) @ 30\mod_1348480199844_15. docx @ 238490 @ 1 @ 1
Danger - danger to life
This symbol in connection with the signal word "Danger" indicates dangerous situations which
could lead to immediate death or to serious injury.
Warning - danger to life
This symbol in connection with the signal word "Warning" indicates a dangerous situation which
could lead to immediate death or to serious injury.
Caution - risk of injury
This symbol in connection with the signal word "Caution" indicates a possibly dangerous situation
which could lead to slight or moderately serious injury.
Attention - damage to property
This symbol indicates a possibly harmful situation. Non-observance of the safety instructions can
lead to damage or destruction of the product.
Note ...
This symbol indicates information or references to additional useful topics. This is not a signal word
for a dangerous situation.
This symbol refers to integrated videos with additional information on the respective chapter.
An Acrobat Reader from Version 9.0 is required to view the videos.
This symbol indicates information on the protection of the environment.
Examples on application, installation and programming are displayed with a grey background.
Pos: 7 /#Neustruktur#/ Online-Dokumentation (+KNX)/ Steuermodule - On line-Dokumentation ( --> Für alle Dokumente <--)/++++++++++++Seitenumbruch ++++++++++++@ 9\mod_12688986 68093_0.docx @ 52149 @ 1 @ 1

Operating Instructions
Busch-Welcome®
Safety
Operating Instructions | 1473-1-8354
— 5 —
Pos: 8.1 /#Neustruktur#/ Online-Dokumentatio n (+KNX)/Überschri ften (--> Für alle Dokumente <--) /1. Ebene/S - T/Sicherhei t @ 18\mod_1302612791790_15. docx @ 103357 @ 22122 @ 1
2 Safety
Pos: 8.2 /#Neustruktur#/ Online-Dokumentatio n (+KNX)/Sicher heitshinweise und Hinwei se (--> Für alle Dokumente <--)/W arnhinweise/Sicherhei t - 230 V @ 18\mod_1302606816750_15.d ocx @ 103308 @ 1 @ 1
Warning
Electric voltage!
Risk of death and fire due to electrical voltage of 230 V.
– Work on the 230V supply system may only be performed by authorised electricians!
– Disconnect the mains power supply prior to installation and/or disassembly!
Pos: 8.3 /#Neustruktur#/ Online-Dokumentatio n (+KNX)/Sicher heitshinweise und Hinwei se (--> Für alle Dokumente <--)/ Hinweise - Sachschäden/Achtung - B eschädigung durch äußer e Einwirkungen @ 26\mod_13439 95985123_15.docx @ 226743 @ 2222 22 @ 1
Caution
Risk of damaging the device due to external factors!
Moisture and contamination can damage the device.
That is why the device must be protected against humidity, dirt and damage during transport,
storage and operation!
Pos: 8.4.1 /#Neustruk tur#/Online-Dokument ation (+KNX)/Überschr iften (--> Für alle Dokumente < --)/2. Ebene/A - F/Bestimmungsge mäßer Gebrauch @ 25\mod_1340691838858 _15.docx @ 220036 @ 222222 @ 1
2.1 Intended use
Pos: 8.4.2 /#Neustruk tur#/Online-Dokument ation (+KNX)/Sic herheit/Musterdokumen t/Bestimmungsge mäßer Gebrauch/Bestimmu ngsgemäßer Gebrauch - 83341 @ 35\mod_ 1363612058226_15.docx @ 288438 @ 22 @ 1
The device must only be operated within the specified technical data!
The device is used for door communication and video transmission.
To set up the device requires an external device (laptop).
Pos: 8.5.1 /#Neustruk tur#/Online-Dokument ation (+KNX)/Überschr iften (--> Für alle Dokumente < --)/2. Ebene/A - F/Bestimmungs widriger Gebrauch @ 30\mod_13484823 82253_15.docx @ 238583 @ 11111111 @ 1
2.2 Improper use
Pos: 8.5.2 /#Neustruk tur#/Online-Dokument ation (+KNX)/Sic herheit/Musterdokument/ Bestimmungswidriger Gebrauc h/Bestimmungswidri ger Gebrauch - 83341 @ 35\mod_1363612092911 _15.docx @ 288470 @ 1222333 @ 1
The device is dangerious if used improperly. Any non-intended use is deemed improper use. The manufacturer is
not liable for damages resulting from such improper use. The associated risk is borne by the user/operator.
Pos: 8.6.1 /#Neustruk tur#/Online-Dokument ation (+KNX)/Überschr iften (--> Für alle Dokumente < --)/2. Ebene/U - Z/Zielgr uppen und Qualifikatione n @ 30\mod_1348478339232 _15.docx @ 238335 @ 223 @ 1
2.3 Target groups and qualifications
Pos: 8.6.2 /#Neustruk tur#/Online-Dokument ation (+KNX)/Si cherheit (--> Für alle Doku mente <--)/Zielgruppen und Quali fikationen/Ziel gruppen und Aulifikati onen @ 30\mod_134847812144 8_15.docx @ 238322 @ 3211113331 @ 1
Installation, commissioning and maintenance of the product must only be carried out by trained and properly
qualified electrical installers. The electrical installers must have read and understood the manual and follow the
instructions provided. The operator must adhere to the valid national regulations in his country governing the
installation, functional test, repair and maintenance of electrical products.
Pos: 8.7.1 /#Neustruk tur#/Online-Dokument ation (+KNX)/Überschr iften (--> Für alle Dokumente < --)/2. Ebene/G - L/Haftung und Gewährlei stung @ 30\mod_1348478525 228_15.docx @ 238363 @ 331111133 3 @ 1
2.4 Liability and warranty
Pos: 8.7.2 /#Neustruk tur#/Online-Dokument ation (+KNX)/Si cherheit (--> Für alle Doku mente <--)/Haftung und Gewährleis tung/Haftung und Gewähr leistung - KNX... @ 30\mod_1348478419853_15.d ocx @ 238349 @ 2222233111323 @ 1
Improper use, non-observance of this manual, the use of inadequately qualified personnel, as well as
unauthorized modification excludes the liability of the manufacturer for the damages caused. It voids the warranty
of the manufacturer.
Pos: 9 /#Neustruktur#/ Online-Dokumentatio n (+KNX)/Steuermodul e - Online -Dokumentation (--> Für alle Dokumente <--)/ ++++++++++++Seitenumbruch++++++++++++ @ 9\mod_1268898668093_0. docx @ 52149 @ 31113 @ 1

Operating Instructions
Busch-Welcome®
Environment
Operating Instructions | 1473-1-8354
— 6 —
Pos: 10.1 /#Neustrukt ur#/Modul-Struktur/ Online-Dokumentation/Übersc hriften (--> Für alle Dokument e <--)/1. Ebene/U - Z/ Umwel t @ 18\mod_130261 4158967_15.docx @ 103383 @ 33333 3@ 1
3 Environment
Pos: 10.2 /#Neustrukt ur#/Online-Dokumenta tion (+KNX)/Sicher heitshinweise und Hin weise (--> Für alle Dokumente <--) /Hinweis e/Hin weis - Umwel t - Hinweis Elektroger äte @ 18\mod_1302763973434_ 15.docx @ 103500 @ 3333333333333 @ 1
Consider the protection of the environment!
Used electric and electronic devices must not be disposed of with domestic waste.
– The device contains valuable raw materials which can be recycled. Therefore, dispose of the
device at the appropriate collecting depot.
Pos: 10.3 /#Neustrukt ur#/Online-Dokumenta tion (+KNX)/Sicher heitshinweise und Hin weise (--> Für alle Dokumente <--) /Hinweis e/Hin weis - Umwel t - Entsorgung Elektrogerät e @ 20\mod_1325760695972_15. docx @ 136583 @ 3333333333 @ 1
All packaging materials and devices bear the markings and test seals for proper disposal. Always dispose of the
packaging material and electric devices and their components via the authorized collecting depots and disposal
companies.
The products meet the legal requirements, in particular the laws governing electronic and electrical devices and
the REACH ordinance.
(EU Directive 2002/96/EC WEEE and 2002/95/EC RoHS)
(EU REACH ordinance and law for the implementation of the ordinance (EC) No.1907/2006)
Pos: 11 /#Neustruktur #/Online-Dokumentati on (+KNX)/Überschr iften (--> Für alle Dokumente <--)/ 1. Ebene/S - T/Systemvorausse tzungen @ 17\mod_12976744463 98_15.docx @ 100396 @ 33333332333 3311311 @ 1
4 System requirements
Pos: 12 /#Neustruktur #/KNX-Produkthandbüc her/Busch-IP_Project/IPP Guide s/Installation/ Systemvorraussetz ungen - 83341 @ 35\mod_1363612133 631_15.docx @ 288502 @ 311311 @ 1
Note
When choosing the installation site, please note that the IP gateway must be connected to the
router by a LAN cable.
The following system requirements are necessary for smooth operation of the IP gateway:
Components for the IP gateway
The following components are required to operate the IP gateway:
- A Busch-Welcome®door communication system including at least one outdoor station and one system
controller
- IP network (should connect mobile devices, must have a WLAN connection)
- An outdoor station with camera must be integrated for video transmission
As tenants
As tenants, the following come into question for operation with the IP gateway:
- The Busch-ComfortTouch®series 2.4 or higher
- Mobile terminal devices with Google Android (from Android 4.0 and Cortex-A8 CPU) or Apple iOS (from iOS
5) operating system
Mobile app
If you want to use the Busch-Welcome®mobile app from the Internet, the following requirements must also be
met:
- DSL-6000 Internet connection or faster
- Minimum 3G (UMTS) mobile Internet
- Camera for fast configuration via QR code
- DynDNS account
Note
To correctly route calls from the Internet, the IP gateway must have a static IP address. If not, a
DynDNS service can ensure that calls are correctly routed (see section ""Network configuration"
page").
Pos: 13 /#Neustruktur #/Online-Dokumentati on (+KNX)/Steuermodu le - Online -Dokumentation (--> Für alle Dokumente < --)/++++++++++++Seitenumbruch++++++++++++@ 9\mod_12688 98668093_0.doc x@ 52149 @ 1111111 11133333333333 @ 1

Operating Instructions
Busch-Welcome®
Start-up
Operating Instructions | 1473-1-8354
— 7 —
Pos: 14 /#Neustruktur #/Leermodule/-----------------------------------------Erstinbetriebnahme----------------------------------------- @ 25\mod_1340800537629_15.doc x@ 220 369@ 1111 111111 @ 1
Pos: 15 /#Neustruktur #/Online-Dokumentati on (+KNX)/Überschr iften (--> Für alle Dokumente <--)/ 1. Ebene/A - F/Erstinbetriebna hme @ 17\mod_1299234649340_1 5.docx @ 100978 @ 111111111111111 1111111 @ 1
5 Start-up
Pos: 16 /#Neustruktur #/Online-Dokumentati on (+KNX)/Erstinbetr iebnahme/Busch-W elcome II/Erstinbetri ebnahme - 83341 @ 35\mod_136361216576 7_15.docx @ 288518 @ 11111111111 1 @ 1
The IP gateway has a user interface that can be reached via an Internet browser. The user interface can be
opened from every computer that is part of the same network as the gateway that is to be configured.
For the initial startup of the IP gateway a few basic settings need to be made in this user interface.
Three options are available to you for commissioning:
Commissioning
Description
Version 1 - UPnP Commissioning with the Windows UPnP service (Windows Vista or higher)
Version 2 - DNS Server Commissioning via a router with DNS server
Version 3 - Manual Manual commissioning
Version 4 - IP address Enter IP address directly
Information regarding documentation
The Windows Vista interface is used to describe the configuration options.
Pos: 17 /#Neustruktur #/Online-Dokumentati on (+KNX)/Steuermodu le - Online -Dokumentation (--> Für alle Dokumente < --)/++++++++++++Seitenumbruch++++++++++++@ 9\mod_12688 98668093_0.doc x@ 52149 @ 1222212 222222 @ 1

Operating Instructions
Busch-Welcome®
Start-up
Operating Instructions | 1473-1-8354
— 8 —
Pos: 18 /#Neustruktur #/Online-Dokumentati on (+KNX)/Überschr iften (--> Für alle Dokumente <--)/ 2. Ebene/G - L/Inbetr iebnahme mit de m Windows UPnP-Diens t @ 35\mod_1363612234150_ 15.docx @ 288582 @ 12222222222222 22222 @ 1
5.1 Commissioning with the Windows UPnP service
Pos: 19 /#Neustruktur #/Online-Dokumentati on (+KNX)/Erstinbetr iebnahme/Busch-Welcome II /Einbindung über UPnP - 83341 @ 35\mod_ 1363612178713_15.doc x@ 2885 34 @ 22222222222222222222111 122222222 @ 1
Preconditions:
– There is a DHCP server on the network, e.g. integrated in the router.
– The IP gateway is connected to the router by a LAN cable.
– The PC is connected to the network.
– The IP gateway is connected and ready for operation.
Fig. 1: Windows UPnP service
1. Open Windows Explorer.
2. Click the "Network" entry below the displayed drives.
The window pane on the right now displays all devices currently on the network.
3. Double-click the IP gateway icon.
A browser window with the configuration interface automatically opens.
Note
If the browser does not open automatically, the device properties appear instead. Copy the
displayed IP address, e.g. 192.168.10.192, and enter it manually into the browser's address bar.
Pos: 20 /#Neustruktur #/Online-Dokumentati on (+KNX)/Steuermodu le - Online -Dokumentation (--> Für alle Dokumente < --)/++++++++++++Seitenumbruch++++++++++++@ 9\mod_12688 98668093_0.doc x@ 52149 @ 2211122 22222222 @ 1

Operating Instructions
Busch-Welcome®
Start-up
Operating Instructions | 1473-1-8354
— 9 —
Pos: 21 /#Neustruktur #/Online-Dokumentati on (+KNX)/Überschr iften (--> Für alle Dokumente <--)/ 2. Ebene/A - F/DNS Server @ 36\mod_1365745669 633_15.docx @ 294055 @ 222222222 2222211212222222222 2222222222 @ 1
5.2 DNS Server
Pos: 22 /#Neustruktur #/Online-Dokumentati on (+KNX)/Erstinbetr iebnahme/Busch-W elcome II/DNS Server - 83341 @ 36\mod_1365 745721504_15.doc x@ 29407 0 @ 222222222222222222222 2222222222222222211111 111112 @ 1
Preconditions:
- Router with DNS server
1. Enter the IP gateway followed by the domain name of the router in the address line of your browser. Example:
IP-Gateway.fritz.box
2. A browser window with the configuration interface opens with a press of the Enter key.
Pos: 23 /#Neustruktur #/Online-Dokumentati on (+KNX)/Überschr iften (--> Für alle Dokumente <--)/ 2. Ebene/M - O/Manu elle Konfiguration @ 35\mod_1363612 218754_15.doc x@ 288566 @ 1111221 211111111111111111 1111111111111111111 1111111111111111111 11112111111 @ 1
5.3 Manual configuration
Pos: 24 /#Neustruktur #/Online-Dokumentati on (+KNX)/Erstinbetr iebnahme/Busch-Welcome II /Einbindung über Manuel leKonf iguration - 83341 @ 36\mod_1 370935200660_15.doc x@ 296 744 @ 11112111111111111111111 1111111111 @ 1
Preconditions:
- The IP gateway is connected to the PC directly by a LAN cable.
- The IP gateway is connected and ready for operation.
Fig. 2: Manual configuration

Operating Instructions
Busch-Welcome®
Start-up
Operating Instructions | 1473-1-8354
— 10 —
1. Link the external device in a common network to the IP gateway.
2. Launch the control panel.
3. Open the "Network and Sharing Center".
4. Open the "Local area connection" (1).
5. In the next window, select the "Properties" (2) button.
6. In the next window, select the list item "Internet Protocol version 4 (TCP/IPv4)" (3).
7. Click the "Properties" button (4).
The "Properties" window for Internet protocol version 4 (TCP/IPv4) opens.
8. Select the option (5) to manually enter the IP address.
9. Assign an IP address (6) within the same range as the IP gateway.
The default IP gateway address is 192.168.1.111.
Note
The IP address of the PC cannot be identical to the IP address of the IP gateway.
Select, for example, 192.168.1.55.
10. Click the "Subnet Mask" (7) box.
The current value is entered automatically and does not need to be changed.
11. Click "OK" to confirm the entry.
Pos: 25 /#Neustruktur #/Online-Dokumentati on (+KNX)/Überschr iften (--> Für alle Dokumente <--)/ 2. Ebene/A - F/Anzeige der IP-Adr esse @ 36\mod_1365745928155_1 5.docx @ 294086 @ 11111111111111 1111111111111111111 1111111111111111111111 1111211111122111122 2211111111111111131 111111131 @ 1
5.4 Entering the IP address directly
Pos: 26 /#Neustruktur #/Online-Dokumentati on (+KNX)/Bedienung/ Türkommunikation/ Busch-Welcome/Anzeige d er IP-Adresse - 83341 @ 36\mod_136574 5979907_15.docx @ 294102 @ 11111 112111322222221111 @ 1
Enter the IP address of the gateway directly into the address line of your browser.
You can display the current IP address of the gateway as follows:
1. Open the user interface of your router. Here you will see a list of all connected devices including their names
and IP addresses. For example, when using a Fritzbox under: Home network / network list. Copy the IP
address of the device "IP gateway" and insert it in the address line of your browser to call up the user
interface of the gateway.
2. Use a special program to identify the IP addresses and associated devices in the network. For example:
SoftPerfect Network Scanner (Windows); Overlook Fing (iOS/ Android)
Pos: 27 /#Neustruktur #/Online-Dokumentati on (+KNX)/Steuermodu le - Online -Dokumentation (--> Für alle Dokumente < --)/++++++++++++Seitenumbruch++++++++++++@ 9\mod_12688 98668093_0.doc x@ 52149 @ 2211112 2221111111111111113 1111111131 @ 1

Operating Instructions
Busch-Welcome®
Configuration
Operating Instructions | 1473-1-8354
— 11 —
Pos: 28 /#Neustruktur #/Online-Dokumentati on (+KNX)/Überschr iften (--> Für alle Dokumente <--)/ 1. Ebene/G - L/Konfi guration @ 35\mod_1363612248673_15.doc x @ 288599 @ 32211112222311111111 111111111111111211 1111222222222222222 222222222222333333 33333333333333333333333 3333321222222222233333 33333333333333333333333333 33333333333333333333333321 1111111111111111111111111 1111111111211111111111 111111111111111111 @ 1
6 Configuration
Pos: 29 /#Neustruktur #/Online-Dokumentati on (+KNX)/Bedienung/ Türkommunikation/ Busch-Welcome/Allgemein e Schaltflöschen der Konfi gurations Interfac e - 83341 @ 35\mod_1363612261829_15.doc x @ 288614 @ 11113222222111222222 221211111111111111 111111111111111111111 111333333333333333 3333333333333333333 3333333333333333333333 33333333333212222222222222 2222222222222233333333333 33333333333333333333333111 1112222222222111111111 111111111111111111 1111111133333333333 33333333322222222 2222222222112111123 3333333 @ 1
All configurations are set in the browser interface.
6.1 General buttons in the configuration
"Log off" button
Click the "Log off" button at the top right to leave the configuration interface as a logged-on user.
You can leave the configuration interface at any time.
"Reset" button
If you have entered incorrect data in the input fields, click the "Reset" button to clear all your entries.
All input fields are cleared and you can enter your data again.
"Save" button
Click the "Save" button to save your entries and to continue to the next configuration page.
Switching to a new configuration page
Click the individual configuration pages in the left column of the configurations to switch to the required
configuration page.
Pos: 30 /#Neustruktur #/Online-Dokumentati on (+KNX)/Überschr iften (--> Für alle Dokumente <--)/ 2. Ebene/G - L/LOGIN @ 35\mod_13636 12270771_15.docx @ 288630 @ 111111 2222222222222222222222 2222233333333333333 333333333333333333 332122222222223333 33333333333333333333 3333333333322222222222 222222222 @ 1
6.2 Login
Pos: 31 /#Neustruktur #/Online-Dokumentati on (+KNX)/Bedienung/ Türkommunikation/ Busch-Welcome/Menü L OGIN - 83341 @ 36\mod_1370935237 191_15.docx @ 296760 @
11111111111111111111 11111111111111333333333333 3333333333333333333333 33333333333333333333333333 3333333212222222222222222 22222222222333333333333333 3333333333333333333111 11122222222221111111111111 11111111111111111111113333 333333333333333322222 2222222222222112111123 33333332222222222222222 22222222222222222222222222 222222222222222222222222 22222222222222222222222222 2222222333333333331222 22222222223333333333333 33333333333333333333333333 333333333333333333333333 33333333333333333333333333 3333333333222222222 22222222222222222222222222 11111111111111222222222 222222222222222222222222222 22222222222222222222222 22222222222222222222222222 22222222222222222222222222 222221111111111111111111 11111111111111111111111 11111111111111111111111111 11111111111111111111111111 111111111111111111111111 1111111111111111111111 11111111111111111111111111 11111111111111111111111111 11111111111111111
11111111111111111111 11111111111111111111111111 1111111111111111111111 11111111111111111111111111 1111111111111111111111111 11111111111111111111111111 111111111111111111 1111111111111111111 1111111111111111111 111111 @ 1
3. Tragen
Fig. 3: Login window
The IP address shows you the IP address currently used by the device.
The MAC address shows you the MAC address currently used by the device.
User name
Enter the default values in the "User name" and "Password" input fields.
(default values):
User name: admin
Password: admin
"Login" button
Click the "Login" button to display the configuration menu.
The window with the network information appears.

Operating Instructions
Busch-Welcome®
Configuration
Operating Instructions | 1473-1-8354
— 12 —
6.2.1 RESET
Note
If you forget your login data, you can reset the IP gateway back to its factory settings.
The "Reset" button is located on the front of the IP gateway behind a flap.
Performing the reset
1. Press the "Reset" button for at least 3 seconds.
Fig. 4: Position of the RESET button
Pos: 32 /#Neustruktur #/Online-Dokumentati on (+KNX)/Steuermodu le - Online -Dokumentation (--> Für alle Dokumente < --)/++++++++++++Seitenumbruch++++++++++++@ 9\mod_12688 98668093_0.doc x@ 52149 @ 2222222 2222211333333332222 112122222111111111 11111111111111111 11111111111111111111111 111111111111111111 1111111111111111111111 111111111111222222222222222 222233333333112111122222 22222222222222222222222222 2222222222222222222222 22222222222222222222222222 2222222222222222222222222 22222222222222222222222222 2222222222222222222222 22222222@ 1

Operating Instructions
Busch-Welcome®
Configuration
Operating Instructions | 1473-1-8354
— 13 —
Pos: 33 /#Neustruktur #/Online-Dokumentati on (+KNX)/Überschr iften (--> Für alle Dokumente <--)/ 2. Ebene/M - O/Menü Netzwerki nformation @ 34\mod_1362494554 308_15.docx @ 284581 @
22222222222222222222 22222222222222222222222222 2222222222222222222222 22222222222222222222222222 2222233333333333122222222 22222333333333333333333333 3333333333333333333333 33333333333333333333333333 33333333333333333333333333 333322222222222222222 22222222222222222211111111 11111122222222222222222222 22222222222222222222222222 222222222222222222222 22222222222222222222222222 22222222222222222222222111 11111111111111111111111111 1111111111111111111111 1111111111111111111111111 11111111111111111111111111 11111111111111111111111111 1111111111111111111111 1111111111111111111111111 11111111111111111111111111 1111111111111111111111 11111111111111111111111111 11111111111111111111111 111111111111111111111111111 11111111111111111111111 11111111111111111111111111 111111111111111111 1111111111111111 11111111111111111111 11111111111111 @ 1
6.3 Network information
Pos: 34 /#Neustruktur #/Online-Dokumentati on (+KNX)/Bedienung/ Türkommunikation/ Busch-Welcome/Menü Netz werkinformation - 83341 @ 36\mod_1370 935257488_15.doc x@ 296776 @ 233 3333333331222222222 222333333333333333 3333333333333333333 3333333333333333333 3333333333333333333333 3333333333333333333333 33222222222222222222222222 222222222221111111111111122 222222222222222222222222 222222222222222 222222222222222222 2222222222 @ 1
The network information appears after logging in.
Fig. 5: Network information
The "Network information" page display the IP gateway settings currently used.
IP address
The IP address is the address for accessing the connected IP gateway.
You need this address to log into the configuration interface!
Note
Note the displayed IP address to log into the configuration again, e.g. after restarting the system
when creating other users.
Pos: 35 /#Neustruktur #/Online-Dokumentati on (+KNX)/Steuermodu le - Online -Dokumentation (--> Für alle Dokumente < --)/++++++++++++Seitenumbruch++++++++++++@ 9\mod_12688 98668093_0.doc x@ 52149 @ 1223333 3333333222222222222 222222222222222222 22222222222222222 22222222222222222222222222 11222121222211222222222222 22222222222222222222222222 222222222222222222222 22222222222222222222222222 2222222222222222222 222222222222222222 2222222 @ 1

Operating Instructions
Busch-Welcome®
Configuration
Operating Instructions | 1473-1-8354
— 14 —
Pos: 36 /#Neustruktur #/Online-Dokumentati on (+KNX)/Überschr iften (--> Für alle Dokumente <--)/2. Ebene/G - L/K onfigurationsseite „Netz werkkonfiguratio n" @ 34\mod_1362494753800_ 15.docx @ 284613 @ 22222222222222 2222222222222211111111 11111111111111111 11111111111111111111 111111111111111 1111111111111111111121 2221111111 @ 1
6.4 "Network configuration" page
Pos: 37 /#Neustruktur #/Online-Dokumentati on (+KNX)/Bedienung/ Türkommunikation/ Busch-Welcome/Menü Netz werkkonfiguration - 83341 @ 36\mod_ 1370935504989_15.doc x@ 296 854 @ 212111112333333333 11111112221211111111111111 1111111111111113333333333333 33333333333333333333333333 3333333333333333333333 111111111111111111 @ 1
Fig. 6: "Network configuration" page
You can configure your device as required on the "Network configuration" page.
DHCP
Select "DHCP" if the device is to automatically obtain an IP address.
Static IP address
Please note that the IP address of the gateway does not change when a static address is assigned. A static IP
address only needs to be assigned in exceptional cases to manually configure the network. Click the "Static IP
address" check box to enter the following addresses:
The following option is also available:
External IP / hostname
Enter the DynDNS address for access via the Internet or from other networks.
Proceed as follows::
To access the IP gateway from the Internet or other networks (changing IP addresses), the hostname has to be
converted to the current IP address.
Note
In this case, there must be an account for a DynDNS provider (DDNS provider).
1. Enter the specified DynDNS address in the "External IP / Hostname" field.
2. Set up forwarding for ports 50600 - 50700 (TCP and UDP) in your router as shown in the example.

Operating Instructions
Busch-Welcome®
Configuration
Operating Instructions | 1473-1-8354
— 15 —
Note
The example shown may differ based on the router used.
Opening several ports makes it possible to integrate multiple mobile devices.
Example based on a FRITZ!Box
Fig. 7: Device can access the Busch-Welcome® app
After setting up the external IP address and forwarding the ports, you can access the Busch-Welcome®system on
the Internet from a mobile device using the Busch-Welcome®app.
Note
You can find more information in the "Integrating mobile end devices with theBusch-Welcome®
app" chapter.
Pos: 38 /#Neustruktur #/Online-Dokumentati on (+KNX)/Steuermodu le - Online -Dokumentation (--> Für alle Dokumente < --)/++++++++++++Seitenumbruch++++++++++++@ 9\mod_12688 98668093_0.doc x@ 52149 @ 2222222 2222222222222222222 222222222222222222 22222222222222222 22222222222222222222222 222222222222222222 2222222222222222222222 222222222222221112121111111 111111122222222122222223 2223322222222222222 @ 1

Operating Instructions
Busch-Welcome®
Configuration
Operating Instructions | 1473-1-8354
— 16 —
Pos: 39 /#Neustruktur #/Online-Dokumentati on (+KNX)/Überschr iften (--> Für alle Dokumente <--)/ 2. Ebene/M - O/Konfigur ationsseite "Grundei nstellungen" @ 34\mod_13 62494927689_15.doc x@ 28464 5 @ 111111111111111111111 11111111111111111111111111 111111111111211111111211 11111111111111111122222 22222222222222222222222222 222211111111111111 @ 1
6.5 "Basic settings" configuration page
Pos: 40 /#Neustruktur #/Online-Dokumentati on (+KNX)/Bedienung/ Türkommunikation/ Busch-Welcome/Menü Grundei nstellungen - 83341 @ 35\mod_1363 612329100_15.doc x@ 288694 @ 233 3333333331111221111 1111211111111111111111 1111111111111111111 1111111111111111111 111111111111111111 11111111111111111111111111 1111111111111111111 111111111123222 3322222222222222 @ 1
Fig. 8: "Basic settings" configuration page
You can adjust the basic settings for the IP gateway on the "Basic settings" configuration page.
Address of the indoor station
The address of the indoor station indicates which call button on the outdoor station is used to control the IP
gateway.
Note
Up to 4 mobile terminal devices and Busch-ComfortTouch®can be connected to a call button.
Default outdoor station
The address of the default outdoor station is the station set as the preferred outdoor station. One audio and video
connection also without incoming door call can be set up for this station.
Master / slave mode
When more that one indoor station is installed in the apartment (same addresses), one station must be configured
as master and others as slave.
Pos: 41 /#Neustruktur #/Online-Dokumentati on (+KNX)/Steuermodu le - Online -Dokumentation (--> Für alle Dokumente < --)/++++++++++++Seitenumbruch++++++++++++@ 9\mod_12688 98668093_0.doc x@ 52149 @ 2222222 2222222222222222222 222222222222222222 22222222222222222 22222222222222222222222 222222222222222222 2222222222222222222222 222222222222222222222222222 222222222222222222222222 21211122222222222221211122 2222222222222222222223 2223322222222222222 @ 1

Operating Instructions
Busch-Welcome®
Configuration
Operating Instructions | 1473-1-8354
— 17 —
Pos: 42 /#Neustruktur #/Online-Dokumentati on (+KNX)/Überschr iften (--> Für alle Dokumente <--)/ 3. Ebene/M - O/Konfigur ationsseite "Pas swort ändern" @ 34\mod_1362 495029239_15.doc x@ 284 676@ 2111 2111222222222222222222 22222222222222222222222222 2221111111111111111111111 11111111111111111111111111 1111111111111111111111 11111111111111111111111 111111111111112222 22222222 @ 1
6.6 "Change password" configuration page
Pos: 43 /#Neustruktur #/Online-Dokumentati on (+KNX)/Bedienung/ Türkommunikation/ Busch-Welcome/Menü Pass wort ändern - 83341 @ 35\mod_136361234 4390_15.docx @ 288710 @ 211111111 1112111222221211111 112111211111111111 1111111111111111111 1111111111111111111 111111111111111111 1111111111111111111 111111111111111111 11111111111111111111111 111111111111111111 11111111222222222 2221 @ 1
Fig. 9: "Change password" configuration page
You can change the password on this configuration page.
Current password
Enter the password previously used.
New password
Enter your new password.
Confirm new password
Enter your new password again.
Note
You can only change the password for the currently active user. Please follow the general
recommendations for generating strong passwords.
Pos: 44 /#Neustruktur #/Online-Dokumentati on (+KNX)/Steuermodu le - Online -Dokumentation (--> Für alle Dokumente < --)/++++++++++++Seitenumbruch++++++++++++@ 9\mod_12688 98668093_0.doc x@ 52149 @ 2222222 22222222222222222222222222 222222222222222222222 22222222222222222222222222 22222222222222222222222222 2222222222222222222222 22222222222222222222222222 2222222222222222222222222 22222222222222222222222222 2222222222111212222222 22222111111111222111222122 2222222222222 @ 1

Operating Instructions
Busch-Welcome®
Configuration
Operating Instructions | 1473-1-8354
— 18 —
Pos: 45 /#Neustruktur #/Online-Dokumentati on (+KNX)/Überschr iften (--> Für alle Dokumente <--)/ 2. Ebene/G - L/Konfi gurationsseite "Benutz erverwaltung" @ 34\mod_136 2495133356_15.doc x@ 28470 9 @ 222222222222222222222 22212222222222222222222222 2222222222222222222222222222 2222222222222222222222 22222222222111111111111111 11111111111111111111111111 1111111111111111 1111111111111111 1111111111111111111 111111121211112322 233222222222222 22 @ 1
6.7 "User management" configuration page
Pos: 46 /#Neustruktur #/Online-Dokumentati on (+KNX)/Bedienung/ Türkommunikation/ Busch-Welcome/Menü Benutz erverwaltung - 83341 @ 36\mod_1370 935278536_15.doc x@ 296792 @ 222 2222222222222222222 22111111111111111111111111 111111111111111111111 111111111111111111111111111 11111111111111111111111111 11111111111111111111111111 11111111111111111111111 122222222222222222222222 22222222211111111122111122 21111111111111311111111111 11111111111111111111111 111111122111111111 11111111111111111 1132222222112423222 332222222222222 2 @ 1
Fig. 10: "User management" configuration page
You can create up to three new users and administer your user settings on this configuration page.
ID
The ID is the sequential number of the user.
User name
All assigned accounts are displayed under "User name". Several devices can be logged in under each account.
You have the option of deleting the user or editing the settings.
Add user
Click the "Add user" button to create a new user.
1. Click the "Add user" button.
The description of the "Create new user" configuration page explains this function.
Edit
Click the "Edit" button to change your personal user settings.
The "Add user" configuration page opens. The current user appears and can be edited.
Delete
Click the "Delete" button to remove a user from the list.
Pos: 47 /#Neustruktur #/Online-Dokumentati on (+KNX)/Steuermodu le - Online -Dokumentation (--> Für alle Dokumente < --)/++++++++++++Seitenumbruch++++++++++++@ 9\mod_12688 98668093_0.doc x@ 52149 @ 2121111 2222111111111111111 111111111111111111 11111111111111111 11111111111111111111111 111111111111111111 1111111111111111111111 111122222222222222222222222 222222222222222222222222 2222222222222222222 22222222222222222222222222 22222222222222222222222222 222222222222222222222222 2222222222222222222222 22222222222222222222222 22222222222222222222222222 22222222222222222222222222 222222222222222222222 22222222222222222222222222 22222222222222222222222222 2222222222222222222222 22222222222222222222222 222222222222222222222222 22222222222222222222222222 22222222222222222222222222 2222222222222222222222 11112211111111122 2222322233222222222 22222 @ 1

Operating Instructions
Busch-Welcome®
Configuration
Operating Instructions | 1473-1-8354
— 19 —
Pos: 48 /#Neustruktur #/Online-Dokumentati on (+KNX)/Bedienung/ Türkommunikation/ Busch-Welcome/Menü Benutzer verwaltung - Neuen Benutzer anlege n - 83341 @ 35\mod_1363612371770_15. docx @ 288742 @ 2213111111111111 1111111111111111111 11111111111111111 1111111111111111111 111111111111111111 11111111111111111111111111 12111121122221222222222222 2222222111111111111111111 1111111111111111111111 11111111111111111111111111 11111111111111111111111111 11111111111111111111111111 111111111111111111111 11111111111111111111111111 11111111111111111111111111 1111111111111111111111 1111111111111111111111111 11111111111111111111111111 111111111111111111 111111111111111 1111111114232223322 222222222222 @ 1
6.7.1 "Add user" configuration page
Fig. 11: "Add user" configuration page
The "Add user" configuration page opens.
User name
Enter the name of the new user in the "User name" input field.
A total of 3 different users with different roles can be created.
Password
Enter the required password of the new user in the "Password" input field.
Confirm
Enter the required password of the new user again in the "Confirm" input field.
Note
When specifying the user name, use characters without umlauts and numbers only, e.g.
Smartphone1. Spaces and special characters are not allowed.
Permission
You can assign the following permissions to the user:
Monitoring function
The user can use the Welcome app to establish a video connection to the outdoor station (e.g. using a
smartphone or tablet) without there being a door call.

Operating Instructions
Busch-Welcome®
Configuration
Operating Instructions | 1473-1-8354
— 20 —
Open door
Specify if the door can be opened by a smartphone, for example, or if only the incoming call and video signal are
transmitted.
Switch on/off the light
This function is only available if the lighting, e.g. the staircase lighting, can be switched on/off directly from the
Busch-Welcome®system.
Save new user
1. Click the "Save" button.
The new user is saved.
The "User management" configuration page opens.
To activate the new user, the IP gateway must be restarted by clicking the "Restart" button.
Fig. 12: Restarting the IP gateway
Note
Make all required system settings before you create new users.
2. Click the "Restart" button.
The IP gateway restarts! The new user is activated.
Pos: 49 /#Neustruktur #/Online-Dokumentati on (+KNX)/Steuermodu le - Online -Dokumentation (--> Für alle Dokumente < --)/++++++++++++Seitenumbruch++++++++++++@ 9\mod_12688 98668093_0.doc x@ 52149 @
22211211111122222222 2222222222222222222 222222222222222222 2222222222221111111 111111111111111111 111111111111111 11111111111111111 1111111111111111111 111111111111111111 1111111111111111111 1111111111111111111 111111111111111111 11111111111111111 1111111111111111111 111111111111111 111111111111111111 1111111221311111111 1111111111111111111 11111111111111111 111111111111111111 1111111111111111111 111111111111111111 1111111111111111111 1111111111111111111 1111111111111 111211112112222122 2222222222222222211 1111111111111111111 111111111111111111 1111111111111111111 11111111111111111 111111111111111111 1111111111111111111 1111111111111111111 11111111111111 11111111 111111111111111 11111111111111111 111111111111111111 1111111111111111111 1111111111111111111 111111111111111111 1111111111111111112 2211111111112 2222222222222231111 111111122112111 122122222221122 @ 1
This manual suits for next models
1
Table of contents
Other ABB Gateway manuals

ABB
ABB Ekip E-Hub User manual

ABB
ABB RER601 User manual

ABB
ABB VIM1EC User manual

ABB
ABB 83342-500 User manual

ABB
ABB Ability Cassia X2000 User manual

ABB
ABB Ability Naveo Pro GW 1.0 User manual

ABB
ABB AWIN GW120 User manual

ABB
ABB ARG600 ANSI User manual

ABB
ABB 83350-500 User manual

ABB
ABB i-bus KNX SUG/U 1.1 User manual