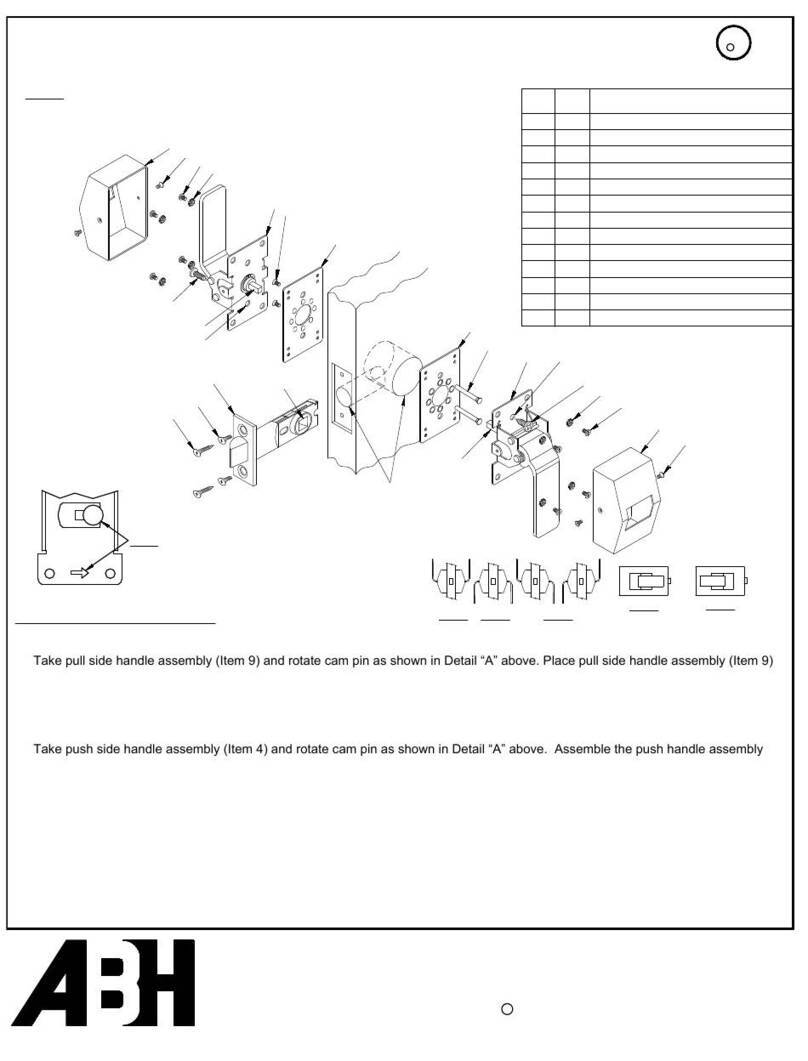
DETAIL "A"
NOTE:
Before mounting push and pull
handles, cam pin must be rotated
towards side indicated by arrow
stamped on the base.
4
10
3
10
39
7
6
5
6100 SERIES RETROFIT FOR 161 PREP
INSTALLATION
PATENT No. 6,196,599 & 5,730,478
US
R
CL
CLASSIFIED
U
c 2014 ABH Mfg., Inc.
printed in USA
www.abhmfg.com
Architectural Builders Hardware Mfg., Inc.
1222 Ardmore Ave., Itasca, IL 60143
630.875.9900; FAX 800.9FAXABH (932.9224)
O
R
PAGE 1 OF 2
REVISED 09-16-14
6100-1-07.DWG
8
11
CAM SHAFT
PUSH CAM
All prep mounting holes
to be straight & parallel
to one another, this will
help prevent any binding
of mechanical parts.
1LATCH CAM
3
2
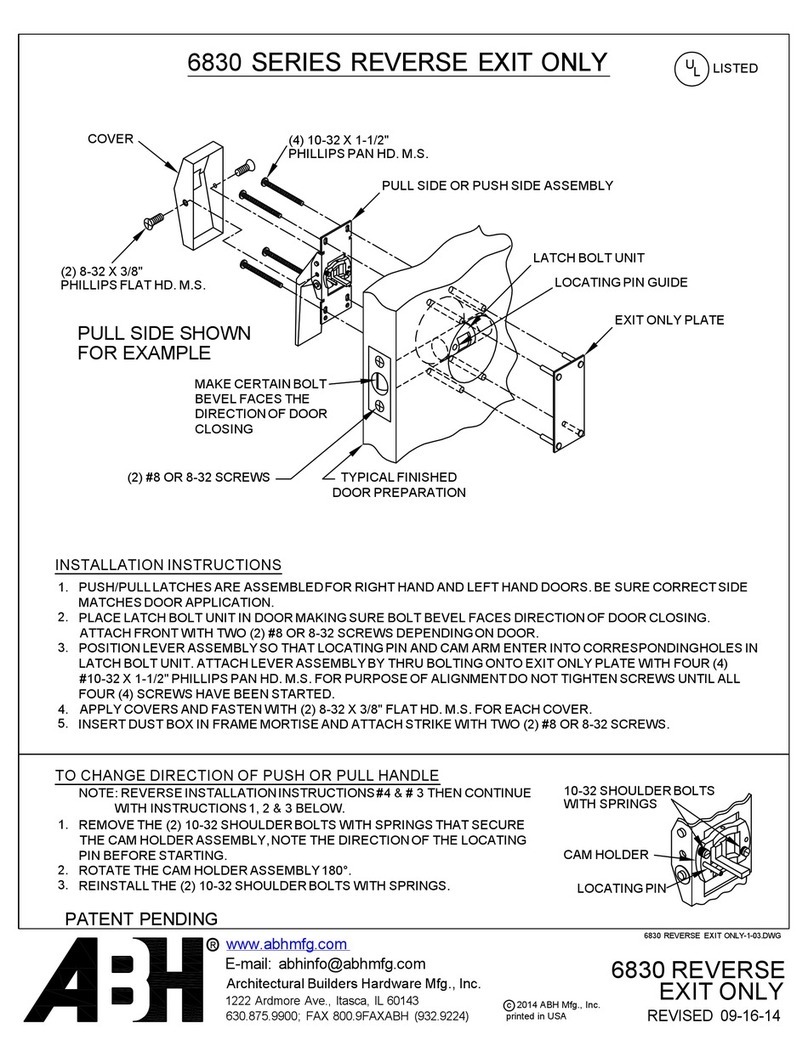
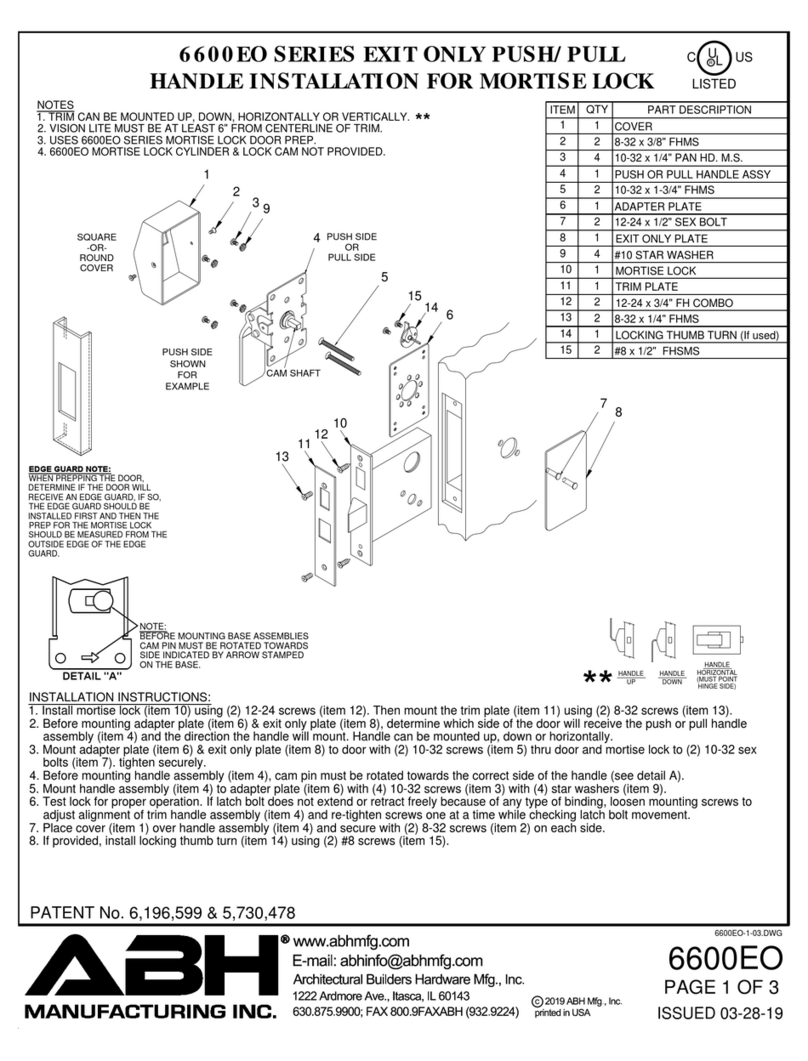
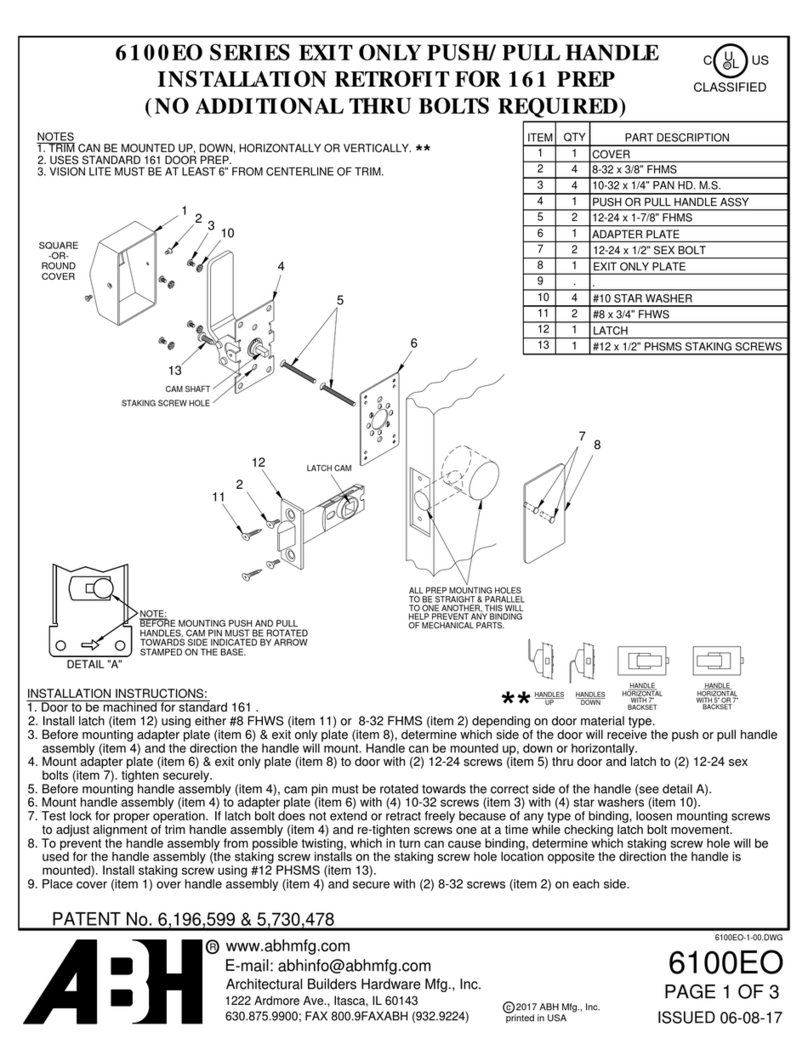
INSTALLATION INSTRUCTIONS:
1. Door to be machined for standard 161 prep.
2. Install latch (Item 1) using either #8 x ¾” FHWS (Item 2) or (2) 8-32 FHMS (Item 3) depending on door
material type.
3. Take pull side handle assembly (Item 4) and rotate cam pin as shown in Detail “A” above. Place pull side
handle assembly (Item 4) on pull side of door and slide the cam shaft through the latch cam on the latch.
4. On the push side of the door, assemble the push side adapter plate (Item 5) to the sex blots on the pull side
handle assembly using (2) 10-32 x ¾” FHMS (Item 6). Test pull handle for free movement of the latch bolt
before installing push side handle assembly. If latch bolt does not extend or retract freely because of any
type of binding, loosen screws (Item 6) to align adjustment of base assemblies and retighten screws one at a
time while checking for proper latch retraction.
5. Take push side handle assembly (Item 7) and rotate cam pin as shown in Detail “A” above. Assemble the
push handle assembly (Item 7) onto the push side adapter plate (Item 5) using (4) #10 star washers (Item 8)
and (4) 10-32 x ¼” Truss Head MS (Item 9) and engage push cam onto the pull side cam shaft.
6. Test both handles for free movement of the latch bolt before tightening all screws. If latch bolt does not
extend or retract freely because of any type of binding, loosen screws (Item 6) to align adjustment of base
assemblies and retighten screws one at a time while checking for proper latch retraction.
7. To prevent the handle assemblies from possible twisting, which in turn can cause binding, determine which
staking screw hole will be used for the push and the pull side handle assemblies (the staking screw installs on
the staking screw hole location opposite the direction the handle is mounted). Depending on door material,
prep for (1) staking screw on each side by either spotting for #10 wood screws (Item 11) or drill and tap for
12-24 machine screws (Item 12).
8. Install covers (Item 10) using (2) 8-32 x 3/8” FHMS (Item 3).
1 1 Backset Latch
2 2 #8 x ¾” Phillips FHWS
3 6 8-32 x 3/8” Phillips U/C FHMS
4 1 Pull Side Handle Assembly (w/Adapter Plate & Sex Bolts)
5 1 Push Side Adapter Plate
6 2 10-32 x ¾” Phillips U/C FHMS
7 1 Push Side Handle Assembly
8 4 #10 Star Washer
9 4 10-32 x ¼” Phillips Truss Hd MS
10 2 Cover
11 2 #10 x 1” Phillips Pan Hd WS (Staking Screw)
12 2 12-24 x 1” Phillips Pan Hd MS (Staking Screw)
QTY PART DESCRIPTIONITEM
11
12
OR
12
OR
STAKING
THRU
HOLE
STAKING
THRU
HOLE
6100


