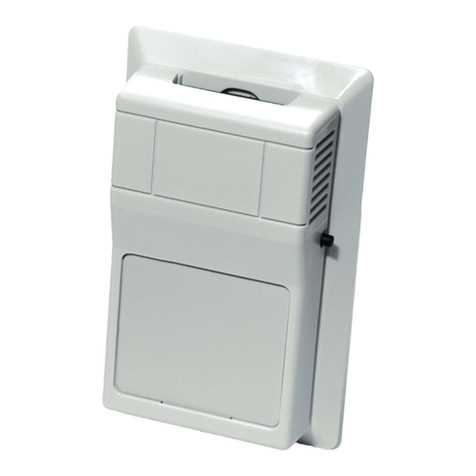
aci Room Series Installation instructions

Automation Components, Inc.
2305 Pleasant View Road | Middleton, WI 53562
Phone: 1-888-967-5224 | Website: workaci.com
Page 1
Version: 6.0
I0000233
2.75"
(69.85 mm) 1.12"
(28.55 mm)
4.50"
(114.30 mm)
ROOM, VERSION 1
[R]
FRONT
BOTTOM
RIGHT
FIGURE 1: ROOM DIMENSIONS
ROOM SERIES
Installation & Operation Instructions
A/TT-RSO-LCD
Phone: 1-888-967-5224
Website: workaci.com
PRECAUTIONS
• DO NOT RUN THE WIRING IN ANY CONDUIT
WITH LINE VOLTAGE (24/120/230 VAC).
GENERAL INFORMATION
The A/TT-RSO-LCD is a temperature transmitter
product family intended for room applications.
Optional features, if selected, provide useful features
often desired in room applications, including
setpoint and override outputs. Both the temperature
transmitter and the setpoint transmitter functions
support 4-20mA, 1VDC to 5VDC, and 2VDC to 10VDC
output options. The setpoint function also supports
resistance output options, with or without an oset
resistance. The override function provides a normally
open dry-contact switch output for occupancy
indication.
MOUNTING INSTRUCTIONS
Separate the cover from the base. The ACI/LCD is
shipped as a two-piece unit.The LCD Module must be
unplugged from the 10 pin connector before the
base of the sensor may be mounted. Attach the base
directly to the wall or to a standard 2” x 4” junction
box using the (2) #6-32 x 1”screws provided.
Take care when mounting. Check local code for
mounting height requirements. Typical mounting
heights are 48-60” (1.2-1.5 m) o the ground and at
least 1.5’ (0.5 m) from the adjacent wall. The sensor
should be mounted in an area where air circulation is
well mixed and not blocked by obstructions - see
FIGURE 2 (next page).
For optimal readings, follow these tips:
•Avoid conned areas such as shelves, closed
cabinets, closets, and behind curtains.
MOUNTING (Continued)
•Eliminate and seal all wall and conduit
penetrations. Air migration from wall cavities
may alter temperature readings.
•Do not install near heat sources, eg: lamps,
radiators, direct sunlight, copiers, chimney
walls, walls concealing hot-water pipes.
•A thermally-insulated backing should be used
when tting to solid walls (concrete, steel,
etc.).
ACI part: A/ROOM-FOAM-PAD
•Do not install on external walls.
•Avoid air registers, diusers, vents, and
windows.
Refer to the wiring instructions (p. 1-2) to
make necessary connections.
LCD Installation
The LCD Module should then be gently inserted
into the

Automation Components, Inc.
2305 Pleasant View Road | Middleton, WI 53562
Phone: 1-888-967-5224 | Website: workaci.com
Page 2
Version: 6.0
I0000233
MOUNTING (Continued)
10 pin connector. Tighten the cover down,
using the (2) 1/16” Allen screws located in
the bottom of the housing. Take care to
make sure the LCD module lines up with the
enclosure LCD window.The LCD module can
be bent if adjustments are needed. A 1/16”
Hex driver is needed to secure the cover to
the base.
Note: If mounting an TT-RS/O(with
setpoint), you must mount to standard 2” x
4” junction box. It cannot be surface
mounted. The set point PCB is located on
back of enclosure.
WIRING INSTRUCTIONS
PRECAUTIONS
• Transmitter is powered by 24 VDC only.
• Remove power before wiring. NEVER
connect or disconnect wiring with power
applied.
• When removing the shield from the
sensor end, make sure to properly trim
the shield to prevent any chance of
shorting.
• When using a shielded cable, ground
the shield ONLY at the controller end.
Grounding both ends can cause a
ground loop.
• If the 24 VDC power is shared with
devices that have coils such as relays,
solenoids, or other inductors, each coil
must have an MOV, DC Transorb, Transient Voltage Suppressor (ACI Part: 142583), or diode
placed across the coil or inductor. The cathode, or banded side of the DC Transorb or diode,
connects to the positive side of the power supply. Without these snubbers, coils produce very
large voltage spikes when de-energizing that can cause malfunction or destruction of electronic
circuits.
Open the cover of the enclosure. ACI recommends 16 to 26 AWG twisted pair wires or shielded cable for all
transmitters. Twisted pair may be used for 2-wire current output transmitters or 3-wire for voltage output.
Refer to FIGURE 3 (right) and TABLE 1 (p. 3) for wiring connections. The number of wires needed depends
on the application. All wiring must comply with all local and National Electric Codes.
Note: If the A/TT-RSO is selected with both the temperature and the setpoint transmitter features, 50mA is
required from a single power source.
VAC
COVER
FIGURE 2: MOUNTING
#6-32 x 1”
MOUNTING SCREWS
LCD MODULE
Must be unplugged before
the sensor is mounted
BACKPLATE
OPTIONAL INSULATING
GASKET
CIRCUIT BOARD
FIGURE 3: PBC SETPOINT WITH BACKPLATE
0.63"
(16 mm)

Automation Components, Inc.
2305 Pleasant View Road | Middleton, WI 53562
Phone: 1-888-967-5224 | Website: workaci.com
Page 3
Version: 6.0
I0000233
FIGURE 4: LAYOUT
FIGURE 5: SETPOINT PCB
WIRING INSTRUCTIONS
(Continued)
Note: The A/TT-RSO temperature
transmitter function and setpoint
transmitter function can be operated
with two power sources to allow for
separate 4-20mA current loops.
Note: If the A/TT-RSO is selected with
the resistance setpoint feature, the
setpoint resistance supports a maximum
of 0.25 Watt power dissipation capabili-
ty.
All ACI TT temperature transmitters
can be powered from either an unregu-
lated or regulated 8.5 to 32VDC power
supply. The TT DO NOT support an AC
input. All TT temperature transmitters
are reverse polarity protected. After
wiring, attach the cover to the
enclosure.
Note: The minimum voltage at the
transmitter power terminal is 8.5V
after load resistor voltage drop.
•249 Ω load resistor (1-5VDC output) =
13.5V min supply voltage
•499 Ω load resistor (2-10VDC output)
= 18.5V min supply voltage
TABLE 1: DISPLAY TEMPERATURE
TRANSMITTER
TABLE 2: DISPLAY SETPOINT OUTPUT
TERMINAL BLOCKS
+ TEMP
- LCD
+ SET (located on back
PCB)
-SET (located on back
PCB)
O/R
O/R
CONNECTIONS
+15-35VDC Supply Voltage
(-) 4 to 20 mA temperature output to
controller analog input
+24VDC Supply Voltage
(-) 4 to 20 mA set point output to
controller analog input
Override signal to controller analog input
(N/O Dry Contact Closure)
Override signal common to controller
analog input (N/O Dry Contact Closure)
TERMINAL BLOCKS
+ TEMP
- TEMP
+ SET (located on back
PCB)
-SET (located on back
PCB)
+ LCD
- LCD
CONNECTIONS
+15-35VDC Supply Voltage
(-) 4 to 20 mA temperature output to
controller analog input
+24VDC Supply Voltage
Connect to +LCD terminal block
Connect to - SET terminal block
(-) 4 to 20 mA set point output to
controller analog input
Note: J8 must be installed to place the temperature
transmitter in series with the loop powered LCD.
Note: J8 must be removed.

TROUBLESHOOTING
Automation Components, Inc.
2305 Pleasant View Road | Middleton, WI 53562
Phone: 1-888-967-5224 | Website: workaci.com
Page 4
Version: 6.0
I0000233
PROBLEM
Temperature Transmitter Not Working
4 to 20 mA Setpoint Not Working
Temperature Transmitter Reading High
Display Not Working
SOLUTION(S)
•Power supplied to transmitter (+). Verify that there is a common
ground.
•Power supplied to transmitter (+). Verify that there is a common
ground.
•Verify that the (2) shunts are on the headers in the lower right
hand corner.
•Verify that the Jumper on J8 is on.This completes the loop from the
Temperature transmitter to the display. Verify that the display is
plugged in correctly.
Formula for Number of Transmitters
Several transmitters may be powered from the same supply as shown in FIGURE 4 (below). Each transmitter draws
25mA; refer to the following equation to obtain the number of permissible transmitters: [# Transmitters] =
[Current] / (25 mA).
FIGURE 4: MULTIPLE TRANSMITTER CONNECTIONS
P
ower Supply
+ -
+ -
+ -
Controller
Gnd In1 In2 In3
= Connections
I
n1 = Controller Input #1
I
n2 = Controller Input #2
I
n3 = Controller Input #3
Temp.Transmitter #1 Temp.Transmitter #1 Temp.Transmitter N
TEMPERATURE DISPLAY ADJUSTMENTS
The Temperature Display may be adjusted by adjusting the ZERO Potentiometer as shown on the above
diagram. Adjust (P2) until the LCD Display reading matches your sensor if necessary. Do not adjust the
SPAN pot.
SETPOINT CONTROL
Adjust slider at bottom of housing for set point control. Slide to right to increase set point temperature.
Slide to left to decrease temperature control. Units can be setup from factory for Direct Acting (resistance
increases when adjusted to right), or Reverse Acting (resistance decreases when adjusted to right).
OVERRIDE ADJUSTMENTS
Override will be set to Override Short Sensor (default). Adjust J3 Jumpers to change.

WARRANTY
The ACI Room Series temperature sensors are covered by ACI’s Five (5) Year Limited Warranty, which is located in
the front of ACI’S SENSORS & TRANSMITTERS CATALOG or can be found on ACI’s website: www.workaci.com.
W.E.E.E. DIRECTIVE
At the end of their useful life the packaging and product should be disposed of via a suitable recycling
centre. Do not dispose of with household waste. Do not burn.
PRODUCT SPECIFICATIONS
Automation Components, Inc.
2305 Pleasant View Road | Middleton, WI 53562
Phone: 1-888-967-5224 | Website: workaci.com
Page 5
Version: 6.0
I0000233
One
1/16”Allen screws (2 qty) / 1/16”Hex Driver
“Dry Contact” Closure (Separate Input)
1.5 to 50 °C (35 to 122 °F)
-40 to 65 °C (-40 to 149 °F)
10 to 95% RH, non-condensing
Screw Terminal Blocks (Non-Polarity Sensitive) | 16 (1.31 mm²) to 26 AWG (0.129 mm²)
0.5 Nm (Minimum); 0.6 Nm (Maximum)
“R” Enclosure: ABS Plastic | Beige UL94-HB
Dry Contact “N/O” Contact | Minimum: 10 uA @ 1 VDC | Maximum: 50 mA @ 24 VDC
+/- 10% | 4-20 mA: 4 mA (Far Left) / 20 mA Far Right (DA - Direct Acting Default)
20 mA (Far Left) / 4 mA Far Right (RA - Reverse Acting (Optional)
Platinum RTD | PTC (Postive Temperature Coecient) | One
+/- 0.06% Class A | (Tolerance Formula: +/- ºC = (0.15ºC + (0.002 * |t|))
where |t| is the absolute value of temperature above or below 0ºC in ºC
DIN EN 60751 (IEC 751) | 3850 ppm / ºC
+/- 0.03% after 1000 Hours @ 300ºC (572ºF)
+8.5 to 32 VDC (Reverse Polarity Protected) | 25 mA minimum
250 Ω Load: +13.5 to 32 VDC | 500 Ω Load: +18.5 to 32 VDC
“-LCD” Loop Powered: Add +7 VDC to 250/500 Ω Load Supply Voltage above
(Terminal Voltage - 8.5 V) | 0.020 A
Current: 4-20 mA (2-Wire Loop Powered)
Temp. Spans < 500ºF (260ºC): +/- 0.2%
Temp. Spans <100ºF (38ºC): +/- 0.04%/ºF | Temp. Span >100ºF (38ºC): +/- 0.02%
10 Minutes | +/- 0.1%
Screw Terminal Blocks | 16 AWG (1.31 mm2) to 26 AWG (0.129 mm2)
0.37 ft-lb (0.5 N-3m) nominal
4 to 20 mA Only (2-Wire Loop Powered)
+/- 1.0% of Calibrated Temperature Span or +/- Whichever is Greater
ºF (Fahrenheit) or ºC (Celsius) | 3 ½ Digits (-199.9 to 199.9)
50,000 Hours Minimum
SENSOR NON-SPECIFIC INFORMATION
Number Temperature Sensing Points:
Housing Screw Size / Drive Size:
Override Option:
Operating Temperature Range:
Storage Temperature Range:
Operating Humidity Range:
Connections | Wire Size:
Terminal Block Torque Rating:
Enclosure Material | Color:
Override Contact Type | Contact Ratings:
Set Point Accuracy:
Sensor
Sensor Type | Sensor Curve | Sensing
Points:
RTD Tolerance Class | Sensor Accuracy:
Din Standard | Temperature Coefficient:
Sensor Stability:
Transmitter
Transmitter Supply Voltage | Supply
Current:
Maximum Load Resistance:
Output Signals:
CalibratedTransmitter Accuracy |
Linearity1:
Temperature Drift2:
Warm Up Time | Warm Up Drift:
Connections | Wire Size:
Terminal Block Torque Rating:
LCD Specifications
LCD Display Inpute Signal:
LCD Display Accuracy:
LCD Display Descriptor | Resolution:
LCD Display Life Expectancy:

NOTES
Page 6
Automation Components, Inc.
2305 Pleasant View Road | Middleton, WI 53562
Phone: 1-888-967-5224 | Website: workaci.com
Version: 6.0
I0000233

Page 7
NOTES
Automation Components, Inc.
2305 Pleasant View Road | Middleton, WI 53562
Phone: 1-888-967-5224 | Website: workaci.com
Version: 6.0
I0000233

Automation Components, Inc.
2305 Pleasant View Road
Middleton, WI 53562
Phone: 1-888-967-5224
Website: workaci.com
Page 8
Automation Components, Inc.
2305 Pleasant View Road | Middleton, WI 53562
Phone: 1-888-967-5224 | Website: workaci.com
Version: 6.0
I0000233
This manual suits for next models
1
Table of contents
Other aci Transmitter manuals

aci
aci DUCT Series Installation instructions

aci
aci OUTSIDE AIR Series Installation instructions

aci
aci B5C User manual

aci
aci WALL PLATE HUMIDITY Series Installation instructions

aci
aci Room Series Installation instructions

aci
aci B5 User manual

aci
aci Room Series Installation instructions

aci
aci STRAP ON Series Installation instructions

aci
aci ACCESS series User manual

aci
aci Room Series Installation instructions