manuals.online logo
Brands
  1. Home
  2. •
  3. Brands
  4. •
  5. Acoustic Signature
  6. •
  7. Turntable
  8. •
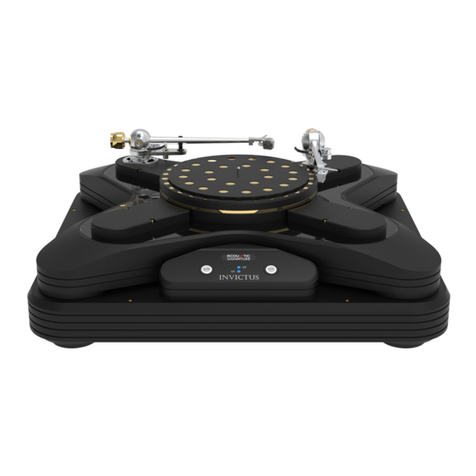
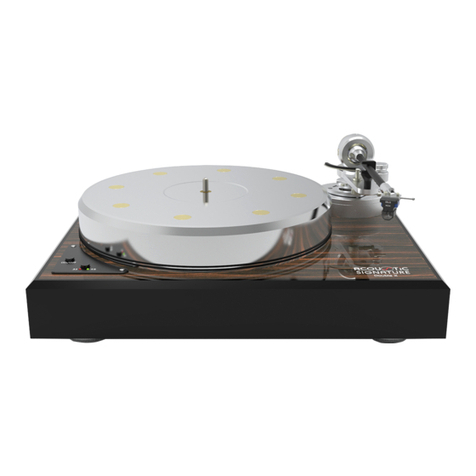
  9. Acoustic Signature INVICTUS jr User manual

Acoustic Signature INVICTUS jr User manual

TURNTABLE / PLATTENSPIELER
INSTRUCTION MANUAL
BEDIENUNGSANLEITUNG
INVICTUS jr.
2
Dear Acoustic Signature customer
many thanks for your confid nc in our product, th turntabl
Invictus jr. With th purchas of your turntabl you acquir d
a pr cision instrum nt for th play-back of r cords. To mak it
sound p rf ct, th r is som att ntion n c ssary for s tup and
handling. Th manufacturing of this turntabl and its ass mbly
tak s plac compl t ly in G rmany at th high st ngin ring
standards - this still guarant s high st quality aft r y ars.
Und rstandably you want to start imm diat ly as possibl with
list ning to music. W kindly ask you how v r to r ad this
guidanc b for th first us att ntiv ly, so that you can us
your turntabl optimally.
W tri d to put all th n c ssary information into this manual.
If you still should hav qu stions, which ar not answ r d
h r , th n f l fr to contact us dir ctly at www.acoustic-
signatur .com or by -mail: info@as-distribution.d
Your t am of Acoustic Signatur
Declaration of Conformity
W acknowl dg th fact that th d vic Invictus jr. b longs
to this instruction manual corr sponds to valid EEC guid lin s
at th tim of printing for th acquisition of th CE-Sign. All
th n c ssary ch cks w r mad with positiv r sult
Warranty
Acoustic Signatur manufactur r’s warranty. W commit our-
s lv s to r plac incorr ct s ctions of this d vic fr of
charg if it should fail within th warranty p riod. Th warran-
ty amounts to 10 y ars for th b aring and 2 y ars for th r st
of th turntabl , count d starting from th purchas dat .
Th manufactur r warranty going b yond th l gal warranty
duration of 12 months ntitl d Acoustic-Signatur to mak on
his own d cision xchang or r pair of th d f ctiv s ctions.
If a d f ct of your d vic occurs within th warranty p riod,
th n pl as inform Acoustic-Signatur or your d al r und r
sp cification of th typ of th probl m. Damag , which tak s
plac via n gl ct of th op rating instruction or via outsid
m chanical ff cts, as w ll as transport damag s ar xclud d
from this warranty. Warranty is valid only for th first own r of
th turntabl .
Use of the turntable
Your turntabl has b n built to b us d in clos d rooms.
Pl as us it only in such rooms. Mak sur that th r is no
wat r or humidity clos to th turntabl or th pow r supply.
In any cas of a damag or qu stion pl as contact your im-
port r / d al r.
Sehr geehrter Acoustic Signature Kunde
h rzlich n Dank für Ihr V rtrau n in uns r Produkt, d n Plat-
t nspi l r Invictus jr. Mit d m Kauf di s s Platt nspi l rs
hab n Si in Präzisionsinstrum nt zur Wi d rgab von
Schallplatt n rworb n, das um s in r Aufgab g r cht zu
w rd n, mit Sorgfalt b hand lt und ing richt t w rd n muss.
Di F rtigung di s s Platt nspi l rs und di Montag rfolg n
kompl tt nach höchst n Qualitätsstandards in D utschland.
V rständlich rw is woll n Si möglichst sofort mit d m Mu-
sikhör n losl g n. Wir bitt n Si j doch di s Anl itung vor
d m rst n G brauch aufm rksam durch zu l s n, damit Si
d n Platt nspi l r optimal nutz n könn n und lang Fr ud
daran hab n.
Wir hab n uns b müht, all s Notw ndig und Wiss nsw rt in
di s r Anl itung unt rzubring n. Sollt n Si noch Frag n ha-
b n, di hi r nicht b antwort t w rd n, so w nd n Si sich
dir kt an uns üb r www.acoustic-signatur .com od r p r E-
Mail: in[email protected] .
Ihr T am von Acoustic Signatur
Konformitätserklärung
Hi rmit wird b stätigt, dass d r Platt nspi l r Invictus jr. d n
w s ntlich n Schutzanford rung n ntspricht, di in d r Richt-
lini d s Rat s zur Angl ichung d r R chtsvorschrift n d r
Mitgli dstaat n üb r di l ktromagn tisch V rträglichk it
(2014/30/EU) f stg l gt sind.
Garantie
Es g lt n di g s tzlich n B stimmung n für di G währl is-
tung von 24 Monat n in voll m Umfang. B i d r Rücks ndung
d r War an d n H rst ll r muss d r Originalkarton mit d n
ntspr ch nd n Einsätz n v rw nd t w rd n. Wir mpf hl n
dah r dring nd, di s n Karton zumind st für d n Z itraum d r
G währl istung aufzub wahr n.
D r V rsand an d n H rst ll r muss in j d m Fall fr i Haus
rfolg n. B i b r chtigt n Mäng lrüg n w rd n di s binn n
ang m ss n r Frist b hob n und d r Rückv rsand rfolgt
b nfalls fr i Haus.
Tritt inn rhalb d r Garanti z it in Mang l an Ihr m G rät auf,
so b nachrichtig n Si Ihr n Händl r unt r Angab d r Art d r
Störung. Falls d r F hl r nicht vor Ort b hob n w rd n kann,
s nd n Si das G rät in d r Original-V rpackung an Acoustic
Signatur in. Schäd n, di durch Nichtb achtung d r B di -
nungsanl itung od r durch äuß r m chanisch Einwirkung n
rfolg n, sowi Transportschäd n sind durch di Garanti nicht
abg d ckt.
Verwendung
Ihr Platt nspi l r wurd zur V rw ndung in g schloss n n
Räum n konstrui rt. Bitt v rw nd n Si ihn nur in Wohn-
räum n. Acht n Si darauf, dass d r Platt nspi l r und das
N tzt il k in r F uchtigk it ausg s tzt w rd n.
Das N tzt il wird mit 230V N tzspannung b tri b n. Bitt
zi h n Si vor d m Öffn n unb dingt d n N tzst ck r.
3
Packing
Parts
1 Bas plat with 3 ins rt d adjustm nt
scr ws (on bottom sid )
2 Subplatt r
3 Platt r
4 Digital Motor Control DMC2
5 (Hight adjustm nt) wr nch
6 Tool s t
7 Patch cabl s RJ45 r d and blu
8 Pow r cord
9 Chassis
10 4 Driv b lts (not shown)
11 L ath r mat (not shown)
12 Manual (not shown)
Verpackung
Teile
1 Grundplatt mit 3 ing schraubt n
Einst llschraub n (in Unt rs it )
2 Subt ll r
3 Platt nt ll r
4 Digital Motorst u rung DMC2
5 Schraub nschlüss l für Höh nv rst llung
6 Tools t
7 Patchkab l RJ45 rot und blau
8 N tzanschlusskab l
9 Chassis
10 4 Antri bsri m n (nicht darg st llt)
11 L d rmatt (nicht darg st llt)
12 B di nungsanl itung (nicht darg st llt)
4
Setup
Preparation
To avoid transport damag s th Invictus jr.
com s in a car fully d sign d packing and is
partially pr ass mbl d.
W r comm nd having a plan ar a of about
600x600mm² / 24x24 squar inch for s tup.
First, tak out th bas plat and plac it on th
d signat d op rating plac .
Now you can s t th chassis onto th bas plat ,
so that all 4 damp rs fit asily in th corr -
sponding hol s in th bas plat
Levelling
Aft r placing th bas plat and chassis you can
now l v l th turntabl by turning th 3 adjust-
m nt scr ws in th bas plat , using th n-
clos d wr nch. Us a suitabl bubbl l v l for
adjustm nt ( . g. Acoustic-Signatur s dual axis
bubbl l v l, s pictur b low).
Aufbau
Vorbereitung
Um Transportschäd n zu v rm id n wird d r
Platt nspi l r sorgfältig v rpackt und t ilw is
z rl gt g li f rt.
Für d n Aufbau b nötig n Si in b n Fläch
von ca. 600x600mm².
N hm n Si nun vorsichtig di Grundplatt aus
d r V rpackung und st ll n si auf d n vorg s -
h n n B tri bsplatz.
Nun s tz n Si das Chassis auf di Bod nplatt ,
so dass all 4 Dämpf r xakt in di ntspr -
ch nd n Aussparung n pass n.
Ausrichten
Nach d m Aufst ll n von Grundplatt und Chas-
sis könn n Si d n Platt nspi l r nun durch V r-
dr h n d r Einst llschraub n in d r Grundplatt
mit Hilf d s b ig fügt n Schraub nschlüss ls
und in r g ign t n Wass rwaag (z. B.
Acoustic-Signatur s Dopp l-Wass rwaag , si h
Bild unt n) ausricht n.
5
Mounting the subplatter
Tak away th cov r strip ov r th b aring hol .
Ins rt th subplatt r car fully into th b aring.
Tak car that it slid s in slowly and asily.
Do not let the subplatter drop into the
bearing hole as this may damage the bear-
ing.
Turn th subplatt r by hand to mak sur it
spins asily.
Mounting the belts
Plac th four provid d b lts around th pull ys
and th subplatt r as shown in th pictur s b -
low. Each b lt must b plac d around two adja-
c nt pull ys and th subplatt r.
Start mounting th first b lt in th low st groov
(groov 4) of th pull y.
Do not us sharp tools or point d tw z rs. This
may damag b lts, subplatt r and pull ys.
Subteller montieren
Entf rn n Si d n Schutzaufkl b r üb r d r La-
g rbohrung.
S tz n Si nun d n Subt ll r vorsichtig in di
Lag rbohrung in und s nk n ihn ab. Acht n Si
dab i darauf, dass r l icht und ohn rk nnba-
r n Wid rstand ins Lag r gl it t
Lassen Sie den Subteller nicht in die La-
gerbohrung fallen da dies das Lager be-
schädigen kann.
Dr h n Si d n Subt ll r von Hand und prüf n
Si , ob r sich l icht dr h n lässt.
Antriebsriemen montieren
L g n Si di 4 mitg li f rt n Ri m n inz ln
um j w ils zw i b nachbart Pull ys und d n
Subt ll r. V rl g n Si in n Ri m n j Nut im
Pull y, b ginn nd mit d r unt rst n Nut (Nut 4).
V rw nd n Si k in scharf n W rkz ug od r
spitzig Pinz tt n, da di s zur B schädigung von
Ri m n, Subt ll r führ n kann.
6
Groov / Nut 4 Groov / Nut 3
Mounting the platter
Plac th platt r car fully on top of th subplat-
t r as shown in th pictur abov . Mak sur
that both con s ar fr of any dirt. This may
aff ct th pr cis run of your turntabl .
Pl as k p in mind that th platt r w ighs ap-
prox. 19kg or 42lbs. P rhaps ask som on to
assist.
Do not l t th platt r drop onto th subplatt r,
this may damag th b aring.
Groov / Nut 2 Groov / Nut 1
Teller montieren
S tz n Si d n T ll r vorsichtig auf d n Subt l-
l r auf, wi im obig n Bild darg st llt. Acht n
Si darauf, dass b id Kon n fr i von V runr i-
nigung n sind. Di s kann d n präzis n Lauf Ih-
r s Platt nspi l rs b inträchtig n
B acht n Si bitt das G wicht d s T ll rs von
ca. 19kg. Frag n Si g g b n nfalls j mand n
um Hilf .
Lass n Si d n T ll r nicht auf d n Subt ll r
fall n, di s kann das Lag r b schädig n.
7
Mounting a tonearm
Now you can start to mount th ton arm and
cartridg according to th s tup manual of th
ton arm manufactur r.
B for mounting a ton arm you n d to mount
th appropriat armboard (if not suppli d al-
r ady mount d).
W provid armboards for a wid rang of ton -
arms. Pl as contact us for furth r information.
To dismount th armboard simply loos n th 2
scr ws M5 x 55 in ach armboard, using an All n
k y siz 4.
Your Invictus jr. can carry up to 4 ton arms,
on in ach corn r of th chassis. To mount a
n w armboard inst ad of th mount d fac plat ,
loos n th 2 scr ws M5 x 30 of th fac plat ,
tak it out and put in th d sir d armboard.
Fix th n w armboard with th d liv r d scr ws
M5 x 55.
Tonarm einbauen
Nun könn n Si damit b ginn n in n Tonarm
zu monti r n. B acht n Si hi rzu di di Mon-
tag anw isung d s Tonarmh rst ll rs.
Vor d r Montag d s Tonarms müss n Si g g -
b n nfalls das pass nd Armboard monti r n.
wurd .
Wir li f rn Armboards für in gross Anzahl von
Tonarm n. Bitt w nd n Si sich an uns für w i-
t r Information n.
Zur D montag d s Armboards lös n Si bitt
di b id n M5x55 Schraub n unt r V rw ndung
in s Inbus-Schlüss ls Gröss 4.
Ihr Invictus jr. kann bis zu 4 Tonarm trag n,
in n in j d r Eck d s Chassis.
Um in n u s Armboard anstatt d r monti rt n
Bl nd zu v rw nd n, lös n Si infach di b i-
d n Schraub n M5x30 in d r Bl nd und n h-
m n si h raus. Das n u Armboard b f stig n
Si mit d n mitg li f rt n Schraub n M5x55.
8
Connecting the Invictus jr.
Conn ct th Invictus jr. in 3 st ps:
- Patch cabl RJ45 r d
- Patch cabl RJ45 blu
- Pow r cord
Conn ct th pow r cabl to your wall sock t and
switch on th Motor Control on its backsid .
Den Invictus jr. anschliessen
Schli ss n Si d n Invictus jr. in 3 Schritt n
an:
- Patchkab l RJ45 rot
- Patchkab l RJ45 blau
- N tzkab l
V rbind n Si das N tzkab l mit d r St ckdos
und schalt n di Motorst u rung auf d r Rück-
s it in.
9
Operating the Invictus jr.
Switch on th digital motor control DMC2 on its
backsid (main switch).
Pr ss th pow r switch on th DMC2.
Start rotation of turntabl by pushing th start
button (mark d with On/Off).
Th Invictus jr. is quipp d with a r sum
function, so th last chos n sp d is activ wh n
turning on.
Chang sp d by pr ssing th sp d button
(mark d with 33/45).
As long as th Invictus jr. sp ds up or down,
th targ t sp d LED is blinking. Wh n th blink-
ing stops your Invictus jr. is lock d into th
s l ct d sp d.
Bedienung des Invictus jr.
Schalt n Si di digital Motorst u rung DMC2
auf d r Rücks it in (Hauptschalt r).
Drück n Si d n Einschaltknopf am DMC2.
Start n Si d n Platt nspi l r durch Druck auf
di Starttast (b schrift t mit On/Off).
B im Start wird imm r mit di zul tzt g wählt
Dr hzahl von d r St u rung ing st llt.
Zum Änd rn d r Dr hzahl drück n Si di G -
schwindigk itstast (b schrift t mit 33/45).
Solang d r T ll r s in Solldr hzahl noch nicht
rr icht hat, blinkt di ntspr ch nd LED. Nach
Err ich n d r Solldr hzahl l ucht t di ntspr -
ch nd G schwindigk its-LED dau rhaft.
10
Dimensions
Abmessungen
11
Invictus jr.
Technical data Technische Daten
Dimensions:
526mm x 526mm x 261mm
20,7“ x 20,7“ x 8,5“
Abmessungen:
526mm x 526mm x 261mm
Weight:
94kg / 207,2lbs
Gewicht:
94kg
Drive System:
4 int grat d DC-Motors, subplatt r t chnology
fin adjustm nt of sp d possibl
Antrieb:
4 int gri rt DC-Motor n, Subt ll r-T chnik;
Dr hzahl f in inst llbar
Speed range:
33 1/3 RPM and 45 RPM
Drehzahlbereich:
33 1/3 UpM und 45 UpM
Power supply:
Int rnal AC to DC pow r adaptor (in Digital Motor
Control DMC2),
Input 100V to 260V AC 50Hz.
Optional: DC-Input 24V via XLR 5-pin-conn ctor
Stromversorgung:
Int rn s N tzt il (in Digital r Motorst u rung DMC2
int gri rt)
Eingang: 100V -
260V AC, 50 Hz.
Optional: 24V DC-Input üb r XLR 5-pol. St ck r
Bearing:
High pr cision TIDORFOLON b aring
Lager:
Hochpräzis s TIDORFOLON-Lag r
Chassis (including baseplate):
526mm x 526mm x 168mm,
20,7” x 20,7” x 7,8”;
Aluminium;
3 h ight adjustabl f t (in bas plat )
Chassis:
526mm x 526mm x 168mm;
Aluminium;
3 höh nv rst llbar Füss (in Bod nplatt )
Platter:
Platt r in sandwich construction aluminium / brass /
aluminium, with sil nc r t chnology;
Ø335mm x 50mm / Ø13,2“ x 1,97“;
w ight: 19kg / 41,9lbs.
Teller:
T ll r in Sandwi
chbauw is Aluminium / M ssing /
Aluminium, mit Sil nc r-T chnologi ;
Ø335mm x 50mm;
G wicht: 19kg
Tonearm base:
D sign d to fit to custom rs ton arm
Tonarmbasis:
An kund ns itig n Tonarm ang passt
Acoustic Signatur
Mad by AS-Distribution GmbH
Hill nbrandstrass 10
D-73079 Süss n / G rmany
T l: +49 7162 9474450
www.acoustic-signature.com
E-Mail: info@as-distribution.d

Other Acoustic Signature Turntable manuals

Acoustic Signature PRIMUS User manual

Acoustic Signature

Acoustic Signature PRIMUS User manual

Acoustic Signature Maximus SE User manual

Acoustic Signature

Acoustic Signature Maximus SE User manual

Acoustic Signature TORNADO NEO User manual

Acoustic Signature

Acoustic Signature TORNADO NEO User manual

Acoustic Signature HURRICANE NEO User manual

Acoustic Signature

Acoustic Signature HURRICANE NEO User manual

Acoustic Signature Typhoon NEO User manual

Acoustic Signature

Acoustic Signature Typhoon NEO User manual

Acoustic Signature GRIP MK3 User manual

Acoustic Signature

Acoustic Signature GRIP MK3 User manual

Acoustic Signature TORNADO NEO User manual

Acoustic Signature

Acoustic Signature TORNADO NEO User manual

Acoustic Signature THUNDER MK3 User manual

Acoustic Signature

Acoustic Signature THUNDER MK3 User manual

Acoustic Signature WOW XL User manual

Acoustic Signature

Acoustic Signature WOW XL User manual

Acoustic Signature MERLIN User manual

Acoustic Signature

Acoustic Signature MERLIN User manual

Acoustic Signature MONTANA Neo User manual

Acoustic Signature

Acoustic Signature MONTANA Neo User manual

Acoustic Signature INVICTUS User manual

Acoustic Signature

Acoustic Signature INVICTUS User manual

Acoustic Signature MONTANA Neo User manual

Acoustic Signature

Acoustic Signature MONTANA Neo User manual

Acoustic Signature INVICTUS User manual

Acoustic Signature

Acoustic Signature INVICTUS User manual

Acoustic Signature Typhoon NEO User manual

Acoustic Signature

Acoustic Signature Typhoon NEO User manual

Acoustic Signature Ascona MK3 User manual

Acoustic Signature

Acoustic Signature Ascona MK3 User manual

Acoustic Signature Double X User manual

Acoustic Signature

Acoustic Signature Double X User manual

Acoustic Signature Invictus Neo User manual

Acoustic Signature

Acoustic Signature Invictus Neo User manual

Acoustic Signature INVICTUS JR. NEO User manual

Acoustic Signature

Acoustic Signature INVICTUS JR. NEO User manual

Acoustic Signature NOVUM User manual

Acoustic Signature

Acoustic Signature NOVUM User manual

Acoustic Signature CHALLENGER 2018 User manual

Acoustic Signature

Acoustic Signature CHALLENGER 2018 User manual

Acoustic Signature Double X Neo User manual

Acoustic Signature

Acoustic Signature Double X Neo User manual

Acoustic Signature MAXIMUS Neo User manual

Acoustic Signature

Acoustic Signature MAXIMUS Neo User manual

Acoustic Signature Double X Neo User manual

Acoustic Signature

Acoustic Signature Double X Neo User manual

Popular Turntable manuals by other brands

Dual CS 415-2 operating instructions

Dual

Dual CS 415-2 operating instructions

ION TTUSB Quick start owner's manual

ION

ION TTUSB Quick start owner's manual

Oracle Audio Origine MkII owner's manual

Oracle Audio

Oracle Audio Origine MkII owner's manual

Clearaudio TT2 user manual

Clearaudio

Clearaudio TT2 user manual

Stanton STR8-50 operating instructions

Stanton

Stanton STR8-50 operating instructions

Victrola Journey Signature+ VSC-450SB instruction manual

Victrola

Victrola Journey Signature+ VSC-450SB instruction manual

Ortofon AS-212R user guide

Ortofon

Ortofon AS-212R user guide

PE 1010 MKII user manual

PE

PE 1010 MKII user manual

Pro-Ject Audio Systems VTA it Setup guide

Pro-Ject Audio Systems

Pro-Ject Audio Systems VTA it Setup guide

Dual CS 430 operating instructions

Dual

Dual CS 430 operating instructions

Kronos Sparta Assembly instructions

Kronos

Kronos Sparta Assembly instructions

McIntosh MT10 owner's manual

McIntosh

McIntosh MT10 owner's manual

Dual ASP 125 Service manual

Dual

Dual ASP 125 Service manual

NETGEAR NeoTV NTV200 quick start guide

NETGEAR

NETGEAR NeoTV NTV200 quick start guide

auna 10032018 manual

auna

auna 10032018 manual

Cambridge Audio Alva TT v2 manual

Cambridge Audio

Cambridge Audio Alva TT v2 manual

PIONEER DJ PLX-CRSS12 instruction manual

PIONEER DJ

PIONEER DJ PLX-CRSS12 instruction manual

NAD C555 owner's manual

NAD

NAD C555 owner's manual

manuals.online logo
manuals.online logoBrands
  • About & Mission
  • Contact us
  • Privacy Policy
  • Terms and Conditions

Copyright 2025 Manuals.Online. All Rights Reserved.