manuals.online logo
Brands
  1. Home
  2. •
  3. Brands
  4. •
  5. Acoustic Signature
  6. •
  7. Turntable
  8. •
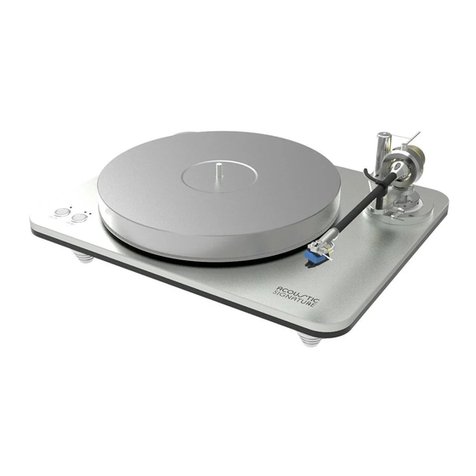
  9. Acoustic Signature PRIMUS User manual

Acoustic Signature PRIMUS User manual

PLATTENSPIELER/TURNTABLE
Bedienungsanleitung/Instruction Manual
PRIMUS
Dear Acoustic Signature customer,
many thanks for your confidence into our product, the record
player PRIMUS.With the purchase of your record player you
acquired a precision instrument for the playback of records.
To make him sound perfect there is some attention neces-
sary for setup and handling.The manufacturing of this turn-
table and the assembly takes place completely in Germany
at the highest engineering standards - this still guarantees
highest quality after years.
Understandably you want to start as quick as possible with
listening to music. We ask you however:
Please read this manual before the first use attentively, so
that you can use the drive optimally. We tried to put all the
necessary information into this manual. If you should have
still questions, which are not answered here, then you con-
tact us directly at www.acoustic-signature.com or with e-
mail: info@as-distribution.de
Your team of Acoustic-Signature
Conformity Declaration
We acknowledge the fact that the device belongs to this in-
struction manual corresponds to valid EEC guidelines at the
time of printing for the acquisition of the CE-Sign.All the ne-
cessary checks were made with positive result.
Warranty
Acoustic Signature manufacturer warranty. We commit our-
selves to replace incorrect sections of this device free of
charge if it should fail within the guarantee period. The war-
ranty amounts to 10 years for the bearing and 2 years for
the rest of the turntable, counted starting from the purchase
date. The manufacturer warranty going beyond the legal
warranty duration of 12 months entitled Acoustic-Signature
to make on his own decision exchange or repair of the de-
fective sections. If a defect of your device occurs within the
guarantee period, then you inform Acoustic-Signature or
your dealer under specification of the type of the problem.
Damage, which take place via neglect of the operating in-
struction or via outside mechanical effects, as well as trans-
port damages are not taken off by the warranty. The
warranty extends only to the turntable and the motor inclu-
sive power pack. Tonearm and pick-ups have the warranty
granted by the respective manufacturer. Warranty is valid
only for the first owner of the turntable.
Use of the turntable
Your turntable has been built to be used in closed rooms.
Please only use it in such rooms. Make sure that there is
not water or humidity close to the turntable or the power
supply.
In any case of a damage or question please contact your
importer/dealer..................................................
Sehr geehrter Acoustic-Signature Kunde,
herzlichen Dank für Ihr Vertrauen in unser Produkt, den Plat-
tenspieler PRIMUS. Mit dem Kauf Ihres Plattenspielers
haben Sie ein Präzisionsinstrument zur Wiedergabe von
Schallplatten erworben, das um seiner Aufgabe gerecht zu
werden, mit Sorgfalt behandelt und aufgestellt werden
muss. Die Fertigung dieses Laufwerks und die Montage er-
folgen komplett in Deutschland. Verständlicherweise wollen
Sie möglichst sofort mit dem Musikhören loslegen.Wir bitten
Sie jedoch: Bitte lesen Sie diese Anleitung vor dem ersten
Gebrauch aufmerksam durch, damit Sie das Laufwerk op-
timal nutzen können und lange daran Freude haben.
Wir haben uns bemüht, alles Notwendige und Wissens-
werte in dieser Anleitung unterzubringen. Sollten Sie noch
Fragen haben, die hier nicht beantwortet werden, so wen-
den Sie sich direkt an uns.
Ihr Team von Acoustic-Signature
Konformitätserklärung
Hiermit wird bestätigt, dass der Plattenspieler PRIMUS mit
Motorsteuerung und Motor den wesentlichen Schutzanfor-
derungen entspricht, die in der Richtlinie des Rates zur
Angleichung der Rechtsvorschriften der Mitgliedstaaten
über die elektromagnetische Verträglichkeit (2014/30/EU)
festgelegt sind.
Garantie
Es gelten die gesetzlichen Bestimmungen für die Gewähr-
leistung von 24 Monaten in vollem Umfang. Bei der Rück-
sendung der Ware an den Hersteller muss der Ori-
ginalkarton mit den entsprechenden Einsätzen verwendet
werden. Wir empfehlen daher dringend diesen Karton, zu-
mindest für den Zeitraum der Gewährleistung, aufzubewah-
ren. Der Versand an den Hersteller muss in jedem Fall frei
Haus erfolgen. Bei berechtigten Mängelrügen werden diese
binnen angemessener Frist behoben und der Rückversand
erfolgt ebenfalls frei Haus.
Tritt innerhalb der Garantiezeit ein Mangel an Ihrem Gerät
auf, so benachrichtigen Sie Ihren Händler unter Angabe der
Art der Störung. Falls der Fehler nicht vor Ort durch Zusen-
dung des Austauschteiles behoben werden kann, senden
Sie das Gerät in der Original-Verpackung an Acoustic-
Signature ein. Schäden, die durch Nichtbeachtung der Be-
dienungsanleitung oder durch äußere mechanische Einwir-
kungen erfolgen, sowie Transportschäden sind durch die
Garantie nicht abgedeckt. Die Garantie erstreckt sich nur
auf das Laufwerk und den Motor inkl. Netzteil.Tonarme und
Tonabnehmer haben die vom jeweiligen Hersteller gewährte
Garantie.
Verwendung
Ihr Plattenspieler wurde zur Verwendung in geschlossenen
Räumen konstruiert. Bitte verwenden Sie ihn nur in Wohn-
räumen.Achten Sie darauf, dass er keiner Feuchtigkeit aus-
gesetzt wird.
Das Netzteil wird mit 230 V Netzspannung betrieben. Bitte
ziehen Sie vor dem Öffnen unbedingt den Netzstecker.
Packing Overview
1 Chassis with mounted tonarm
2 Platter
3 External Power supply and Adaptor Plugs
4 Leathermat
5 Drive belt
6 Glass with oil
7 Counterweight/Tonearm (in packing of Power
supply)
8 Instruction manual
Verpackung
1 Chassis mit montierter Tonarm
2 Teller
3 Externes Netzteil mit Adaptern
4 Ledermatte
5 Antriebsriemen
6 Gegengewicht/Tonarm (in Verpackung vom
Netzteil)
7 Bedienungsanleitung
8 Glasflasche mit Ölpipette
Part 1
Part 1: Please bend the foam
upward and then pull it out to
avaid damage to the tonarm.
Part 1: Bitte den Schaum-
stoff erst nach oben biegen und
dann herausziehen um Beschä-
digungen des Tonarmes zu
vermeiden.
Verpackung des Gerätes
Bitte achten Sie darauf, dass die
schmalen Inlays (Pos. 1, beidseitig)
und das breite Inlay (Pos. 2, links
am Spieler) an der richtigen Stelle
sitzen.
Die Schutz-Inlay’s für die Tonarm-
Gewichte sollten passend zum
ausgewählten Tonarm immer unter
dem Gegengewicht positioniert
werden. Für jeden Transport oder
Versand. (Pos. 7 und Pos. 9).
Schmales Inlay 34mm (Pos. 7)
Rega Tonarm.
Breites Inlay 40mm (Pos. 9)
AS-Tonarm TA-500.
Packing of the Turntable
Please take care that the small
inlays (Pos 1 both sides) and the
wider Inlays (Pos 2 left on the tun-
table) are positioned as shown in
the drawing. If not please correct.
The protection foam for the Coun-
terweight should be positioned
below the counterweight for any
transport.
Set up
To avoid transport damages the
PRIMUS comes in a carefully de-
signed packing and preassembled.
The PRIMUS requires at least a
space of 18 x 14 inch for setup.
Please take out all the delivered
items and place the chassis on a
suitable surface.
After placing the Chassis you can
level the turntable by turning the
feet.
Before turning the foot itself,
you need to open the lock nut
by turning it clockwise (seen
from top).
Now you can turn the foot for
adjustment.
After adjustment, thighten the
lock nut by turning it counter
clockwise (while holding the
foot in its position) until it is fixed.
Platter
Take away the bearing cover
paper.
Please use the supplied glass con-
tainer and apply 2 drops of oil to
the front part of the platter axle be-
fore inserting it to the bearing as
shown in the drawing you see
below.
Take the platter and place it care-
fully into the bearing. Take care that
it slides in slowly and make sure
the axle is not dashing onto the be-
aring bottom. Turn the platter by
hand to make sure it spins easily. .
Aufbau des Gerätes
Zum Vermeiden von Transport-
schäden wird der Plattenspieler
sorgfältig verpackt und teilweise
zerlegt geliefert. Nehmen Sie nun
vorsichtig alle Teile aus der Verpa-
ckung. Stellen Sie das Chassis auf
dem dafür vorgesehenen Betriebs-
platz auf.
Achten Sie darauf, dass der Plat-
tenspieler waagrecht steht. Kontrol-
lieren und korrigieren Sie dies
mittels einer Wasserwaage.
Nach dem Aufstellen können Sie
als Nächstes den Plattenspieler
durch Verdrehen der Füsse aus-
richten. Vor dem Drehen der Füsse
lösen Sie bitte die Kontermutter
durch Drehen im Uhrzeigersinn
(von oben gesehen). Jetzt können
Sie die Füsse zur Justage verdre-
hen. Nach erfolgter Justage ziehen
Sie die Kontermutter durch Drehen
im Gegenuhrzeigersinn wieder
fest. Halten Sie dabei den Fuss in
seiner Position fest.
Teller
Entfernen Sie den Schutzaufkleber
vom Lager.
Nehmen Sie die beiliegende Glas-
flasche und geben Sie vor dem
Einführen des Tellers 2 Tropfen Öl
auf den vorderen Bereich der
Achse.
Setzen Sie nun den Plattenteller
vorsichtig in das Lager ein. Achten
Sie unbedingt darauf, dass die
Kugel an der Achsenspitze nicht
auf dem Lagerboden aufschlägt.
Drehen Sie den Teller von Hand
und prüfen Sie ob er sich leicht
drehen lässt. Legen Sie jetzt die
Ledermatte auf.
Now place the belt around the plat-
ter as shown in the drawing. When
finished place the provided leather
mat on top of the platter.
Now you can start to mount tone
arm (if not supplied already moun-
ted from the factory) and cartridge
according to the setup manual of
the manufacturer if this is not al-
ready done by preordering arm
and cartridge.
Your PRIMUS should look like this
after finishing the assembly.
Connecting the Power supply
Plug the provided power supply
first into the backside of the
PRIMUS and then into the mains.
See powersupply manual.
Using your PRIMUS
At the left front of the PRIMUS
there are 2 push button marked
with 33/45 and On/Off. Simply
Press the ON/Off button for starting
the PRIMUS. Changing the speed
also works with pressing the 33/45
button.
.
Anschließend schlingen Sie den
Riemen um den Teller und das An-
triebspully des Motors.
Montieren Sie jetzt falls dies nicht
schon ab Werk bestellt wurde Ihren
Tonarm entsprechend der Anlei-
tung des Herstellers.
Nun sollte Ihr PRIMUS so aus-
sehen.
Anschluss der Stromversorgung
Stecken Sie den Stecker des bei-
gelegten externen Netzteils erst in
die passende Buchse am PRIMUS
und dann in die Steckdose.
Siehe Anleitung im Netzteil.
Bedienung des Laufwerks
Vorne links am Chassis befinden
sich 2 Taster die mit On/Off und
33/45 markiert sind.
Zum Enschalten einfach den
On/Off Taster drücken und der PRI-
MUS beginnt sich zu drehen. Dies
erfolgt immer mit der zuletzt benut-
zen Drehzahl. Zum Ändern der
Drehzahl den 33/45 Taster drücken
die Geschwindigkeit wechselt da-
raufhin.
Front view
Side view
Dimensions: H 11,0 cm x B 41,0 cm x T 31,0 cm
Technical Data:
Drive System:
1 DC Motor, speed controlled and regulated, fine adjust-
ment of Speed possible, external Power supply.
Power Supply:
external Wall plug in Type Power Adapter Input 100 to
260 AC Output 12V DC
Bearing: High precision Tidorfolon Bearing
Chassis: 30 mm plinth made of MDF and Chipwood.
Topped with a layer of high Gloss high density fiber.
Height adjustable feets.
Platter: High precison platter made of aluminium,
24 mm height. 4.5 kg weight.
Speed Range: 33 1/3 UPM, 45 UPM switchable
Power Supply: 100V to 260V AC
Weight: approx. 8 kg
Vorderansicht
Seitenansicht
Abmessungen: H 11,0 cm x B 41,0 cm x T 31,0 cm
Technische Daten:
Antrieb:
1 DC Motor, geschwindigkeitsgeregelt mit Motorelektro-
nik, Drehzahl feineinstellbar, externes Netzteil.
Netzteil:
Externes Steckernetzteil 100V - 260 V Ausgang: 12V DC
Lager: Hochpräzises rolliertes TIDORFOLON Lager
Chassis: 30 mm Sandwich Chassis aus MDF und
Spannplatte. Hochglänzend beschichtet. Füße höhenver-
stellbar.
Teller: Hochpräzisionsteller aus massiven Aluminium.
4.5 kg Gewicht.
Drehzahlbereich:
33 1/3 UPM, 45 UPM mit Regelelektronik.
Stromversorgung: 100V bis 260V
Gewicht: ca. 8 kg
Acoustic-Signature
Made by AS-Distribution GmbH
Hillenbrand Straße 10
D-73079 Süssen
Tel: +49 7162 9474450
Fax: +49 7162 9474459
www.acoustic-signature.com
E-Mail: inf[email protected]

Other Acoustic Signature Turntable manuals

Acoustic Signature TORNADO NEO User manual

Acoustic Signature

Acoustic Signature TORNADO NEO User manual

Acoustic Signature Double X Neo User manual

Acoustic Signature

Acoustic Signature Double X Neo User manual

Acoustic Signature MERLIN User manual

Acoustic Signature

Acoustic Signature MERLIN User manual

Acoustic Signature TORNADO NEO User manual

Acoustic Signature

Acoustic Signature TORNADO NEO User manual

Acoustic Signature WOW XL User manual

Acoustic Signature

Acoustic Signature WOW XL User manual

Acoustic Signature Maximus SE User manual

Acoustic Signature

Acoustic Signature Maximus SE User manual

Acoustic Signature Typhoon NEO User manual

Acoustic Signature

Acoustic Signature Typhoon NEO User manual

Acoustic Signature MONTANA Neo User manual

Acoustic Signature

Acoustic Signature MONTANA Neo User manual

Acoustic Signature Ascona MK3 User manual

Acoustic Signature

Acoustic Signature Ascona MK3 User manual

Acoustic Signature Double X User manual

Acoustic Signature

Acoustic Signature Double X User manual

Acoustic Signature Double X Neo User manual

Acoustic Signature

Acoustic Signature Double X Neo User manual

Acoustic Signature NOVUM User manual

Acoustic Signature

Acoustic Signature NOVUM User manual

Acoustic Signature INVICTUS JR. NEO User manual

Acoustic Signature

Acoustic Signature INVICTUS JR. NEO User manual

Acoustic Signature MONTANA Neo User manual

Acoustic Signature

Acoustic Signature MONTANA Neo User manual

Acoustic Signature GRIP MK3 User manual

Acoustic Signature

Acoustic Signature GRIP MK3 User manual

Acoustic Signature CHALLENGER 2018 User manual

Acoustic Signature

Acoustic Signature CHALLENGER 2018 User manual

Acoustic Signature THUNDER MK3 User manual

Acoustic Signature

Acoustic Signature THUNDER MK3 User manual

Acoustic Signature HURRICANE NEO User manual

Acoustic Signature

Acoustic Signature HURRICANE NEO User manual

Acoustic Signature Invictus Neo User manual

Acoustic Signature

Acoustic Signature Invictus Neo User manual

Acoustic Signature Typhoon NEO User manual

Acoustic Signature

Acoustic Signature Typhoon NEO User manual

Acoustic Signature INVICTUS User manual

Acoustic Signature

Acoustic Signature INVICTUS User manual

Acoustic Signature MAXIMUS Neo User manual

Acoustic Signature

Acoustic Signature MAXIMUS Neo User manual

Acoustic Signature INVICTUS jr User manual

Acoustic Signature

Acoustic Signature INVICTUS jr User manual

Acoustic Signature INVICTUS User manual

Acoustic Signature

Acoustic Signature INVICTUS User manual

Popular Turntable manuals by other brands

QuVIS Encore user manual

QuVIS

QuVIS Encore user manual

Grace Victoria III GDI-TW3USB user guide

Grace

Grace Victoria III GDI-TW3USB user guide

Roksan Audio Attessa Set Up Guide and Product Manual

Roksan Audio

Roksan Audio Attessa Set Up Guide and Product Manual

Technics SL-1210GAE manual

Technics

Technics SL-1210GAE manual

Rega P9 owner's manual

Rega

Rega P9 owner's manual

AWA UCE1168PR instruction manual

AWA

AWA UCE1168PR instruction manual

Akiyama Acorde user manual

Akiyama

Akiyama Acorde user manual

LENCO LS-100 V2 user manual

LENCO

LENCO LS-100 V2 user manual

tropitone Slat KD Assembly instructions

tropitone

tropitone Slat KD Assembly instructions

Audizio RP315 instruction manual

Audizio

Audizio RP315 instruction manual

Sovereign Mk4-2 owner's manual

Sovereign

Sovereign Mk4-2 owner's manual

Grace Retrowriter GDI-C2CDRW Operation manual

Grace

Grace Retrowriter GDI-C2CDRW Operation manual

Dual CS 525 operating instructions

Dual

Dual CS 525 operating instructions

Philips Audio SA235/17X manual

Philips

Philips Audio SA235/17X manual

SIGNIFY BROADWAY EA1345 instruction manual

SIGNIFY

SIGNIFY BROADWAY EA1345 instruction manual

Pyle PTR8U instruction manual

Pyle

Pyle PTR8U instruction manual

Hama TT3000RBT operating instructions

Hama

Hama TT3000RBT operating instructions

Roadstar HIF-8888TUMPN user manual

Roadstar

Roadstar HIF-8888TUMPN user manual

manuals.online logo
manuals.online logoBrands
  • About & Mission
  • Contact us
  • Privacy Policy
  • Terms and Conditions

Copyright 2025 Manuals.Online. All Rights Reserved.