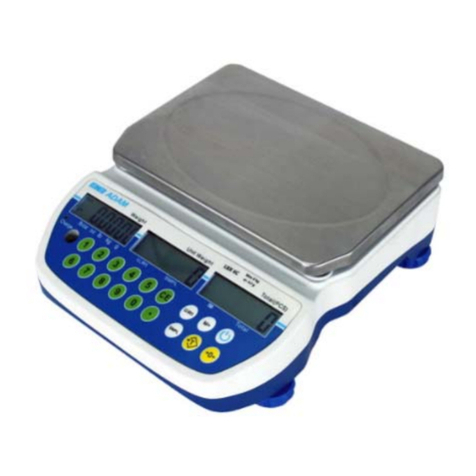
Adam Swift SWZ Series User manual

© Adam Equipment Co Ltd 2018
Adam Equipment
Swift SWZ SERIES
(with EC type Approval)
Software rev: V 1.09 & above

© Adam Equipment Co Ltd 2018
Easy Reference:
Model name of the balance:
Serial number of the unit:
Software revision number
(Displayed when power is first turned on):
Date of Purchase and Address:
Name and address of the supplier:

© Adam Equipment Co Ltd 2018
1
CONTENTS
P.N. 3.02.6.6.13677, Rev. C, December 2018
1.0 INTRODUCTION ...........................................................................................................3
1.1 FEATURES ................................................................................................................3
1.2 SPECIFICATIONS......................................................................................................4
2.0 INSTALLATION .............................................................................................................1
2.1 LOCATING THE SCALES..........................................................................................1
2.2 SETTING UP THE SCALES.......................................................................................2
2.3 DISPLAY WINDOWS.................................................................................................2
2.4 BATTERY CHARGING...............................................................................................3
3.0 KEY DESCRIPTIONS....................................................................................................3
4.0 OPERATION..................................................................................................................5
4.1 ZEROING THE DISPLAY...........................................................................................5
4.2 TARING...................................................................................................................5
4.3 DETERMINING VALUE OF A PRODUCT BY WEIGHT.............................................6
4.4 ENTERING VALUES FOR THE PLUs........................................................................7
4.5 USING A STORED PLU VALUE FOR UNIT PRICE ..................................................7
4.6 AUTO CLEAR KEY ....................................................................................................8
4.7 PRICE PER KILOGRAM AND PER 100 GRAM- [Kg 100g] KEY...............................8
4.8 AUTO SLEEP FUNCTION..........................................................................................8
4.9 BACKLIGHT OPERATION.........................................................................................8
4.10 KEY SOUND BEEPER............................................................................................9
4.11. NON WEIGHED ITEMS.......................................................................................9
4.12 CHANGE FUNCTION ...........................................................................................10
4.13 RS-232 INTERFACE.............................................................................................10
4.13.1 Input commands format..............................................................................10
4.13.2 RS-232 Setup..............................................................................................11
4.14 REAL TIME CLOCK SETUP.................................................................................12
Setting up the clock...........................................................................................................12
© Adam Equipment Co Ltd 2018
2
5.0
ERROR CODES..........................................................................................................13
6.0 CALIBRATION.............................................................................................................14
7.0 REPLACEMENT PARTS AND ACCESSORIES..............................................................14
WARRANTY STATEMENT ...........................................................................................15
WARNING:
Please read carefully following instructions for installation and use
before starting your work with a new balance. Failure to use the
balance in accordance with the advice in the user manual could
mean that the product gives incorrect readings

© Adam Equipment Co Ltd 2018
3
1.0 INTRODUCTION
The Swift (SWZ) series of digital price-computing scales are EC Type approved for computing
price by weight.
1.1 FEATURES
•
Stainless steel weighing platform
•
Level indicator with adjustable levelling feet
•
Colour coded, sealed keypad
•
Large 3 x 6 digits backlit liquid crystal displays (LCD)
•
Displays for Weight, Unit Price and Total Price (or Price to Pay)
•
Displays on both front and back panels (Optional user display on pillar)
•
Price per 100g and per kilogram (Not applicable for South Africa and Far East)
•
Auto-sleep function
•
Auto clear function
•
Real Time Clock (RTC) and date
•
RS-232 bi-directional interface
•
Battery operated for portability
•
90 hours battery life when fully charged
•
Up to 161 Prices (PLU) stored for easy access

© Adam Equipment Co Ltd 2018
4
1.2 SPECIFICATIONS
SWZ
3D
SWZ
6D
SWZ
15D
SWZ
30D
SWZ
3DP*
SWZ
6DP*
SWZ
15DP*
SWZ
30DP*
Maximum Capacity
1.5Kg / 3kg 3kg / 6kg 6kg / 15kg 15kg / 30kg 1.5Kg / 3kg 3kg / 6kg 6kg / 15kg 15kg / 30kg
Readability
0.5g / 1g 1g / 2g 2g / 5g 5g / 10g 0.5g / 1g 1g / 2g 2g / 5g 5g / 10g
Repeatability (S.D)
1g / 2g 2g / 4g 4g / 10g 10g / 20g 1g / 2g 2g / 4g 4g / 10g 10g / 20g
Linearity (+/-)
1.5g / 3g 3g / 6g 6g / 15g 15g / 30g 1.5g / 3g 3g / 6g 6g / 15g 15g / 30g
Pan size
300 x 210 mm
Operating
Temperature
-10ºC to 40ºC
Battery life
90 hours typical
.
Battery Life
is less when the backlight is
used.
Power
External power adapter
12vDC 800mA
Interface
RS-232 bi-directional
interface
English, German, French,
Spanish, Italian, Portuguese
selectable text
Date/Time
Real Time Clock (RTC), To
print date and time
information
(Dates in
year/month/day,
day/month/year or
month/day/year formats-
Battery backed)
Display
Backlit LCD with 15mm -
high digits
Housing
ABS Plastic with Stainless
Steel Pan
Overall Dimensions
315 x 355 x 120 mm
315 x 400 x 530 mm
Net Weight
4.2 kg
4.5 kg
*NOTE: SWZ-P models have the Pillar Display.

© Adam Equipment Co Ltd 2018
1
*NOTE: SWZ-P models have the Pillar Display
SWZ-a models USA only
SWZ
3D
SWZ
6Da
SWZ
6D
SWZ
15Da
SWZ
15D
SWZ
30Da
SWZ
30D
SWZ
60Da
SWZ
3DP
SWZ
6DPa*
SWZ
6DP*
SWZ
15DPa*
SWZ
15DP*
SWZ
30DPa*
SWZ
30DP*
SWZ
60DPa*
Maximum
Capacity
1.5Kg /
3kg
3lb /
6lb
3kg /
6kg
6lb /
15lb
6kg /
15kg
15lb /
30lb
15kg /
30kg
30lb /
60lb
1.5Kg /
3kg
3lb /
6lb
3kg /
6kg
6lb /
15lb
6kg /
15kg
15lb /
30lb
15kg /
30kg
30lb /
60lb
Readability
0.5g /
1g
0.001lb
/0.02lb
1g / 2g
0.02lb /
0.05
2g / 5g
0.05lb /
0.01lb
5g /
10g
0.01lb /
0.02lb
0.5g /
1g
0.001lb
/0.02lb
1g / 2g
0.02lb /
0.05
2g / 5g
0.05lb /
0.01lb
5g /
10g
0.01lb /
0.02lb
Pan si e
300 x210 mm
Operating
Temperature
-10ºC to 40ºC
Battery life
90 hours typical
.
Battery Life is less when the backlight is used.
Power
External power adapter 12vDC 800mA
Interface
RS
-
232 bi
-
directional interface
English, German, French, Spanish, Italian, Portuguese selectable text
Date/Time
Real Time Clock (RTC), To print date and time information
(Dates in year/month/day, day/month/year or month/day/year formats- Battery backed)
Display
3 x 6 digits backlit LCD displays
Housing
ABS Plastic with
Stainless Steel Pan
Overall
Dimensions
315 x 355 x
120
mm
/
124 x 140 x 47 inch
315 x
400
x 53
0
mm
/
124 x 158 x 209 inch
Net Weight
4.
2
kg
4.
5
kg

© Adam Equipment Co Ltd 2018
1
2.0 INSTALLATION
2.1 LOCATING THE SCALES
The scales should not be placed in a location that will reduce the accuracy:
•
Avoid extremes of temperature. Do not place in direct
sunlight or near air conditioning vents.
•
Avoid unsuitable tables. The table or floor must be rigid
and not vibrate.
•
Avoid unstable power sources. Do not use near large
users of electricity such as welding equipment or large
motors. Do not place near vibrating machinery.
•
Avoid high humidity that might cause condensation.
Avoid direct contact with water. Do not spray or immerse
the scales in water.
•Avoid air movement such as from fans or opening
doors. Do not place near open windows or air-
conditioning vents.
•Keep the scales clean. Do not stack material on the
scales when they are not in use.
•

© Adam Equipment Co Ltd 2018
2
2.2 SETTING UP THE SCALES
1) Place the stainless steel platform (supplied separately) into the receptacles on the top
cover.
2) Do not press with excessive force as that could damage the load cell inside.
3) If an optional scoop has been supplied, place it on top of the platform.
4) If an optional display on Pillar is supplied, install the pillar into the socket at the rear of
the scale by carefully pushing the cable inside the pillar rod. Use 2x M4 screws to
secure.
5) Level the scale by adjusting the four feet until the spirit level bubble is in the centre of
the level and the scale is supported by all four feet.
6) Turn the power ON by pressing the power button on the keypad.
7) The unit will display the software revision number in the Weight window and count down
to zero while performing a self-test.
8) When ready all three displays will show zero.
2.3 DISPLAY WINDOWS
The window for the Weight has arrows to indicate when the scale is at zero or if the scale is
displaying a net weight (if a tare value has been entered). It also indicates when the scale is
stable.
The window for the Unit Price has arrows to show when the Auto Clear function is active and
if the unit price is per 100g or per kilogram
Pillar Attachment
Mainsconnection
USB connectivity port

© Adam Equipment Co Ltd 2018
3
NOTE: Unit price per 100g or per kg is not available in South Africa or the Far East.
The window for the Price to Pay displays the number of items on the scale.
The above display panel is also available with French, German, Spanish, Italian and
Portuguese and text or with symbols for Weight, Unit Weight and Price to Pay.
2.4 BATTERY CHARGING
The battery icon can be found in the weighing display on the top left-hand side of the display.
To charge the battery, simply switch the main power ON. The scale need not be turned on.
The battery can operate for up to 90 hours when fully charged or less if the backlight is on. The
battery should be charged for 12 hours for full capacity.
If the battery icon is empty, the scale will still operate for about 15 minutes after which it will
automatically switch off to protect the battery from getting damaged.
If the battery has not been used properly or it is used for a number of years it may eventually
fail to hold a full charge. If the battery life becomes unacceptable then contact your distributor
or Adam Equipment.
In order to check the battery voltage press [Setup] and scroll through the menu till you see
‘’Recharge’’, then press [Tare] ↵key to select it and the battery voltage will be shown in the
Unit price window. If the scale is connected to mains the Price to Pay window will show the
current in mA.
3.0 KEY DESCRIPTIONS

© Adam Equipment Co Ltd 2018
4
[0-9]
Numeric entry keys to set the unit price.
[00]
Numeric entry key to enter double zero values e.g. press [2] and [00] to show 2.00 on the
display
[CE]
Clears an erroneous entry or return to normal operation.
[PLU+]
Stores or recalls a PLU value from one of the stored 161 PLU values.
[Tare] or key
Sets the scale to display zero weight when an empty container is placed on the platform or
removed again.
[CH]
The change key displays the total price to pay by subtracting unit weight from the unit price
value.
[Total]
The total key provides the total price to pay by multiplying unit weight by the unit price value.
[MR]
The memory key shows the 2 most frequently used Weight, Unit Price and Price to Pay values.
[Setup]
Brings up the setup menu for changing date, time, power etc
[Zero] or key
It sets the zero when the platform is empty and no tare value is entered.
[Auto Clear]
Allows the user to automatically reset the unit price to zero, when the weight is removed.
[Kg 100g]
It selects the unit price per kilogram or per 100g.
Note: This key is not available for South Africa and Far East models
[Print M+]
It sends the results of the current displays to the RS-232 interface.

© Adam Equipment Co Ltd 2018
5
4.0 OPERATION
4.1 ZEROING THE DISPLAY
Steps:
1) You can press the [Zero]/0
Esc
key when no tare is entered to set the zero point
from which all other weighing is measured.
2) When the zero point is obtained the Weight window will show an arrow next to the Zero
legend marked under the Weight window.
3) The scale has an automatic re-zeroing function to account for minor drifting or
accumulation of material on the platform. However you may need to press
[Zero]/0
Esc
if weight is displayed whilst the platform is empty.
4.2 TARING
Taring is used to eliminate the weight of a container so that only the net weight is displayed.
Steps:
1) Zero the scale by pressing [Zero]/0
Esc
if necessary. The zero indicator will be on.
2) Place an empty container on the platform. The weight of the container will be displayed.
3) Press [Tare] ↵to zero the scale. The displayed weight is then stored as the tare value
and that value is subtracted from the display, leaving zero on the display. The Net
indicator will now show. As product is added only the weight of the product will be shown.
4) When the product and container are removed the weight window will show a negative
value. To use a different container, remove this negative tare value by pressing [Tare]
↵once more.

© Adam Equipment Co Ltd 2018
6
4.3 DETERMINING VALUE OF A PRODUCT BY WEIGHT
To determine the cost of a product sold by weight, it is necessary to enter the cost per kilogram
or per 100g using the numeric keys or one of the pre-set PLU values.
The Weight window will show the net weight, the Unit Price window will show the price per
kilogram or per 100g as selected by the [kg 100g] key. The Total Price window will show the
computed value for the total price.
Example:
Di
s
play will show
Weight
(in kg) Unit Price Total Price
Place a container on the
scale and Press [Tare] 0.000 0.00 0.00
Place the items on the
platform 1.300 0.00 0.00
Key in the unit price 1.300 5.00 6.50
Press the [kg 100g] key to change the calculation to a price based on the cost per 100g or the
cost per kilogram.
If a different unit price is required either press [CE] to reset the unit price to 0.00 or simply enter
a new unit price.
NOTE: For South Africa and Far East, unit weight per 100g or per kg is not available.

© Adam Equipment Co Ltd 2018
7
4.4 ENTERING VALUES FOR THE PLUs
To store values for the [PLU+] key into the memory follow the procedure:
1) Enter the unit price value using the keypad, selecting either price/kg or price/100g if
needed.
2) Press the [PLU+] key, then select “Store” (using digits [1] or [6] to change the selection);
once selected press [Tare] ↵key. Display will show ‘’PoS 0” on the price to pay
display.
3) Enter any number (00 up to 161) for saving the unit price in the desired position. For
example, press [1] and [4] for the position 14. It will show “PoS 014”. Press [Tare] ↵
key) to save it.
4) To change the earlier saved value against a particular PLU, simply repeat the process.
4.5 USING A STORED PLU VALUE FOR UNIT PRICE
Product Look-Up (PLU) numbers are used to store information about the most commonly used
items. Using SWZ, the PLU values can be stored as either cost per kilogram or cost per 100g.
During the weighing operation, the user can recall the cost per kilogram or per 100g of a
particular item very easily using the PLU values.
The individual PLU values should be entered against specific items before the weighing
process starts so that the desired PLU’s can be recalled during the weighing process.
The user can store and recall up to 161 PLU values (PoS 001 to PoS 161) using the [PLU+]
key.
To recall one of these PLU values the following procedure applies:
1) To recall a PLU value, press [PLU+]. The display will show “store” or “recall” – press
digits [1] or [6] to change the selection and then press [Tare] ↵key
2) Once selected, display will show “PoS 0” on the Price to Pay display. Enter a number
(00 to 161) and press [Tare] ↵key to save the value against the number selected.
3) Once complete, the value can be recalled by selecting “recall” using the previous steps
and entering the saved PLU number.
If the item is loaded on the pan, the Price to Pay window will show the total cost. If nothing is
loaded, only the PLU value saved for the location will be displayed in the Unit Price window
and the Price to Pay window will display “0,00 ”.

© Adam Equipment Co Ltd 2018
8
4.6 AUTO CLEAR KEY
The [Auto Clear] key will enable the Auto Clear function.
When this function is active the scale will automatically clear (set the unit price to zero) when
the last item to be weighed has been removed from the scale.
When the Auto Clear is active the Auto Clear indicator (arrow) on the LCD will be ON.
Pressing [Auto Clear] will turn off the function and the indicator will disappear. Pressing it will
turn the function to ON again.
4.7 PRICE PER KILOGRAM AND PER 100 GRAM- [Kg 100g] KEY
Pressing the [kg 100g] key will change the scale from using a price per kilogram to price per
100g. This will show on the display:
This information is also saved for the PLU values that are stored in the memory.
NOTE: This is not applicable for SWZ for South Africa and Far East.
4.8 AUTO SLEEP FUNCTION
If there has been no movement on the keypad or when the scale is not used for some time (as
pre-set by the user under this function) it automatically switches off. To set this parameter:
1) Press [Setup] key and scroll through the menu using the [1] or [6] digits until you come
to “Power”
2) Select Power using [Tare] ↵key and then choose the amount of time you want (e.g.: 1,
2, 5, 10, 15 minutes or OFF) by using the [1] or [6] digits
3) Press the [Tare] ↵key to select the amount of time until this function activates or to turn
this off.
4.9 BACKLIGHT OPERATION
The backlight may be enabled or disabled by the user. If the backlight is disabled the battery
life will be maximised, when in operation the battery life will depend on usage.

© Adam Equipment Co Ltd 2018
9
To set the backlight:
•Press the [Setup] key to bring up the setup menu, then use the digits [1] or [6] to scroll
through until “bl” is displayed.
•Press the [tare] key to select.
•The price to pay display will provide options for “on”, “off” or “auto”. Press the [Tare]
↵key to select the preferred mode.
When ‘’on’’ or ‘’auto’’ selected you can set the brightness level by pressing [Tare]↵key and
then using the digits [1] or [6] select: ‘’Low’’, ‘’Mid’’ or ‘’High’’.
Backlight operation
When the backlight is set to automatic control it will only turn on when the scale is being used,
when there is weight on the platform or when a key is pressed.
It will turn off automatically after a few seconds when the weight is zero or after a while, the
last key was pressed.
4.10 KEY SOUND BEEPER
To turn ON or OFF the key sound beeper press [Setup] and then use the digits [1] or [6] to
scroll through until you find ‘’KEY bP’’. Press [Tare] ↵key to select it and then select ‘’ON’’ for
activate the sound or ‘’OFF’’ for deactivate it, using the digits [1] or [6] to scroll. Press [Tare]
↵key to save your option.
4.11. NON WEIGHED ITEMS
1) For non-weighed items enter the unit price and press [TOTAL] key.
2) The price is transferred to the Weight window; the units (g or kg) disappear and an arrow
will point to the symbol.
3) In the Unit price window an arrow will point to the pieces symbol. Enter the number of
pieces and the Price to Pay window will show the Total price to pay.
4) To enter a new quantity of the same non weight item, you can exit using the [Esc] key or
pressing [TOTAL] key again and then enter the new quantity and the new price to pay will be
displayed.

© Adam Equipment Co Ltd 2018
10
4.12 CHANGE FUNCTION
The change function allows you to calculate the correct change for both weight and non-weight
items.
1) When Total price to pay is shown in the Price to Pay window, press [CH] key and total
price goes to Weight window.
2) Type the amount of tendered which will be shown in the Unit price window and the
amount of change will be displayed in the Price to pay window.
4.13 RS-232 INTERFACE
SWZ scales include a bi-directional RS-232 interface. The scale can be controlled by sending
commands from a PC when connected via an RS-232 cable. See section 4.13.1.
Specifications:
RS-232 output of weighing data
ASCII code
Adjustable Baud rate: 1200, 2400, 4800, 9600, 19200, 38400, 57600, 115200 baud
8
data bits No Parity
Connector:
9
pin D-subminiature socket
Pin 2 Output
Pin 3 Input
Pin 5 Signal Ground
4.13.1 Input commands format
The scale can be controlled with the following commands. The commands must be sent in
upper case letters.
T<cr><lf>
Tares the scale to display the net weight. This is the same
as pressing [Tare] key.
Z<cr><If>
Sets the zero point for all subsequent weighing. The display
shows zero.
P<cr><lf>
Prints the results to a PC or printer using the RS-232
interface.

© Adam Equipment Co Ltd 2018
11
4.13.2 RS-232 Setup
The RS-232 interface uses parameters set by the user for language, currency symbol, baud
rate, date format and label format of the printout.
Press the [Setup] key to bring up the setup menu, then use the digits [1] or [6] to scroll through
until “rS232” is displayed. Press [Tare] ↵ key to confirm your enter, then use again the digits
[1] or [6] to scroll through parameters options.
When a parameter is entered by pressing [Tare] ↵, the displays will guide you through the
parameter selected and the options available. The parameters and their function are:
Displays
Options Functions
Weight
Unit Price
Price to Pay
rS232 - Pr int
PC
C md
Printer
Continuous to PC
Command
- Baud 1200, 2400,
4800, 9600, 19200,
38400, 57600, or 115200
Set baud rate.
- Format / ATP 1, 2 or 3 /ATP Select label format to
print.
- If ATP –
Copy1 1-8 Select no of copies to
be printed.
- Language EnGLiSH, FrEnCH,
GErMAn, SPAniSH ,
Italian or Portuguese
Select Language to be
printed.
LABEL FORMATS:
(NOTE: All lines are terminated with a <cr><lf>)
Format 1 (English with £ shown):
2018/08/31 13:01:56
UNIT PRICE NET TOTAL
-------------------------------------
£ 1.20/100g 0.200kg £ 2.40
Format 2 (Spanish with $ shown):
FECHA 2017/04/08 HORA 04:00:30
PRECIO
UNIT. $ 10.99/100g
NETO 0.200kg
TOTAL $ 21.98

© Adam Equipment Co Ltd 2018
12
Format 3 (Weight only):
+ 0.200kg
ATP format
4.14 REAL TIME CLOCK SETUP
The Real Time Clock (RTC) is used for the RS-232 output only. The Date and Time can be set
as required within the setup menu ([Setup] key). The scale will keep the clock running even
when the power is off.
Setting up the clock
1) Press the [Setup] key to bring up the setup menu.
2) Using the digits [1] and [6], scroll through until you see “Time” in the display. Press the
[Tare] ↵key.
3) The display below will show the current time set in the format 00:00:00.
4) Use the keypad to enter the correct time in hours, minutes and seconds (24 hour format)
and press the [Tare] ↵key to confirm.
Setting up the date
To change the date, follow the same process as above, selecting “date” from the setup menu.
Here you will be presented with several formats:
“YY-mm-dd” year, month, day
“mm-dd-YY” month, day, year
“dd-mm-YY” day, month, year
1) Press the [Tare] ↵key to accept the chosen format and then enter the date in this format.
2) Press the [Tare] ↵key to accept the date.
An error code will be shown if the time (Err 1) or the date (Err 2) is not the permissible values.
For example, 34
th
day of a month is an invalid entry.
DATE 12-12-2018
USER. ID 0
SCALE. ID 0
TIME 13:23:42
NET 0.5000kg
TARE 0.0000kg
GROSS 0.5000kg
UNITPRICE 12.34 /kg
TOTAL 6.17

© Adam Equipment Co Ltd 2018
13
5.0 ERROR CODES
During the initial power-on testing or during operation, the scale may show an error code in
which case consult the table below. If the error persists, contact your dealer for further support.
ERROR
CODE DESCRIPTION POSSIBLE CAUSES
Err 1
Time input Error Invalid time entry such as “268970” for
the time format “H-m-S”.
Err 2
Date input Error 34
th
day of a month is an invalid entry.
Err 3
Zero when power on and not
stable. Scale not placed on a stable surface
Err 4
Initial Zero is greater than
allowed (4% of maximum
capacity) when power is turned
on or when the [Zero/Enter]
key is pressed.
Weight on the pan when turning the
scale on. Excessive weight on the pan
when zeroing the scale.
Platform is not installed.
Improper calibration of the scale.
Damaged load cell.
Damaged Electronics.
Err 5
Zeroing error Trying to zero too much mass
Err 6
Negative tare error Pressing tare with a negative value
Err 7
Stability error Draft or vibrations causes unstable
weight
Err 8
Percent input error Percent function is entered with no
reference mass on the pan.
Err 9
User zero calibrate exceed
factory calibration 10% Improper calibration (should be within
+10% of the factory calibration). The old
calibration data will be retained until the
calibration process is complete.
Err 10
User load calibration exceed
factory calibration 10% Improper calibration (should be within
+10% of the factory calibration). The old
calibration data will be retained until the
calibration process is complete.
Err 19
Weight lower limit is larger than
upper limit High limit is set first, then the low limit is
set higher than the high limit and low
limit not equal to zero.
Err ADC
Incorrect ADC value Load cell is damaged.
Electronics is damaged.
---
OL
---
Weight over range Weight over scale range
---
Lo
---
Below Gross zero by >20e
Weight below scale range
This manual suits for next models
16
Table of contents
Other Adam Scale manuals

Adam
Adam ACBplus Series User manual

Adam
Adam CPWplus 35 User manual

Adam
Adam CBC-M Series User manual

Adam
Adam AE-202 User manual

Adam
Adam Luna LAB Series User manual

Adam
Adam TBB User manual

Adam
Adam AGB35 User manual

Adam
Adam MDW - 300L User manual

Adam
Adam WBW 2L User manual

Adam
Adam LBX C Series User manual