Adaptivation VOICEPAL LEVELS User manual

1
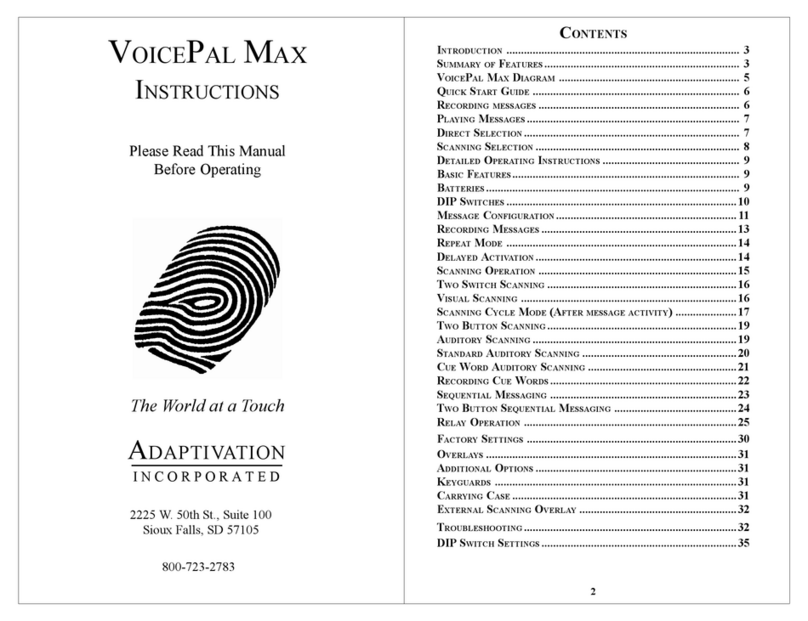
VOICEPAL LEVELS
INSTRUCTIONS
Please Read This Manual
Before Operating
The World at a Touch
800-723-2783
ADAPTIVATION
I N C O R P O R A T E D
2225 W. 50th St., Suite 100
Sioux Falls, SD 57105

23
INTRODUCTION
Congratulations on purchasing your VoicePal
Levels. It is one of the most affordable and functional
digital communication aids available. Adaptivation
strives to offer our clients products and follow-up
support that meets the highest quality standards in the
assistive technology field. Feel free at any time to
contact our offices for assistance on using your new
VoicePal Levels.
The VoicePal Levels can record and playback up to
20 natural voice messages for a total recording time of 90
or 120 seconds. The total recording time is divided
among the two levels, allowing each level its own amount
of time. Recording messages on one level will not affect
the messages on the other level. Messages can be
activated in any of five ways: 1) Directly by the keypad
on top of the VoicePal Levels, 2) Directly by plugging in
external switches, 3) Through scanning input, both visual
and auditory, 4) Sequential messaging and 5) Random
messaging.
SUMMARY OF FEATURES
•90 or 120 seconds of record time
•Great sound quality.
•2 levels.
•Keyboard configuration 2, 3, 5 or 10 messages.
•Delayed activation 0 or 2 sec.
•Scan up to 20 messages.
•Visual scanning & auditory scanning.
•Normal auditory scanning or cue-word scanning.
•Select from multiple scan speeds
CONTENTS
INTRODUCTION ................................................................................... 3
SUMMARY OF FEATURES .................................................................... 3
VOICEPAL LEVELS DIAGRAM .............................................................. 5
DETAILED OPERATING INSTRUCTIONS ................................................... 6
BATTERIES .......................................................................................... 6
FUNCTION SWITCHES .......................................................................... 7
MESSAGE CONFIGURATION .................................................................. 8
RECORDING MESSAGES ........................................................................ 9
DELAYED ACTIVATION ....................................................................... 10
DIRECT SELECTION .......................................................................... 10
SCANNING OPERATION ..................................................................... 10
VISUAL SCANNING ............................................................................ 11
TWO BUTTON STEP SCANNING ......................................................... 11
AUDITORY SCANNING ....................................................................... 12
STANDARD AUDITORY SCANNING ...................................................... 13
CUE WORD AUDITORY SCANNING ..................................................... 13
SEQUENTIAL MESSAGING ................................................................... 15
RANDOM MESSAGING ........................................................................ 15
JOIN LEVELS .................................................................................... 16
SHIFT LEVELS .................................................................................. 16
RELAY OPERATION ........................................................................... 17
OTHER FEATURES ............................................................................. 18
OVERLAYS ....................................................................................... 18
KEYGUARDS ..................................................................................... 19
CARRYING CASE .............................................................................. 19
EXTERNAL SCANNING LEDS/MOTORS ............................................... 19
TROUBLESHOOTING ........................................................................... 20
FUNCTION SWITCH SETTINGS ............................................................ 23

45
•No programming is required. Just set the switches to the
desired position, and leave them. The factory setting is
for all switches to be in the OFF position.
•Compatible with easy-to-use external scanning LEDs or
vibrating motors.
•The cause-effect relay (labeled “TOY”) activates a toy or
battery-operated device during message playback.
•The LEDs on the keypad light up while a message is speak-
ing. This visual feedback allows deaf users to know
when the message is finished.
•During recording, the LEDs on the keypad light up, providing
visual feedback of which message is being recorded.
Also, the message is replayed to provide a convenient
way of checking the new recording.
•The volume knob affects the sound level for both auditory
scanning and during normal use. The speaker volume can
be set so that it is more quiet during auditory scanning
than it is when the selected messaged is speaking.
•There are three separate jacks for using scanning: SEQ,
SCAN (POS) and SCAN (INV). Switches plugged into
these jacks control four primary kinds of scanning: Se-
quential Messaging, Positive scanning (also known as
Auto scanning), Inverse scanning (including Step scan-
ning) and 2-Button Step scanning.
•SEQ controls Sequential Messaging. When the SEQ switch
is pressed, a message will be played through the
speaker. Each successive press of this switch will
cause the next message in sequence to be played.
•By enabling Join Levels, scanning will not resume with mes-
sage 1 of the same level. It will instead resume with mes-
sage 1 of the other level. When the highest message is
reached on the new level, scanning will resume with
message 1 of the original level.
•The Randomize function is used in conjunction with a
switch plugged into the SEQ jack. When the switch is
pressed, a message is chosen at random.
•Shift Levels feature. If Shift Levels is enabled, then button 1
on the keypad (or a switch plugged into jack 1) will not
function to activate message 1. Instead, pressing button
1 will change the active level, so that the next time an-
other button is pressed, the non-default level will be
used.
VOICEPAL LEVELS DIAGRAM
Diagram 1 shows the VoicePal Levels with each of
the major features identified.
RECORD
SEQ SCAN
VOL
EXT SCAN TOY
1 2 3 4 5 6 7 8 9 10
VoicePal Levels
DIP Switches
On/Off/Volume
Knob
Record
Button
SEQ Jack External Switch
Jacks
Speaker
Microphone
Toy
Jack
Keypad Buttons
External
Speaker
Jack
Scan
Speaker
Jack
Template
Pouch
Scan
Jacks
Diagram 1.
Ext LEDs
Jack

67
DETAILED OPERATING INSTRUCTIONS
BASIC FEATURES
The VoicePal Levels provides a total of 90 or 120
seconds of recording time, depending on the model. The
recording time can be divided among two, three, five, or
ten messages. There are four main methods of selecting
messages for playback: direct selection, scanning,
sequential messaging and random selection.
With direct selection, the ten front-panel buttons
are used to select the desired message. Button 1 is in the
upper left corner. Button 2 is the second one from the left
on the top row and so on. Button 10 is in the lower right
corner. There are ten jacks corresponding to Buttons 1
through 10 that accept either external switches or
Adaptivation’s Taction Pads. Messages can be directly
selected using these external switches in addition to the
front panel buttons. Scanning capabilities are described
later in this manual.
You can custom-create your own symbol or picture
overlays and slip them in the VoicePal Levels’ pouch.
Templates are provided for each configuration to help
you position pictures and punch out holes in your
overlays so the LEDs are visible. “LED” is short for light
emitting diode. It refers to the small red lights on the
VoicePal Levels.
BATTERIES
The VoicePal Levels operates on four AA batteries.
Alkaline, rechargeable alkaline or rechargeable NiMH
batteries are recommended. Under normal use, alkaline
batteries can be expected to last up to six months using
direct selection.
FUNCTION SWITCHES
There are 12 Function switches on the VoicePal
Levels, designated as SW1 through SW12. These
switches are used to configure various features on the
VoicePal Levels.
The following chart contains Function switch
settings and can be found on the back of your VoicePal
Levels. This chart can be used as a quick reference guide
to programming.

89
MESSAGE CONFIGURATION
The VoicePal Levels can be configured to supply
either two, three, five or ten messages, depending on the
operator’s needs. If you wish to switch between 2, 3, 5
and 10 message modes, you should record new messages.
For beginning operators, it may be necessary to configure
the VoicePal Levels to supply only two messages. As the
operator becomes proficient with two messages, the
VoicePal Levels can be configured to supply three
messages, then five, then ten.
TEN MESSAGES
SW2= OFF, SW3= OFF. Pressing Button 1 selects
message one. Pressing Button 2 selects message two,
etc.
FIVE MESSAGES
SW2= OFF, SW 3= ON. Pressing button 1 or 6
selects message one. Pressing button 2 or 7 selects
message two. Pressing button 3 or 8 selects message
three. Pressing button 4 or 9 selects message four.
Pressing button 5 or 10 selects message five.
THREE MESSAGES
SW2= ON, SW3= OFF. Pressing button 1 or 6
selects message one. Pressing button 3 or 8 selects
message two. Pressing button 5 or 10 selects message
three. The spaces between 1, 2 and 3 are intentional dead
space.
TWO MESSAGES
SW2= ON, SW3= ON. Pressing button 1, 2, 6 or 7
selects message one. Pressing button 4, 5, 9 or 10 selects
message two. The space between messages 1 and 2 is an
intentional dead space.
Note: When switching between 2, 3, 5 and 10 message
modes, it is best to rerecord the messages since the
VoicePal Levels re-configures its memory each time.
RECORDING MESSAGES
1. Press and hold the record button firmly. The Record LED
will begin to flash. Continue holding the Record button
until the Record LED goes solid (about two seconds),
then release. The VoicePal Levels is now in record mode.
If the LED for button #10 is lit, press and immediately
release the Record button to turn LED #10 off. When
LED #10 is lit, the VoicePal Levels will record cue words
for auditory scanning, which is discussed later in this
manual.
2. Get ready to talk, then press and hold button #1. Speak
clearly about 12 inches away from the VoicePal Levels
microphone (MIC).
3. When you are done talking, release button #1. (Note:
As long as you touch the button or external switch, the
VoicePal Levels will be recording whether you are talking
or not.)
4. Repeat steps 2 and 3 to record other messages. (The
messages can be recorded in any order. Also you can
rerecord one message without having to rerecord any
other messages.)
5. Press and hold the Record button firmly. The Record
LED will begin to flash. Continue holding the Record
button until the Record LED goes out (about two
seconds), then release. The VoicePal Levels is no longer
in record mode.

10 11
DELAYED ACTIVATION
Typically when a keypad or external switch is
pressed, the corresponding message plays back immedi-
ately. A 2-second delay can be added. This means the
keypad button or external switch must be held down for 2
seconds before a message plays. This is particularly
helpful for two reasons. First, in the case of Taction Pads
stuck to objects, the person has time to feel each object
to identify if it is the one of choice. When the desired
object is found, the person holds his or her hand on it for
the 2 seconds. Delayed activation is also helpful if a
person drags his or her hand across the keypad before
reaching the button of choice. A message will play only
if the person’s hand stays on the button for the 2 sec-
onds. Delayed activation has no effect in Record mode.
PLAYING MESSAGES
DIRECT SELECTION
1. Make sure the Record LED is not lit. If it is, press and
hold the Record button until the Record LED turns off.
2. Make sure the volume knob is turned up.
3. Press button #1 on the keypad or external switch
plugged into Jack #1. The message will play.
4. Repeat step 3 with other keypad buttons.
SCANNING OPERATION
Scanning allows the user to select any message
with the touch of a single external switch. Two-message,
three-message, five-message and ten-message scanning
can be selected. There are two kinds of scanning: visual
and auditory scanning. Related to scanning is Sequential
Messaging which is discussed later. There are four ways
to select messages when using scanning: Positive
scanning selection, Inverse scanning selection, Step
scanning selection, and Two-Button scanning selection.
Note: In order for scanning to work, there must not
be a switch plugged into the SEQ jack.
POSITIVE SCANNING SELECTION
The jack marked SCAN (POS) controls Positive
scanning. When the switch plugged into SCAN (POS) is
first pressed, scanning begins. To select the desired
message, press the switch again when the corresponding
LED is lit. The message will be played through the
speaker.
INVERSE SCANNING SELECTION
Scanning begins when the scan switch is pressed
and held. When the scan switch is released, a message is
selected. Plug the external switch into the jack marked
SCAN (INV).
STEP SCANNING SELECTION
Scanning begins when the SCAN (INV) switch is
pressed. Repetitively tapping the scan switch causes the
VoicePal Levels to cycle to the next message. To select a
message, release the scan button for at least 3/4 of a
second. Step scanning works best with visual scanning.
TWO BUTTON STEP SCANNING
If switches are plugged into both SCAN (POS) and
SCAN (INV), then 2-Button Step scanning will be used.
To start, press and release the SCAN (POS) switch. This
will cause the LED(s) for the first message to be lit. Each
successive press of this switch will “bump” to the next

12 13
message. When the desired message is reached, press the
SCAN (INV) switch. This will cause the message to be
played.
VISUAL SCANNING
During visual scanning, there is an LED associated
with each keypad button. These LEDs light up, indicat-
ing that the corresponding message can be selected. For
example, in two-message mode, there are four LEDs lit at
one time. LEDs 1, 2, 6 and 7 are lit when message 1 is
presented, and LEDs 4, 5, 9 and 10 are lit when message 2
is presented.
SCAN SPEED
One of our visual speeds can be selected. Follow
the Function switch chart (see page 23) to adjust scan
speeds.
AUDITORY SCANNING
SW9= ON. There are two types of auditory scan-
ning: whole message (standard) and cue word.
The volume knob affects the sound level for both
auditory scanning and during normal use. The speaker
volume can be set so that it is more quiet during auditory
scanning (Function switch 1 in the ON position) than it is
when the selected messaged is speaking. If a speaker is
plugged into the Scan Speaker jack, then auditory
scanning will be heard on the external scan speaker rather
than on the internal speaker. The volume of the external
scan speaker cannot be adjusted. It is fixed at a relatively
low volume. This external speaker should be a mono
speaker. If a stereo speaker is used, a mono-to-stereo
adapter will be needed. If a speaker is plugged into the
External Speaker jack, sound will be heard on the external
speaker rather than on the internal speaker. The volume
of this external speaker can be adjusted just as the
internal one is.
STANDARD AUDITORY SCANNING
With standard auditory scanning, each message
plays one-by-one, quietly, privately through a headphone
or pillow speaker, or through the main speaker. The
headphones or pillow speaker plug into the jack marked
SCAN SPK. The volume level played through the
headphones cannot be adjusted using the Volume knob.
When the operator hears the desired message, he or she
can then select it by pressing the external scan switch.
This causes the message to play loudly over the built-in
amplified speaker. The LEDs illuminate during scanning
as each message plays.
CUE WORD AUDITORY SCANNING
With cue word auditory scanning, each message
has a separate cue word or phrase associated with it.
When the external scan switch is pressed, each cue word
plays one-by-one, quietly, privately through a headphone
or pillow speaker, or through the main speaker. When the
user hears the desired cue word, he or she can then select
it by pressing the scan switch. This will cause the entire
message associated with the cue word to play loudly over
the built-in speaker. It is best to rerecord your messages
and cue words when using cue word auditory scanning.
RECORDING CUE WORDS
SW10= ON The VoicePal Levels re-configures its
memory to reserve space just for cue words. To eliminate
any message confusion when switching from Standard to
Cue Word scanning, it is best to rerecord your messages

14 15
and cue words. The chart below shows various message
lengths based on model and configuration.
Follow these steps to record cue words.
1. Press and hold the record button. The Record LED will
flash. Continue to hold the Record button until the
Record LED goes solid (about 2 seconds), then release.
The VoicePal Max is now in record mode. Now press the
Record button once and LED #10 lights up. When LED
#10 is on, the VoicePal Levels will record cue words.
When it is off, it will record regular messages.
2. Record cue words the same way you recorded messages
as described in the “Recording Messages” section.
3. You will need to rerecord the actual messages as well.
Press the Record button once and LED #10 will turn off,
but still leaving the Record LED on. You may now record
actual messages.
4. Turn the Record LED off by pressing and holding the
Record button. The Record LED will flash. Continue
holding until the LED goes out, then release.
SEQUENTIAL MESSAGING
The SEQ jack controls Sequential Messaging. When
the switch plugged into the SEQ jack is pressed, a
message will be played through the speaker. Each succes-
sive press of this switch will cause the next message in
sequence to be played. To reset Sequential Messaging so
that it begins with a given message, press the keypad
switch corresponding to that message. If a switch is
plugged into SCAN (POS), then pressing that switch will
cause the last message to be repeated. If a switch is
plugged into SCAN (INV), then pressing that switch will
cause the previous message to be played. Note: Sequen-
tial messaging overrides Positive, Inverse and 2-Button
scanning. To use any of these kinds of scanning, then
make sure that there is not a switch plugged into SEQ.
RANDOM MESSAGING
The Randomize function (Function switch 4) is
used in conjunction with a switch plugged into the SEQ
jack. When the switch is pressed, a message is chosen at
random. It is very useful in many activities where the
special needs child chooses teammates, plays rock, paper,
scissors, or rolls dice for a game. The message chosen is
a function of the keyboard configuration. If the keyboard
is configured for two messages, then one of the two
messages will be chosen at random. If the keyboard is
configured for ten messages, then one of the ten mes-
sages will be chosen at random. If the Join Levels feature
is also enabled, then messages will be randomly chosen
from both level 1 and level 2. This forms a group of up to
20 messages from which to choose.
Note: when Randomize is enabled, Sequential

16 17
Messaging is disabled. If Randomize is enabled, and a
switch is plugged into the SEQ jack then, SCAN (POS)
and SCAN (INV) operate as they do during normal
Sequential Messaging. If no switch is plugged into SEQ,
then SCAN (POS) and SCAN (INV) operate as normal for
Positive Scanning and Inverse Scanning, respectively.
SWITCH LEVELS
Function switch 12 determines whether the indi-
vidual will be activating messages on level 1 or level 2. In
the OFF position, level 1 will be active, and in the ON
position, level 2 will be active.
JOIN LEVELS
For all the types of scanning discussed above,
scanning will be limited to any one level. That is, when
the highest message is reached, scanning will resume
with message 1 of that same level. By enabling Join
Levels (Function switch 11 in the ON position), scanning
will not resume with message 1 of the same level. It will
instead resume with message 1 of the other level. When
the highest message is reached on the new level, scan-
ning will resume with message 1 of the original level. This
effectively daisy-chains the two levels together, allowing
up to 20 messages to be scanned. Scanning will start on
the level determined by Function switch 12, which sets
the default level.
SHIFT LEVELS
Function switch 6 controls the Shift Levels feature.
If Shift Levels is enabled, then button 1 on the keypad (a
switch plugged into jack 1) will not function to activate
message 1. Instead, pressing button 1 will change the
active level, so that the next time another button is
pressed, the non-default level will be used. For example if
Function switch 12 is in the OFF position, messages
recorded and played will be on level 1 only. With the shift
Levels feature, messages on both level 1 and level 2 can
be directly accessed. This allows up to 18 messages to be
directly selected either with the keypad buttons or with
external switches.
RELAY OPERATION
GENERAL
The VoicePal Levels has one internal relay that acts
as a switch to turn battery-operated devices on and off.
The relay can be set to activate during messages 2 & 3
and works with any mode (direct selection, external
switches, scanning, and sequential messaging). The
relay activates devices while the message plays.
Environmental control units such as the FreeSwitch,
FreeHand, and switch-latch, timing devices such as the
Linkswitch can be used to give the relay latch and timing
capabilities.
CONNECTING EXTERNAL DEVICES
The upper, right-hand corner of the VoicePal Levels
has a jack labeled TOY. Plug the device which you intend
to activate utilizing a standard 1/8” (3.5mm) plug into the
jack marked TOY. The relay will automatically function
when messages 2 & 3 are activated. The relay will
activate for the duration of the message.
Remember the FreeSwitch, FreeHand, and
Linkswitch can be used to enhance timing and latching
capabilities.
The following diagram illustrates a typical relay
setup using the VoicePal Levels hooked into a
LinkSwitch, and also plugged into a battery adapted toy.

18 19
OTHER FEATURES
EXTERNAL SPEAKER JACK
This jack will allow you to plug in an additional
speaker. This may be an amplified speaker for situations
when a very loud volume is needed, or a set of head-
phones when a quiet message is needed. The VoicePal
Levels’ internal speaker will automatically shut off when
an external speaker is used.
OVERLAYS
The VoicePal Levels has a built-in pouch which
enables you to easily slide in custom overlays with
pictures or symbols. Included with the VoicePal Levels
are templates for the 2, 3, 5 and 10-message modes.
These templates also have punch-outs for the scanning
LEDs. Boardmaker from Mayer-Johnson is a popular
program which allows you to make custom overlays with
many symbols to choose from. If you have Boardmaker,
pre-sized templates are available. Use the following steps
to open Adaptivation templates.
1. Open Boardmaker
2. Under File menu, Open
3. Open the Pre-made folder
4. Open the folder named “Adaptiv”
5. Choose the template you wish to use.
ADDITIONAL OPTIONS
KEYGUARDS
The VoicePal Levels has keyguards available to help
the operator zero in on the desired keypad button. The
keyguard helps prevent inadvertent activation of the
keypad. Keyguards are available in 2, 3, 5 and 10-
message formats.
CARRYING CASE
The VoicePal Levels has a custom designed carrying
case available to help protect it from bumps, spills and
other hazards. The carrying case can be hung over the
shoulder, or worn around the waist to provide easy
access.
EXTERNAL SCANNING LEDS/MOTORS
External visual scanning is possible with the
VoicePal Levels using the External Scanning LEDs.
Objects such as glasses, toys, utensils or large photos or
symbols can be scanned by placing the three, large LED
lights on the objects to facilitate very concrete scanning
capability. The optional external LEDs correspond to
messages 1, 2 and 3. These LEDs provide visual feedback
in the same manner as described above. They are also
used during scanning. The external motors provide tactile
feedback in the same way that the LEDs provide visual
feedback. The external LEDs (and motors) can be used
with any keyboard configuration, however they function
only with the first three messages.

20 21
TROUBLESHOOTING
Voice Pal Levels records but does not play back.
Is volume turned up?
Are batteries in correctly?
Batteries may be too low. Try new ones.
If external speaker is used, does it work?
Is Delayed Activation being used? If so press the button
for required length of time.
Is the VoicePal Levels programmed for 2 or 3 message
mode? Keep in mind that some keypad buttons and
corresponding external switch jacks are intentional dead
spaces and won’t activate messages.
VoicePal Levels will not go into RECORD mode.
Firmly press the record button for two to three seconds
until the flashing Record light comes on solid, then
release.
Make sure batteries are fresh.
Make sure ON/OFF Volume switch is on.
The VoicePal Levels will not go into Record mode until
the message currently playing ends.
You can get into record mode but messages won’t record.
Are you in 2 or 3 message mode? These modes have
intentional dead spaces and will not record in those
areas.
Release the Record button after the Record LED comes
on. Do not press the Record button and the keypad
buttons at the same time.
Are you recording cue words or regular messages?
When LED 10 is on while in record mode, you will be
recording cue words.
Messages are quiet or have too much background noise.
Speak clearly and loudly, no less than 12 inches away
from the unit.
Batteries may be too low.
Are you near a source of electrical noise? Such as: Power
lines, automobiles, electrical motors, air conditioner. If
so, increase the distance of the VoicePal Levels from
these sources.
While using relays, you hear the relay clicking but the
battery operated device does not turn on.
Is your battery operated device turned on?
Are the batteries fresh in the battery operated device?
Does the device work if you plug a conventional switch
directly into it?
Did you plug the battery operated device into the correct
jack?
Auditory scanning is not working.
Make sure SW9= ON.
Make sure the volume knob is turned up.
VoicePal Levels appears “dead” after replacing the batteries.
Whenever installing new batteries, always wait at least
15 seconds after the old batteries have been removed. If
your device does seem to be “dead”, remove the
batteries. Turn the power knob ON. Press the record
button and release. Wait 15 seconds. Turn the power
knob OFF. Replace the batteries, turn the power knob
back on, and the VoicePal Levels will now work.

22 23
FUNCTION SWITCH CHART
NOTES

24
VoicePal Levels
1 Year Limited Warranty
Your Adaptivation VoicePal Levels was carefully tested and inspected before it
was shipped from the factory. We warrant this product to be free from defects in
materials and workmanship under normal use and service for one (1) year from
the date of purchase. In the event of a defect in materials or workmanship, we
will either repair or replace without charge, at our option, any part which in our
judgment shows evidence of such defect within one (1) year of purchase. Taction
Pads are warranted for six months from the original date of purchase.
This warranty does not apply if the VoicePal Levels or Taction Pads have been
misused, abused, altered, or tampered with. At the end of the warranty period,
Adaptivation shall be under no further obligation expressed or implied.
This warranty gives you specific rights, and you may also have other rights which
vary from state to state.
For repair service, contact Adaptivation's technical dept. to receive a re-
quired RMA# (return material authorization number) prior to the return
of the device.
Adaptivation, Inc.
2225 W. 50th St. Suite 100
Sioux Falls, SD 57105
1(800)-723-2783, (605) 335-4445, Fax: (605) 335-4446, e-mail:
Please make sure your VoicePal Levels is clean before returning it to Adaptiva-
tion for service.
This is not a medical device. It should not be used where incor-
rect or faulty operation could reasonably be expected to result in
injury or worse!
6/04
REV A.7
Table of contents
Other Adaptivation Conference System manuals
