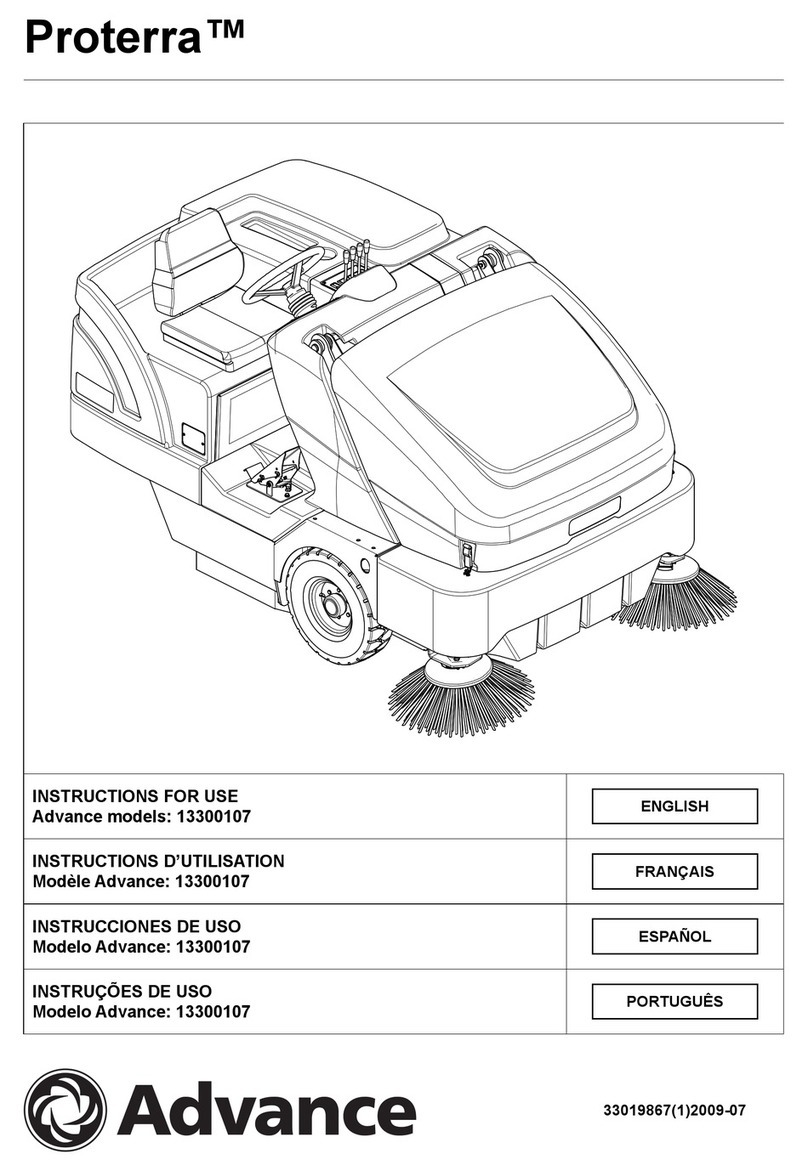
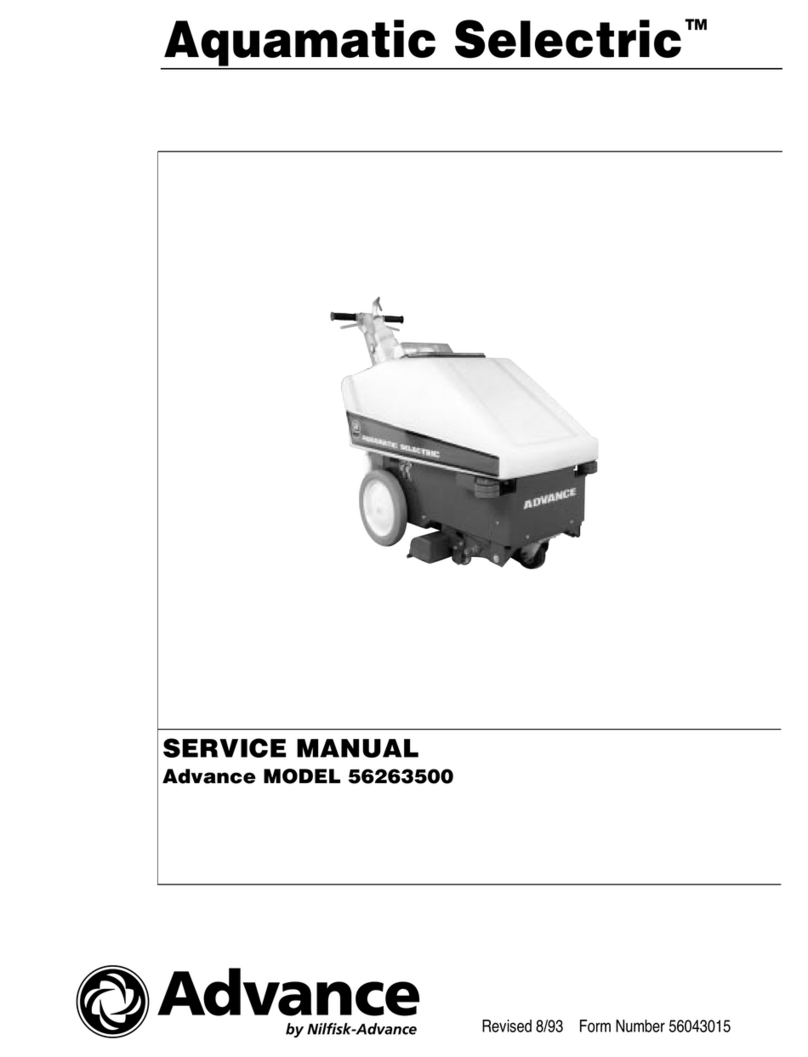
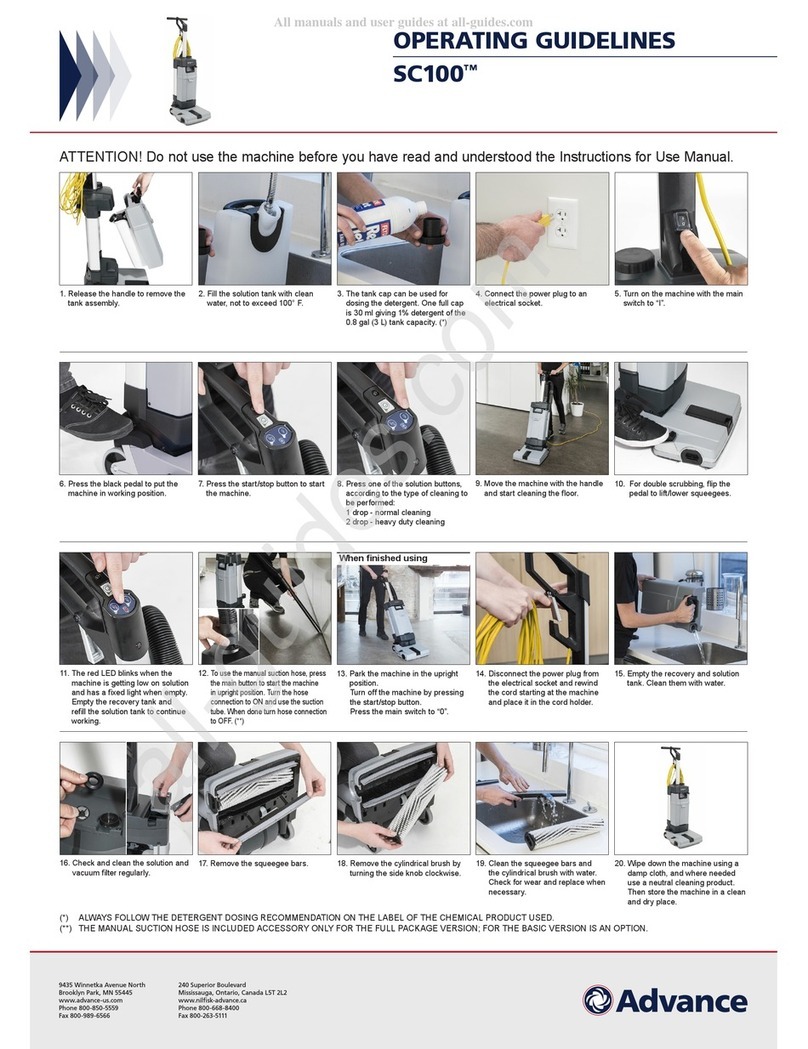
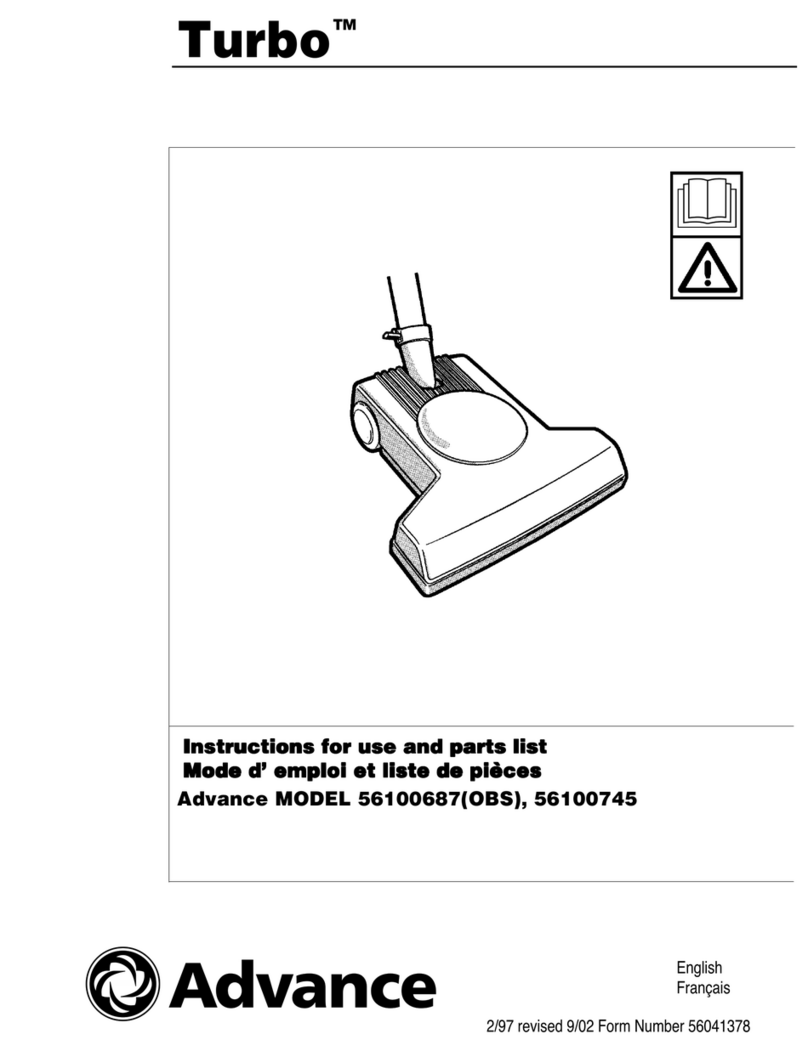
Advance acoustic Carpetwin 56704200 User manual

5/99 revised 11/02 Form Number 56041453
Carpetwin™14 / 18
OPERATOR MANUAL AND PARTS LISTOPERATOR MANUAL AND PARTS LIST
OPERATOR MANUAL AND PARTS LIST
Advance MODELS 56704200, 56704201

1 - FORM NO. 56041453 / CARPETWIN 14 / 18
A
C
B
D
Impor an Safe y Ins ruc ions ................................................................ 2
Grounding Ins ruc ions .......................................................................... 5
In roduc ion ........................................................................................... 7
Par s and Service.................................................................................. 7
Namepla e............................................................................................. 7
Unpacking he Machine ........................................................................ 7
Know Your Machine .............................................................................. 7
Se -Up and Assembly ........................................................................... 7
Opera ing he Machine.......................................................................... 8
Using he Wand .................................................................................... 8
Af er Using he Machine........................................................................ 8
Vacuum Mo or Brushes ........................................................................ 8
Main enance ......................................................................................... 8
Changing he Paper Dus Bag .............................................................. 8
Changing he Clo h Dus Bag ............................................................... 8
Cleaning he Vacuum Inle Fil er ........................................................... 9
Changing he Elec ros a Exhaus Fil er ................................................ 9
Changing he Brush .............................................................................. 9
Replacing he Bel ................................................................................. 9
Technical Specifica ions ....................................................................... 9
Bag Housing Par s Lis .................................................................. 11-12
Brush Housing Par s Lis ............................................................... 13-14
Wiring Diagram ................................................................................... 15
1
2
2
3
4
5
6
7
8
9
10
11
12
13
14
15 17
18
19
22
20
20
16
21

FORM NO. 56041453 / CARPETWIN 14 / 18 - 2
IMPORTANT SAFETY INSTRUCTIONS
When using an elec rical appliance, basic precau ions should always be followed, including he following:
Read all ins ruc ions before using.
This machine is for commercial use, for example in ho els, schools, hospi als, fac ories, shops and offices o her han normal residen ial
housekeeping purposes.
THIS APPLIANCE IS INTENDED FOR DRY USE ONLY!
DO NOT USE FOR WET FLOOR OR CARPET!
WARNING
To reduce he risk of fire, elec ric shock, or injury:
*Do no leave he appliance when i is plugged in. Unplug he uni from he ou le when no in use and before servicing.
WARNING
To reduce he risk of elec ric shock, do no use ou doors or on we surfaces.
*Do no allow o be used as a oy. Close a en ion is necessary when used by or near children.
*Use only as described in his manual. Use only he manufac urer’s recommended a achmen s.
*If he appliance is no working as i should be, has been dropped, damaged, lef ou doors or dropped in o wa er, re urn i o a service
cen er. The machine mus no be used if he elec rical cord shows any sign of damage. Regularly inspec he cord for damage,
par icularly if i has been crushed, shu in a door or run over.
*Do no pull or carry by he cord, use he cord as a handle, or pull he cord around sharp edges or corners. Keep he cord away
from hea ed surfaces.
*Do no unplug by pulling on he cord. To unplug, grasp he plug, no he cord.
*Do no handle he plug, cord or appliance wi h we hands.
*Do no pu any objec in o openings. Do no use wi h any opening blocked.
*Keep loose clo hing, hair, fingers, and all par s of body away from openings and moving par s.
*Do no pick up any hing ha is burning or smoking, such as cigare es or ma ches. Under no circums ances should he machine
be used for picking up ho ma erial. In par icular he machine mus no be used for cleaning open and closed fireplaces, ovens
or similar ha con ain warm or glowing ashes.
*Do no use wi hou dus bag and/or fil ers in place.
*Turn off all con rols before unplugging. The plug mus always be removed from he socke ou le before s ar ing any service or
repair work of he vacuum cleaner or he cord.
*Avoid vacuuming hard or sharp objec s.
*Use ex ra care when cleaning on s airs.
*The machine mus no be used for picking up combus ible ma erials which are heal h endangering or explosive ma erials such
as pe rol (gasoline), nor should i be used in an explosive a mosphere. The machine mus no be used for picking up wa er, o her
liquids or for picking up hazardous - i.e. poisonous dus .
*No changes or modifica ions of he mechanical, elec rical or hermal safe y devices should be made.
*When repairing or replacing he cord, he same ype of cord as originally supplied wi h he machine mus be used. This cord can
be supplied by ADVANCE.
SAVE THESE INSTRUCTIONS

3 - FORM NO. 56041453 / CARPETWIN 14 / 18
INSTRUCTIONS DE SÉCURITÉ IMPORTANTES
Toujours suivre cer aines précau ions élémen aires lors de l’u ilisa ion d’un appareil élec rique.
Lire ou es les ins ruc ions avan d’u iliser la machine.
Ce e machine es adap ée à l’usage commercial, par exemple dans les hô els, les écoles, les hôpi aux, les usines, les magasins e
les bureaux.
CET APPAREIL NE DOIT ETRE UTILISE QU’A SEC!
NE PAS UTILISER SUR UNE SURFACE HUMIDE!
AVERTISSEMENT
Pour réduire les risques d’incendie, de décharge élec rique ou de blessures:
*Ne pas abandonner l’appareil s’il es branché. Débrancher l’alimen a ion sec eur quand l’appareil n’es pas u ilisé ou avan
l’en re ien.
AVERTISSEMENT
Pour réduire les risques de décharges élec riques, ne pas u iliser l’appareil en ex érieur ou sur des surfaces humides.
*Ce appareil n’es pas un joue . Res er a en if quand il es u ilisé par ou près des enfan s.
*U iliser l’appareil conformémen aux ins ruc ions de la no ice. U iliser seulemen les accessoires préconisés par le fabrican .
*Ne pas u iliser l’appareil si le cable d’alimen a ion ou la prise es endommagé. Re ourner l’appareil au cen re de service après-
ven e s’il ne fonc ionne pas correc emen , s’il es ombé, s’il a é é endommagé, s’il a é é laissé à l’ex érieur ou s’il es ombé dans
l’eau.
*Ne pas irer ou por er l’appareil par le cable d’alimen a ion, ou coincer le cable dans une por e ou irer le cable sur des angles
vifs ou des coins. Ne pas faire passer l’appareil sur le cable. Eloigner le cable des surfaces chaudes.
*Ne pas débrancher l’appareil en iran sur le cable d’alimen a ion, mais en saisissan la prise.
*Ne pas manipuler la prise, le cable d’alimen a ion ou l’appareil avec les mains humides.
*Ne rien in roduire dans les ouver ures de l’appareil. Ne pas u iliser l’appareil si l’une des ouver ures es obs ruée; éliminer la
poussière, les peluches, les cheveux e ou corps é ranger pouvan gêner le flux d’air.
*Eloigner les vê emen s amples, cheveux, doig s e ou e au re par ie du corps des pièces en mouvemen e des ouver ures.
*Ne pas aspirer d’obje s qui brûlen ou dégagen de la fumée, comme des cigare es, des allume es ou des cendres chaudes,
ni de poussières dangereuses pour la san é. Ne pas aspirer d’eau ou des liquides.
*Ne pas u iliser sans sac à poussière e /ou fil re en place.
*Placer ou es les commandes en posi ion d’arrê avan de débrancher l’appareil.
*Evi er d’aspirer des corps durs ou poin us.
*E re par iculièremen pruden en ne oyan les escaliers.
*Ne pas aspirer de liquides inflammables ou combus ibles, elle l’essence, e ne pas u iliser à proximi é.
*Evi er d’aspirer des obje s durs ou poin us.
*Ne pas modifier les sys èmes élec riques, mécaniques ou hermiques.
*Remplacer le cable far un cable iden ique fourni far Advance.
CONSERVER CES INSTRUCTIONS

FORM NO. 56041453 / CARPETWIN 14 / 18 - 4
INSTRUCCIONES IMPORTANTES DE SEGURIDAD
Deben aplicarse cier as precauciones básicas siempre que se u ilice un apara o eléc rico, incluyendo las siguien es:
Lea odas las ins rucciones an es de u ilizar la máquina.
Es a máquina ambién es adecuada para el uso profesional, por ejemplo, en hó eles, colegios, hospi ales, fábricas, iendas y oficinas,
que no sean los usos domés icos normales.
¡ESTE APARATO HA SIDO DISEÑADO ÚNICAMENTE PARA SU USO EN SECO!
¡NO UTILICE LA MÁQUINA EN SUELOS O MOQUETAS HÚMEDOS!
¡AVISO
Para reducir el riesgo de incendio, descarga eléc rica o lesión:
*No deje la máquina conec ada a la red. Desenchufe la máquina cuando no se es á u ilizando y an es de efec uar una revisión.
¡AVISO
Para reducir el riesgo de una descarga eléc rica, no u ilice la máquina al aire libre, ni en superficies húmedas o mojadas.
*No deje que se u ilice la máquina como jugue e. Debe pres arse una a ención especial cuando la maneja o se u iliza cerca de
los niños.
*Siga escrupulosamen e las indicaciones de es e manual. U ilice únicamen e piezas recomendadas por el fabrican e.
*No u ilice la máquina con el cable o clavija en es ado defec uoso. Si el apara o no funciona correc amen e, si ha sufrido una caída
o daños, si se ha dejado a la in emperie, o si ha sufrido una inmersión en agua, devuélvalo a un Cen ro de Servicio. No u ilice
la máquina si el cable eléc rico mues ra cualquier signo de daño. Inspeccione regularmen e el cable por si presen e algún daño,
especialmen e cuando haya sido aplas ado, cogido por una puer a o pisado por un obje o pesado.
*No arras re o ranspor e la máquina por el cable. No u ilice el cable para dirigir la máquina. Man enga el cable alejado de bordes
y esquinas que lo podrían dañar. Así mismo, man enga el cable alejado de fuen es de calor.
*No desenchufe la máquina irando del cable. Para desenchufar, ire de la clavija, no del cable.
*No oque la clavija, el cable o la máquina con las manos húmedas o mojadas.
*No inser e ningún obje o en las aber uras. No u ilice la máquina con ninguna aber ura obs ruida.
*Man enga alejado de las aber uras y piezas en movimien o las prendas suel as, el pelo, los dedos y odas las demás par es del
cuerpo.
*No aspire ningún ipo de obje o que es é ardiendo o que desprenda humo, como cigarrillos o cerillas. Bajo ninguna circuns ancia
la máquina podrá ser usada para aspirar ma eriales calien es. En par icular no u ilice la máquina para limpiar chimeneas, hornos
o similares con cenizas calien es o incandescen es.
*No u ilice la máquina sin ener colocados los fil ros y/o la bolsa del polvo.
*Apague odos los con roles an es de desenchufar la máquina. La clavija siempre debe ser desenchufada de la red eléc rica an es
de revisar o reparar la máquina o el cable de conexión eléc rica.
*No aspire obje os duros o afilados.
*Tenga un cuidado especial cuando aspirar las escaleras.
*No u ilice la máquina para recoger combus ible, ma eriales nocivos para la salud o ma eriales explosivos como la gasolina,
ampoco debe u ilizarse en a mósferas explosivas. No u ilice la máquina para aspirar agua u o ros líquidos o para aspirar polvo
peligroso, con aminan e o óxico.
*No realice ningún ipo de in ervención o modificación en los disposi ivos mecánicos, eléc ricos o de seguridad érmica de la
máquina.
*Cuando repare o sus i uya el cable de conexión eléc rica, u ilice el mismo ipo de cable suminis rado originalmen e con la
máquina. Es e cable le puede ser suminis rado por ADVANCE.
NO PIERDA ESTAS INSTRUCCIONES

5 - FORM NO. 56041453 / CARPETWIN 14 / 18
GROUNDING INSTRUCTIONS
This appliance mus be grounded. If i should elec rically malfunc ion, grounding provides a pa h of leas resis ance for elec ric curren o reduce
he risk of elec ric shock. This appliance is equipped wi h a cord having an equipmen -grounding conduc or and grounding plug. The plug mus be
plugged in o an appropria e ou le ha is properly ins alled and grounded in accordance wi h all local codes and ordinances.
DANGER
Improper connec ion of he equipmen -grounding conduc or can resul in a risk of elec ric shock. Check wi h a qualified elec rician or
service person if you are in doub as o whe her he ou le is properly grounded. Do no modify he plug provided wi h he appliance.
If i will no fi he ou le , have a proper ou le ins alled by a qualified elec rician.
This appliance is for use on a nominal 120-vol circui , and has a grounding plug ha looks like he plug illus ra ed in Figure 1 below. A emporary
adap er illus ra ed in Figures 2 and 3 may be used o connec his plug o a 2-pole recep acle as shown in Figure 2 if a properly grounded ou le
is no available. The emporary adap er should be used only un il a properly grounded ou le (Figure 1) can be ins alled by a qualified elec rician.
The green-colored rigid ear, ab, or he like ex ending from he adap er mus be connec ed o a permanen ground such as a properly grounded
ou le box cover. Whenever he adap er is used, i mus be held in place by a me al screw. Grounding adap ers are no approved for use in Canada.
Replace he plug if he grounding pin is damaged or broken.
The Green (or Green/Yellow) wire in he cord is he grounding wire. When replacing a plug, his wire mus be a ached o he grounding pin only.
Ex ension cords connec ed o his machine should be 12 gauge, hree-wire cords wi h hree-prong plugs and ou le s. DO NOT use ex ension cords
more han 50 fee (15 m) long.
PLEASE NOTE: FOR NORTH AMERICA ONLY
INSTRUCTIONS VISANT LA MISE À LA TERRE
Ce appareil doi ê re mis à la erre. En cas de défaillance ou de panne éven uelles, la mise a la erre fourni au couran un chemin de moindre
résis ance qui rédui le risque de choc élec rique. Ce appareil es pourvu d’un cordon muni d’un conduc eur de erre e d’une fiche avec broche
de erre. La fiche doi ê re branchée dans une prise appropriee correc emen ins allée e mise à la erre conformémen aux règlemen s e
ordonnances municipaux.
AVERTISSEMENT
Un conduc eur de erre mal raccordé peu en raîner un risque de choc élec rique. Consul er un élec ricien ou un echnicien d’en re ien
qualifié si vous n’ê es pas cer ain que la prise es correc emen mise à la erre. Ne pas modifier la fiche fournie avec l’appareil - si elle
ne peu ê re insérée dans la prise, faire ins aller une prise adéqua e par un élec ricien qualifié.
Ce appareil es des iné à un circui de 120 V e es muni d’une fiche de erre semblable à celle illus rée par le croquis 1. Un adap a eur emporaire
semblable à celui illus ré par le croquis 2 e C peu ê re u ilisé pour brancher ce e fiche à une prise bipolaire comme l’illus re le croquis 2 si une
prise avec mise à la erre n’es pas disponible. L’adap a eur emporaire devrai e re u ilisé seulemen jusqu’à ce qu’une prise avec mise à la erre
soi ins allée par un élec ricien qualifié. L’oreille rigide ou le croche ou au re disposi if semblable, de couleur ver e, prolongean l’adap a eur doi
Iê re raccordé à un élémen correc emen mis à la erre comme le couvercle d’une boî e de sor ie mise à la erre. L’adap a eur doi ê re fixé par
une vis mé allique. Note: Au Canada, I’u ilisa ion d’un adap a eur emporaire n’es pas au orisée par le Code canadien de l’électricité.
Remplacez la prise si la prise de erre es abîmée ou cassée.
Le fil Ver (ou Ver /Jaune) dans la ganse es le fil de erre. Lors du remplacemen d´une prise, ce fil doi ê re raccordé à la prise de erre uniquemen .
Les ralonges connec ées à ce e machine doiven avoir 12 mesures, rois ganses de fil ayan trois fiches masculines féminines tree-prong plugs
and outlets. N´UTILISEZ PAS de ralonge de plus de 15 m (50 pieds) de long.
VEUILLEZ NOTER: CES INSTRUCTIONS CONCERNENT UNIQUEMENT L’AMÉRIQUE DU NORD

FORM NO. 56041453 / CARPETWIN 14 / 18 - 6
INTRUCCIONES PARA HACER LA TOMA A TIERRA
Es e apara o deberá ser conec ado a ierra. En caso de malfuncionamien o o de desperfec os, la oma a ierra proporciona una vía de menor
resis encia de la corrien e eléc rica para reducir el riesgo de choques eléc ricos. Es a unidad viene equipada con un cordón con conduc ores para
oma a ierra y con un enchufe con oma a ierra. Ese enchufe deberá ser enchufado a un recep áculo en buen es ado con ins alación a ierra según
los códigos y ordenanzas de la zona.
¡PELIGRO
Si el conduc or a ierra no es á ins alado correc amen e pueden producirse riegos de choques eléc ricos. En caso de duda, consul e
con un elec ricis a o personal de servicio au orizados. No modifique el cordón provis o con el apara o. Si no calza en el recep áculo,
llame a un elec ricis a calificado para que coloque un recep áculo adecuado.
Es e apara o se usa con un circui o de 120-vol ios nominales, y iene un enchufe con oma a ierra al como se mues ra en la figura 1, a con inuación.
Se puede usar un adap ador provisorio al como se ve en las figuras 2 y 3 en caso de disponerse de un recep áculo sin oma a ierra como en la
figura 2. Dicho adap ador provisorio se usará solamen e has a que un elec ricis a calificado ins ale un recep áculo con la oma a ierra
correspondondien e (figura 1). La lengüe a de conexión de color verde que sale del adap ador deberá ser conec ada a una oma a ierra permanen e
como, por ejemplo, la caja del recep áculo con oma a ierra. Siempre que se use el adap ador, hay que sos enerlo en su lugar con un ornillo de
me al.
Sus i uya el enchufe si la pa illa de ierra es á dañada o ro a.
El hilo verde (o verde/amarillo) del cordón es el hilo de ierra. Cuando sus i uya el enchufe, es e hilo sólo debe ir conec ado a la pa illa de ierra.
Los cables alargadores conec ados a es a máquina deben ser del calibre 12, rifilares, con res pa illas y omas de pared adecuadas. NO UTILICE
cables alargadores de más de 15 m. ATENCIÓN : PARA AMÉRICA DE NORTE SOLAMENTE.

7 - FORM NO. 56041453 / CARPETWIN 14 / 18
A-KNOW YOUR MACHINE
As you read his manual, you will occasionally run across a bold number
in paren heses - example: (2). These numbers refer o an i em shown
on his page. Refer back o his page whenever necessary, o pinpoin
he loca ion of an i em men ioned in he ex .
1 Handle
2 Cord Hook
3 Vacuum Hose
4 Handle Lock Button
5 Bag Housing
6 Carrying Handle
7 Red Light
8 Green Light
9 Brush Housing
10 Brush Height Adjustment Knob
11 Pedal
12 Power Cord
13 Wand
14 Crevice Tool
15 “Bag Full” Light
16 Bag Housing Latch
17 Main Power Switch
18 Exhaust Filter Cover
19 Filter Cover Latch
20 Power Cord Clamp (Figure B)
21 Locking Latch (Figure B)
22 Dusting Brush
B-SET UP AND ASSEMBLY
1Carefully remove he machine from i s car on.
2Push he Handle (1) in o he opening a he op of he Bag Housing
(5) un il he bu on snaps in o he hole be ween he Swi ch (17) and
he Bag Full Ligh (15).
3Ins all he Bag Housing (5) on he Brush Housing (9). Slide he
Locking La ch (21) o he lef .
4Measure 15 inches of Power Cord (12) from where i comes ou of
he machine. Inser he cord a his poin in o he Power Cord Clamp
(20).
5Inser one end of he Vacuum Hose (3) in o he op of he vacuum
body and he o her end in o he ex ension wand. Inser he wand
in o he hole on he righ side of he vacuum body and clip on o he
righ side of he machine. Snap he Hose (3) in o he clip below he
Handle (1).
6To ins all a Paper Dus Bag, push he Bag Housing La ch (16) and
remove he back cover. Then follow he ins ruc ions prin ed on he
Paper Dus Bag. Never opera e he machine wi hou a Dus Bag
in place.
INTRODUCTION
This manual will help you ge he mos from your Advance Carpetwin.
Read i horoughly before opera ing he machine.
Note: Bold numbers in parentheses indicate an item illustrated on
page 1.
This produc is in ended for commercial use only.
PARTS AND SERVICE
Repairs, when required, should be performed by your Au horized Ad-
vance Service Cen er, who employs fac ory rained service personnel,
and main ains an inven ory of Advance original replacemen par s and
accessories.
Call he ADVANCE DEALER named below for repair par s or service.
Please specify he Model and Serial Number when discussing your
machine.
(Dealer, affix service s icker here.)
NAME PLATE
The Model Number and Serial Number of your machine are shown on he
Namepla e on he machine. This informa ion is needed when ordering
repair par s for he machine. Use he space below o no e he Model
Number and Serial Number of your machine for fu ure reference.
MODEL NUMBER
SERIAL NUMBER
UNCRATE THE MACHINE
When he machine is delivered, carefully inspec he shipping car on and
he machine for damage. If damage is eviden , save he shipping car on
so ha i can be inspec ed. Con ac he Advance Cus omer Service
Depar men immedia ely o file a freigh damage claim.

FORM NO. 56041453 / CARPETWIN 14 / 18 - 8
OPERATING THE MACHINE
1To release he Power Cord (12) from he Cord Hooks (2), press he
Handle Lock Bu on (4) in while pushing down on he Handle (1) and
pull he power cord off he hooks. Plug he Power Cord in o a
properly grounded elec rical ou le .
2Turn he Main Power Swi ch (17) ON. “l” is ON and “O” is OFF.
3S ep on he Pedal (11) and il he handle back. The Green Ligh (8)
on he base will come on o indica e ha he brush mo or is running.
C - IMPORTANT
Foo pedal mus be used o release base o opera ing posi ion.
Failure o do so could resul in damage o he handle release
mechanism.
4Turn he Heigh Adjus men Knob (10) o adjus he heigh of he
brush. If he Red Ligh (7) comes on, slowly urn he Knob in he
opposi e direc ion un il he ligh goes off.
If he red ligh s ays on con inuously, here may be debris wrapped
around he brush. This can cause he overload pro ec or for he
brush mo or o rip. If his occurs, urn he Main Swi ch OFF and
unplug he power cord. Remove any debris from he brush and urn
he Main Swi ch back ON. This will au oma ically rese he overload
pro ec or. The machine can also be rese by locking he handle in
he uprigh posi ion. Remove any debris from he brush and repea
S ep 3. If he overload pro ec or rips repea edly, or if he red ligh
s ays on con inuously, con ac Advance for service.
5Change he bag whenever he “Bag Full” Ligh (15) comes on.
If he ligh comes on before he bag is full, he inside of he bag may
be coa ed wi h very fine dus (change he bag), or debris may be
buil up somewhere be ween he brush and he bag.
USING THE WAND
To use he Wand (13), pu he Handle in he uprigh locked posi ion. The
brush mo or will s op au oma ically. Slide he Wand ou of i s holder.
Ins all he Crevice Tool (14) or Dus ing Brush (22) on he end of he
Wand, if desired.
AFTER USING THE MACHINE
1Unplug he Power Cord from he elec rical ou le and wrap i around
he Cord Hooks on he fron of he machine.
2Check o see if he bag is full, replace if necessary. Clean he bag
housing, if necessary.
3Clean or replace he Vacuum Inle Fil er every hird ime he bag is
changed. Clean or replace he Elec ros a Exhaus Fil er every fif h
ime he bag is changed.
4Remove any buil -up carpe fibers or debris from he brush housing.
5S ore he machine indoors in a clean, dry place.
VACUUM MOTOR BRUSHES
Have your Advance Dealer check he carbon mo or brushes once a year
or af er 500 opera ing hours.
IMPORTANT
Mo or damage resul ing from failure o service he carbon brushes
is no covered under warran y. See he Limi ed Warran y S a e-
men .
MAINTENANCE
CAUTION
Always disconnec he Power Cord before performing any ma-
chine main enance.
CHANGING THE PAPER DUST BAG
Change he Bag whenever he “Bag Full” Ligh comes on. To replace he
Paper Dus Bag :
1Push he Bag Housing La ch (16) in and remove he back cover.
2Remove he Paper Dus Bag following he ins ruc ions prin ed on
he bag.
3Ins all a new Paper Dus Bag following he ins ruc ions prin ed on
he bag.
IMPORTANT
Never opera e he machine wi hou a Dus Bag in place.
CHANGING THE CLOTH DUST BAG
Emp y he Bag whenever he “Bag Full” Ligh comes on. To emp y he
Clo h Dus Bag :
1Push he Bag Housing La ch (16) in and remove he back cover.
2Remove he Clo h Dus Bag following he ins ruc ions prin ed on he
bag.
3Remove bag clip and shake ou bag con en s.
4Pu he bag clip back on he bag.
5Ins all he Clo h Dus Bag following he ins ruc ions prin ed on he
bag.
6Replace he Elec ros a Exhaus Fil er every fif h ime he bag is
changed (more of en in very dus y applica ions).
IMPORTANT
Never opera e he machine wi hou a Dus Bag in place.

9 - FORM NO. 56041453 / CARPETWIN 14 / 18
CLEANING THE VACUUM INLET FILTER
The vacuum inle fil er ca ches any dir spilled from he bag, before i can
en er he vacuum mo or. The fil er is loca ed jus below he bag. Clean
he fil er every hird ime ha he bag is changed (more of en in very dus y
applica ions). To clean he Vacuum Inle Fil er...
1Push he Bag Housing La ch (16) in and remove he back cover.
2Slide he Fil er Holder ou of he bo om of he Bag Housing.
3Remove he fil er and wash i in warm wa er. Le he fil er dry
comple ely before pu ing i back in o he machine.
IMPORTANT
Never opera e he machine wi hou he Vacuum Inle Fil er in
place.
D-CHANGING THE ELECTROSTAT EXHAUST FILTER
The elec ros a exhaus fil er ca ches any dir ha may escape from he
dus bag, vacuum inle fil er, or lower mo or fil er. The elec ros a exhaus
fil er is loca ed jus below he carrying handle. Replace the filter every
fifth time that the dust bag is changed (more often in very dusty
applications).
To replace he Elec ros a Exhaus Fil er...
1Push he Fil er Cover La ch (19) in and remove he Elec ros a
Exhaus Fil er Cover (18).
2Remove he Fil er from he fil er holder and inser a new fil er in i s
place.
3Snap he Fil er Cover back in o place.
IMPORTANT
Never opera e he machine wi hou he Elec ros a Exhaus Fil er
in place.
CHANGING THE BRUSH
1Lay he machine over on o i s lef side.
2Slide he side cover (i em #46 / page 13) off of he brush housing.
3Carefully pry he roller suppor (i em #40 / page 13) off he end of
he brush (reuse on new brush).
4Grasp he cen er of he brush by he bris les and pull i up and ou
he righ side of he housing.
5Slide brush end wi h hex opening in o housing firs , make sure i
slides all he way down on o ransmission suppor (i em #34 / page
13).
6Follow s eps 1-3 in reverse order o reassemble.
REPLACING THE BELT
WARNING
To reduce he risk of elec ric shock, unplug before servicing.
1Remove screws (7 on Carpe win 14 / 9 on Carpe win 18) from he
op cover (i em #2 / page 13) and remove op cover from he brush
housing.
2Remove bo h screws in ransmission suppor (i em #34 / page 13).
3Lif he end of he brush up and remove he bel from he brush
pulley.
4Bend brush housing ou jus enough o slide he bel off of he mo or
pulley (be careful not to break housing ).
5Reassemble in reverse order.
TECHNICAL SPECIFICATIONS (as installed and tested on the unit)
Model Carpe win 14 Carpe win 18
Vol age V/Hz 120/60 120/60
Ra ed Power W 900 920
Pro ec ion Class (elec rical)
Sound Pressure Level dB(A)/20µPa 69 69
To al Weigh lbs / kg 19.5 / 8.8 20.5 / 9.3
Vibra ions a he Hand Con rols m/s2<2.5m/s2<2.5m/s2

FORM NO. 56041453 / CARPETWIN 14 / 18 - 10
NOTES

11 - FORM NO. 56041453 / CARPETWIN 14 / 18

FORM NO. 56041453 / CARPETWIN 14 / 18 - 12
BAG HOUSING
Item Ref. No. Qty Description
156704205 1 Bag Housing Cover
256646851 1 Grill Complete
356703712 1 Grill Filter Holder
456703714 1 Scented Pad (pkg of 10)
556703713 1 Internal Filter
656703720 1 Bag Entrance
756704206 1 Electrical System Assembly (3 wires)
856703785 1 Round Dusting Brush
9 56646858 1 Round Dusting Brush Support
10 56704207 1 Bag Housing
11 56703779 1 Valve Kit
12 56646861 1 Valve Filter
13 56703978 1 O-Ring
14 56704216 1 SemiFlex Hose W/Sleeves
15 56703725 1 Crevice Tool
16 56704208 1 Upper Hook for Flex Tube
17 56646865 1 Handle Grip
18 56704209 1 Retainer
19 56704221 1 Chromate Tube
21 56646869 1 Handle Tube Assy
22 56704210 1 Handle Cover
23 56703795 1 Cord, 3 x 18
24 56703662 1 Strain Relief
25 56703977 1 Cord Clamp
26 56704159 1 Vacuum Sensor
27 56646875 1 Button (w/support & spring)
28 56703708 1 Main Switch
29 56646877 1 Indicator Light
31 56646878 1 Cord Hook
32 56704211 1 Frame Handle Assy
33 56646879 1 Contact Housing
34 56646880 1 Contact Cover
36 56703706 1 Foam Filter
37 56703705 1 Gasket
38 56703972 1 Terminal Block
39 56646884 1 Foam Motor Filter
40 56646885 1 Gasket
Item Ref. No. Qty Description
41 56704212 1 Bag Door Latch (w/spring)
42 56704222 1 Filter Holder
43 56646888 1 Exhaust Filter (pkg of 5)
44 56704223 1 Exhaust Filter Cover
45 56704224 1 Complete Grill
46 56703966 1 Blocking Joint Pin
47 56703938 1 Joint Pin
48 56646893 1 Control Pin Slide
49 56704225 1 Vacuum Motor Housing
50 56646895 1 Lower Curve
51 56646896 1 Curve Support
52 56646897 1 Upper Curve
53 56646898 1 O-Ring
54 56704215 1 Inner Vacuum Motor Housing
55 56646900 1 Hose Inlet
56 56646901 1 Cord Clamp
57 56704237 1 Vacuum Motor NOTE 1
* 56704238 2 Carbon Brush for 56704237 & 56704168
TSBUS2002-829
58 56703775 1 Foam Filter
59 56704213 1 Telescopic Wand
60 56704214 1 Wand Clip
61 56704226 1 Vacuum Sensor Adapter
66 56703990 1 Cord Clip
** 56703768 A/R Bag, Paper (pkg of 10)
** 56703769 A/R Cloth Bag W/Clip
** 56320676 A/R Clip, Cloth Bag
** 56703774 A/R Upholstery Tool
** 56703771 A/R Extension Tube, 30mm x 30cm
** 56703772 A/R Tube Bend W/Suction Control
** = Optional
* = Not Shown
NOTE 1: 56704168 used prior to SN1498331 on 14” & prior to SN1499231 on 18”
revised 11/02

13 - FORM NO. 56041453 / CARPETWIN 14 / 18
57
49
16
46
10
19
15
23
9
57
18
87
49 4
12
13
11 14
51
52
2
56
3
25
32
41
28
27
50
28
31
30
29
48
37
36
42
39
35
34
47
49
18
17
38
55
40
39
43
54 1
45
44
22
21
20
23
33
6553
49
26
24

FORM NO. 56041453 / CARPETWIN 14 / 18 - 14
BRUSH HOUSING - 14 / 18
Item Ref. No. Qty Description
56704203 1 Brush Housing Assembly, 14"
56704204 1 Brush Housing Assembly, 18"
1 56704227 1 Body Main Brush Head, 14"
56704228 1 Body Main Brush Head, 18"
2 56704229 1 Elec ric Brush Cover, 14"
56704230 1 Elec ric Brush Cover, 18"
3 56704148 1 Join Comple e w/pin slide (#4)
4 56704016 1 Join Pin Slide
5 56704017 1 Suppor Righ Join w/fel seal
6 56704018 2 Plunger
7 56703766 2 Spring, Handle Release Pedal
8 56704019 1 Double Pin Washer
9 56704020 1 Double Release Pla e
10 56704107 1 Handle Release Pedal
11 56704022 1 Suppor Lef Join w/fel seal
12 56704023 1 Swi ch Ac iva or Pin
13 56704024 1 Spring
14 56703738 1 Brush Mo or Swi ch
15 56703762 1 Brush Adjus er
16 56703008 1 Brush Adjus er Knob
17 56704028 1 Fron Axle
18 56703757 2 Fron Wheel
19 56704030 1 Spring, Brush Adjus
20 56704031 1 Rear Axle
21 56704032 2 Rear Wheel
22 56704033 2 Wheel Re ainer
23 56704065 4 Screw, 2.9 x 16mm
24 56704106 1 Fil er Grill
25 56704035 1 Brush Mo or Fil er
26 56704124 1 S op Grill Pla e
27 56703743 1 Brush Mo or, 14"
56704037 1 Brush Mo or, 18"
* 56704137 2 Carbon Brush for 56703743 & 56704037
28 56704038 1 Brush Mo or Suppor Ki
29 56704130 1 Pulley Spacer
30 56704129 1 Pulley
Item Ref. No. Qty Description
31 56703853 1 Pulley Nu
32 56704042 1 Circui Board
33 56704155 1 Channel Cover
34 56704044 1 Transmission Suppor
35 56703747 1 Brush Pulley
36 56703746 1 Brush Pulley Nu
37 56704039 1 Timing Bel
38 56704047 1 Wheels Suppor
39 56704041 4 Screw, 3.9 x 16mm
40 56704049 1 Roller Suppor
41 56704050 1 Side Lever
42 56704051 1 Fron Bumper Gaske , 14"
56704052 1 Fron Bumper Gaske , 18"
43 56704053 1 Back Bumper Gaske , 14"
56704054 1 Back Bumper Gaske , 18"
44 56704055 5 Screw, 4.8 x 50mm (q y of 6 on 18")
45 56704056 2 Screw, 3.5 x 38mm (q y of 3 on 18")
46 56704105 1 Side Cover
47 56704058 1 Brush Roller, 14"
56704059 1 Brush Roller, 18"
48 56704060 1 Brush Mo or Fil er
49 56704046 5 Screw, 3.9 x 13mm
50 56704067 2 Screw, 3.5 x 22mm
51 56704045 1 Screw, 2.2 x 16mm
52 56704217 1 Lens Se , Red / Green
53 56704218 1 Fel for brush housing
54 56704140 1 Shoe Ki , 14"
56704141 1 Shoe Ki , 18"
55 56704135 1 O-Ring
56 56704131 1 Male Elec rical Connec ion Se
57 56704231 3 Washer
* = No Shown

15 - FORM NO. 56041453 / CARPETWIN 14 / 18
2
3
14
5
6
7
Brush
Motor
Vac
Motor
12 3
12 3
120Vac
WIRING DIAGRAM
Item Ref. No. Qty Description
156703708 1 Main Switch
256704159 1 Vacuum Sensor
356646877 1 Indicator Light
456704237 1 Vacuum Motor (56704168 used prior to SN1498331 on 14” & SN1499231 on 18”)
* 56704238 2 Carbon Brush for 56704237 & 56704168 TSBUS2002-829
556703738 1 Brush Motor Switch
656704042 1 Circuit Board
756703743 1 Brush Motor, 14"
56704037 1 Brush Motor, 18"
* 56704137 2 Carbon Brush for 56703743 & 56704037
revised 11/02

✂
IMPORTANT: This card contains information necessary to expedite warranty protection.
Mail within 30 days of purchase to Nilfisk-Advance.
LIMITED WARRANTY
PLEASE PRINT
Purchaser________________________________________________
Address _________________________________________________
City _______________________ State ___________ Zip _________
Model ______________Serial Number ________________________
Purchased from___________________________________________
City _______________________ State __________ Zip__________
Date Purchased ___________________________________________
THIS IS TO CERTIFY THAT THE ABOVE EQUIPMENT
WAS CHECKED OUT IN WORKING CONDITION.
Cut out and mail to:
Nilfisk-Advance, Inc.
14600 21st Avenue North
Plymouth, Minnesota 55447-3408
Carpetwin 14 / 18 TWO YEAR LIMITED WARRANTY
FOR MODELS 56704200 & 56704201 ONLY
Nilfisk-Advance, Inc. warran s each new Carpe win 14 / 18 carpe vacuum agains defec s in ma erial and workmanship under normal use and service.
The obliga ion under his warran y is limi ed o repair or replace a our fac ory or au horized dis ribu or service s a ion any par or par s hereof which
wi hin he warran y period are re urned o our fac ory or au horized dis ribu or service s a ion, ranspor a ion prepaid, af er examina ion discloses i
o have been hus defec ive.
The warran y period during which basic coverage applies is Two (2) years for par s replacemen and one year for service labor. The s ar da e of he
warran y coverage shall be he purchase da e by he original end user, or six mon hs from he da e he machine was shipped from he fac ory, which
ever is earlier. The Warran y Regis ra ion Card is o be comple ed and re urned immedia ely a he ime of purchase.
This warran y shall no apply o: (1) acciden s and misuse, (2) damage in ransi , (3) overloading he capaci y of he machine, (4) failure due o lack
of proper main enance or care as described in he opera ing and main enance ins ruc ions, (5) rela ively minor adjus men s such as igh ening
of screws or bol s, e c., no connec ed wi h he replacemen of par s, (6) repairs or al era ions by an organiza ion o her han he fac ory or an au horized
Nilfisk-Advance Service Cen er.
STATED WARRANTIES ARE IN LIEU OF ALL OTHER WARRANTIES, EXPRESSED OR IMPLIED. Any s a u ory implied warran ies, including any
warran y of merchan abili y or fi ness for a par icular purpose, are expressly limi ed o he dura ions of his wri en warran y. Nilfisk-Advance will no
be liable for any o her damages arising ou of or in connec ion wi h he furnishing, performance, use of or inabili y o use he machine. This remedy
shall be he exclusive remedy of he Buyer.
Au horized Nilfisk-Advance Service Cen ers can assis owners in he proper handling of any warran y ques ion or claim. In he even ha you wan
o con ac Nilfisk-Advance direc ly, please wri e o he Cus omer Service Depar men a Nilfisk-Advance, Inc., 14600 21s Avenue Nor h, Plymou h,
Minneso a 55447-3408. Provide an explana ion of he problem and include he serial number of he machine as well as he name of he selling
organiza ion. The Cus omer Service Depar men will inves iga e and hen con ac you.
This manual suits for next models
3
Table of contents
Languages:
Other Advance acoustic Vacuum Cleaner manuals

Advance acoustic
Advance acoustic Aquamatic Selectric User manual

Advance acoustic
Advance acoustic AdVac 11 User manual

Advance acoustic
Advance acoustic Turbo 56100687 User manual

Advance acoustic
Advance acoustic SC100 Instruction Manual

Advance acoustic
Advance acoustic VU500 12 INCH SMU US User manual

Advance acoustic
Advance acoustic Adgility 6XP User manual

Advance acoustic
Advance acoustic NOVA 2 Quick setup guide

Advance acoustic
Advance acoustic QuickStar B Guide

Advance acoustic
Advance acoustic L/A 114 User manual

Advance acoustic
Advance acoustic SD 4317 User manual