AEG ax515 User manual

AX515 user manual
Version: 2.0.0
2012- 8-20
Preface
Thank you for purchasing this mobile phone. This device will provide you with high quality
mobile communication and entertainment based on our exceptional technology and high standards.
This user manual has been specially designed to guide you through the functions and features of
your device.

Preface ..............................................................................................................................................1
Get to know your device...................................................................................................................4
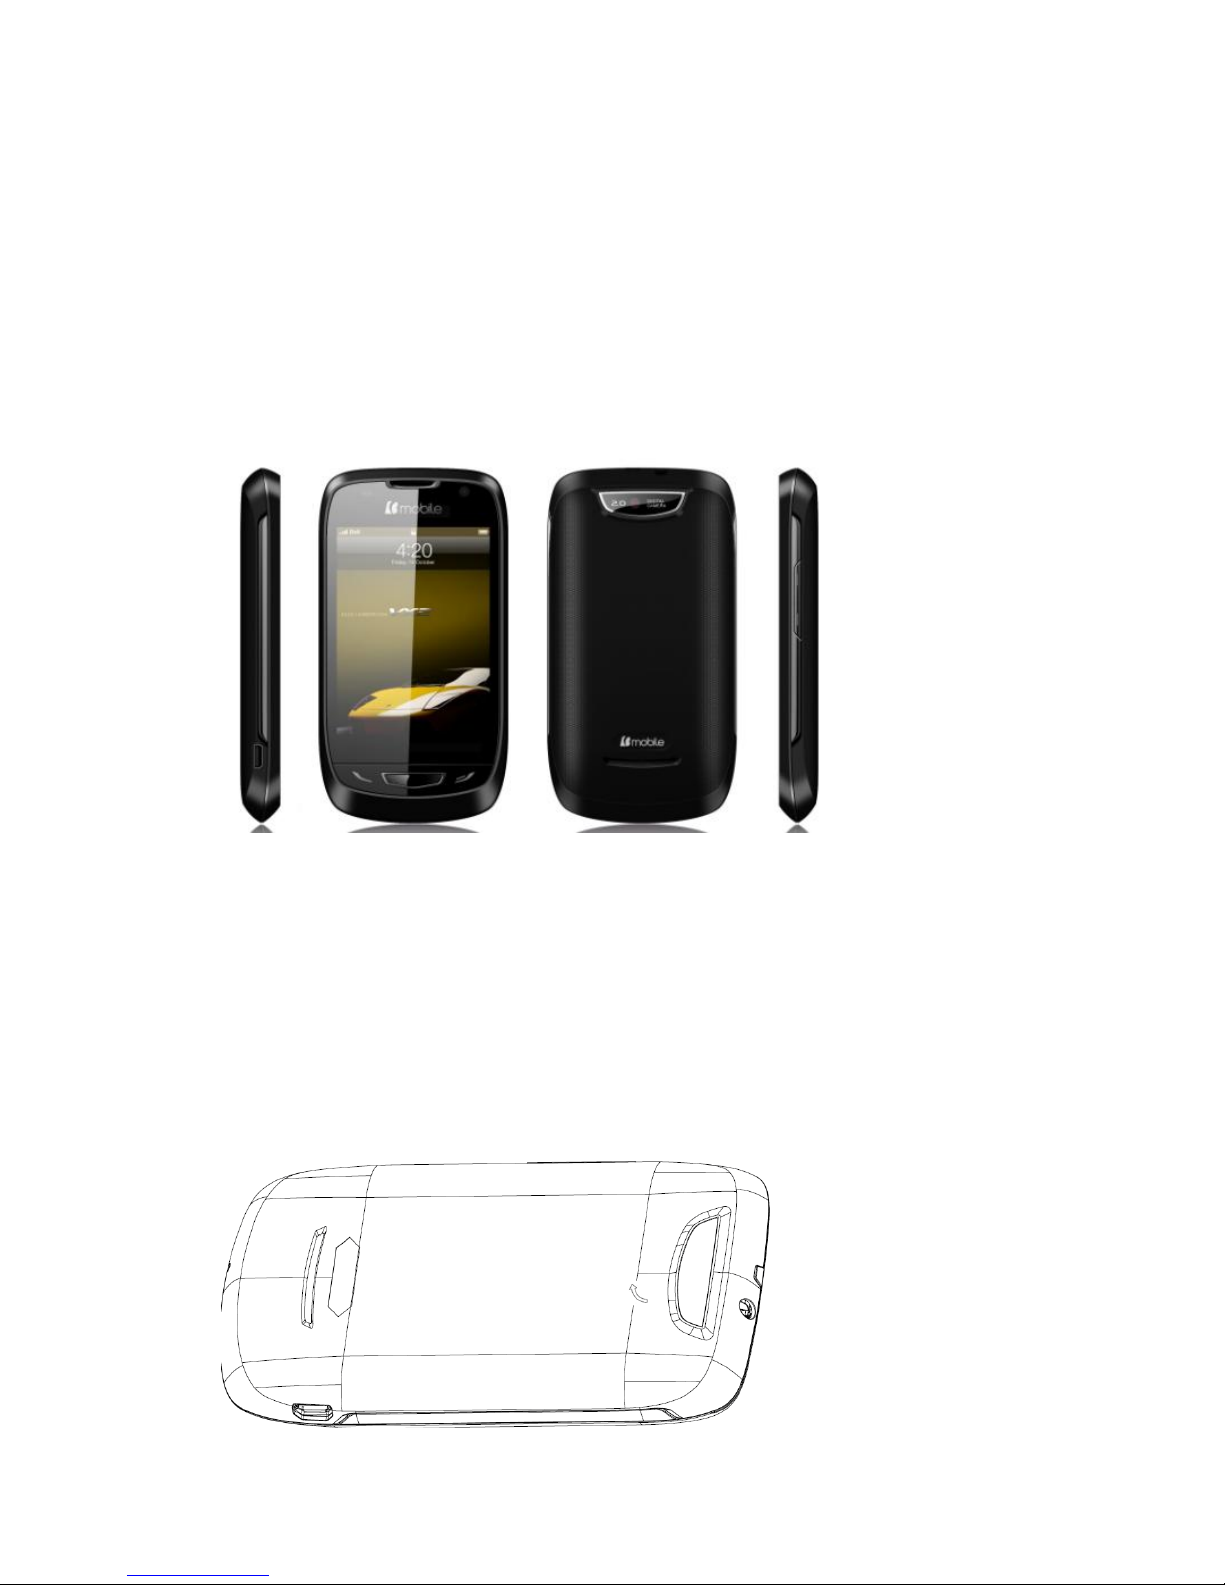
Phone appearance......................................................................................................................4
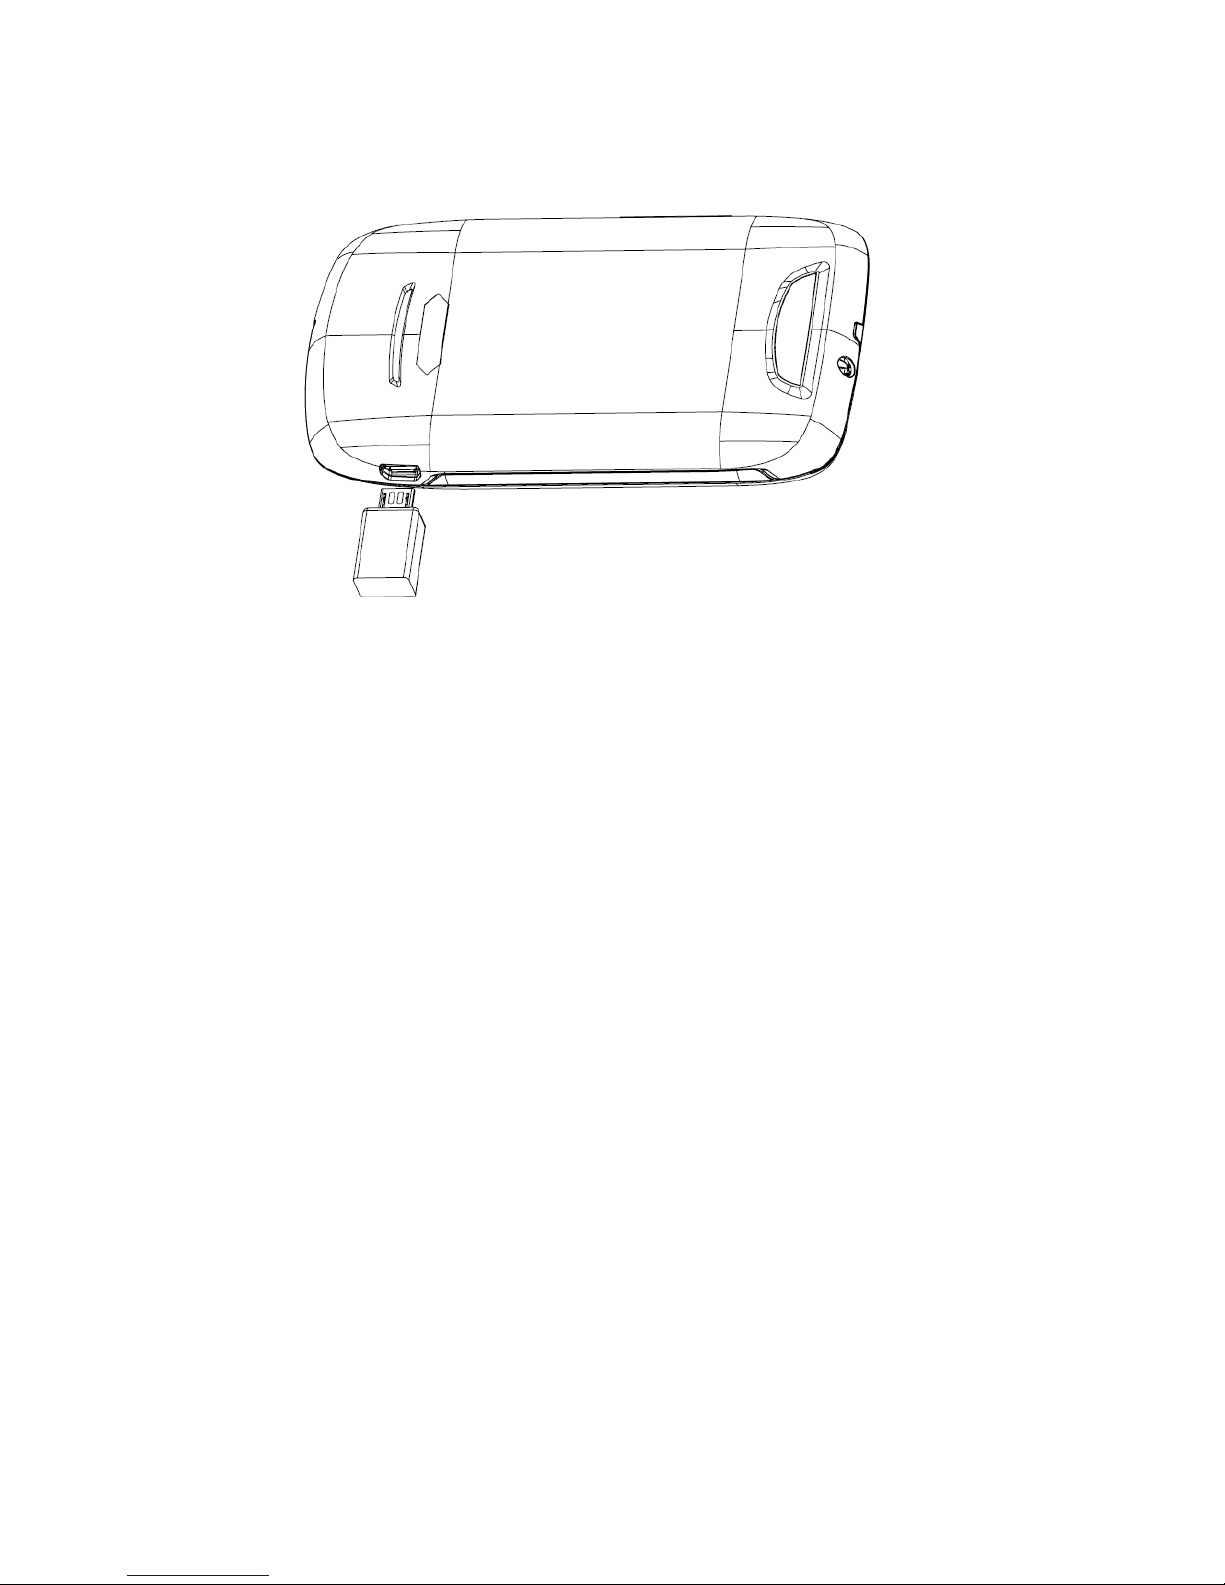
Install SIM card , memory card and battery..............................................................................4
Charge the battery.....................................................................................................................6
Getting started...................................................................................................................................7
Getting to know the idle screen.................................................................................................7
Lock or unlock the touch screen and keys ................................................................................8
Synchronize data.......................................................................................................................8
Access recent applications ........................................................................................................8
Opening the Notifications panel................................................................................................8
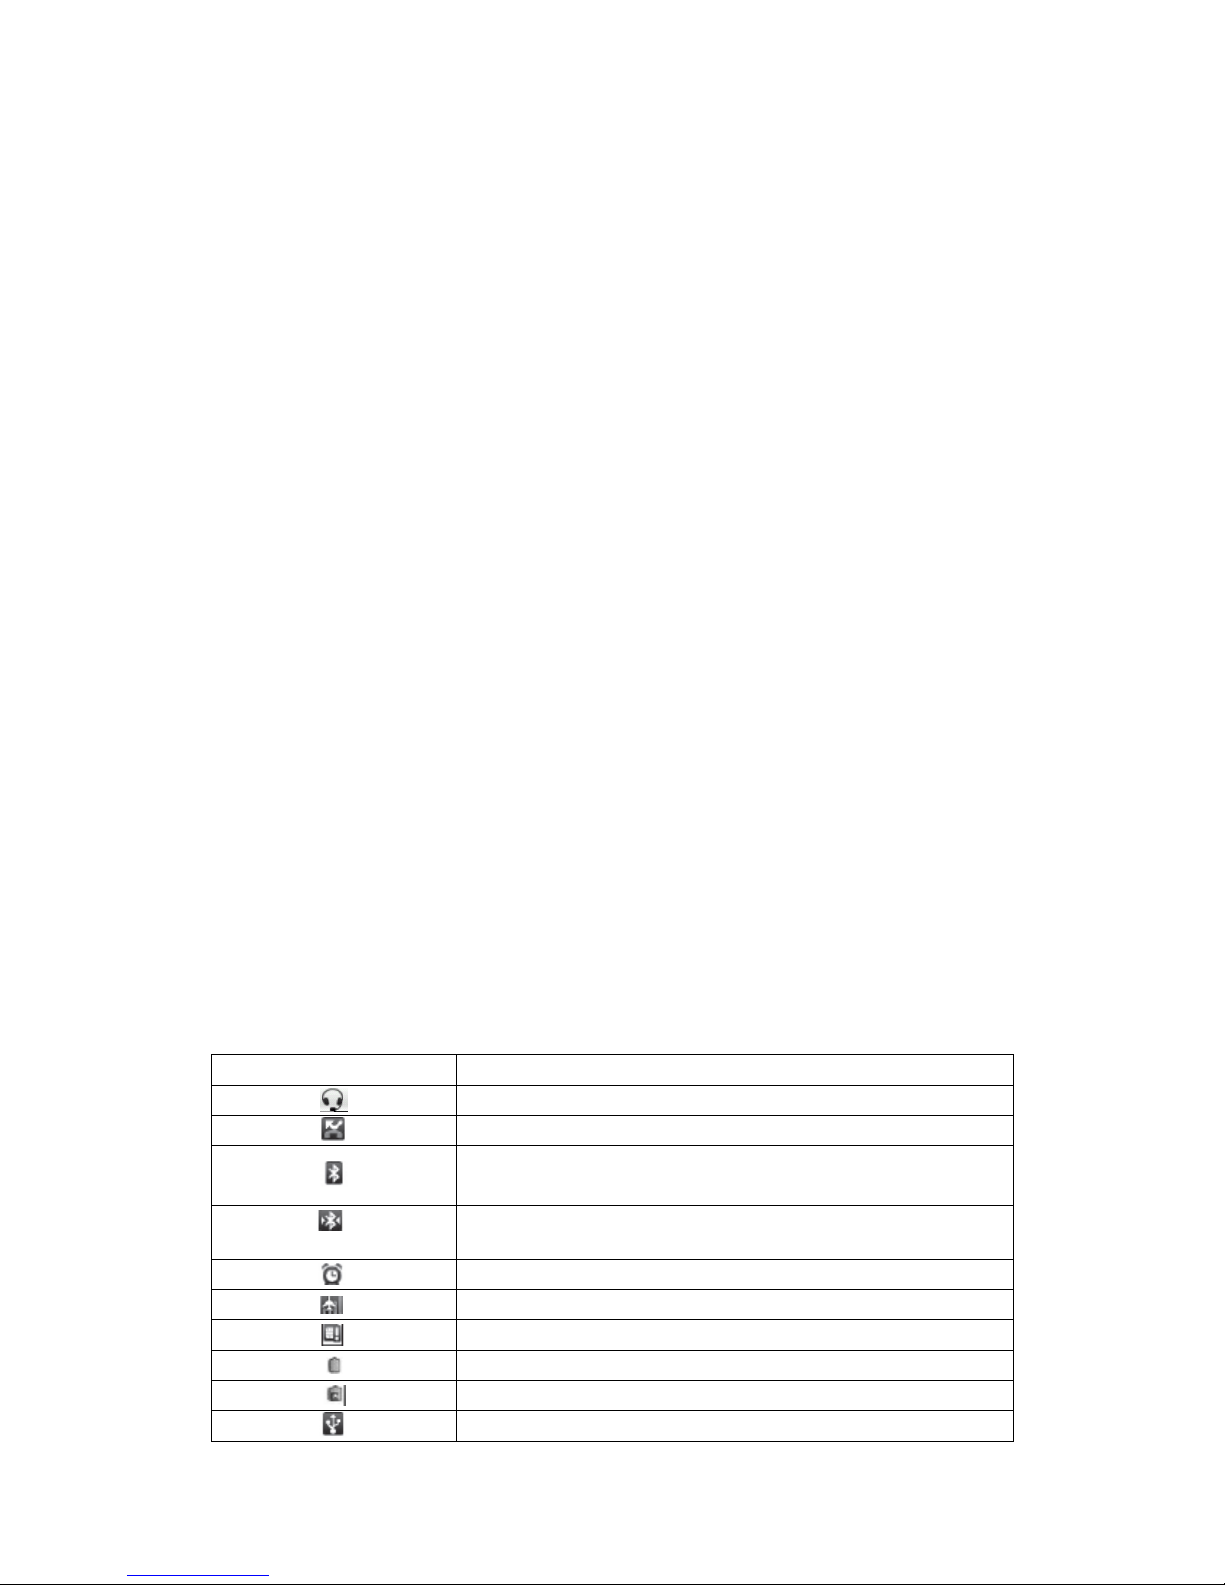
Phone status icons.....................................................................................................................8
Enter text...........................................................................................................................................9
Android keyboard type..............................................................................................................9
Phone calls......................................................................................................................................10
Making calls............................................................................................................................10
Answer a call...........................................................................................................................10
Reject a call.............................................................................................................................10
Call an international number...................................................................................................10
Use the headset........................................................................................................................10
Use options during a voice call...............................................................................................10
View call logs .........................................................................................................................11
Contacts...........................................................................................................................................11
Create a contact.......................................................................................................................11
Find a contact..........................................................................................................................11
Create a group of contacts.......................................................................................................11
Copy contacts..........................................................................................................................12
Import or export contacts........................................................................................................12
Downloads ......................................................................................................................................12
Messaging.......................................................................................................................................12
Email...............................................................................................................................................13
Gmail ..............................................................................................................................................14
Send an email message ...........................................................................................................14
View email messages ..............................................................................................................14
Organise email by labels.........................................................................................................15
Account Synchronize......................................................................................................................15
Configuring account sync and display options .......................................................................15
Browse ............................................................................................................................................16
Twitter.............................................................................................................................................17
Facebook.........................................................................................................................................17
Skpye ..............................................................................................................................................17
WhatsApp .......................................................................................................................................17
Ebuddy............................................................................................................................................17
Maps................................................................................................................................................17

Latitude...........................................................................................................................................18
Navigation.......................................................................................................................................19
Places ..............................................................................................................................................19
Analog compass..............................................................................................................................19
Talk .................................................................................................................................................19
Camera............................................................................................................................................20
Camcorder.......................................................................................................................................21
YouTube..........................................................................................................................................22
Gallery ............................................................................................................................................22
Music Player ...................................................................................................................................23
FM Radio........................................................................................................................................24
Sound Recorder...............................................................................................................................24
Calendar..........................................................................................................................................24
Clock...............................................................................................................................................25
Calculator........................................................................................................................................26
File Manager...................................................................................................................................26
Menu Toolkit...................................................................................................................................26
Market.............................................................................................................................................26
Download applications from Android Market ........................................................................26
Settings............................................................................................................................................27
Wireless and network..............................................................................................................27
Call settings.............................................................................................................................27
Audio profiles .........................................................................................................................28
Display....................................................................................................................................29
Location ..................................................................................................................................29
Security...................................................................................................................................29
Applications............................................................................................................................30
Account &sync........................................................................................................................30
Privacy ....................................................................................................................................30
storage.....................................................................................................................................30
Language & Keyboard............................................................................................................30
Voice input and output ............................................................................................................31
Accessibility............................................................................................................................31
Date & time.............................................................................................................................31
Schedule power on/off ............................................................................................................31
About phone............................................................................................................................31
Search..............................................................................................................................................32
Safety precautions...........................................................................................................................32
Battery information.................................................................................................................32
Operating environment........................................................................................................33
Electronic devices ................................................................................................................33
Pacemaker ....................................................................................................................33
Hearing aids..................................................................................................................33
Other medical devices.................................................................................................33

Vehicles..........................................................................................................................34
Potentially dangerous situations........................................................................................34
Care and maintenance................................................................................................................34
Get to know your device
Phone appearance
Install SIM card , memory card and battery
When you subscribe to a cellular service, you will receive a Subscriber Identity Module (SIM)
card, with subscription details, such as your personal identification number (PIN) and optional
services.
1. If the device is on, press and hold power key and select Power off to turn it off.
2. Remove the back cover.

3. Insert the SIM card
4. Insert memory card
5. Insert the battery.

6. Replace the back cover.
Charge the battery
Before using the device for the first time, you must charge the battery. You can charge the device
with the provided travel adapter or by connecting the device to a PC with a PC data cable.
NOTE: When your battery is low, the device will emit a warning tone and display a
low battery message. The battery icon will also be empty and turn red. If the battery
level becomes too low, the device will automatically power off. Recharge your battery
to continue using your device.
Charge with the travel adapter
1. Open the cover to the multifunction jack on the top of the device.
2. Plug the small end of the travel adapter into the multifunction jack.

3. Plug the large end of the travel adapter into a power outlet.
4. When the battery is fully charged (the battery icon is no longer moving), unplug the travel
adapter from the device and then from the power outlet.
Charge with the PC data cable
Before charging, ensure that your PC is turned on.
1. Open the cover to the multifunction jack on the top of the device.
2. Plug one end (micro-USB) of the PC data cable into the multifunction jack.
3. Plug the other end of the PC data cable into a USB port on a PC.
4. When the battery is fully charged (the battery icon is no longer moving), unplug the PC data
cable from the device and then from the PC
Getting started
Getting to know the idle screen
The Home screen extends beyond the screen width to provide more space for adding icons,
widgets, and more.
Navigating the Home screen
You can go to the extended Home screen by sliding your finger horizontally across the screen to
go to the left or right side of the Home screen. While on an extended Home screen, press HOME
to return to the main Home screen.
Directly going to a particular screen using Leap view
1. On any Home screen, pinch the screen to show the Leap view that shows all 7 screens as
thumbnails.
On the main Home screen, you can press HOME to show the Leap view.
3. Tap the screen you want to open.

Lock or unlock the touch screen and keys
You can lock the touch screen and keys to prevent any unwanted device operations.
To lock, press power key. To unlock, turn on the screen by pressing power key, and then flick the
icon with your finger.
Synchronize data
You can synchronize data with various web servers and back up or restore your data. Once the
synchronization is completed, your device stays connected to the web. If any change is made on
the web, the updated information will appear on your device and will automatically begin
synchronization, and vice versa.
Access recent applications
1. Press and hold the Home key to open the list of applications you have accessed recently.
2. Select an application to access.
Opening the Notifications panel
Notification icons on the status bar report the arrival of new messages, calendar events,
alarms set and ongoing settings such as when call forwarding is on or the current call status.
You can open the Notifications panel to open the message, reminder, or event notification
and see the mobile operator name.
When a new notification icon displays in the status bar, press and hold the status bar, then
slide your finger downward to open the Notifications panel.
If you have several notifications, you can scroll down the screen to view more notifications.
Phone status icons
These are the icons that may appear on the phone status area of the status bar
Icon
Function
Wired microphone headset connected
Missed call
Bluetooth is on
Connected to a Bluetooth device
Alarm is set
Airplane mode
No storage card installed on the phone
Battery is full
Battery is charging
Phone connected to computer via USB cable

Downloading data
Enter text
You can enter text by selecting characters on the virtual keypad. You cannot enter text in some
languages. To enter text, you should change the writing language to one of the supported
languages.
Android keyboard type
- Switch between Number and Symbol mode.
- Switch between capital letter and lowercase.
- delete characters.
Press the back key to withdraw the virtual keypad.
Copy and paste text
While you are entering text, you can use the copy and paste feature to use text in other
applications.
1. Place the cursor where you want to start.
2. Tap and hold the text input field.
3. Select the Select text from the option list.
4. Drag your finger across the text you want to highlight.
5. Select Copy to copy, or Cut to cut the text onto the clipboard.
6. In another application, tap and hold the text input field..
7.Select Paste to insert the text from the clipboard into the text field.

Phone calls
Making calls
You can use the buttons or the touch screen when you make, accept, end or reject calls.
Make a call
1. In Idle mode, open the application list, select phone, enter an area code and a phone number.
2. Select to make a call.
3. To end the call, select End call.
Answer a call
1.When a call comes in, touch answer .
When the device is ringing, press the Volume key to mute the ringtone.
2.To end the call, select End call.
Reject a call
When a call comes in, touch reject.
To send a message when you reject incoming calls, select options send messsage.
Call an international number
1. In Idle mode, open the application list and select Phone, and tap and hold 0 to insert the +
character.
2. Enter the complete number you want to dial (country code, area code and phone number), and
then select to dial the number.
Use the headset
By plugging the supplied headset into the device, you can answer and control calls hands-free
• To answer a call, press the headset button.
• To reject a call, press and hold the headset button.
• To place a call on hold or retrieve a held call during a call, press and hold the headset button.
• To end a call, press the headset button.
Use options during a voice call
You can use the following options while a voice call is in progress
•To adjust the voice volume, press the Volume key up or down.
•To place a call on hold or retrieve a held call, select Hold
To dial a second call, select Add call and then dial a new number.
•To answer a second call, touch answer when a call waiting tone sounds. The device asks
whether to end or hold the first call. You must subscribe to the call waiting service to use this

feature.
•To open the dialing screen, select Dialpad.
•To activate the speakerphone feature, select Speaker.
To turn off the microphone so that the other party cannot hear you, select Mute.
•To listen and talk to the other party via a Bluetooth headset, select Headset.
•To switch between the two calls, select Swap.
•To make a multiparty call (conference call), make or answer a second call and select Merge
when connected to the second party. Repeat to add more parties. You must subscribe to the
multiparty call service to use this feature.
View call logs
You can view logs of your calls filtered by their types.
1.In Idle mode, open the application list and select phone →call log.
From the call logs, you can make a call or send a message directly to a contact by quickly flicking
the contact to the left or right.
3. Select a log to view its details.
From the detail view, you can dial the number, send a message to the number or add the number to
the phonebook or reject list.
Contacts
Create a contact
1. In Idle mode, open the application list and select Contacts.
2. Select “+”
3. Select a memory location.
4. Enter contact information.
5. Select Save to add the contact to memory.
You can also create a contact from the dialing screen.
1. In Idle mode, open the application list and select Phone →Keypad.
2. Enter a phone number.
3. Select the icon Add to Contacts
4. Select a memory location.
5. Enter contact information.
6. Select Save to add the contact to memory.
Find a contact
1 In Idle mode, open the application list and select Contacts.
2 Scroll up or down on the contact list.
3 Select a contact’s name.
Create a group of contacts
By creating groups of contacts, you can manage multiple contacts and send messages or email to

an entire group.
Start by creating a group.
1.In Idle mode, open the application list and select Contacts, Press menu key →Groups→Add
Group
2.Input group name
3.Select OK to save it
Copy contacts
You can copy contacts to and from the SIM or SD card.
1. In Idle mode, open the application list and select Contacts.
2. Press menu key→more →Import/Export →Import from SIM card
3. Select contacts to copy and select Import or Export.
4. For exporting contacts, select Yes to confirm.
Import or export contacts
You can save all of your contacts as vcf files in a memory card, and export them from a memory
card.
1. In Idle mode, open the application list and select Contacts.
2. Press menu key →Import/Export →Import from SD card or Export to SD card.
3. For importing contacts, select an importing location.
For exporting contacts, select OK to confirm.
Downloads
It is a shortcut to the downloads files.
Messaging
Learn to create and send text (SMS) or multimedia (MMS) messages, and view or manage
messages you have sent or received. You may incur additional charges for sending or receiving
messages while outside your home service area. For details, contact your service provider.
Send a text message
1. In Idle mode, open the application list and select Messaging →compose new message.
2. Select Contacts.
Note: You can enter a number manually or select one from the logs or contact groups by selecting
another button.
3.Select the check boxes next to contacts and select Add.
4. Select Type to compose and enter your message text.
To insert emoticons, press menu key →Insert smiley.
5 .Select Send to send the message.
Send a multimedia message
1. In Idle mode, open the application list and select Messaging →compose new message.
2. Select Contacts.

Note: You can enter a number manually or select one from the logs or contact groups by selecting
another button.
3.Select the check boxes next to contacts and select Add.
Note: When you enter an email address, the device will convert the message as a multimedia
message.
4. Select Type to compose and enter your message text.
To insert emoticons, press menu key→Insert smiley.
5. Press menu key→Attach →an option and add an item.
You can select a file from the file list or create a new photo, video, or sound.
6.Press menu key→Add subject and add a subject for the message.
7. Select Send to send the message.
View a text or multimedia message
1. In Idle mode, open the application list and select Messaging.
Your messages are grouped into message threads by contact, like a messenger.
2. Select a contact.
3. Select a text or multimedia message from the message thread.
Listen to voice mail messages
If you have set missed calls to be diverted to the voice mail server, callers may leave voice
messages when you do not answer incoming calls. To access your voice mail inbox and listen to
voice mail messages.
1. In Idle mode, open the application list and select Phone →Keypad and then tap and hold 1.
2. Follow the instructions from the voice mail server.
Note: You must save the voice mail server number before accessing the server. Your service
provider can give you the number.
Email
Learn to send or view email messages via your personal or company email account.
Set up an email account
1. In Idle mode, open the application list and select Email.
2. Enter your email address and password.
3. Select Next (for general email accounts, such as Google Mail and Yahoo) or Manual setup (for
other company email accounts).
4. Follow the on-screen instructions.
When you are finished setting up the email account, the email messages are downloaded to your
device. If you have created more than two accounts, you can switch between email accounts; Press
menu key→Accounts and select one you want to retrieve messages from.
Send an email message
1. In Idle mode, open the application list and select Email→an email account.
2.Press menu key →Compose.
3. Select Contacts.
You can enter an email address manually or select one from the recent recipients or groups by
selecting another button.
4. Select the Cc/Bcc field to add more recipients.

5. Select the subject field to enter a subject.
6. Select the text input field to enter your email text.
7. Select Attach and attach a file.
8. Select Send to send the message.
View an email message
When you open an email account, you can view previously retrieved emails offline or connect to
the email server to view new messages. After retrieving email messages, you can view them
offline.
1. In Idle mode, open the application list and select Email→an email account.
2. Press menu key→Refresh to update the message list.
3. Select an email message.
From the message view, use the following options:
•To reply to the message, press menu key→Reply.
•To forward the message to other people, press menu key→Forward.
•To delete the message, press menu key→Delete.
•To view an attachment, select the attachment area. You can also save it to your device.
Gmail
You can retrieve new email messages from Gmail to your Inbox. When you access this application,
the Inbox screen appears. The total number of unread messages displays in the title bar and unread
messages display in bold. If you have labeled a message, its label appears in a colored rectangle
on the message.
•This feature may be unavailable depending on your region or service provider.
•This Gmail menu may be labeled differently depending on your service provider.
Send an email message
1. In Idle mode, open the application list and select Gmail.
2.Press menu key→Compose.
3. Enter a name or address in the recipient field.
4 Enter a subject and message.
5 To attach an image file, press menu key→Attach →a file.
6 Select Send to send the message.
View email messages
1. In Idle mode, open the application list and select Gmail.
2. Select an email message.
From the message view, use the following options:
•To reply to the message, select Reply.
•To reply to the message including all recipients, select Reply to all.
•To forward the message to other people, select Forward.
•To view an attachment, select Preview. To save it to your device, select Download.
•To archive the message, select Archive.

•To delete the message, select Delete.
•To move to the previous or next message, select forward or back icon.
Organise email by labels
You can organise your email by labeling your messages or adding stars to mark important
messages. You can sort messages by label filter.
Add a label to a message
1. From the Inbox screen, tap and hold a message.
2. Select Change labels.
3. Select a label to add and select OK.
Add a star to a message
1. From the Inbox screen, tap and hold a message.
2. Select Add star. The star icon next to the message is activated.
Filter messages
1. From the Inbox screen, press menu key→Go to labels.
2. Select the label of the messages you want to view.
Account Synchronize
Configuring account sync and display options
You can configure background data use and synchronization options for all of the applications on
your phone. You can also configure what kinds of data you synchronize for each account. Some
applications, such as Gmail and Calendar, have their own synchronization settings. Some
applications, such as Contacts, Gmail, and Calendar, can sync data from multiple applications.
Others sync data only from the first Google Account you sign into on your phone, or from an
account associated specifically with that application. For some accounts, syncing is
two-directional; changes that you make to the information on your phone are made to the copy of
that information on the web. Your Google Account works this way. Other accounts support only
one-way sync; the information on your phone is read-only.
To configure general sync settings
1. Open the Accounts & Sync Settings screen
2. Check or uncheck Background data to control whether applications and services can transmit
data when you are not working with them directly (that is, when they are running in the
background). If you uncheck this option, Gmail stops receiving new mail, Calendar stops syncing
events, and so on, until you touch the Refresh menu item or send an email
2. Check or uncheck Auto-sync to control whether changes you make to information on the
phone or on the web are automatically synced with each other. For example, when this option
is checked, changes that you make in Contacts on the phone are automatically made in Google
Contacts on the web. If you uncheck this option, you may be able to use an application’s tools
to sync data manually.
To change an account’s sync settings
1 Open the Accounts & Sync Settings screen.
2 Touch the account whose sync settings you want to change.

The Data and Synchronization screen opens, displaying a list of the kinds of information the
account can sync.
Checked items are configured to sync to your phone.
3. Check or uncheck the kinds of information you want to sync to the phone. The Unchecked
option does not remove the information from your phone; it simply stops it from being kept in
sync with the version on the web. To remove the information previously synced for the
account, you must remove the account.
Browse
While browsing the web page, use the following options:
•To zoom in or out, double-tap the screen. You can also use the two finger zoom; Place your two
fingers on the screen and slowly pinch or spread apart.
•To open a new window, press menu key →windows→New window.
•To view the currently active windows, press menu key →Windows. You can open multiple
pages and switch back and forth between them.
•To go to a next page in history, press menu key→Forward.
•To bookmark the current web page, press menu key →bookmarks→Add bookmark.
•To add the RSS feed, press menu key →More→Add RSS feeds. You can read RSS feeds
using Google Reader.
•To search for text on the web page, press menu key→More→Find on page.
•To view the web page details, press menu key →More →Page info.
•To send the web address (URL) of the web page to others, press menu key →More →Share
page.
•To view the download history, press menu key →More →Downloads.

•To customize the browser settings, press menu key→More →Settings.
Opera Mini requests web pages through Opera Software's servers, which process and compress
them before sending them to the mobile phone, speeding up transfer by two to three times and
dramatically reducing the amount of data transferred, chargeable on many mobile phone data
plans. The pre-processing increases compatibility with web pages not designed for mobile phones.
And it support low-memory device.
Twitter
View trends, browse your interests and see suggested users in several categories, including fashion,
entertainment and travel, or search to find out what people are saying about topics you care about,
such as politics or big sporting events.
share photos, videos and web pages, real-time search, view maps, trends, and follow.
Facebook
Facebook is a social utility that connects people with friends and others who work, study and live
around them. Also you can share photos to your friends, and keep up with you friends.
Skpye
Make internet calls for free with Skype. Call friends and family on any phone with Pay As You Go
and Pay Monthly subscriptions.
WhatsApp
Whatsapp messenger will send a one time SMS message to verify your phone number.
Ebuddy
Chat on multiple MSN, Facebook, Yahoo, AIM, ICQ, GTalk, MySpace & Hyves accounts
Chat everywhere with eBuddy Messenger. Stay always connected with all your friends and family
on MSN (Windows Live Messenger or WLM), Facebook, Yahoo!, MySpace, Gtalk (Orkut), ICQ,
AIM (AOL) and Hyves.
Maps
Learn to use Google Maps to find your location, search the online map for streets, cities, or
countries, and get directions.
•This feature may be unavailable depending on your region or service provider.

•Do not touch the internal antenna area or cover this area with your hands or other objects while
using the GPS functions.
•To receive better GPS signals, avoid using your device in the following conditions:
–– between buildings, in tunnels or underground passages, or inside buildings
–– in poor weather
–– around high voltage or electromagnetic fields
Activate location services to use with Google Maps
You must activate location services to find your location and search the map.
1.In Idle mode, open the application list and select Settings →Location and security.
2. Adjust the following settings to activate location services:
Options
Function
Use wireless networks
Set to use or mobile networks for finding your
location..
Use GPS satellites
Set to use the GPS satellite for finding your
location. You can view locations at street level.
Search for a specific location
1. In Idle mode, open the application list and select Maps.
The map will display your current location.
2. Press menu key →Search.
3. Enter a keyword for the location and select .
•To zoom in or out, select or .
•To add layers to the map, press →Layers →an option.
Get directions to a specific destination
1. In Idle mode, open the application list and select Maps.
2. Press menu key→Directions.
3. Enter the addresses of the starting location and the ending location.
To enter an address from your contact list or point the location on the map, select →Contacts
or Point on map.
4. Select a travel method (car, bus, or walk) and select Go.
5. Select a travel route to view details of your trip (if necessary).
6. Select Show on map.
7. When you are finished, press menu key →Clear Map.
Latitude
Share your location via Google Latitude
Learn to share your location with your friends and view friends’ locations via Google Latitude.
1. In Idle mode, open the application list and select Latitude. The device automatically joins
Latitude.
2. Press menu key→Add friends →Select from Contacts or Add via email address.
3. Select friends you want to add or enter an email address, and select Add friends →Yes.

When your friend accepts your invitation, you can share locations.
4 Press menu key→See map.
Your friends' locations are marked with their photos on the map.
Navigation
Navigation is a shortcut menu from the Map or Latitude. In Idle mode, open the application list
and select Navigation, you can get directions to a specific destination.
Places
Places is a shortcut menu from the Map or Latitude,search for a place around you.
This feature may be unavailable depending on your region or service provider.
1. In Idle mode, open the application list and select Places.
2. Select a category.
Your device searches for places around your current location that are related to the category.
3. Select a place name to view its details.
4. To view the place on the map, select .
To view the route to the place, select .
Analog compass
Use the analog compass to guide your trip. Press the menu key, there are many styles and
backgrounds to choose from.
Talk
Learn to chat with friends and family via Google Talk.
Note: This feature may be unavailable depending on your region or service provider.
Add friends to your friend list
1. In Idle mode, open the application list and select Talk. The friend list shows all of your
Google Talk contacts at a glance.
2. Press menu key →Add friend.
3. Enter an email address of the friend and select Send invitation.
When your friend accepts the invitation, the friend is added to your friend list.
Start a chat
1. In Idle mode, open the application list and select Talk.
2. Select a friend from the friend list. The chat screen opens.
3. Enter your message and select Send.
To insert emoticons, press menu key→More →Insert smiley.
4 To switch between active chats, press menu key →Switch chats.

5 To end the chat, press menu key→End chat.
Camera
The camera displays in landscape view only. You’ll find the following controls on the
Viewfinder screen:
number
function
1
zoom button
Tap to display or hide the onscreen zoom bar.
See “Zooming” for details.
2
White balance
Adjust the color balance according to lighting
conditions.
3
Store location
Select on, GPS will locate the photo, select off,
GPS can’t locate the photo.
4
Change the camera settings.
5
Change the camera settings.
Table of contents
Other AEG Cell Phone manuals