9
UK
tPress the OK button to confirm.
>If the phonebook memory is empty, the phone will automatically return to the standby display.
Otherwise, the first alphanumeric phonebook entry will be shown.
tPress the numeric key button (2/ABC~9/WXYZ) that corresponds to the first letter of a name and the
search will jump to the first entry in the phonebook beginning with that letter.
tPress the up or down button to scroll through the other records.
tPress the stop button repeatedly to return to standby mode or wait until the unit times out.
10.2 To add a new record into the phonebook
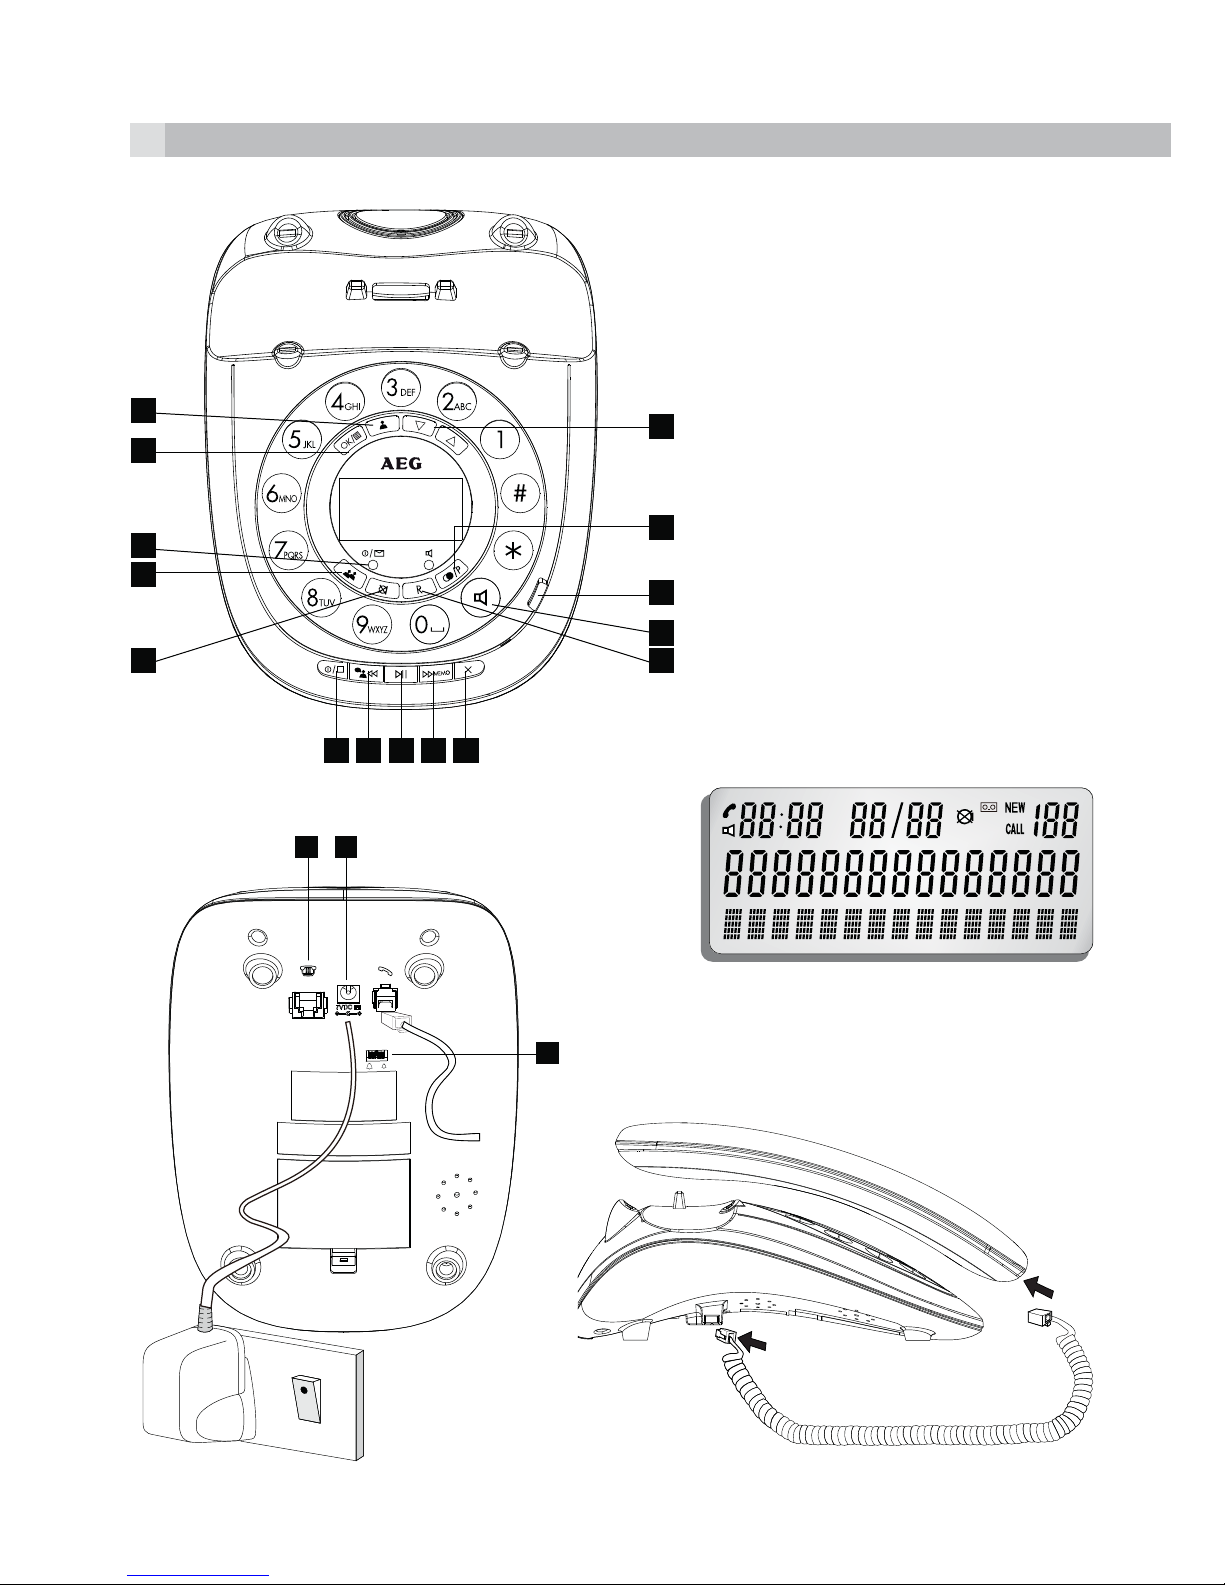
tPress the phonebook button .
>The display shows “SEARCH ADD”, with the “SEARCH” option blinking.
tPress the up or down button to select “ADD”.
tPress the OK button to confirm.
>The display shows the cursor blinking on the number field.
tInput the telephone number, up to a maximum of 24 digits.
tPress the OK button to confirm.
>The display shows the cursor blinking on the name field.
tInput the name, up to a maximum of 15characters using keypad buttons 2/ABC to 9/WXYZ and 1
or 0 for punctuation or spaces.
tPress the OK button to confirm.
tPress the stop button repeatedly to return to standby mode or wait until the unit times out.
10.3 To make a call from the phonebook
tWhen viewing the phonebook records, press the up or down button to find the record you
wish to call.
tLift the handset or press the speakerphone button .
>The phone automatically dials the displayed record using the handset or speakerphone mode
selected.
11 CALLER DISPLAY OPERATION
VERY IMPORTANT:
The caller display feature of this product requires a subscription to the caller display service from your
telephone company. If you subscribe to the caller display service you can see the phone number of
the person calling you before you answer, and in the calls list afterwards. The caller display information
includes:
tThe caller’s number (max. 24 digits).
tThe date and time of the call.
tThe caller’s name (max. of 15characters) if the received number matches one in your phonebook. It
will also show the name if the network sends it.
“WITHHELD” will be displayed if the call is from someone who has withheld their number.
“UNAVAILABLE” will be displayed if the number of the caller is unavailable, for example from an
international call.
Withheld and unavailable calls are saved in the calls list and show as missed calls.