3
Contents
Appliance Description. . . . . . . . . . . . . . . . . . . . .2
Sa ety Instructions . . . . . . . . . . . . . . . . . . . . . . .3
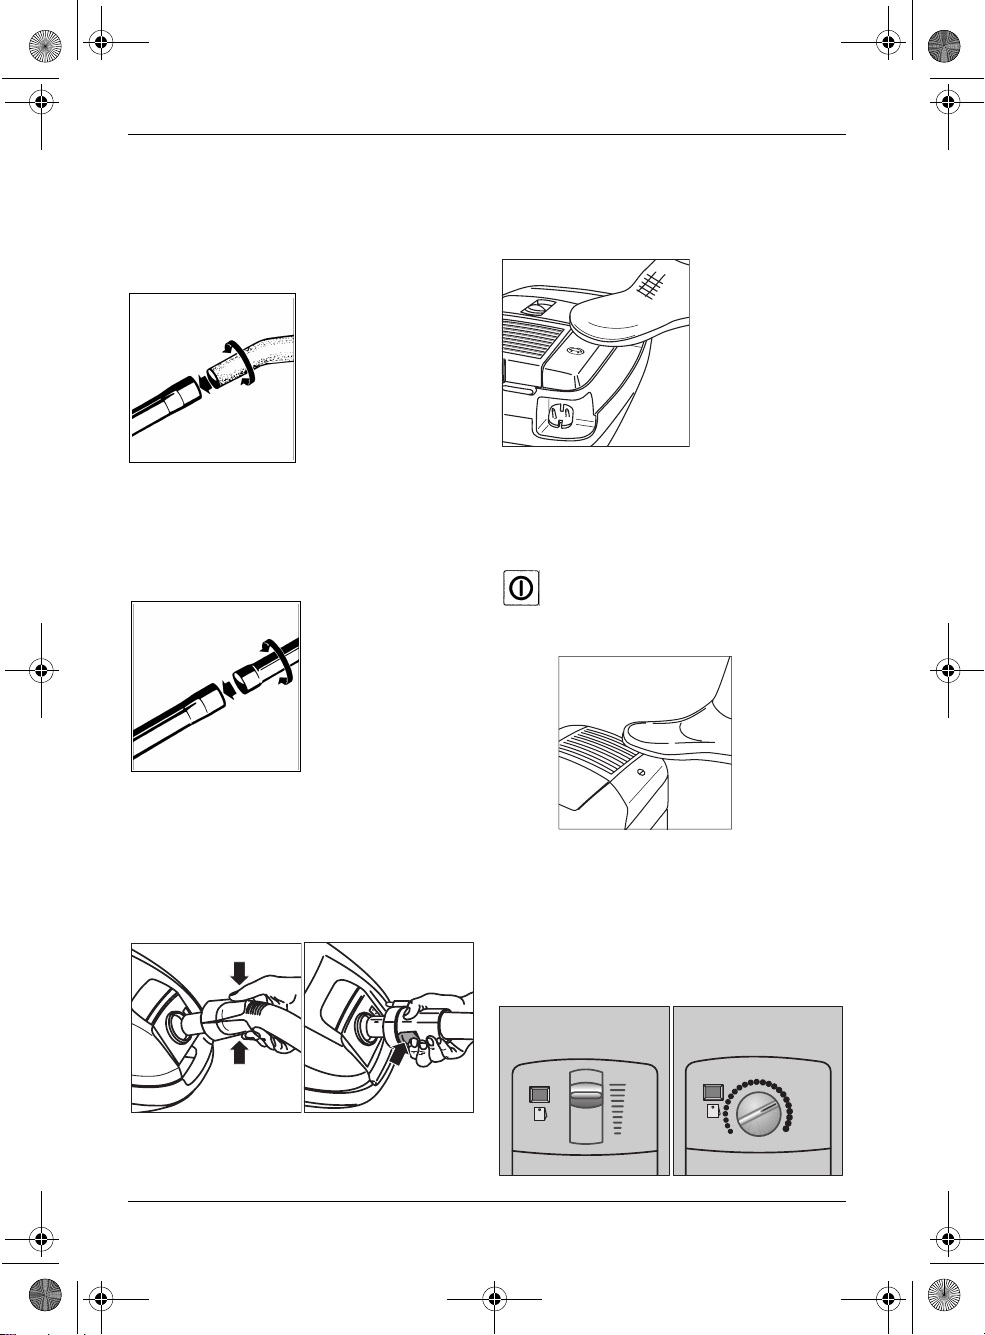
Making the Vacuum Cleaner Ready
or Use. . . . . . . . . . . . . . . . . . . . . . . . . . . . . . . . . .4
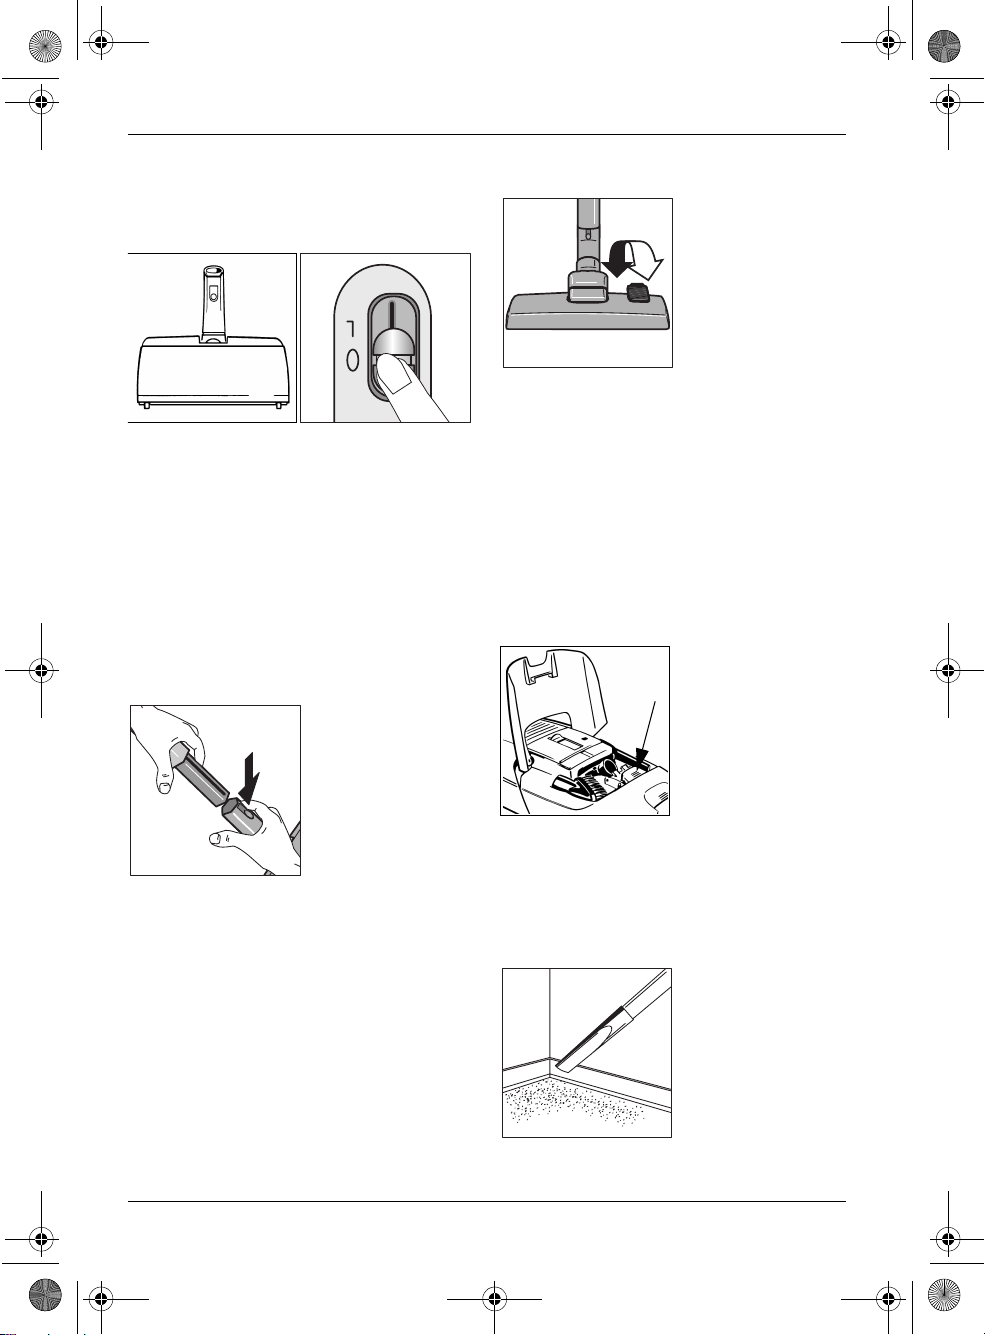
Switching On . . . . . . . . . . . . . . . . . . . . . . . . . . . .4
Adjusting the Suction Power . . . . . . . . . . . . . .4
Using the Nozzles . . . . . . . . . . . . . . . . . . . . . . . .6
Additional Accessories . . . . . . . . . . . . . . . . . . . .7
Filter Replacement . . . . . . . . . . . . . . . . . . . . . . .8
Maintenance and Cleaning . . . . . . . . . . . . . . .11
What to do i . . . . . . . . . . . . . . . . . . . . . . . . . . .11
AEG Customer Service in Europe . . . . . . . . 175
Dear customer,
Please read these operating instructions through
carefully. Above all please observe the safety
instructions on the initial pages of these operat-
ing instructions! Please keep these operating
instructions for future reference. Pass them onto
any subsequent owner of the appliance.
Sa ety Instructions
Only connect the appliance to 220/230 V
AC.
The circuit for the socket used must be pro-
tected with a fuse with a rating of at least
16 A, or 10 A slow blow.
Never remove the mains plug from the socket
by pulling on the cable.
Do not use the appliance if:
the mains lead is damaged,
the electrical hose, electrical telescopic
tube or electrical vacuum brush show visi-
ble signs of damage,
the housing shows visible signs of damage.
Important! The electrical hose and electrical
telescopic tube contain electrical connec-
tions. These should be checked regularly and
must not be used if damaged. Do not immerse
the electrical hose, electrical telescopic tube
or electrical vacuum brush in water. Never
vacuum liquids using the vacuum cleaner.
Avoid running over the mains lead with the
appliance, the vacuum brush or the electrical
vacuum brush. The insulation could be dam-
aged.
I a paper ilter is not inserted, it is not
possible to close the cover. Please do not
use orce!
Ensure that a paper filter, a fresh air activated
charcoal filter/microfilter* and a hygiene filter
are always fitted.
Toner dust from laser printers and copiers
must not be vacuumed using normal house-
hold vacuum cleaners.
It is only permitted to use this vacuum
cleaner for dry vacuuming. People and ani-
mals must not be vacuumed using the appli-
ance.
Keep children away from electrical appliances.
The manufacturer does not accept any liabil-
ity for any damage caused by incorrect use or
incorrect operation of the appliance.
Leave wet shampooed carpets to dry com-
pletely. Otherwise the vacuum cleaner will be
damaged. Furthermore, protection against
electric shock may be impaired.
Do not vacuum matches, glowing ashes or
cigarette ends using the appliance. Avoid
picking up hard, pointed objects as these may
damage the appliance or the paper filter.
Do not subject the appliance to the effects of
the weather, moisture or sources of heat.
If the mains lead is defective, the complete
cable roller must be replaced by AEG cus-
tomer service, or an authorised repair centre.
Repairs to electrical appliances are only to be
performed by qualified service engineers.
Improper repairs can give rise to significant
ha ards for the user.
Therefore if your appliance needs repairing,
please contact your retailer or AEG customer
service.
; This appliance complies with the following
EC directives: - 73/23/EWG dated 19.02.1973
Low Voltage Directive 89/336/EWG dated
03.05.1989 (including Directive Amendment
92/31/EWG) EMC Directive.
*) depending on model
949126ts.book Seite 3 Dienstag, 12. Dezember 2000 11:01 11