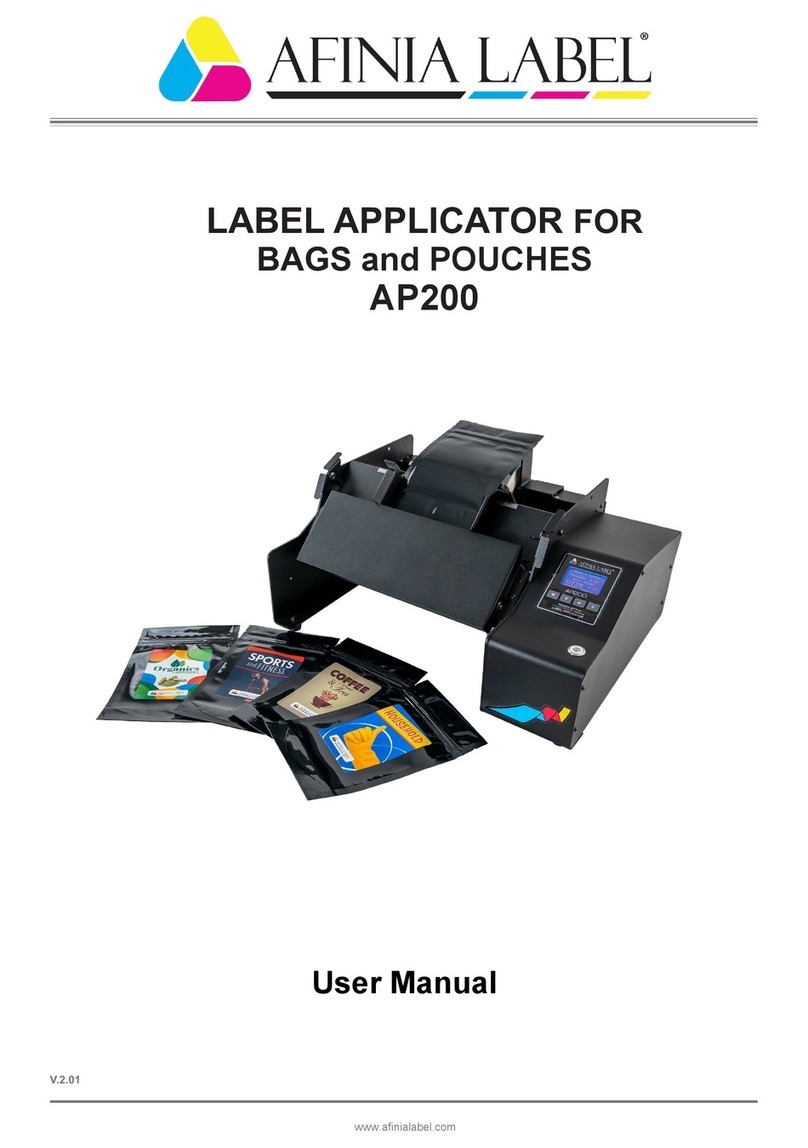
AFINIA LABEL A200 User manual

Phone: US 888-215-3966 EU: 44.845.230.7800
www.afinialabel.com
3
Table of Contents
Introduction........................................................................................................................................................5
Using the applicator.......................................................................................................................................5
Included Items................................................................................................................................................6
Specification ..................................................................................................................................................6
Noise information...........................................................................................................................................6
Equipment Description...................................................................................................................................6
General safety instructions ................................................................................................................................8
Workplace Environment.................................................................................................................................8
Specific safety instructions.............................................................................................................................8
Operating instructions........................................................................................................................................9
Setup.............................................................................................................................................................9
Preparing the applicator.................................................................................................................................9
Turning on the applicator .............................................................................................................................11
How to determine the Offset Stop value.......................................................................................................11
Working with the menu and changing parameters........................................................................................12
Labeling.......................................................................................................................................................12
Adjusting display contrast and brightness ....................................................................................................12
Adjustment of the label sensor.....................................................................................................................13
How to determine the Offset Stop value.......................................................................................................14
How to determine the Offset Stop 1 value....................................................................................................15
How to determine the Offset Stop 2 value....................................................................................................16
Memory Locations........................................................................................................................................17
Working with the menu and changing parameters........................................................................................17
ONE LABEL mode parameters.................................................................................................................18
TWO LABEL mode parameters................................................................................................................19
How to determine the distance between labels ............................................................................................20
Maintenance and cleaning...............................................................................................................................21
Service............................................................................................................................................................21
Transportation.................................................................................................................................................21
Warranty..........................................................................................................................................................22
Regulatory Details...........................................................................................................................................23
Technical Support............................................................................................................................................24
Phone: US 888-215-3966 EU: 44.845.230.7800
www.afinialabel.com
4
The following symbols are found in this manual.
Read the User Manual!
Follow safety warnings and instructions!
Protect yourself from electric shock. Use Caution!
Keep children away from the machine while in operation!
Risk of electric shock when a power cord is damaged!
Dispose of the packaging and the appliance in
accordance with environmental regulations!
!

Phone: US 888-215-3966 EU: 44.845.230.7800
www.afinialabel.com
5
Introduction
Before using the machine for the first time, get acquainted with the
functions of the machine and be informed about the correct operation
with electrical appliances. Read the following operating instructions.
Follow the instructions in the manual. When handing over the machine
to third parties, include all documentation.
Using the applicator
The machine is designed to apply one or two self-adhesive labels (front side and back side) on
cylindrical containers of different diameter and length, with smooth walls. Labels should be on one roll, and in
case of front and back labels - arranged in the correct order.
Place the container horizontally on the machine shafts, between the detents. Press the start button or
foot petal. The machine adheres the label as it rotates the container. After stopping the rotation, the label is
applied and the container is removed from the machine manually.
Any other use is considered unlawful and generates significant risks of accident. The manufacturer
accepts no responsibility for faults and damages caused by incorrect use of the applicator.
The electrical protection of the machine is accomplished by protective sheath of the current-carrying
parts and by grounding of the metal housing. This requires the use of a straight electrical outlet (socket).
Overcurrent protection is provided by fuses built into the machine. Their replacement should by performed
qualified personnel. Attention!
Do not place any larger or smaller containers on the machine
other than those specified in the technical data! Do not use
damaged containers or containers that have irregular shapes.
There is a danger of being injured.
Do not label full containers which are not properly sealed!
There is a danger of electric shock!
Do not use labels with size beyond those specified in the
specifications! Feed with labels and maintain and clean the
machine only when the power is off!
Do not cover the ventilation openings of the machine! Be careful not to
spill liquid on the machine!
Do not insert objects into the openings of the machine! There is a
danger of electric shock!
Do not place your hand or fingers on the shafts of the machine! There is a
danger of injury!
Attention!
In case of electric shock, immediately disconnect the power
cable from the machine.
!
!

Phone: US 888-215-3966 EU: 44.845.230.7800
www.afinialabel.com
6
Included Items
-1 A200 Label applicator
- 1 power cable
- 1 'Start pedal' with connection cable
-
1 operation manual.
Specification
Supply voltage: North America –100V - 120V AC, 60 Hz
Europe, Asia, Middle East - 220V AC, 50Hz
Power consumption: 50W, <100VA
Electrical connection: Grounded AC power cable
Dimensions: W 365mm, H 245mm, D 330mm
W 14.4in, H 9.5in, D 13 in
Machine weight: 12kg (26.5 lbs)
Diameter of container: 25 to 160mm (1 to 6.3 inches)
Length of container: 80 to 240mm (3.15 to 9.45 inches
Diameter of label roll: <200mm (7.87 inches)
Core size: 46 to 76mm (1.8 to 3 inches)
Label width: 25 to 150mm (1 to 6 inches)
Label length: 25 to 500mm (1 to 19.68 inches)
Label Gap: >2.5mm (.1 inches)
Dispensing speed: 0.1m/sec (4 in/sec)
Noise information.
Acoustic pressure level <70dB (A)
Noise level <70dB
Equipment Description
See Figure 1.1 and Figure 1.2
1.
Supporting shaft 10. Control panel
2.
Driving shaft 11. Start button
3.
Stoppers (detents) 12. Sensor for labels
4.
Pull shaft 13. Power switch
5.
Pressing shaft 14. Power supply coupling
6.
Clamping mechanism 15. Driving shaft
7.
Stopper (detent) of label roll 16. Label roll driver
8.
Roll label holder 17. Foot petal connection
9.
Brake of the label roll

Phone: US 888-215-3966 EU: 44.845.230.7800
www.afinialabel.com
8
General safety instructions
Attention!
The following safety precautions must be observed when using
electrical appliances to protect against electric shock, risk of injury and
fire. Read all of these instructions before using the machine.
Workplace Environment
-
Ensure good lighting in the workplace.
-
Do not use the appliance in humid conditions.
-
Do not use the appliance in places where there is a risk of fire or explosion.
-
Keep bystanders, especially children, away from the equipment
when it is running.
-
Do not use the appliance for purposes other than those intended.
-
Do not use the cord to pull the plug from the wall socket. Protect the
cable from heat and sharp objects.
-
Carefully maintain your device.
-
If you do not use the applicator, disconnect the power cable.
-
Do not use the applicator if the power switch or power cable is damaged.
-
Only use a grounded AC power cable.
-
Inspect the machine for any damage. Check that the moving parts function as
designed and that there are no damaged parts. All parts must be installed correctly
and meet all conditions to ensure proper operation. Damaged safety components and
parts must be repaired or replaced by a certified technician, unless otherwise stated
in the instructions of the operation manual. Damaged circuit breakers must be
replaced by a certified electrician.
Specific safety instructions.
The container to be labeled is inserted and removed manually. The labeling
procedure is started by pressing the built-in 'Start' button, or by an external start pedal
connected to the device.
-
Do not insert an item while the applicator rollers are moving.
-
Do not start the machine with a container incorrectly installed.
-
Do not remove the container from the machine until the rollers have stopped.
-
Failure to follow these instructions may result in injuries or damages.
!

Phone: US 888-215-3966 EU: 44.845.230.7800
www.afinialabel.com
9
!
Operating instructions
Attention!
Every operator working with the label applicator should become
acquainted with this user manual.
Setup
The machine should be placed on a flat, horizontal surface larger than its base. You
should provide space around the machine for maintenance servicing and handling.
From the kit supplied with it, a power cord is connected to the supply socket and also a
'start pedal' is connected to an external start coupling.
Preparing the applicator
The orientation of container (left - right) depends on the direction of the printed labels. The height of
the clamping mechanism and the position of the support shaft are adjusted according to the diameter
of the container. Adjust the detents (stoppers) so that the container is in the middle of the work area.
The roll is affixed to the label roller stand so that the labels face the adhesive zone. The position of
the roll is fixed by the two magnetic stoppers (detents). The brake is positioned in the middle of the
roll.
The pressure shaft is 'unlocked' by moving it forward. The label roll is loaded according to the picture
below. The sensor is positioned so that the label roll fully covers the sensor area (narrow gap).
Sensor set up is carried out on page 13. The beginning of the label (front - for two labels) is
positioned next to the peeling edge. The pressure shaft is 'locked'. Label tape drivers are positioned
and fixed to the edges without squeezing it.
The Stoppers (detents) are installed to allow for the maximum size container. If a container smaller
than 60mm is used, the stoppers can be adjusted, to allow for this.
1. Remove the thumb screws. There are two washers under the thumb screw. Be careful not to
misplace the washers.

Phone: US 888-215-3966 EU: 44.845.230.7800
www.afinialabel.com
11
Turning on the applicator
Plug in the AC power cord to the back of the unit. Turn on the power switch. The unit will boot up to
the main screen.
How to determine the Offset Stop value
The sensor which is reading the end of the label is located at distance 100mm before the peeling
edge and its position cannot be changed. This requires the input of the 'Offset- stop' parameter for
single-label mode and 'Offset-stop 1' and 'Offset-stop 2' / for two-label mode. This parameter
determines the proper positioning of the subsequent label to the peeling edge. The values depend on
the length of the labels and the distance between them. Determine the offset and distance values
prior to applying labels. The online tool to calculate the values can be found on our website,
https://afinialabel.com/calculate-a200. This QR code will take you to the webpage.
When applying a single label, see page 14 to manually calculate the parameter value.
When applying two labels, see pages 15 and 16 to manually calculate the parameter values. If the
front label is less than 100mm and the back (rear) label is larger than 100mm, the back (rear) label
must be applied first.

Phone: US 888-215-3966 EU: 44.845.230.7800
www.afinialabel.com
12
Working with the menu and changing parameters
To gain access to the menu, hold down the key for 3 seconds. Once in the menu, parameters
for one label and two label applications can be set.
For the one label mode, Offset Stop and Time Move Motor values can be set.
For the two label mode, label gap size, distance between labels, offset stop 1, offset stop 2 and Time
Move Motor values can be set. Details can be found on page 16.
Labeling
The initial setup is done without a container installed. The new label should be just to the peeling edge. Offset-
stop adjustments are made if necessary.
The labeling procedure is started by pressing the built-in 'Start' button, or by the external 'Start' pedal
connected to the applicator. Performance is indicated on the display. At the completion of label application, the
label counter increases. Any time the start key is pressed for more than 3 seconds, the counter is reset.
Adjusting display contrast and brightness
Press and hold the button for 3 seconds. The CONTRAST screen will
appear. Press the button to increase the contrast level. Press the
button to decrease the contrast value. Press the button to save the
setting.
The BRIGHTNESS screen will now appear. Press the button to increase
the contrast level. Press the button to decrease the contrast value. Press
the button to save the setting.
- CLEAR + UP
BRIGHTNESS
------------------------------
>>>>
------------------------------

Phone: US 888-215-3966 EU: 44.845.230.7800
www.afinialabel.com
13
Adjustment of the label sensor
The label stock and matrix must travel through the sensor area. If
irregular shaped label stock is used, the sensor will not register the
gap correctly. When calibrating, the label stock cannot be moving.
1. Position the stock so that the gap is under the sensor, as shown in
figure 3.2
2. Press and hold the TEACH button for 3 seconds. The yellow LED
under T will be lit. When the button is released, the LED will be
blinking. Sensor calibration takes place and the sensor level will
be displayed on the LEDs under L. Once calibration is completed,
the T LED will turn off.
3. Position the stock so a label is under the sensor, as shown in
figure 3.3.
4. Press the TEACH button. The LED under T will turn on and will
briefly blink. Sensor calibration takes place and the sensor level
will be displayed on the LEDs under L.
5. If there is not enough signal difference between the label stock
and the liner, the level LED indicators will blink, indicating an error.
If this occurs repeat these steps again, with another section of the
label material or try different label stock.
6. Exiting the error state can also be done by powering off the
applicator.

Phone: US 888-215-3966 EU: 44.845.230.7800
www.afinialabel.com
14
How to determine the Offset Stop value
This value needs to be determined when applying one label. The easiest way to do this is to use the
online tool on our website, https://afinialabel.com/calculate-a200. This QR code will take you to the
webpage.
To manually determine the value, follow these steps.
L = 100mm. This is the distance between the
label sensor and the pooling edge.
1. If the length of the label being applied is
larger than 100mm, the Offset Stop value
will be 100mm.
2. If the label is length and half of the gap
distance is equal to 100mm, then the offset
stop value will be 100mm.
3. If the label length is less than 100mm, but
larger than 50mm, measure the label size
and half of the gap distance. Take that total
and subtract it from 100mm. This will be the
Offset Stop value.
4. If the labels are much smaller than 100mm,
measure the labels and gaps, adding the
values to get as close to 100mm as
possible. Subtract that number from
100mm. That is the Offset Stop value.

Phone: US 888-215-3966 EU: 44.845.230.7800
www.afinialabel.com
15
How to determine the Offset Stop 1 value
This value determines the correct position of the back (2nd) label, when applying two labels to a
container. The easiest way to do this is to use the online tool found on our website,
https://afinialabel.com/calculate-a200. This QR code will take you to the webpage.
To manually determine the value, follow these steps.
L = 100mm. This is the distance between the
label sensor and the peeling edge.
1. If the length of the 2nd label is larger than
100mm, the Offset Stop 1 value will be
100mm.
2. If the length of the 2nd label and half of the
gap size is equal to 100mm, the Offset Stop 1
value will be 100mm.
3. If the length of the 2nd label is less than
100mm but total size of both the 2nd and 1st
label is larger than 100mm, measure the
label size and half of the gap. Subtract that
total from 100mm. That will be the Offset
Stop 1 value.
4. If the length of both the 2nd and 1st labels
combined is less than 100mm, add the
values and gaps to get as close to 100mm as
possible. Subtract that number from 100mm.
That will be the Offset Stop 1 value.

Phone: US 888-215-3966 EU: 44.845.230.7800
www.afinialabel.com
16
How to determine the Offset Stop 2 value
This value determines the correct position of the front (1st) label, when applying two labels to a
container. The easiest way to do this is to use the online tool on our website,
https://afinialabel.com/calculate-a200. This QR code will take you to the webpage.
L = 100mm, the distance between the label sensor
and the peeling edge.
1. If the length of the front label is larger than
100mm, then the Offset Stop 2 value will be
100mm.
2. If the length of the front label and half of the
gap size is equal to 100mm, then the Offset
Stop 2 value will be 100mm.
3. If the length of the 1st label is less than 100mm
but the total size of both the 1st and 2nd label is
larger than 100mm, measure the size of the
front label and half of the gap size and subtract
that total from 100mm. That will be the Offset
Stop 2 value.
4. If the length of both the 1st and 2nd labels
combined are less than 100mm, add the
values and the gaps to get as close to 100mm
as possible. Subtract that value from 100mm.
That will be the Offset Stop 2 value.

Phone: US 888-215-3966 EU: 44.845.230.7800
www.afinialabel.com
17
Memory Locations
There are 29 memory locations that can be used to store job parameters. Once a memory location is
selected, enter in the job parameters, as described below. Once the parameters are saved, that
memory location can be recalled, to run that particular job in the future.
To enter the memory location menu, press and hold the < button for 3 seconds.
The select program menu will appear. Use the ^ and < to change the values.
Once the memory location is selected, press the M button.
If recalling a previously saved job, select that memory location. If creating a new
job, select an unused memory location and enter the values below.
NOTE: You will need to record which jobs are associated with each memory location. If
you do not recall if a memory location has been used, you can select that location and
press M to review the settings.
Working with the menu and changing parameters
To access the menu to change parameters, press and hold the key for 3 seconds. The
display will show the SELECT MODE menu. Use the button to select the mode. Press the
button to enter that mode:
SELECT PROGRAM
------------------------------
01
---------------------------
[00..29 program]
SELECT PROGRAM
------------------------------
22
---------------------------
[00..29 program]

Phone: US 888-215-3966 EU: 44.845.230.7800
www.afinialabel.com
18
ONE LABEL mode parameters
There are two parameters associated with the one label mode, Offset Stop and Time Move Motor.
Refer to page 13 to manually determine the Offset Stop value. The Time Move Motor value is the
amount of time the container will turn, to apply the label.
The easiest way to do this is to use the online tool found at this website: afinialabel.com/…..
Scanning this QR Code will take you to that web page.
Once these numbers are determined, they can be entered into the applicator.
In the Select Mode menu, select ONE LABEL and press the {M} button. The Offset Stop menu will
then appear:
Press to change digit positions.
Press to change values.
Press to clear the value.
Once the value is use, press the button.
Next, the TIME MOVE MOTOR menu appears.
Use the button to change values.
User the button to change digit positions.
Use the button to clear the value.
Once the value is use, press the button.
The main menu will now appear.

Phone: US 888-215-3966 EU: 44.845.230.7800
www.afinialabel.com
19
TWO LABEL mode parameters
There are five parameters associated with the two label mode, Labels Gap, Distance labels, Offset
Stop 1, Offset Stop 2 and Time Move Motor.
Refer to pages 14 and 15 to manually determine the Offset Stop values. The Time Move Motor value
is the amount of time the container will turn, to apply the label. The labels gap value is the size of the
gap between labels. The distance labels is the distance between the application of the 1st label and
the second label.
The easiest way to determine these values is to use the online tool found at this website:
afinialabel.com/….. Scanning this QR Code will take you to that web page.
Once these numbers are determined, they can be entered into the applicator.
In the Select Mode menu, select TWO LABEL and press the {M} button. The Labels Gap menu will
then appear:
Press to change digit positions.
Press to change values.
Press to clear the value.
Once the value is use, press the button.
Press to change digit positions.
Press to change values.
Press to clear the value.
Once the value is use, press the button.
Press to change digit positions.
Press to change values.
Press to clear the value.
Once the value is use, press the button.
Press to change digit positions.
Press to change values.
Press to clear the value.
Once the value is use, press the button.
Press to change digit positions.
Press to change values.
Press to clear the value.
Once the value is use, press the button.

Phone: US 888-215-3966 EU: 44.845.230.7800
www.afinialabel.com
20
How to determine the distance between labels
When applying two labels, the distance between label one and label two needs to be entered into the
applicator. The easiest way to do this is to use the online tool on our website,
https://afinialabel.com/calculate-a200. This QR code will take you to the webpage.
To calculate this value manually, follow these steps.
L1 = length of the front label (mm)
L2 = length of the back label (mm)
L3 = distance between the front and back label (cm)
D = diameter of the container
L3 = ((D*3.14 - L1 - L2) / 2) /10 [сm]
Example:
For a container with a diameter of 73mm, a front label size of 85mm, a back label size of 55mm, the
distance between labels will be:
L3 = ((73*3.14 - 85 - 55) /2) /10 cm
L3 = 4.461 cm
The Distance Labels value entered in the parameters section would be 4.61.
Table of contents
Other AFINIA LABEL Label Maker manuals

AFINIA LABEL
AFINIA LABEL L801 User manual

AFINIA LABEL
AFINIA LABEL Afinia 502 User manual

AFINIA LABEL
AFINIA LABEL Mini DLF Series User manual

AFINIA LABEL
AFINIA LABEL LT5C User manual

AFINIA LABEL
AFINIA LABEL L801 Reference manual

AFINIA LABEL
AFINIA LABEL DLF L Series User manual

AFINIA LABEL
AFINIA LABEL L901 User manual

AFINIA LABEL
AFINIA LABEL L301 Specification sheet

AFINIA LABEL
AFINIA LABEL Afinia L501 Specification sheet

AFINIA LABEL
AFINIA LABEL AP200 User manual