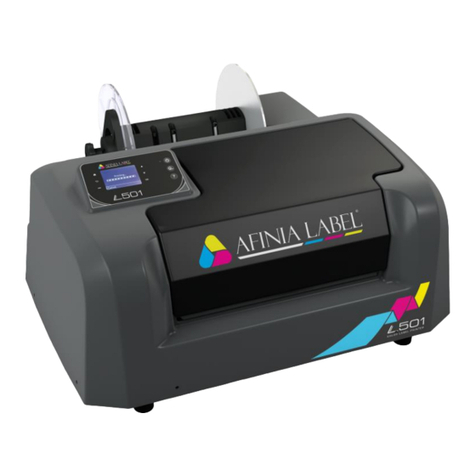
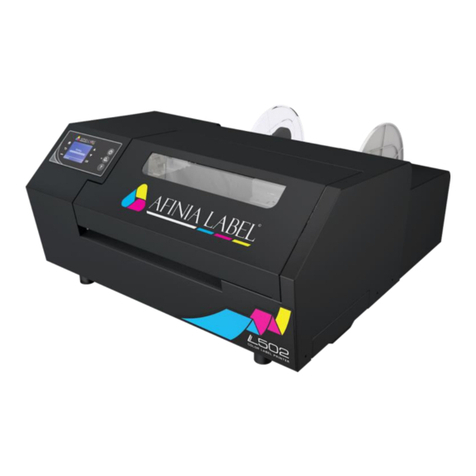
AFINIA LABEL Afinia L501 User manual

Afinia L501
Label Printer
User Manual
Version 1.0.0

Afinia Label
Copyright © 2017 Afinia Label. All rights reserved.
No part of this document may be photocopied, reproduced, or translated to another language without the prior written
permission of Afinia.
Trademarks
Firefox is a trademark of the Mozilla Foundation.
Intel and Intel Core are trademarks of Intel Corporation in the U.S. and/or other countries.
Java and Oracle are registered trademarks of Oracle and/or its affiliates.
Microsoft, Windows, Windows Vista, and Windows Server are registered trademarks of Microsoft Corporation in the U.S.A.
and/or other countries.
Edition
L501 Printer User Guide Edition 1.0.0. December 2017.
FCC
This device complies with Part 15 of the FCC rules. Operation is subject to the following two conditions: (1) this device may not
cause harmful interference, and (2) this device must accept any interference received, including interference that may cause
undesired operation.

L501 Label Printer
3
Table of Contents
Setting up the Printer.................................................................................................................................... 5
In the Box .................................................................................................................................................. 5
Parts of the Printer.................................................................................................................................... 6
The Control Panel...................................................................................................................................... 7
Unpacking, Setup, and Installation ........................................................................................................... 8
Remove Tape and Foam ....................................................................................................................... 8
Connect Power...................................................................................................................................... 8
Set Date, Time, and Language .............................................................................................................. 8
Install Printer Driver.............................................................................................................................. 9
USB Connection ..................................................................................................................................10
Network Connection........................................................................................................................... 10
Install Ink Cartridges ........................................................................................................................... 11
Align the Printheads............................................................................................................................13
Using the Printer ......................................................................................................................................... 14
Choosing Label Media............................................................................................................................. 14
Loading the Printer ................................................................................................................................. 16
Unloading Media.................................................................................................................................16
Using the Control Panel .......................................................................................................................... 17
Help Screen......................................................................................................................................... 17
Home Screen....................................................................................................................................... 17
Setup ................................................................................................................................................... 17
Cartridge Information ......................................................................................................................... 18
Network ..............................................................................................................................................19
Printing Labels......................................................................................................................................... 21
Printer Preferences............................................................................................................................. 21
Adjusting Alignment for Printing ........................................................................................................ 23
Selecting Media Size ........................................................................................................................... 24
Creating Custom Media Sizes ............................................................................................................. 25
Selecting Media Type.......................................................................................................................... 25
Change Default Settings in Printer Driver...........................................................................................25
Canceling a Print .....................................................................................................................................26
Out of Paper............................................................................................................................................ 26
Wrong Media .......................................................................................................................................... 27
End of Roll ............................................................................................................................................... 27
Shutting Down the Printer ......................................................................................................................27
Software Tools ........................................................................................................................................ 28
Afinia L501 Toolbox ............................................................................................................................ 28
Afinia L501 Ink Cost Calculator ........................................................................................................... 30
Add Afinia L501 Network Printer Utility ............................................................................................. 32
Printer Maintenance................................................................................................................................... 33
Replacing an Ink Cartridge ......................................................................................................................33
Dye or Pigment Ink Cartridges ............................................................................................................33
Changing Printheads ............................................................................................................................... 34
Purchasing Printheads.............................................................................................................................34
Guidelines for Preventative Maintenance ..............................................................................................35
4| Setting up the Printer
General dust and debris removal ....................................................................................................... 35
Cutter Maintenance............................................................................................................................ 35
Print Path Maintenance...................................................................................................................... 36
Print Carriage Sensor Maintenance.................................................................................................... 36
Pinch Roller Maintenance................................................................................................................... 37
Unwinder Maintenance ......................................................................................................................37
Ink Tray Maintenance ......................................................................................................................... 38
Troubleshooting.......................................................................................................................................... 39
Control Panel LED.................................................................................................................................... 39
Poor Print Quality or Incorrect Printout ................................................................................................. 40
Clearing a Media Jam .............................................................................................................................. 42
L501 Label Printer Control Panel Menu.................................................................................................. 43
Technical Support ...................................................................................................................................45

Afinia Label
5
Chapter 1
Setting up the Printer
In the Box
Tri-Color and Black
Ink Cartridges
Power Supply and Cord
USB Cable
Afinia L501 Label Printer
4 Ink Cartridges
(1 each)
Will be either Dye-based
or Pigment-based,
depending on which type
was purchased
Quick Setup Guide
See the full L501 Label Printer instructional video library at
http://afinialabel.com/l501info
When you see this
icon, click for
available video links!
4 aerosol
absorbing pads

Afinia Label
6| Setting up the Printer
Parts of the Printer
Ink Cartridge
Access Door
Control Panel
Label
Output
Front view
Unwinder
Label Guide
USB Connection
Rear view
Label Input
Power Connection
Network
Connection

L501 Label Printer
Setting up the Printer | 7
The Control Panel
The control panel includes nine buttons to help you navigate through the menu to the
various controls and functions. For example:
Press Help on the Control Panel.
Press the OK button with Printer Information selected to view the printer
name, model, serial number, and firmware version.
Press to go back
one level, or
Press to return to the
Home screen.
Full list of control panel
functions on page 17
Up Button
OK/Accept Right
Option Button
Down Button
Home Button
Back Button
Accept Left
Option Button
Power Button
Unload Media
Help Button

Afinia Label
8| Setting up the Printer
Unpacking, Setup, and Installation
Remove Tape and Foam
Lift top foam from the box
Remove the Accessory box from the box
Lift printer from box
Remove the packaging tape from
the printer cover (x2) and Ink
waste tray (right)
Connect Power
Set Date, Time, and Language
Us e the Up/Down buttons to set the Date, Time, and Language. Press the OK button
when the element shown is correct. Press Done when complete.
This will only needs to be done the first time the printer is turned on.
Press Power button on Control Panel
Connect the Power Supply to
the Printer
Rear of Printer,
right side

L501 Label Printer
Setting up the Printer | 9
Install Printer Driver
Before connecting the printer to a PC, download and run the installer from
http://afinialabel.com/l501info.
If an installation for Microsoft .NET
Framework 4.6.1 Web launches,
click Install. This is necessary for
the additional software that comes
with the L501 Printer. Depending
on your Operating System version,
you may need to re-run the L501
Installer once the .NET installation
is complete.
Follow the instructions in each window
of the installer as they appear.
During installation, three windows may
appear asking for confirmation before
installing drivers. Click Install on each.
You can avoid the last two windows by
checking the option to Always trust
software from Microboards
Technology LLC in the first window.
The Afinia Label L501 Label Printer can
be connected directly to a PC by USB or
can be set up as a network printer.
If connecting directly to the PC, click the
USB button.
If connecting to an L501 already
connected to your network, click the
Network button.
Follow the connection instructions on
the next page that match the connection
type.

Afinia Label
10 | Setting up the Printer
USB Connection
Click Finish to close the installer.
Network Connection
The L501 Label Printer must already be connected to the network and have an IP
Address before you can connect your computer to it.
When the L501 is idle, the top line of the display will alternate between showing the
date and time and the IP address. For more information on network settings, please see
page 19.
At the end of the installation, click the Network button to launch the Add Afinia L501
Network Printer utility.
Connect the USB to the Printer
and computer
Rear of Printer
(right side)
Install the Print Drivers and Toolbox BEFORE
connecting to the computer
Install the Print Drivers and Toolbox on your computer
BEFORE connecting to the network printer

L501 Label Printer
Setting up the Printer | 11
Enter the IP (v4) Address of the printer in the 4 fields provided. You can only enter 3
digits in each field, but can enter fewer.
Click the Add IP port and printer button.
You will be told if the printer was added successfully or not.
If it was not added successfully, verify the IP address of the printer and that it is
connected and on before trying again.
Close the Network Printer Utility once the printer has been added, then click Finish to
close the installer.
For more information on using the Add Afinia L501 Network Printer utility, please see
page 32.
Install Ink Cartridges
Open the Ink Cartridge Access Door
oCarriage will move to the center to expose the cartridges
Insert the Cyan, Magenta, Yellow, and Black ink cartridges into the print
carriage, in that order from left to right.
oPush each cartridge in until it clicks into place and release
Close the Ink Cartridge Access Door
1
2
3
4

Afinia Label
12 | Setting up the Printer
Dye or Pigment Ink Cartridges
The Afinia L501 can use either the supported Dye-based or Pigment-based ink
cartridges. The Afinia Label L501 Label Printer comes with a set of Dye- or Pigment-
based cartridges.
Each type must be used in separate printheads. To use a different type of ink, you will
need to install a second printhead (see Changing Printheads on page 34).
Ink Cartridge Color and Part Numbers, by ink type
Ink Type
Ink color
Reorder Number
Dye
Cyan
30636
Magenta
30643
Yellow
30650
Black
30657
------------------------------------------------------------------------------------------------------------------------------------------------------------------------------------------------------------
Pigment
Cyan
30664
Magenta
30671
Yellow
30678
Black
30685
If you will be using both ink types, you will need a second printhead. It is strongly
recommended that you label each printhead accordingly.
Each new printhead comes with a full set of the specified ink cartridges
Installing a new Printhead requires a new set of ink
cartridges for priming!
Once a printhead has been primed with one type of
cartridge, that printhead will not recognize the other type
of cartridge!

L501 Label Printer
Setting up the Printer | 13
Align the Printheads
To ensure the best print quality, a Printhead Alignment is triggered the first time the
printer is turned on.
To perform the alignment:
1. Loosen Unwinder knob
and remove end plate
2. Turn mandrel so one of
the flat surfaces faces the
back of the printer
3. Move media guide to the
widest position
4. Slide an 8.5” x 11” sheet
of plain, matte paper into
the label input slot until
the printer pulls in the
sheet
a. The paper must
be matte for the
alignment to
complete
successfully
b. You can also use
continuous matte
label stock,
minimum 4” wide
5. Move media guide to side
of paper
6. Press the OK button on the Control Panel
7. A series of patterns will be printed and used to automatically align the
printheads
a. This will take about a minute
8. Once complete, the display should read Alignment Successful
a. If the display reads Alignment Failed or Alignment Finished, remove the
paper from the printer and repeat steps 4-7 with a new sheet of paper
9. Pull the paper out the front of the printer

L501 Label Printer
14
Chapter 2
Using the Printer
Choosing Label Media
Ensure that the label media meets the requirements for the printer:
Table 1: Media Specifications
Media Type and Dimensions
Media type
Inkjet-printable coating required
Gloss, semi-gloss, and matte
Roll Width
1.5” to 8.625” (38.1 mm to 219 mm)
Label width
1.0” to 8.625” (25.4 mm to 219 mm)
Label length
Minimum 0.75” (19.1 mm)
Maximum 48” (1.016 m)
Label thickness
Maximum 0.01” (0.3 mm, including liner)
Minimum 0.005” (0.13 mm)
Media Handling
Print mode
Roll to cut
Roll to roll
Roll Specifications
Figure 1
Minimum
Maximum
I
Requires 3.0” (76.0 mm) cardboard core
J
N/A
Maximum 8” (203.2 mm)
Figure 1: Media Roll
Coating on the
outside
J
I
J

L501 Label Printer
Using the Printer | 15
Figure 2: Gap (Transmissive) Media
Figure 3: Black Mark (Reflective) Media
Minimum
Maximum
A
0.125” (3.0 mm)
0.3” (8.0 mm)
B
0.0
0.5” (12.7 mm)
C
0.0
N/A
D
1.5” (38.1 mm)
8.625” (219 mm)
E
0.75” (19.1 mm)
48.0” (1.219 m)
Minimum
Maximum
D
1.5” (44.5 mm)
8.625” (219 mm)
E
0.75” (19.1 mm)
48.0” (1.219 m)
H
1.25” (31.75 mm)
8.625” (219 mm)
G
0.125” (3 mm)
0.3” (8.0 mm)
Direction of travel through printer
as seen from above
A
E
B
C
D
Direction of travel through printer
as seen from below
E
G
H
D
E

Afinia Label
16 | Using the Printer
Loading the Printer
The Afinia Label L501 Label Printer requires a 3” ID core with the labels would face out.
1. Cut a clean leading edge on media being loaded
a. No partially peeled labels
b. No folded edges
2. Loosen the knob on the Stock Mandrel and
remove the adjustable guide plate.
3. Slide the roll onto the Mandrel
against the fixed guide
plate, label side up
4. Pull end of label stock
until the end of stock is
even with the front of
the cover
5. Slide the adjustable guide
plate back onto the Mandrel
against the stock
6. Retighten the Mandrel knob until the Mandrel
holds the core in place
7. Using the black handle, slide the label guide out to at least the width of the stock
8. With the printer on, feed the
stock into the input slot
a. Stock should be as far
towards the fixed core
holder side as possible
9. Feed until the printer advances the stock
10. When the stock starts loading, adjust the label guide
so it is against the edge of the stock
Unloading Media
Press the Unload button to roll media
back to the rear of the printer
Any printed labels in the printer will be
cut before unloading
Mandrel knob
Label Guide

L501 Label Printer
Using the Printer | 17
Using the Control Panel
Navigate through the menu by using the Up and Down buttons to highlight your choice
and click OK.
Help Screen
Press the Help button
Printer Information: Displays
Printer Name, Product Number,
Serial Number, Service ID, and
Firmware Version
Home Screen
Go to Setup menu
Check Cartridge Information
Go to Network menu
Setup
Select Setup on the Home Screen
and press OK.
Printer Settings : Preferences
With Printer Settings selected, press
OK twice to open the Preferences
menu.
Date and Time
In the Date and Time menu are the
options to enter the Date, Time, select the Time Zone from a list, and turn the 24-Hour
format and Daylight Savings settings On or Off.
Language
Select the language from the available list.
Country/Region
Select the Country or Region from the available list

Afinia Label
18 | Using the Printer
Brightness
Change the brightness of the display; options are Better, Normal, and Darker.
Continuable Events
Can be set to Press OK to Continue or Auto Continue.
Press OK to Continue is the recommended setting.
Tools
Highlight Tools and press OK.
Clean Printhead (requires minimum 4” wide continuous stock)
Select this function to clean the printheads and print the Print Quality Report when
complete. The report should show no gaps in the printed output.
Align Printheads
Alignment can be done using plain paper or continuous stock
Plain Paper (requires 1 sheet 8.5” x 11” plain paper)
Turn the stock mandrel so the flat surface is facing the rear of the printer, then load
the sheet of paper until the printer starts to feed
Continuous stock (requires minimum 4” wide matte continuous stock)
Matte paper stock must be used when aligning the printheads. Glossy media will
cause the alignment to fail. Load stock normally.
A series of patterns will be printed and scanned, with the alignment done automatically.
If the display reads Alignment Successful, remove the paper or stock.
If the display reads Alignment Finished or Alignment Failed, repeat the alignment. If
using plain paper, a new sheet will be needed.
Print Reports
Highlight Print Reports and press OK.
Print Quality Report (requires minimum 4” continuous stock)
Select this function to print a grid showing the pen health of each color.
If any lines are missing in any of the colors, Clean Printheads should be run.
Network Configuration Page (requires minimum 4” continuous stock)
Select this function to print the Ethernet settings for the printer.
Cartridge Information
Select Cartridge Information on
the Home Screen and press OK.
Estimated Levels
Press OK when selected to view an
estimate of the ink levels.
This shows the same levels as the
Afinia L501 Toolbox.

L501 Label Printer
Using the Printer | 19
Cartridge Low Alert
Use the Up and Down buttons to set Alert levels to either Automatic or Custom; press
OK when the correct option is selected. Alert levels can be set for each cartridge.
If set to Custom, use the Up and Down buttons to set the percentage remaining and
click OK when each percentage is set.
Cartridge Details
Select Cartridge Details and press OK.
Use the Up and Down buttons to select the correct cartridge and press OK. Information
on the cartridge will be displayed.
Network
Select Network on the Home Screen and press OK.These settings are only used if the
L501 Label Printer is connected to your network using an Ethernet cable.
Ethernet Settings
Select View Ethernet Details to review or print the Ethernet settings.
Press the button to print the information. Printing requires minimum 4” wide
continuous stock.
Ethernet Settings : Advanced Settings
IP Settings
By default, the L501 Label Printer Advanced Ethernet Settings are Automatic. If your
network uses DHCP through a Domain Name Server, you do not need to change the
IP Settings.
After the printer has been connected to the network and is assigned an IP address,
the IP address can be displayed using the View Ethernet Details menu option above.
To assign a Static IP address to the printer, change the IP Settings to Manual. Enter
in the IP Address, Subnet Mask, Default Gateway, Preferred DNS Address, and
optionally enter an Alternate DNS Address.
If a Domain Name Server has assigned the printer an IP address, the IP address,
Subnet Mask, Default Gateway, and DNS Server addresses will already be entered.
To add or change an address, use
the Up and Down buttons to
select each digit of the address,
moving from left to right.
Press the button when the
current digit is correct to move
to the next digit.
Press the OK button when each
address is complete.

Afinia Label
20 | Using the Printer
Ethernet Settings : Advanced Settings (continued)
IPv6
This option allows you to turn IPv6 addressing On (default) or Off.
Host Name and Bonjour Name
You can change the Host Name and Bonjour Name with these options.
Confirm that you want to change the name by pressing the button when
prompted.
Proxy Settings
Use this option to turn the Proxy Settings On or Off (default).
Link Speed
Select the Link Speed. Options are Automatic (default), 10 –Full, 10 –Half, 100 –
Full, and 100 –Half.
Disable EEE
Use this option to turn the EEE (Energy Efficient Ethernet) On or Off (default).
Print Reports
Requires minimum 4” wide continuous stock.
Press the OK button twice to print the Network Configuration Page.
This is the same report as is printed from the Setup : Print Reports : Network
Configuration Page and when selecting the Print option from the View Ethernet Details
menu item.
Restore Network Settings
Use this option to restore all network settings back to the defaults.
Other manuals for Afinia L501
1
Table of contents
Other AFINIA LABEL Label Maker manuals

AFINIA LABEL
AFINIA LABEL Afinia 502 User manual

AFINIA LABEL
AFINIA LABEL L801 Reference manual

AFINIA LABEL
AFINIA LABEL A200 User manual

AFINIA LABEL
AFINIA LABEL Mini DLF Series User manual

AFINIA LABEL
AFINIA LABEL DLP-2000 User manual

AFINIA LABEL
AFINIA LABEL DLF L Series User manual

AFINIA LABEL
AFINIA LABEL AP200 User manual

AFINIA LABEL
AFINIA LABEL LT5C User manual

AFINIA LABEL
AFINIA LABEL L901 User manual

AFINIA LABEL
AFINIA LABEL DLF-220L User manual