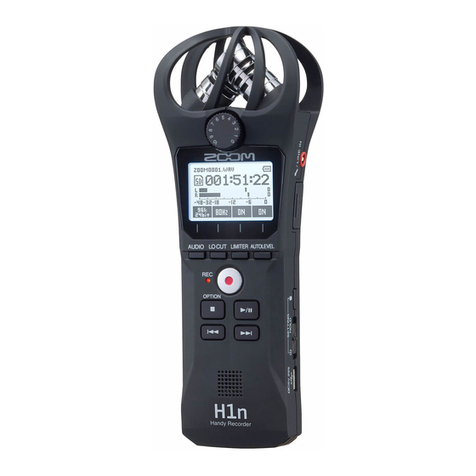
AFL DFS1 User manual

1
DFS1 FiberScope Quick Reference Guide
The DFS1 is a hand-held electronic imaging device used to inspect fiber optic connector
end-faces for damage or contamination. It is connected to an M-Series (M200, M700)
OTDR or C-Series OTDR or Certification Tester (C840, C850) via a USB port. The DFS1
obtains power from the attached device and delivers video images to the attached device
for display and archiving.
Adapter tips are used with the DFS1 Digital FiberScope to inspect ferrule ends of jumper
cables, as well as fiber ends mounted inside bulkhead adapters on the front panels of
transmission equipment and in patch panels.
An extensive range of tips is available. Please refer to the Adapter Tips Selection Guide
available at www.AFLglobal.com -> NOYES Test and Inspection -> DFS1 -> Downloads.
Focus Adjust Knob
Display Capture Button
Interchangeable
Probe Adapter Tips
USB Connector
Adapter Tip Locknut
Probe Adapter Base
Probe Dust Cover
DFS1 Controls and Interfaces

2
Name Key Function
Focus Adjust Knob Rotate to focus on fiber end-face
Display Capture
Button
Press to capture image to the attached device (OTDR or
Certification Tester) for labeling and storage
USB Cable and Port - Powers the DFS1 from the attached device (OTDR or
Certification Tester)
- Communicates digital fiber end-face images to the attached
device (OTDR or Certification Tester)
Probe Dust Cover Protects probe base and adapter tip when not in use
Probe Base Accepts interchangeable probe adapter tips. Includes alignment
key and threaded locknut to securely retain installed adapter tip.
Interchangeable Probe
Adapter Tips
Adapts DFS1 for precise viewing of fiber end-faces on a wide
variety of fiber optic connectors and bulkhead adapters
No batteries or AC supply is required, as the DFS1 is powered from the device (NOYES
OTDRs or Certification Testers) attached to the USB port.
Configuring the DFS1 for Fiber Inspection
How do I change adapter tips?
1. Identify the type of Probe Adapter Tip to install on the probe base. Pre-configured kits
are available with commonly used FC, SC, and/or LC adapter tips. Additional probe
adapter tips are available for other connector types.
(See the DFS1 Adapter Tips Selection Guide for a complete listing and ordering
information for available probe adapter tips.)
–For jumper cables with SC, FC, ST, E2000 or other connectors having a 2.5 mm PC or
UPC ferrule, use the Universal 2.5 mm PC male adapter tip engraved ‘U25’.
–For jumper cables or connectors having a 2.5 mm angle-polished ferrule, use the
Universal 2.5 mm APC male adapter tip engraved ‘U25A’.
–For jumper cables with LC, MU, LX.5 or other connectors having a 1.25 mm PC or
UPC ferrule, use the Universal 1.25 mm PC male adapter tip engraved ‘U125’.
–For FC/PC or SC/PC bulkhead adapters, use the FC/SC bulkhead adapter tip
engraved ‘FS’.
DFS1 Controls and Interfaces

3
–For FC/APC bulkhead adapters, use the adapter tip engraved ‘FSA’.
–For SC/APC bulkhead adapters, use the adapter tip engraved ‘SCA’.
–For LC/PC bulkhead adapters, use the adapter tip engraved ‘LC’.
2. Remove the Probe Dust Cover. If the required probe adapter tip is already installed,
proceed to step 3. If another probe adapter tip is already installed and must be
replaced, remove the installed adapter tip as follows:
–Holding the unit with the probe tip facing up, turn the captive knurled knob at the
base of the adapter tip in the clockwise direction. Once the knurled knob is fully
unscrewed from the adapter tip, it will be free to slide down the probe base.
–Remove the adapter tip by pulling it gently off the probe base.
3. Note the alignment key on probe base. Rotate the adapter tip to be installed until its
keying slot is aligned with the key on the probe base. Gently slide the adapter tip onto
the probe base. While holding the adapter tip in place with one hand, use the other hand
to turn the threaded ring counter-clockwise onto the threads at the base of the adapter
probe tip. Do not overtighten.
The DFS1 is now ready for use with an AFL M-Series OTDR (M200, M700) or C-Series
OTDR or Certification Tester (C840, C850).
1. Plug the USB connector of the DFS1 into the OTDR or Tester USB port (Note: If the DFS1
is not plugged in, the OTDR Tester displays, “Waiting for DFS1”).
2. From the OTDR/Tester Main Menu, select the DFS icon to display the DFS mode.
Selecting DFS Test Mode
To change Fiber, Cable, or
DFS location:
• Use arrows to select
the desired option
• Use the arrows to
change Fiber or Location
• Press key to
display Results Manager
and change Cable
Configuring the DFS1 for Fiber Inspection

4
The following instructions assume the DFS1 is configured with the appropriate adapter tip
installed, an appropriate device (M-Series OTDR or C-Series OTDR or Certification Tester)
is powered up, the DFS1 operation mode is selected, the DFS1 is connected to the OTDR/
Tester USB port, DFS1 initialization has completed, and real-time images from the DFS1
are currently being displayed on the OTDR/Tester screen.
1. If testing an optical fiber connector:
–Slide the ferrule of the optical fiber into the installed adapter probe tip, using caution
not to contaminate the end-face of the fiber connector.
–A dark circle will appear on the attached device display.
2. If testing an optical fiber connector mounted in a bulkhead adapter:
–Slide the probe adapter tip into the bulkhead adapter.
–Adjust the angle of the adapter tip until a dark circle appears on the attached device
display.
3. If the edges of the displayed dark circle are fuzzy:
–Rotate the Focus Adjust Knob on the DFS1 clockwise or counter-clockwise until the
displayed circle is in sharp focus.
4. If display sharpness or contrast is poor:
–Press the Settings function key, adjust the contrast and sharpness.
–Press Apply to save the adjusted settings.
–Then press Settings to return to image display.
5. Once a good image has been obtained, it may be captured and archived either by
pressing the Display Capture button on the DFS1, or by pressing the Snap function key
on the attached OTDR or Tester.
–Either of these actions results in the OTDR/Tester displaying the message “S avi ng.”
–If an image for the identified fiber number, cable ID, and fiber end already exists, the
OTDR/Tester will prompt “The file already exists. Would you like to overwrite the file?”
–Press Yes or No to complete or abort the image capture.
–Once the image has been captured, the fiber number is incremented.
6. Remove the probe adapter from the inspected fiber and repeat the process for
subsequent fibers.
7. Clean, undamaged fibers should display with no dark spots showing on the fiber end-
face. If dark spots are displayed on the fiber end-face, the fiber end should be cleaned
using the appropriate cleaning stick (One-Click Cleaner) or wipe.
Inspecting Fibers with the DFS1

5
DFS Test Mode: Display Features
Battery icon - fully charged
Page header
DFS Page tabs
Live (Test) Mode View Saved Mode View
Back tab
Clean connector
Dirty connector
Press to capture and
save the displayed
end-face image
Press to display
the DFS Tools
menu
Press to adjust
the contrast and
sharpness values
Press to switch
to Live DFS
inspection mode
• Use arrows to select the
desired Tools option
• Onceselected,pressTools
to exit
• IfZoomIn/Outselected,
each screen touch zooms
in/out
• IfPanselected,touch
screen and move display to
the desired location
Main Menu tab

6
Press tabs or use key to display the desired DFS page and
perform the following:
1. Home page - activates Live DFS Inspection mode that allows
capturing the displayed fiber end-face image.
2. Results page - display captured end-face image.
3. Job Settings - displays fiber ID information and allows the user
to define Job, End Locations, and Operator parameters.
DFS Inspection Test Mode Tabs and Pages
1 2 3
DFS Test Mode: Display Features
Reviewing Saved Images
Access Results Manager from the Main Menu by pressing the [Results]- soft key.
Test results are saved as files that are stored in Cable folders. Cable folders are organized
into Route, Job, and Drive folders.
OPM power and loss readings (M700
and C850 only!) are saved in .ATD
file format and displayed on the “file
tree” as icon.
DFS fiber end-faces images are saved
in .JPG file format and displayed on
the “file tree” as icon.
OTDR test results are saved in .SOR
file format and displayed on the “file
tree” as icon.
Drive
Folder
Job
Route
Cable
Results
• Usethe arrows to navigate up/down the list of folders/files.
• Use the arrows to expand/contract the selected Drive/Folder/Job/Route/Cable.
• To open saved test results, navigate to the desired file, and then press [Open].
• Use Tools menu to copy, create or delete jobs, files and folders.

7
Adapter Tip Identification Guide
Adapter Tips are engraved to indicate associated
connector type
DFS1-00-0003MR
FC/SC UPC Bulkhead
FS
DFS1-00-0004MR
LC UPC Bulkhead
LC
DFS1-00-0002MR
2.5mm UPC Ferrule
U25
DFS1-00-0001MR
1.25mm UPC Ferrule
U125
DFS1-00-04XU Kit
Refer to the Adapter Tip ID label located on the inside cover of your adapter tip box for
adapter tip identification.

8
© 2011, AFL, all rights reserved. DFS1-00-1ENG Revision 1B, 2011-05-27
1. To properly view FC and SC end faces in APC bulkhead adapters, align circle engraved
on side of FSA and SCA adapters with key slot on bulkhead adapter.
2. To properly view end faces of 2.5 mm APC ferrules, align groove on side of U25A
adapter with key slot on ferrule.
Adapter Tip Identification Guide
Adapter Tips are engraved to indicate associated
connector type
DFS1-01-0003MR
FC APC Bulkhead
FSA
DFS1-01-0011MR
SC APC Bulkhead
SCA
DFS1-01-0002MR
1.25 mm APC Ferrule
U25A
NOTE:
For proper viewing
of APC end-faces,
align key marks with
connector key
DFS1-00-04XA Kit
Refer to the Adapter Tip ID label located on the inside cover of your adapter tip box for
adapter tip identification.
Other AFL Measuring Instrument manuals

AFL
AFL NOYES OPM5 -4D User manual
AFL
AFL OFL280 FlexTester User manual
AFL
AFL OPM1 Series User manual

AFL
AFL NOYES OFL280-10x User manual
AFL
AFL FOCIS Flex User manual
AFL
AFL Noyes OPM 4 OLS 2D User manual
AFL
AFL M310 User manual
AFL
AFL OFL250 User manual
AFL
AFL Noyes CSS1 Series User manual

AFL
AFL Noyes OFS 300 User manual
