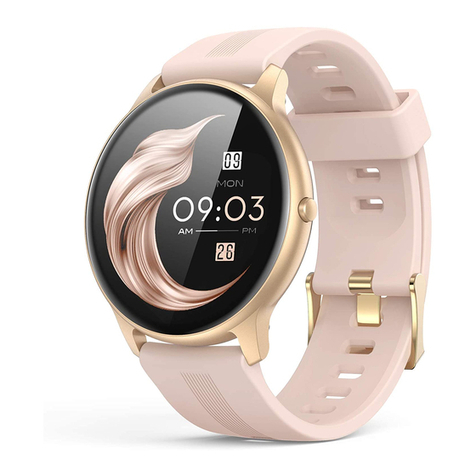
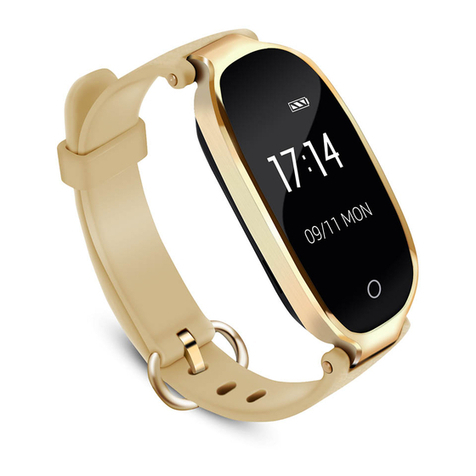
AGPtek G22 Operating and safety instructions

G22 Smart Watch
>> Welcome Guide

CONTENTS
◉English................01/08
◉Français..............09/17
◉Italiano...............18/26
◉Español...............27/35

1
Thanks for choosing this product. Please read
this [user manual] carefully before use and
keep this instruction for future reference. Any
problems about this product, please feel free
Product Overview
Note: Long press red button to power on.
Charging Watch
1. Buckle the watch into the charger seat as
shown in the picture. It needs to be charged
to activate the watch when it is started for the
first time.
2. Insert the USB end of the charger seat into

2
USB wall charger or USB interface of
computer.
Wear/Install
1. Wear: Wear the wristband one finger away
from the wrist bone and adjust the tightness
of the wristband to a comfortable position.
2. Replace The Strap: Flip the switch and take
out the wristband. (A: Switch)
Tip: Wearing too loosely may affect the

3
accuracy of heart rate data.
Download App
1. Download “GloryFit” from
“Apple store” or “Google play
store” (Android App store).
2. Scan the left QR code.
Note: Mobile phone must
support Android 4.4/iOS 8.0+
and Bluetooth 4.0+.
Binding
1. For first use, start App “GloryFit”, register
and log in.
2. Go to [Device]>[Add a new device]>[Select
device].
3. After searching, select and click “G22” to
complete the connection.
Smart Watch - Main Menu
⦁Main Interface
3 Main interfaces are available. Press and hold
(2S) the touch point on the main interface to
switch.

4
⦁Pedometer
24-Hour real-time recording
your steps, walking distance,
and burned calories during
that day. They also can be
viewed after syncing to the
App.
⦁Heart Rate
In the heart rate interface, it
will enter into the real time
monitoring.
1. These data will be
synchronized to App in time
and analyze the conditions
of your heart rate in watch and App.

5
Note: The data of heart rate measurement are
for reference only and cannot be used as a
basis for medical related aspects.
⦁Sports
Switch to the Sports
interface, and press and hold
(2S) to access 7 different
exercise. Select one of your
favorite exercise, press and
hold (2S) to start it. If wanna
exit the current exercise, press and hold (2S)
to exit or press the red button to return.
⦁Message
Switch to the message
interface, press and hold (2S)
to access the message.
⦁Setting
Switch to this interface, press and hold (2S) to
access its function. A relative list will show:

6
Bright, Info, Reset, Find, Off.
1. Bright. Adjust the
brightness of watch.
2. Info. Check the firmware
version and Bluetooth
information.
3. Reset. Restore the watch
to factory state.
4. Find. Find the mobile phone.
5. Off. Turn off the watch.
Other Functions
⦁Reminder
The reminders (Call, SMS, SNS) need to turn
on in the App and always stay connect
between watch and App. All these reminder is
to vibrate to notify.
⦁Sleep Monitor
Record your sleep from 23:00 pm to 8:00 am.
The detected data only show in the App, not
the watch. Sync and update the data through
manually pulling down the the "Home" page

7
of App.
Attentions
⦁DON’T use over 5V/2A power adapter to
charge it.
⦁This device is is an electronic product, not
for medical reference, so the detected data is
for reference only.
⦁Monitoring process:
Take a comfortable, restful sitting
position and keep your mind
easeful. Forbidden to speak. Place
the watch at the same height as
your heart (as shown on the left).
FAQ
⦁Why can't I receive the notification?
1. Android: When you turn on the QQ/
Wechat reminder for the first time, the App
will get the corresponding permissions
automatically.
2. iOS: (Call, SMS, SNS) When the reminders
in the App are turned on, your phone will

8
automatically pop up the accessing request,
you just need to select OK.
Specifications
Screen
1.3 IPS color screen
Battery
160mAh
Working
Time
7 days
BT Distance
10m (In the open space)
Charging
Way
5V/500mA USB charger;
Computer USB
Charging
Time
2 hours
Waterproof
IP67
Support
App
Reminder
QQ/Wechat/Linkedin/Line
/Skype/Facebook/Twitter/
WhatsApp/Viber...
Compati-
bility
✔iOS8.0+/Android5.0+/
Smartphones with BT 4.0+;
✖Tablet/HuaweiP8/Sams-
ungS7&S8&J3/LG/PC/iPad/
Phone/Desktop/Windows

9
Merci d'avoir choisi ce produit. Veuillez lire
attentivement ce “manuel de l'utilisateur
“avant l’utilisation et conservez ces
instructions pour référence future. Pour tout
problème concernant ce produit, n'hésitez pas
à nous contacter à support@agptek.com.
Présentation du Produit
Remarque: appuyez longuement sur le bouton
rouge pour allumer.
Charge de Montre
1. Bouclez la montre dans le siège du
chargeur comme indiqué sur l'image. Elle doit
être chargée pour activer la montre lors de
son premier démarrage.

10
2. Insérez l'extrémité USB du siège du
chargeur dans le chargeur mural USB ou dans
l'interface USB de l'ordinateur.
Porter / Installer
1. Port: Portez le bracelet à un doigt de l'os
du poignet et ajustez l'étanchéité du bracelet
dans une position confortable.
2. Remplacez la Sangle: basculez
l'interrupteur et retirez le bracelet. (A:
Commutateur)

11
Conseil: un port trop lâche peut affecter la
précision des données de fréquence
cardiaque.
Télécharger App
1. Téléchargez «GloryFit»
depuis «Apple Store» ou
«Google Play Store» (Android
App Store).
2. Scannez le code QR de
gauche.
Remarque: le téléphone portable doit prendre
en charge Android 4.4 ou iOS 8.0 ou supérieur
et Bluetooth 4.0 ou supérieur.
Connexion
1. Pour la première utilisation, lancez
l'application «GloryFit», enregistrez-vous et
connectez-vous.
2. Accédez à [Appareil]> [Ajouter un nouvel
appareil]> [Sélectionnez le bracelet].
3. Après la recherche, sélectionnez et cliquez
sur "G22" pour terminer la connexion.

12
Montre Intelligente - Menu Principal
⦁Interface Principale
3 interfaces principales sont disponibles.
Appuyez et maintenez (2S) le point tactile sur
l'interface principale pour basculer.
⦁Pas
Enregistrement en temps
réel de vos pas, de la
distance de marche et des
calories brûlées pendant
cette journée, 24 heures sur
24. En outre, ils peuvent
être affichés après la synchronisation avec
l'application.

13
⦁Rythme Cardiaque
Dans l'interface de
fréquence cardiaque, il
entrera dans la surveillance
en temps réel.
1. Ces données seront
synchronisées avec
l'application à temps et analyseront les
conditions de votre fréquence cardiaque dans
la montre et l'application.
Remarque: les données de mesure de la
fréquence cardiaque sont données à titre
indicatif uniquement et ne peuvent pas être
utilisées comme base pour des aspects
médicaux.
⦁Sports
Basculez vers l'interface
Sports et maintenez la
touche (2S) enfoncée pour
accéder à 7 exercices
différents. Sélectionnez l'un
de vos exercices préférés,

14
maintenez la touche (2S) enfoncée pour le
démarrer. Si vous souhaitez quitter l'exercice
en cours, maintenez la touche (2S) enfoncée
pour quitter ou appuyez sur le bouton rouge
pour revenir.
⦁Message
Basculez vers l'interface de
message, maintenez la
touche (2S) enfoncée pour
accéder au message.
⦁Plus
Basculez vers cette interface,
maintenez la touche (2S)
enfoncée pour accéder à sa
fonction. Une liste relative
affichera: Luminosité,
Information, Réinitialiser,
Recherche, Désactiver.
1. Luminosité. Réglez la luminosité de la
montre.

15
2. Information. Vérifiez la version du firmware
et les informations Bluetooth.
3. Réinitialiser. Remettez la montre en état
d'usine.
4. Recherche. Trouvez le téléphone portable.
5. Désactiver. Éteignez la montre.
Autres fonctions
⦁Rappel
Les rappels (appel, SMS, SNS) doivent être
activés dans l'application et rester toujours
connectés entre la montre et l'application.
Tous ces rappels sont à vibrer pour notifier.
⦁Dossier de Sommeil
Enregistrez votre sommeil de 23h00 à 8h00.
Les données détectées s'affichent uniquement
dans l'application, pas dans la montre.
Synchronisez et mettez à jour les données en
tirant manuellement la page "Accueil" de
l'application.
Attentions
⦁N'UTILISEZ PAS un adaptateur secteur de

16
plus de 5V/2A pour le charger.
⦁Cet appareil est un produit électronique,
pas pour référence médicale, donc les
données détectées sont pour référence
seulement.
⦁Processus de Surveillance:
Prenez une position assise
confortable et reposante et gardez
l'esprit tranquille. Interdit de parler.
Placez la montre à la même
hauteur que votre cœur (comme illustré à
gauche).
FAQ
⦁Pourquoi je ne peux pas recevoir la
notification ?
1. Android: Lorsque vous activez le rappel
QQ/Wechat pour la première fois,
l'application obtiendra automatiquement les
autorisations correspondantes.
2. iOS: (Appel, SMS, SNS) Lorsque les rappels
de l'application sont activés, votre téléphone

17
affiche automatiquement la demande d'accès,
il vous suffit de sélectionner OK.
Spécification
Écran
1.3 écran couleur IPS
Batterie
160mAh
Travail
7 jours
BT distance
10m (Dans l'espace ouvert)
Manière de
Charge
Chargeur USB 5V/500mA;
Ordinateur USB
Charge
2 heures
Waterproof
IP67
Rappel de l'
application
de support
QQ/Wechat/Linkedin/Line
/Skype/Facebook/Twitter/
WhatsApp/Viber...
Compatibili
té
✔iOS8.0+/Android5.0+/Sm
artphones avec BT 4.0+;
✖Tablette/HuaweiP8/Sam
sungS7&S8&J3/LG/PC/iPad
/Phone/Desktop/Windows

18
Grazie per aver scelto questo prodotto.
Leggere attentamente questo [manuale
utente] prima dell'uso e conservare queste
istruzioni per riferimenti futuri. In caso di
problemi con questo prodotto, non esitate a
contattarci all'indirizzo support@agptek.com.
Panoramica del Prodotto
Nota: premere a lungo il pulsante rosso per
accendere.
Orologio di Ricarica
1. Avvitare l'orologio nel sedile del
caricabatterie come mostrato in figura. Deve
essere caricato per attivare l'orologio quando
viene avviato per la prima volta.
Table of contents
Languages:
Other AGPtek Watch manuals

AGPtek
AGPtek G20 Operating and safety instructions

AGPtek
AGPtek LW31 User manual

AGPtek
AGPtek LW31 User manual

AGPtek
AGPtek W06 User manual

AGPtek
AGPtek LW31 User manual

AGPtek
AGPtek W20 User manual
AGPtek
AGPtek LW31 User manual

AGPtek
AGPtek W20 User manual

AGPtek
AGPtek LW11 User manual

AGPtek
AGPtek SW03 User manual