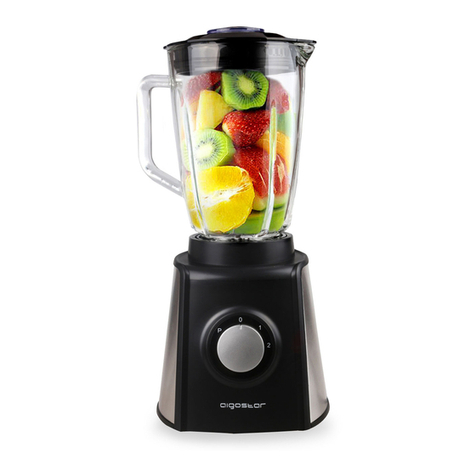
AIGOSTAR 30JPO User manual

INSTRUCTION MANUAL
Model: 8433325504496
The material in contact with the food is PP (polypropylene) and Stainless Steel, 100% BPA
free.

IMPORTANT SAFEGUARDS
Before usin
g
the electrical a
pp
liance, the followin
g
b
asic
p
recautions shoul
d
alwa
y
s
b
efollowe
d
includin
g
the followin
g
:
1. Rea
d
all instructions.
2. Before usin
g
check that the volta
g
e of wall outlet corres
p
on
d
to
the one shown on the ratin
g
p
late.
3. Do not o
p
erate an
y
a
pp
liance with a dama
g
e
d
cor
d
o
r
p
lu
g
o
r
afte
r
the a
pp
liance malfunctions, o
r
is dro
pp
e
d
o
r
dama
g
e
d
in an
y
manner. Return a
pp
liance to the nearest authorize
d
service facilit
y
for examination, re
p
air o
r
electrical o
r
mechanical ad
j
ustment.
4. If the su
pp
l
y
cor
d
is dama
g
e
d
it must
b
ere
p
lace
d
by
the
manufacture
r
or a authorize
d
service a
g
ent o
r
a
q
ualifie
d
technician in orde
r
to avoi
d
a hazard.
5. Un
p
lu
g
from outlet when not in use,
b
efore
p
uttin
g
on o
r
takin
g
off
p
arts, an
d
b
efore cleanin
g
.alwa
y
s disconnect the
b
lender from
the su
pp
l
y
if it is left unattende
d
an
d
b
efore assemblin
g
,
disassemblin
g
o
r
cleanin
g
;
6. Do not let cor
d
han
g
ove
r
ed
g
eoftableo
r
hot surface.
7. Do not immerse u
pp
er
p
art of
b
lender into wate
r
as this woul
d
g
iverisetoelectricshock.
8. Close su
p
ervision is necessar
y
when
y
our a
pp
liance is
b
ein
g
use
d
near children o
r
infirm
p
ersons.
9. Avoi
d
contactin
g
movin
g
p
arts.
10. Kee
p
hands an
d
utensils out of container while
b
lendin
g
to
reduce the risk of severe in
j
ur
y
to
p
ersons o
r
dama
g
etothe
b
lender.
Ascra
p
e
r
ma
y
b
euse
d
b
ut must
b
euse
d
onl
y
when the
b
lender is
not runnin
g
.
11.The a
pp
liance cannot
b
euse
d
fo
r
cho
pp
in
g
ice or
b
lendin
g
har
d
an
d
dr
y
substance, otherwise the
b
lade coul
d
b
e
b
lunted.
12. To reduce the risk of in
j
ur
y
,neve
r
p
lace cuttin
g
b
lade on
b
ase
without first
p
uttin
g
b
owl
p
ro
p
erl
y
in
p
lace.
13. Be sure cho
pp
e
r
li
d
is securel
y
locke
d
in
p
lace
b
efore o
p
eratin
g
GB

a
pp
liance.
14. The use of accessor
y
not recommende
d
by
the manufacture
r
ma
y
cause in
j
uries to
p
ersons.
15. Do not o
p
erate the a
pp
liance for othe
r
than its intended use.
16. This a
pp
liance is not intende
d
fo
r
use
by
p
ersons
(
includin
g
children
)
with reduce
d
p
h
y
sical, sensor
y
o
r
mental ca
p
abilities, or
lack of ex
p
erience an
d
knowled
g
e, unless the
y
have
b
een
g
iven
su
p
ervision or instruction concernin
g
use of the a
pp
liances
by
a
p
erson res
p
onsible fo
r
thei
r
safet
y
.
17. Children shoul
d
b
esu
p
ervise
d
to ensure that the
y
do not
p
la
y
with the a
pp
liance.
18. Do not use outdoors.
19.Save these instructions.
20.Take care of
p
otential in
j
ur
y
from misuse.
21.Care shall
b
e taken when handlin
g
the shar
p
cuttin
g
b
lades,
em
p
t
y
in
g
the
b
owl an
d
durin
g
cleanin
g
.
22. Switch off the a
pp
liance an
d
disconnect from su
pp
l
y
b
efore
chan
g
in
g
accessories o
r
a
pp
roachin
g
p
arts that move in use.
SAVE THESE INSTRUCTIONS
HOUSEHOLD USE ONLY

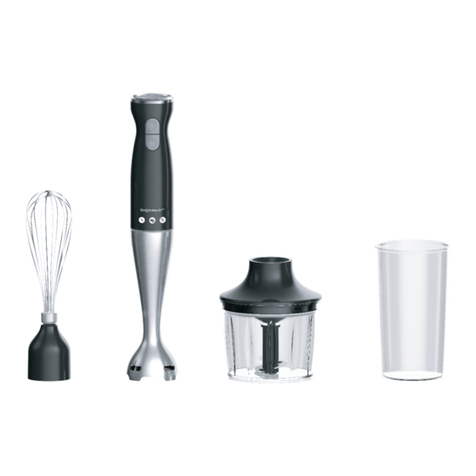
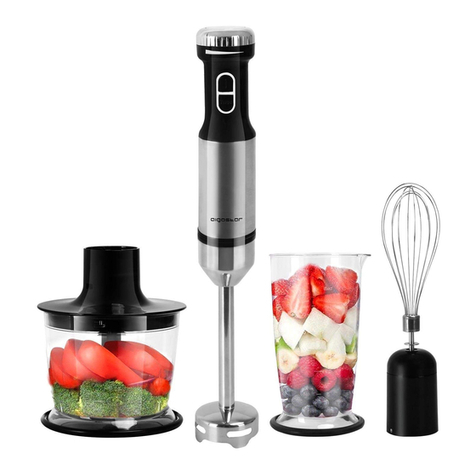
Know your blender (It is suitable for blending vegetable and fruit)
Using your blender
Before the first use, clean the blender according to the section of “quick cleaning”.
The time running unit without load can’t exceed 15s.
Important: Blades are very sharp, handle with care. Ensure that the hand-held blender is
unplugged from the power outlet before assembling or removing attachments.
Instruction for blender
Max operation duration per time less than 30 seconds, and 3 minutes rest time must be
maintained at two consecutive cycles.
1. To assemble the detachable shaft with the motor unit, turn the shaft anti-clockwise direction
until tightened. To disassemble, just turn in the adverse direction.
2. Simply plug the hand-held blender to power outlet.
3. Lower the hand-held blender into food. Then press and hold the low speed button to start
operating. At the same time you can select desired speed setting by dialing the speed control
dial, the speed will be higher gradually when you dial the speed control dial from left to right.
4. You also can start operating by pressing and hold the high speed button (turbo button), the
appliance will operate at the highest speed all the time. The speed will not change even if you
dial the speed control dial.
5. To stop the hand-held blender by releasing the low speed button or high speed button.
1. Speed knob
2. Lower speed button
3. High speed button
4. Lock
5. Blend rod
6. Cap
The max capacity is 700ml

Caution:
-To reduce the risk of injury, never place cutting blade on base without first putting bowl
properly in place.
-Be sure chopper lid is securely locked in place before operating appliance.
- after chopping, for safety, you shall disassemble the motor unit from the chopper lid firstly,
then remove the chopper lid. Never remove the chopper lid with the motor unit in place.
CLEANING AND MAINTENANCE
1. Unplug the appliance and remove the detachable stem.
Note: Do not immerse the detachable stem of the blender in water because overtime the
lubrication on the bearings may wash away.
2. Wash the detachable stem under running water, without the use of abrasive cleaner or
detergents. After finishing cleaning the detachable stem, place it upright so that any water
which may have got in, can drain out. The stem is dishwashing safe component.
3. Wash the cup, bowl, beater and blade in warm soapy water. The bowl and the beater are not
recommended to place in dishwashing machine as the plastic component deteriorates through
prolonged use of dishwasher cleaning.
4. Wipe the motor unit with a damp cloth. Never immerse it in water for cleaning as a electric
shock may occur.
5. Dry thoroughly.
Caution: Blades are very sharp, handle with care.
6. Reassemble the blender shaft to motor unit then place it upright hang it up for saving space.
Quick cleaning
Between processing tasks, hold the hand-held blender in the cup half filled with water and turn
on for a few seconds.
Environment friendl
y
disposal
WARRANTY: 2 YEARS
You can help protect the environment!
Please remember to respect the local regulations: hand
in the non-working electrical equipments to an
appropriate waste disposal center
PRECAUCIONES DE SEGURIDAD
Antes de comenza
r
ausa
r
el a
p
arato eléctrico, debe tene
r
en cuenta
las si
g
uientes
p
recauciones de se
g
urida
d
b
ásicas:
1. Lea todas las instrucciones.
2. Antes de usa
r
el a
p
arato, ase
g
úrese de
q
ue el volta
j
e del enchufe
corres
p
onde con el
q
ue a
p
arece en la eti
q
ueta.
3.
N
o
p
on
g
aenmarchaela
p
arato si el cable está dañado o no
funciona correctamente, debe ser re
p
arado
p
o
r
el fabricante, o un
a
g
ente autorizado
p
ara evitar ries
g
os. Lleve el a
p
arato al centro
autorizado
m
ás cercano
p
ara
q
ue lo examinen, re
p
are
n
orealice
n
los
a
j
ustes necesarios.
4. Si el cable está dañado, debe ser re
p
arado
p
or el fabricante, o un
a
g
ente autorizado
p
ara evitar ries
g
os.
5. Desconecte siem
p
re el a
p
arato de la corriente eléctrica si no va a
usarlo
y
antes de montarlo, desmontarlo o lavarlo.
6.
N
ode
j
e
q
ue el cable
q
uede col
g
ando
p
o
r
el
b
orde de la mesa o
to
q
ue su
p
erficies calientes
7.
N
osumer
j
ala
p
arte su
p
erio
r
del a
p
arato en a
g
ua u otros lí
q
uidos
p
ara evita
r
descar
g
as eléctricas
8. Extreme la
p
recauciónsivaausa
r
el a
p
arato cerca de niños o
p
ersonas enfermas.
9. Evite el contacto con las
p
iezas en movimiento.
10. Manten
g
a las manos
y
utensilios ale
j
ados del reci
p
iente
mientras está en funcionamiento
p
ara evita
r
lesiones
g
raves o
dañar la
b
atidora. Puede usa
r
una es
p
átula cuando la
b
atidora no
esté en funcionamiento.
11. Esta
b
atidoranoestádiseñada
p
ara
p
ica
r
hielo o sustancias
duras
y
secas, esto
p
odría desafilar las cuchillas.
12. Para reducir el ries
g
odelesiones,nuncacolo
q
ue las cuchillas
en la
b
ase sin habe
r
instalado el reci
p
iente en su sitio.
14. El uso de accesorios no recomendados
p
or el fabricante
p
odría
causa
r
lesiones.
ES

15.
N
o utilice el a
p
arato
p
ara un uso diferente del
q
ue fue
diseñado.
16. Este a
p
arato no debe ser utilizado
p
or
p
ersonas con
ca
p
acidades físicas, sensoriales o mentales reducidas, o
q
ue
carezcan de ex
p
eriencia o conocimiento sobre el mane
j
odeestos
dis
p
ositivos, a menos
q
ue estén
b
a
j
osu
p
ervisión de una
p
ersona
res
p
onsable.
17. Ase
g
úrese de
q
ue los niños no
j
ue
g
uen con el a
p
arato.
18.
N
ouseela
p
arato al aire libre.
19. Conserve estas instrucciones.
20. Un uso indebido
p
od
r
ía ocasiona
r
lesiones
21. Mani
p
ule las cuchillas con mucho cuidado cuando vacíe el
reci
p
iente
y
durante su lim
p
ieza.
22.A
p
a
g
ue el a
p
arato
y
desconéctelo de la corriente eléctrica antes
de cambiar los accesorios o acercarse a las
p
artes en movimiento.
CONSERVE ESTAS INSTRUCCIONES
SOLO PAR
A
USO DOM
É
STICO

Conozca su batidora (Puede triturar frutas y verduras)
Cómo usar la batidora
Antes del primer uso, lave la batidora como se detalla en la sección de “lavado rápido”.
El tiempo de puesta en marcha sin alimentos no puede superar los 15 segundos.
Importante: Las cuchillas están muy afiladas. Manipúlelas con cuidado. Asegúrese de que la
batidora está desenchufada antes de montar o desmontar las piezas.
Instrucciones de uso de la batidora
La duración máxima de cada operación no debe ser superior a 30 segundos y deben dejarse 3
minutos de reposo antes del siguiente ciclo.
1. Para instalar el pie batidor desmontable en el cuerpo del motor, gire el batidor en el sentido
contrario de las agujas del reloj hasta que esté bien ajustado. Para desmontarlo, gírelo en la
dirección contraria.
2. Enchufe simplemente la batidora de mano a la corriente.
3. Baje la batidora hacia la comida y mantenga pulsado el botón de velocidad baja para ponerlo
en marcha. Al mismo tiempo, puede seleccionar la velocidad deseada girando el selector de
velocidad, la velocidad será gradualmente mayor cuando gire el selector de velocidad de
izquierda a derecha.
4.También puede poner en marcha el aparato manteniendo pulsado el botón de velocidad alta
(botón turbo) y el aparato comenzará a funcionar manteniendo la velocidad máxima.
En este modo, la velocidad no podrá ajustarse, aunque gire el selector de velocidad.
5. Puede interrumpir la operación dejando de pulsar el botón de velocidad baja o de velocidad
1. Selector de velocidad
2. Botón de baja velocidad
3. Botóndealtavelocidad
4. Bloqueo
5. Pie batidor
6. Vaso
Capacidad máxima 700ml

alta.
Atención:
-Para reducir el riesgo de lesiones, nunca coloque las cuchillas en la base sin haber instalado
antes el recipiente en su sitio.
-Después de triturar la comida, por seguridad, desinstale el cuerpo del motor del pie batidor o
desenchúfelo.
LIMPIEZA Y MANTENIMIENTO
1. Desenchufe el aparato y desencaje el pie batidor.
Nota: No sumerja el pie batidor en agua para proteger la lubricación de los rodamientos
internos.
2. Lave el pie batidor con agua corriente sin usar líquidos abrasivos ni detergentes. Cuando
acabe de lavar el pie batidor, colóquelo de forma vertical para que salga el agua que haya
podido entrar.
3. Lave el vaso, recipiente, varillas y cuchillas en agua templada con jabón. No se recomienda
lavar el recipiente y las varillas en el lavavajillas ya que sus componentes podrían deteriorarse
tras un lavado prolongado en el lavavajillas.
4. Pase un trapo húmedo por el cuerpo del motor. Nunca lo sumerja en agua pues podría
producirse una descarga eléctrica.
5. Seque bien las piezas.
Atención: Las cuchillas están muy afiladas, manipúlelas con cuidado.
6. Vuelva a instalar el pie batidor en la base del motor y colóquelo de forma vertical para
ahorrar espacio
Lavado rápido
Entre las operaciones, coloque el batidor de mano en el vaso, lleno hasta la mitad de agua tibia
y póngalo en marcha durante unos segundos.
Recicla
j
e
GARANTÍA: 2 AÑOS
¡Proteja el medio ambiente!
Respete las regulaciones locales: deposite los aparatos
eléctricos en un centro de reciclaje apropiado.

WAŻ
N
EZASAD
Y
BEZPIECZE
Ń
STWA
Zanim uż
yj
esz urządzenie należ
y
p
rzecz
y
taći
p
ostę
p
owaćz
g
odnie
z
p
oniższ
y
mi
p
unktami:
1. Przecz
y
ta
j
całą instrukc
j
ę.
2. Prze
d
uż
y
ciem u
p
ewni
j
sięcz
y
g
niazdko zasila
j
ące nie ma
żadn
y
ch uszkodzeń.
3.
N
ie uż
y
waćurządzenia które ma uszkodzon
y
p
rzewód, wt
y
czkę,
lub zostało
uszkodzone
p
o
p
rzez u
p
adek. W takich
p
rz
yp
adkach należ
y
oddać
urządzenie do na
j
bliższe
g
oautor
y
zowane
g
oserwisuwcelu
na
p
raw
y
.
4. Jeżeli
p
rzewó
d
j
est uszkodzon
y
, musi on zostaćw
y
mienion
y
p
rzez
p
roducenta lub autor
y
zowane
g
o
p
rzedstawiciela, ab
y
za
p
obiec niebez
p
ieczeństwu.
5. Gd
y
urządzenie
j
est nieuż
y
wane, w
yj
mowane części, wkładane
części lub cz
y
szczone należ
y
j
eod
p
iąć od
pr
ądu.
6.
N
ie
p
ozwolić
by
p
rzewó
d
zasilania leżałna kancie stołulub
g
orące
j
p
owierzchni.
7.
N
ie zanurzaćwwodzie
g
órne
j
części
b
lendera,
p
onieważmoże
s
p
owodowaćto
p
orażenie
p
rądem.
8.
N
ależ
y
zachowaćostrożność
j
eżeli urządzenie
j
est uż
y
wane w
p
obliżu dzieci lub osó
b
zniedołężniał
y
ch.
9. Unikaćkontaktu z ruchom
y
mi częściami.
10.
N
ależ
y
trz
y
mać
r
ęce i
p
rz
y
rząd
y
zdalao
d
p
o
j
emnika
p
odczas
miksowania ab
y
uniknąć zranienia lub uszkodzenia urządzenia.
Skrobak może
by
ćuż
y
wan
y
t
y
lko
g
d
y
urządzenie
j
est w
y
łączone.
11. Urządzenie nie
j
est
p
rzeznaczone do rozdrabniania lodu lub
miksowania tward
y
ch i such
y
ch substanc
j
i, z
p
owodu możliwości
uszkodzenia ostrz
y
.
12. Ab
y
zniwelowaćr
y
z
y
ko zranienia, nie zostawiaćostrz
y
na
wierzchu
b
ez ówczesne
g
o
p
o
p
rawne
g
ozamontowaniamis
y
.
13. U
p
ewni
j
się,żeosłona ostrz
y
j
est zablokowana w swoim
mie
j
scu,
p
rze
d
uż
y
ciem.
PL

14. Uż
y
wanie akcesoriów nie
p
olecan
y
ch
p
rzez
p
roducenta może
s
p
owodowaćzranienia.
15.
N
ie uż
y
waćurządzenia do celów inn
y
ch niż
j
e
g
o
p
rzeznaczenie.
16. Urządzenie nie może
by
ćuż
y
wane
p
rzez osob
y
z
o
g
raniczeniem um
y
słow
y
m, mentaln
y
m lub fiz
y
czn
y
m
(
włącznie z
dziećmi
)
lub
b
ez doświadczenia, ch
y
ba, że
b
ę
d
ąkorz
y
stać
p
o
d
cz
yj
ąś o
p
iekąlub instrukc
j
ązostanie im w
yj
aśniona w s
p
osó
b
zrozumiał
y
.
17. Dzieci
p
owinn
y
by
ć
p
ilnowane, ab
y
u
p
ewnićsię,żenie
b
awią
sięurządzeniem.
18.
N
ie uż
y
waćna zewnątrz
b
ud
y
nku.
19. Zachowaćinstrukc
j
ę.
20.
N
aduż
y
wanie urządzenia możes
p
owodowaćzranienia.
21.
N
ależ
y
p
rz
y
łoż
y
ćszcze
g
ólnąuwa
g
ędo w
y
cią
g
ania ostrz
y
,
o
p
różniania
p
o
j
emnika i cz
y
szczenia.
22.
N
ależ
y
w
y
łącz
y
ćurządzenie i odłącz
y
ćo
d
p
rądu
p
rze
d
zmianą
o
p
rz
y
rządowania
ZACHOWA
Ć
INSTRUKCJ
Ę
WYŁĄCZNIE DO UŻYTKU DOMOWEGO

Poznaj swój blender (idealne do mieszania warzyw i owoców)
Używanie blendera
Przed pierwszym użyciem należyumyćblender zgodnie z rozdziałem „szybkie czyszczenie”.
Czas używania blendera bez zawartości nie może przekroczyć15s.
Ważne: Ostrza sąbardzo ostre, dotykaćostrożnie. Upewnićsię,że blender jest odłączony od
prądu przed demontowaniem części.
Instrukcja
Czas pracy nie może przekroczyć30 sekund po czym musi nastąpić3 minutowa przerwa.
1. Aby zamontowaćnasadkęz jednostkąsterującą,przekręć trzonek przeciwnie do ruchu
wskazówek zegara ażsięzaciśnie. Aby zdemontowaćnależyzrobićczynności odwrotnie.
2. Podłącz blender do zasilania.
3. Obniżblender do jedzenia. Następnie naciśnij i przytrzymaj przycisk niskiej prędkości aby
zacząć miksować. W tym samym czasie możesz wybraćustawienie prędkości na pokrętle,
prędkość zacznie sięzwiększaćgdy pokrętłobędzie przekręcane od lewej do prawej.
4. Można równieżzacząć od wciśnięcia i przytrzymania przycisku szybkiej prędkości (turbo),
urządzenie zacznie miksowaćzmaksymalnąprędkością.Prędkość nie zmieni siędopóki nie
zostanie zmieniona na pokrętle.
5. Aby zatrzymaćblender należypuścićprzycisk niskiej lub wysokiej prędkości.
1. Pokrętłoprędkości
2. Przycisk spowalniający
3. Przycisk przyśpieszający
4. Zapięcie
5. Nasadka
6. Pojemnik
Maksymalna pojemność 700ml

Uwaga:
- Aby zniwelowaćryzyko zranienia, nie zostawiaćostrzy na wierzchu bez ówczesnego
poprawnego zamontowania misy.
-Upewnijsię,żeosłona ostrzy jest zablokowana w swoim miejscu, przed użyciem.
- Po blendowaniu, dla bezpieczeństwa, powinno najpierw zdemontowaćjednostkęsterującąod
pokrywy nasadki. Nie demontowaćpokrywy jeżeli jednostka sterująca jest na swoim miejscu.
Czyszczenie i konserwacja
1. Odłącz urządzenie i odłącz nasadkę.
Notatka: Nie zanurzaćnasadki w wodzie, ponieważmożna zmyćwewnętrzny smar.
2. Nasadki można myćtylko pod bieżącąwodą,bezużywania środków czyszczących lub
detergentów. Po skończeniu czyszczenia położyćnasadkęna stojaku aby woda mogła spokojnie
zniegospłynąć.
3. Misę, trzepaczkę, pokrywkęiostrzamyćw mydlanej wodzie. Misa i trzepaczka nie powinny
byćmyte w zmywarce.
4. Wytrzećjednostkęsterującąwilgotnąściereczką. Nigdy nie moczyćwwodziewcelu
czyszczenia z powodu możliwości porażenia prądem.
5. Wytrzećdokładnie.
Uwaga: Ostrza sąostre, obchodzićsięznimiostrożnie.
6. Ponownie zmontowaćblender w celu oszczędności miejsca.
Szybkie czyszczenie
Między zadaniami czyszczącymi, przytrzymaćblender szklance zapełnionej do połowy wodąi
włączyćna kilka sekund.
Prz
yj
azne dla środowiska usuwanie urządzeń
GWARANCJA: 2 LATA
Możesz pomóc chronićśrodowisko!
Pamiętaj by przestrzegaćlokalnych regulacji:
Elektryczne nie pracujące urządzenia można oddawać
do specjalnych punktów.

IMPORTANTI ISTRUZIONI
Prima di usare l’a
pp
arecchio se
g
uire sem
p
re attentamente le
indicazioni di
b
ase, tra cui le se
g
uenti:
1. Le
gg
ere tutte le istruzioni.
2. Assicurarsi che il volta
gg
io dell’a
pp
arecchio corris
p
onda a
q
uello indicato sulle etichette informative.
3.
N
on utilizzare l’a
pp
arecchio se malfunzionante o se s
p
ina e
cavo di alimentazione risultano danne
gg
iati. Rivol
g
ersi a
d
un
centro assistenza autorizzato al ri
p
aro.
4. Se il cavo di alimentazione risulta danne
gg
iato, deve essere
sostituito dal
p
roduttore o da
p
ersonale tecnico
q
ualificato.
5. Scolle
g
are sem
p
re la
p
resa di alimentazione
q
uando
l’a
pp
arecchio non è in uso o comun
q
ue
p
rima della rimozione
delle com
p
onenti e della
p
ulizia.
6. E’ vietato lasciare incustodito il cavo di alimentazione su tavoli
osu
p
erfici roventi.
7 .E’ vietato immer
g
ere in ac
q
ua la
p
arte su
p
eriore
dell’a
pp
arecchio,
p
erché ciò
p
otrebbe dare ori
g
ineascariche
elettriche.
8. E’ necessaria un’attenta su
p
ervisione
q
uando l’a
pp
arecchio è
utilizzato in
p
resenza di
b
ambini o
p
ersone affette da deficit.
9. E’ vietato toccare le com
p
onenti mentre l’a
pp
arecchio è in uso.
10. E’ necessario tenere mani e utensili lontano dal contenitore
durante l’uso dell’a
pp
arecchio
p
e
r
evitare danni a
p
ersone o
all’a
pp
arecchio stesso.
11.E’ vietato utilizzare l’a
pp
arecchio
p
e
r
tritare il
g
hiaccio o
frullare cibi duri e secchi, al fine di non danne
gg
iare le lame.
12. E’ vietare
p
osizionare le lame sulla
b
ase senza ave
r
messo il
b
icchiere in
p
osizione corretta. 13. Assicurarsi che il co
p
ri
valvola sia
b
loccato correttamente
p
rima di utilizzare
l’a
pp
arecchio.
14. L’ uso di com
p
onenti accessorie non consi
g
liate dal
p
roduttore
p
uò
p
rovocare danni a
p
ersone.
IT

15. E’ vietato utilizzare l’a
pp
arecchio
p
e
r
sco
p
idiversida
q
uello
indicato.
16. L’uso dell’a
pp
arecchio non è consentito a
p
ersone
(
inclusi
b
ambini
)
con ridotte ca
p
acità fisiche, sensoriali o mentali,
p
rive di
es
p
erienza e conoscenza, a meno che non siano sotto
p
osti a
su
p
ervisione o siano state istruite all’uso dell’a
pp
arecchio da
p
ersone res
p
onsabili della loro sicurezza.
17. Tenere lontano dalla
p
ortata dei
b
ambini.
18. E’ vietato utilizzare l’a
pp
arecchio all’esterno.
19. Conservare sem
p
re tutte le istruzioni.
20.Tenere la cura del
p
otenziale danno da un uso im
p
ro
p
rio.
21.Carte deve essere
p
resa
q
uando si mani
p
olano le lame ta
g
lienti,
svuotando la ciotola e durante la
p
ulizia.
22. S
p
e
g
nere l'a
pp
arecchio e scolle
g
are l'alimentazione
p
rima di ca
mbiare accessori o accostarsi a
p
arti in movimento.
CONSERVARE LE ISTRUZIONI. SOLO PER USO
CASALINGO

Come usare il tuo Frullatore (Miscela frutta e verdura)
Uso:
Prima del primo utilizzo, pulire il frullatore secondo la sezione "pulizia rapida".
L'unità di funzionamento del tempo senza carico non può superare i 15 secondi.
Importante: le lame sono affilate, maneggiare con cura. Assicurarsi che l’apparecchio sia
scollegato dalla presa di corrente prima di assemblare o rimuovere le sue parti.
Istruzioni:
La durata massima dell'operazione per un tempo inferiore a 30 secondi e il tempo di riposo di 3
minuti devono essere mantenuti in due cicli consecutivi.
1. Per montare l’asta all’unità motore, ruotarla in senso antiorario e stringere bene. Per
rimuoverla basta girare in senso contrario.
2. Collegare l’apparecchio alla presa di corrente.
3. Con l’apparecchio spento, posizionarlo all’interno de bicchiere dove si trova il cibo. Quindi
premere il pulsante “bassa velocità”. Successivamente sarà possibile regolare l'intensità della
velocità desiderata, attraverso il l’apposita manopola.
4. È inoltre possibile avviare l'operazione tenendo premuto il pulsante “alta velocità” (turbo),
l'apparecchio funzionerà sempre a velocità elevata. La velocità non cambierà nemmeno
utilizzando la manopola di regolazione..
5. Per fermare l’apparecchio, rilasciare il tasto.
Attenzione:
- Per ridurre il rischio di lesioni, non posizionare mai la lama di taglio sulla base senza prima
mettere la ciotola in posizione corretta.
1. Manopola velocità
2. Bassa velocità
3. Alta velocità
4. Blocco di sicurezza
5. Asta
6. Bicchiere
Capacità massima 700ml

- Assicurarsi che il coperchio della valvola di chiusura sia bloccato correttamente prima di
utilizzare l'apparecchio.
- Dopo aver tagliato, per sicurezza, smontare l'unità motore dal coperchio, quindi rimuovere il
coperchio del cilindro. Non rimuovere mai il coperchio del cilindro con l'unità motore in
posizione.
PULIZIA E MANUTENZIONE
1. Scollegare l’apparecchio e rimuoverel’astadall’unitàmotore.
Nota: non immergere in acqua l’asta del frullatore perché il lubrificante dei cuscinetti potrebbe
essere lavato via del tutto.
2. Lavare l’asta sotto acqua corrente, non utilizzando detergenti o sostanze abrasive. Dopo il
lavaggio posizionare in posizione verticale al fine di permettere tutta la fuoriuscita d’acqua.
L’asta è una componente lavabile.
3. Lavare il bicchiere, il recipiente, le fruste e le lame in acqua calda saponata. E’ consigliabile
non lavare in lavastoviglie fruste e recipiente perché le componenti in plastica si potrebbero
deteriorare.
4. Pulire l’unità motore con un panno umido. Non immergere mai in acqua, al fine di evitare
scariche elettriche.
5. Lasciar asciugare completamente.
Attenzione: le lame sono estremamente taglienti, maneggiare con cura.
Pulizia rapida
Durante l’uso, lasciare il frullatore nel bicchiere per metà riempito d’acqua e far funzionare per
pochi secondi..
Riciclo
GARANZIA: 2 ANNI
Aiutaci a proteggere l’ambiente!
Rispetta le normative locali: l’apparecchio deve essere
smaltito in luoghi destinati alla gestione e allo smalti
mento di tali rifiuti.

WICHTIGE SICHERHEITSMASSNAHMEN
Vo
r
de
r
Benutzun
g
des Elektro
g
e
r
äts sin
d
fol
g
ende
g
rundle
g
ende
Vorsichtsmaßnahmen z
u
b
eachten:
1. Lesen Sie alle Anweisun
g
en.
2. Vo
r
de
r
Verwendun
g
pr
üfen, ob die S
p
annun
g
de
r
Wandsteckdose mit de
r
auf dem T
yp
enschild an
g
e
g
ebenen
S
p
annun
g
ü
b
ereinstimmt.
3. Betreiben Sie das Gerät nicht mit
b
eschädi
g
tem Kabel oder
Stecke
r
ode
r
wenn das Gerät defekt ist ode
r
in ir
g
endeine
r
Weise
fallen
g
elassen oder
b
eschädi
g
twird.Gerätandienächst
g
ele
g
ene
autorisierte Kundendienststelle zu
r
P
r
üfun
g
,Re
p
aratur ode
r
elektrischen ode
r
mechanischen Einstellun
g
b
rin
g
en.
4. Wenn das
N
etzkabel
b
eschädi
g
t ist, muss es vom Herstelle
r
ode
r
einem autorisierten Kundendienst ode
r
einem
q
ualifizierten
Technike
r
ersetzt werden, um eine Gefährdun
g
zu vermeiden.
5. Ziehen Sie den
N
etzstecke
r
aus de
r
Steckdose, wenn Sie ihn
nicht
b
enutzen,
b
evor Sie Teile anziehen ode
r
abnehmen. Trennen
Sie den Mische
r
imme
r
von de
r
Versor
g
un
g
,wenne
r
unbeaufsichti
g
t
b
leibt und vor dem Zusammenbau, demontieren
ode
r
reini
g
en;
6. Lassen Sie das Kabel nicht ü
b
e
r
die Kante des Tisches ode
r
heißer Oberfläche hän
g
en.
7. Tauchen Sie den oberen Teil des Mixers nicht in Wasse
r
ein, da
dies zu einem elektrischen Schla
g
führen würde.
8. Eine stren
g
eÜ
b
erwachun
g
ist erforderlich, wenn Ihr Ge
r
ät in
de
r
N
ähe von Kindern ode
r
Personen unter
g
ebracht wird.
9. Be
r
ührun
g
mit
b
ewe
g
lichen Teilen vermeiden.
10. Halten Sie Hände un
d
Utensilien aus dem Behälter, womit Sie
das Risiko einer schweren Verletzun
g
von Personen oder einer
Beschädi
g
un
g
des Mixers verrin
g
ern. Ein Schabe
r
kann verwendet
werden, muss aber nu
r
verwendet werden, wenn de
r
Mischer nicht
läuft.
DE

11.Das Gerät kann nicht zum Zerkleinern von Eis oder zum
Mischen von harter und trockener Substanz verwendet werden, da
sonst die Klin
g
eab
g
estum
p
ft werden könnte.
12. Um das Verletzun
g
srisiko zu reduzieren,
p
latzieren Sie das
Schneidmesser niemals auf die Basis, ohne vorhe
r
die Schüssel
richti
g
zu setzen.
13. Achten Sie darauf, dass de
r
Cho
pp
erdeckel vor dem Betäti
g
en
des Ge
r
ätes siche
r
verrie
g
elt ist.
14. Die Verwendun
g
von Zubehör, das vom Herstelle
r
nicht
em
p
fohlen wird, kann Personenverletzun
g
en verursachen.
15. Betreiben Sie das Gerät nicht fü
r
andere als den vor
g
esehenen
Gebrauch.
16. Dieses Ge
r
ät ist nicht fü
r
denGebrauchdurchPersonen
(
einschließlich Kinder
)
mit ein
g
esch
r
änkten kör
p
erlichen,
sensorischen oder
g
eisti
g
en Fähi
g
keiten oder man
g
elnde Erfahrun
g
und Kenntnisse
g
edacht, es sei denn, sie wurden ü
b
erwacht ode
r
instruiert ü
b
e
r
die Verwendun
g
de
r
Ge
r
äte von eine
r
Person, die
fü
r
ihre Sicherheit verantwortlich ist.
17. Kinde
r
sollten
b
eaufsichti
g
t werden, um sicherzustellen, dass
sie nicht mit dem Gerät s
p
ielen.
18.
N
icht im Freien
b
enutzen.
19.Sichern Sie diese Anleitun
g
.
20.Achten Sie auf mö
g
liche Verletzun
g
en durch Missbrauch.
21.Achtsamkeit wir
d
b
ei de
r
Handhabun
g
de
r
scharfen
Schneidmesser, Entleeren de
r
Schüssel und währen
d
de
r
Reini
g
un
g
notwendi
g
.
22.Schalten Sie das Gerät aus un
d
trennen Sie es von de
r
Versor
g
un
g
,
b
evor Sie das Zubehö
r
wechseln ode
r
sich nähernde
Teile
b
ewe
g
en.
HEBEN SIE DIESE BEDIENUNGSANLEITUNG GUT AUF

NUR IM HAUSHALT VERWENDEN
Kennen Sie Ihren Mixer (zum Mischen von Gemüse und Obst geeignet)
Gebrauch des Mixer
Vor dem ersten Gebrauch den Mixer nach dem Abschnitt "Schnellreinigung" reinigen.
Die Zeitlaufeinheit ohne Last darf 15s nicht überschreiten.
Wichtig: Klingen sind sehr scharf, sorgfältig umgehen. Vergewissern Sie sich, dass der
Handmixer vor dem Zusammenbau oder dem Entfernen von Anbauteilen aus der Steckdose
gezogen wurde.
Anleitung für Mischer
Maximale Betriebsdauer pro Einsatz von weniger als 30 Sekunden und 3 Minuten Ruhezeit
muss in zwei aufeinanderfolgenden Zyklen eingehalten werden.
1. Um die abnehmbare Welle mit der Motoreinheit zusammenzubauen, drehen Sie die Welle
gegen den Uhrzeigersinn, bis sie fest angezogen ist. Um es zu zerlegen, drehen Sie sich einfach
in die umgekehrte Richtung.
2. Stecken Sie den Handmixer einfach in die Steckdose.
3. Senken Sie den Handmixer in die Nahrung. Drücken Sie dann die Taste low speed, um den
Betrieb zu starten. Gleichzeitig können Sie die gewünschte Geschwindigkeitseinstellung
wählen, indem Sie den Drehzahlregler wählen, die Geschwindigkeit wird allmählich höher,
wenn Sie den Drehzahlregler von links nach rechts wählen.
4. Sie können auch den Betrieb durch Drücken und Halten der Hochgeschwindigkeitstaste
(Turbo-Taste) starten, das Gerät arbeitet mit der höchsten Geschwindigkeit die ganze Zeit. Die
Geschwindigkeit ändert sich nicht, auch wenn Sie das Drehzahlregler wählen.
1. Drehknopf
2. Taste mit niedrigerer Geschwindigkeit
3. Hochgeschwindigkeits-Taste
4. Sperren
5. Stab mischen
6. Becher Die maximale Kapazität
beträgt 700ml
This manual suits for next models
2
Table of contents
Languages:
Other AIGOSTAR Blender manuals

AIGOSTAR
AIGOSTAR 8433325500214 User manual

AIGOSTAR
AIGOSTAR 30IWX User manual

AIGOSTAR
AIGOSTAR 30IWW User manual

AIGOSTAR
AIGOSTAR 02075BL08 350W-G User manual

AIGOSTAR
AIGOSTAR 30JDB User manual

AIGOSTAR
AIGOSTAR 8433325500238 User manual

AIGOSTAR
AIGOSTAR 8433325500276 User manual

AIGOSTAR
AIGOSTAR 8433325500191 User manual

AIGOSTAR
AIGOSTAR 300100KYF User manual

AIGOSTAR
AIGOSTAR 8433325502102 User manual