AIGOSTAR 8433325503154 User manual

INSTRUCTION MANUAL
MODEL: 8433325503154
HAND BLENDER SET
AIGOTECH ONSYNK, S.L.
C/LOS TRANSPORTISTAS N.43 NUMANCIA
DE LA SAGRA 45230, TOLEDO, ESPAÑA
C.I.F.: B-85712198
HTTP://WWW.AIGOSTAR.COM
MADE IN P.R.C
The plastic material in contact with the food is AS
(acrylonitrile-styrene copolymer), 100% BPA free

CONTENT
GB
ES
PL
IT
01-08
09-16
17-24
15-32
DE
NL
FR
23-40
41-48
49-56
PT 57-64

GB GB
Important safeguards
Package contents
1.This appliance is intended for household use only.
2.Read all instructions before use, and see all diagrams, and
keep these instructions for further reference.
3.Check if the voltage indicated on the base of the appliance
corresponds to the local mains voltage before you connect the
appliance.
4.Don’t let cord hang over edge of table or counter, do not let
contact hot surface, including the stove.
5.Never use accessories or parts made by other manufactures
not recommended or sold; may cause a risk of injury to
persons.
6.Do not use the appliance if its power cord, plug, blade device
or other part is damaged. In the event of any damaged to the
power cord or blade device of this product, it can only be
replaced with a special one for use with this product or
AIGOSTAR special servicing agency.
7.The appliance is not intended for use by young children or
infirm persons without supervision.
8.Make sure the motor and blade have completely stopped
before disassembling and cleaning.
9.Avoid touching the sharp blades, especially when the
appliance is plugged in.
10.Don’t immerse the motor base, plug or cord in water or any
other liquid.
11.Switch off the appliance and disconnect it from the mains
before you change accessories or approach parts that move
during use.
12.Do not exceed the quantities and appliances for more than
60 seconds at a time. If more processing time is needed, restart
the appliance after a short break. Do not process more than
three batches without interruption. Let the appliance cool
down to room temperature before you continue processing.
13.If the blades get stuck, unplug the appliance before you
remove the ingredients that block the blades.
14.This appliance can be used by children aged from 8 years
and above and persons with reduced physical, sensory or
mental capabilities or lack of experience and knowledge if
they have been given supervision or instruction concerning
use of the appliance in a safe way and understand the
hazards involved.
15.Children shall not play with the appliance. Cleaning and
user maintenance shall not be made by children without
supervision.
16.If the supply cord is damaged, it must be replaced by the
manufacturer, its service agent or similarly qualified persons
in order to avoid a hazard.
17.Always disconnect the appliance from the supply if it is
left unattended and before assembling, disassembling or
cleaning.
18.Do not allow children to use the blender without
supervision.
1. Hand Blender (1PC)
2. Instruction manual (1PC)
1 2

GB GB
1. Wash the parts that will come into contact with food before
using the appliance (see chapter cleaning).
2. The temperature for the food to be mixed shall not exceed
60℃, the volume of food to be processed shall not exceed
the maximum mark level on the blender jar. Assemble the
appliance properly before plugging it into the wall socket.
The hand blender is intended for:
a. Blender fluids, e.g. daily products, sauces, fruit juices,
soups, mixed drinks and shakes.
b. Mixing soft ingredient, e.g. pancake batter or mayonnaise.
c. Pureeing cooked ingredient, e.g. for making baby food.
1. Put the ingredients which is not big than 2 centimeter in
the beaker. (Fig 1)
2. Attach the blender bar to the motor unit. (Fig 2)
3. Put the blender bar in the beaker. (Fig 3)
4. Plug the power cord into wall socket, then press the
or “TURBO” button.
5. Blend the ingredients by moving the appliance slowly up
and down and in circles. (Fig 4)
6. After you have done your work, loosen the button,
unplug the appliance, and pour out the drink.
General Description
Installation and Maintenance
1. Speed Selector 2. Power Button 3.Turbo Button
4. Motor Unit 5. Connecting Hook 6. Metal Mixing Foot
7. Whisk Holder 8. Whisk 9. Beaker
10. Blade Base 11.Blade 12. Chopper Bowl
Technical Data
Instruction for blender
Product name
model voltage frequency Power Capacity
handblender 8433325503154 220-240V~ 50/60Hz 800w 700ml
3 4

GB GB
1. Put the chopper blade in the chopper bowl. (Fig 1)
2. Put the ingredients in chopper bowl, which is not big than 2
centimeter. (Fig 2)
3. Put the chopper onto the chopper bowl. (Fig 3)
If the ingredients stick to the wall of the chopper bowl,
loosen them by adding liquid or using a spatula.
Always let the appliance cool down after chopping meat.
4. Plug the power cord into the wall socket, then press the
“TURBO” button. (Fig 4)
5. After you have done your work, loosen the button,
unplug the appliance, and pour out the meat.
Tips for use
The chopper is intended for chopping ingredients such as meat,
onions, hard cheese boiled eggs, garlics, herbs, dry bread etc.
Chopper
When mixing 350g powdered sugar + 250g honey the
power will be 760W.
Blending quanes and preparaon mes
Ingredients
Blending quanty
Time
Fruits & vegetables 100-200g 60 sec.
Baby food, soups & sauces 100-400ml 60 sec.
Baers 100-500ml 60 sec.
Shakes & mixed drinks 100-500ml 60 sec.
Whisking quanes and preparaon mes
Ingredients Blending quanty Time
Cream 250ml 70-90 sec.
Egg whites 4 eggs 120 sec.
Chopping quanes and preparaon mes
Ingredients Blending quanty Time
Onions & eggs 200g 10 sec.
Meat & fish 250g(MAX) 15 sec.
Herbs 50g 10 sec.
Cheese 100g(MAX) 30 sec.
Whisk
1. Connect the whisk to the whisk base. (Fig 1)
2. Connect the whisk base to the motor unit. (Fig 2)
3. Put the ingredients in the beaker. (Fig 3)
4. Put the whisk in the beaker. (Fig 4)
5. Plug the power cord into the wall socket, then press the
button. Then press the “TURBO” button after 1 minute.
6. After you have done your work, loosen the button, unplug the
appliance, and pour out the drink.
5 6

GB GB
The appliance is easier to clean if you do so immediately after
use.
1.Unplug the appliance, detach the blender jar, whisk, chopper
blade base.
2.Clean these parts in warm water with some washing-up liquid
and rinse them under the tap.
3.Clean the base with a damp cloth, never immerse the motor
base in water not rinse it under the tap caring.
4.Avoid touching the sharp blades, especially when the
appliance is plugged in.
5.Don’t immerse the motor unit and whisk base in water or any
other liquid.
6.If part is stained after blending the carrot, it can be easier to
remove stain by adding a few drops of edible oil.
Updates to hardware components are made regularly.
Therefore some of the instruction, specifications and pictures in
this documentation may differ slightly from your particular
situation. All items described in this guide for illustration
purposes only and may not apply to particular situation. No
legal right or entitlements may be obtained from the
description made in manual.
Cleaning
Disclaimer
Cleaning and Caring
1.Please store the appliance on dry environment.
2.Never put the jar, or any other parts, in a microwave oven.
Caring
1. If, during use, the product is subjected to such abnormality as
noise, smell, smog and increased temperature, disconnect the
power supply and stop the use.
2. In case the appliance fails to work, please check whether the
power supply is properly connected, whether the fittings are in
place.
3. If the appliance can not still function well after the above
inspections, consult the designated servicing agency.
Trouble shooting
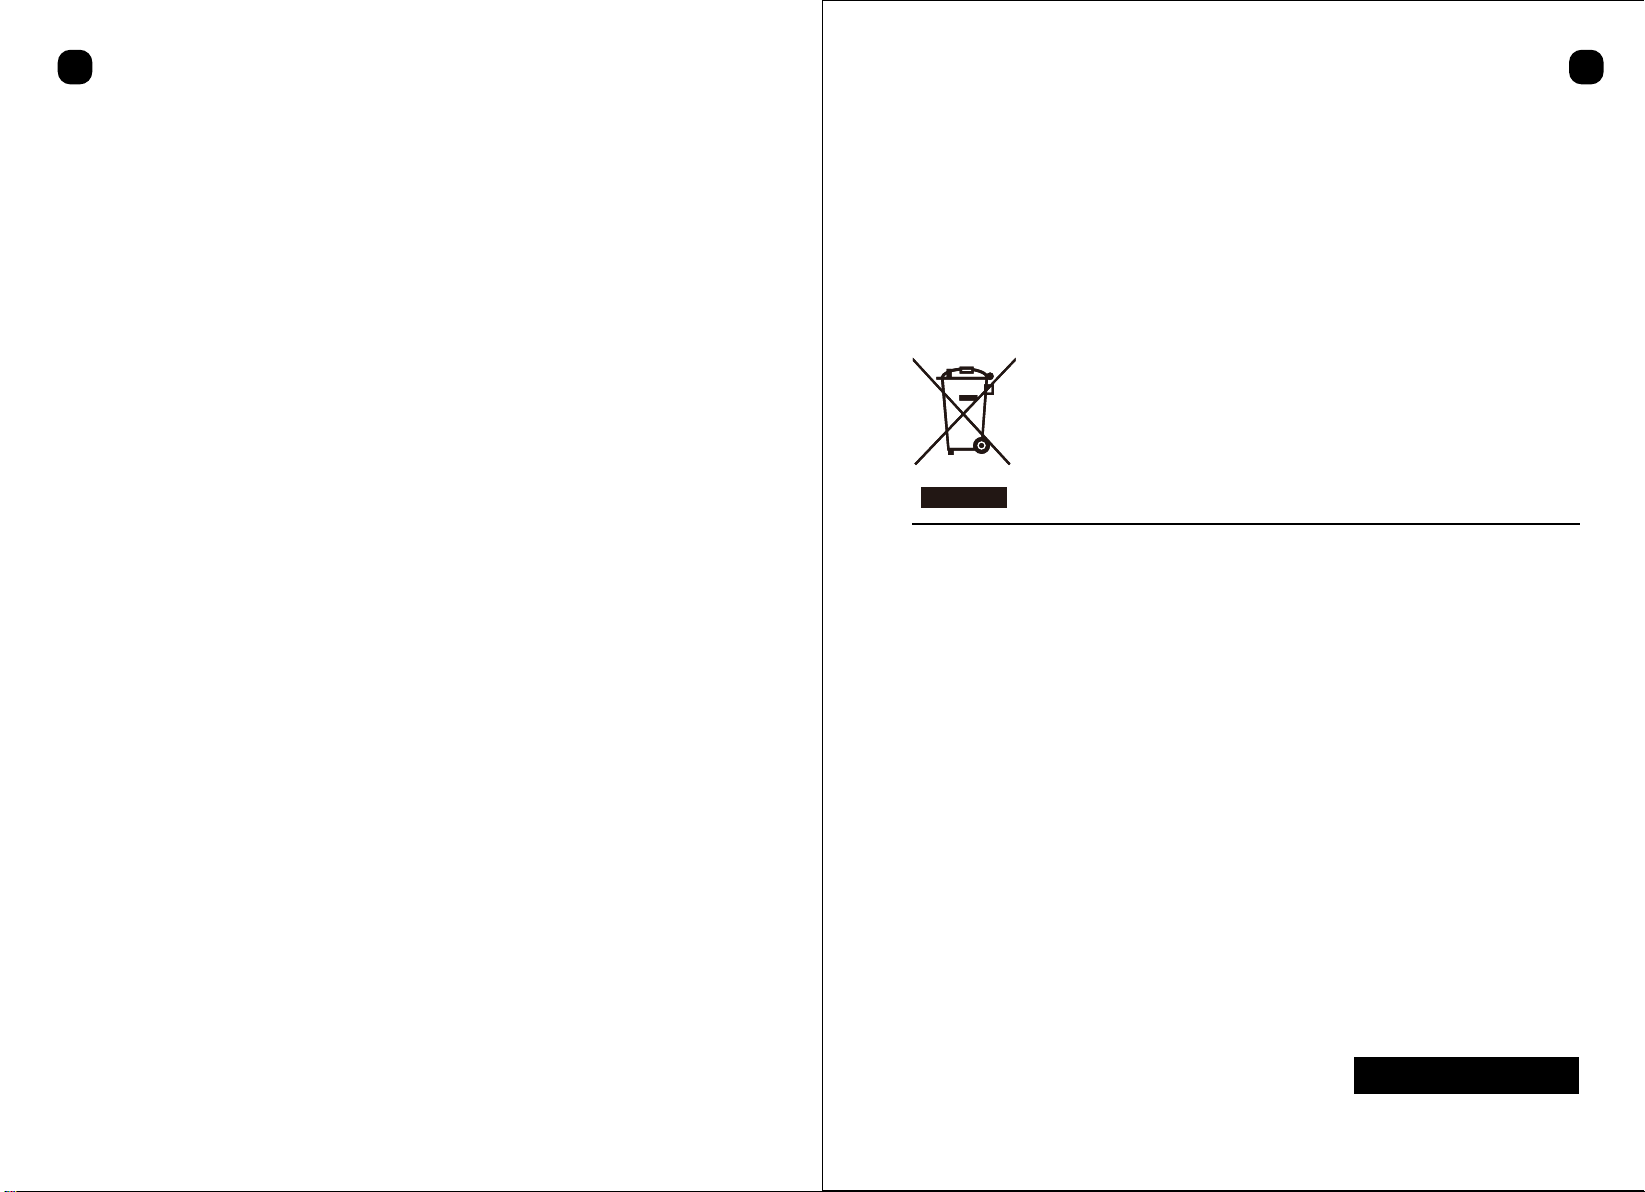
This appliance is labeled in compliance with European directive
2002/96/EC for waste electrical and electronic equipment
(WEEE). By ensuring that this appliance is disposed of correctly,
you will help prevent any possible damage to be the
environment and to human health, which might otherwise be
caused if it were disposed of in the wrong way.
The symbol on the product indicates that it may not be treated
as normal household waste. It should be taken to a collection
point for the recycling of electrical and electronic goods. This
appliance requires specialist waste disposal. For further
information regarding the treatment, recovery and recycling of
this product please contact your local council, your household
waste disposal service, or the shop where you purchased it.
DISPOSAL: Do not dispose this product as
unsorted municipal waste. Collection of such
waste separately for special treatment is
necessary.
WARRANTY: 2 YEARS
7 8

ES ES
Instrucciones de seguridad
Contenidos
1.Este aparato es exclusivamente para uso doméstico.
2.Lea todas las instrucciones y observe las ilustraciones, y
consérvelas para futuras consultas.
3.Antes de usar el aparato, asegúrese de que el voltaje del
enchufe corresponde con el que aparece en la etiqueta.
4.No deje que el cable quede colgando por el borde de la mesa
o toque superficies calientes.
5.El uso de accesorios no recomendados por el fabricante
podría causar lesiones.
6.No ponga en marcha el aparato si el cable está dañado o no
funciona correctamente, debe ser reparado por AIGOSTAR, o
un agente autorizado para evitar riesgos.
7.Este aparato no deben utilizarlo los niños ni las personas
enfermas sin estar bajo supervisión.
8.Asegúrese de que el motor y las cuchillas han parado
completamente antes de desmontar y limpiar el aparato.
9.No toque las cuchillas afiladas, especialmente cuando el
aparato está enchufado.
10.No sumerja el motor, el enchufe ni el cable en agua u otros
líquidos.
11.Apague el aparato y desenchúfelo de la corriente eléctrica
antes de cambiar los accesorios o acercarse a las piezas que
están en movimiento durante el proceso.
12.No sobrepase las cantidades ni ponga en marcha el aparato
durante más de 60 segundos cada vez. Si necesita más tiempo,
vuelva a poner en marcha el aparato tras una breve pausa. No
haga más de tres tandas sin pausa. Deje que el aparato se
enfríe hasta alcanzar la temperatura ambiente antes de
continuar el proceso.
13.Si las cuchillas se atascan, desenchufe el aparato antes de
retirar los ingredientes que bloquean las cuchillas.
14.Este aparato no debe ser utilizado por niños menores de 8
años ni por personas con capacidades físicas, sensoriales o
mentales reducidas, o que carezcan de experiencia o
conocimiento sobre el manejo de estos dispositivos, a menos
que estén bajo supervisión de una persona responsable y
sean conscientes de los posibles riesgos.
15.No deje que los niños jueguen con este aparato. Las
tareas de limpieza y mantenimiento no deben llevarse a cabo
por niños sin supervisión.
16.Si el cable está dañado, debe ser reparado por el
fabricante, o un agente autorizado para evitar riesgos.
17.Desconecte siempre el aparato de la corriente eléctrica si
no va a usarlo y antes de montarlo, desmontarlo o lavarlo.
18.No deje que los niños usen la batidora sin supervisión.
1. Batidora de mano (1PC)
2. Manual de instrucciones (1PC)
9 10

1. Lave las partes que están en contacto con la comida antes
de comenzar a usar el aparato (vea el apartado de limpieza).
2. La temperatura de los alimentos que se van a mezclar no
debe exceder los 60°C, y el volumen de los mismos no debe
sobrepasar la marca de nivel máximo marcada en el vaso de
la batidora. Instale bien todos los accesorios antes de
enchufar el aparato a la corriente eléctrica.
La batidora está diseñada para:
a. Mezclar líquidos como productos lácteos, salsas, zumos de
fruta, sopas, bebidas y batidos.
b. Mezclar ingredientes suaves como la masa para tortitas o
la mayonesa.
c. Hacer purés de ingredientes cocinados como los potitos
para bebés.
1. Introduzca los ingredientes en trozos que no superen los
2 centímetros en el vaso. (Fig 1)
2. Conecte la base batidora al motor. (Fig 2)
3. Introduzca la batidora en el vaso. (Fig 3)
4. Enchufe el aparato y pulse el botón de y después
pulse el botón de “TURBO”.
5. Mezcle los ingredientes moviendo la batidora de arriba a
abajo y en círculos. (Fig 4)
6. Cuando haya terminado, suelte el botón, desenchufe el
aparato y vierta el contenido.
Descripción de las partes
Instalación y mantenimiento
1. Regulador de velocidad 2. Botón de encendido 3.Botón Turbo
4. Motor 5. Gancho conector 6. Pie batidor de metal
7. Soporte de varillas 8. Varillas 9. Vaso
10. Tapa picadora 11. Cuchilla 12. Recipiente de la picadora
Especificaciones técnicas
Batidora de mano
ES ES
Nombre del
producto
Modelo Tensión Frecuencia Potencia Capacidad
Badora de
mano
8433325503154 220-240V~ 50/60Hz 800w 700ml
11 12

1. Coloque la cuchilla en el recipiente de la picadora. (Fig 1)
2. Introduzca los alimentos, en trozos que no superen los 2
centímetros. (Fig 2)
3. Acople la tapa a la picadora y asegúrela al recipiente. (Fig 3)
Si los ingredientes se adhieren a las paredes de la picadora,
añada un poco de agua o utilice una espátula para soltarlos.
Deje que se enfríe el aparato después de picar carne.
4. Enchufe el aparato y pulse el botón de “TURBO”. (Fig 4)
5. Cuando haya terminado, suelte el botón, desenchufe el
aparato y saque la carne picada.
Consejos útiles
La picadora está diseñada para triturar alimentos como la carne,
cebolla, queso, huevo cocido, ajo, hierbas, pan, etc.
1. Conecte las varillas a la base batidora. (Fig 1)
2. Conecte la base batidora al motor. (Fig 2)
3. Introduzca los ingredientes en el vaso. (Fig 3)
4. Introduzca la batidora en el vaso. (Fig 4)
5. Enchufe el aparato y pulse el botón de . Seguidamente
pulse el botón de “TURBO” durante 1 minuto.
6. Cuando haya terminado, suelte el botón, desenchufe el
aparato y vierta el contenido.
Picadora
Varillas
Cuando mezcle 350 g de azúcar en polvo + 250 g de miel,
la potencia debe ser 760W.
ES ES
Badora: ingredientes, candades y empo de preparación
Ingredientes Candad Tiempo
Frutas & verduras 100-200g 60 seg.
Comida de bebés, sopas &
salsas
100-400ml 60 seg.
Masas 100-500ml 60 seg.
Bados & bebidas 100-500ml 60 seg.
Badora de varillas: ingredientes, candades y empo de preparación
Ingredientes Candad Tiempo
Crema 250ml 70-90 seg.
Claras de huevo 4 huevos 120 seg.
Picadora: ingredientes, candades y empo de preparación
Ingredientes Candad Tiempo
Cebollas & huevos 200g 10 seg.
Carne & pescado 250g(MAX) 15 seg.
Hierbas 50g 10 seg.
Queso 100g(MAX) 30 seg.
13 14

Resulta más sencillo lavar el aparato inmediatamente tras su
uso.
1.Desenchufe el aparato, separe el vaso, la batidora de varillas
y la base picadora.
2.Lave los accesorios con agua caliente y jabón, y aclárelos con
agua.
3.Lave la base con un trapo húmedo, nunca sumerja la base
del motor en agua, ni la aclare bajo el grifo.
4.No toque las cuchillas, especialmente cuando el aparato está
enchufado.
5.No sumerja el motor ni la base de la batidora de varillas en
agua u otros líquidos.
6.Las manchas producidas tras batir alimentos de coloración
fuerte se retiran con mayor facilidad añadiendo unas gotas de
aceite de cocina.
El producto está sujeto a actualizaciones regulares. Por lo
tanto, algunas secciones de las instrucciones, especificaciones
e ilustraciones de este manual pueden diferir ligeramente de
su situación particular. Todo lo descrito en esta guía debe
utilizarse como referencia, y puede no ser aplicable a su
situación particular. Las descripciones de este manual no le
otorgan en ningún caso derechos legales.
Limpieza
Nota legal
Limpieza y cuidado
1.Almacene el aparato en un lugar seco.
2.Nunca meta el vaso ni ninguna otra parte en el microondas.
Cuidado
1. Si durante el uso, observa alguna anomalía como ruidos,
olores, humo o una temperatura elevada, desenchufe el
aparato de la corriente eléctrica y deje de usarlo.
2. Si la batidora no funciona, compruebe que esté bien
enchufada y que los accesorios estén bien ajustados.
3. Si la batidora sigue sin funcionar tras realizar las
comprobaciones anteriores, consulte con el servicio técnico.
Resolución de problemas
Este producto cumple con las Directivas de la Unión Europea
(2002/96/CE), sobre los residuos de aparatos eléctricos y
electrónicos
(RAEE). Todos los equipos eléctricos o electrónicos marcados
con este símbolo deben ser recogidos por separado de los
residuos domésticos no clasificados.
Al asegurarse de depositar el aparato en un lugar autorizado,
estará contribuyendo a proteger el medio ambiente y la salud
humana de posibles daños que podrían ocasionarse en el caso
contrario.
Este símbolo indica que el producto no debe tirarse a la basura
doméstica. Este aparato necesita ser depositado en un centro
especializado. Para más información sobre el tratamiento,
recuperación y reciclaje de este producto, contacte con el
punto limpio de su localidad o con la tienda donde compró el
aparato.
RECICLAJE: Este producto no debe
desecharse junto con los residuos
domésticos. Llévelo a los puntos de recogida
especiales para el reciclaje de equipos
electrónicos.
GARANTÍA: 2 AÑOS
ES ES
15 16

PL PL
WAŻNE ŚRODKI OSTROŻNOŚCI:
Zawartość opakowania
1. Urządzenie nadaje się tylko do użytku w gospodarstwie
domowym.
2. Przeczytaj wszystkie instrukcje przed użyciem, przeczytaj
wszystkie diagramy i zatrzymaj na przyszłość.
3. Sprawdź, czy napięcie podane na podstawie urządzenia
odpowiada napięciu w głównym gniazdku przed podłączeniem
urządzenia.
4. Nie pozwól, aby kabel wisiał na rogu stołu lub blatu, nie
pozwól , aby stykał się z gorącą powierzchnią, włączając
kuchenkę i piecyk.
5. Nigdy nie używaj akcesoriów ani innych elementów
wykonanych przez innego producenta, ponieważ może
wystąpić ryzyko okaleczenia ludzi.
6. Nie używaj urządzenia jeżeli jego przewód, wtyczka, ostrze
lub inna część jest uszkodzona. W przypadku jakiegokolwiek
uszkodzenia przewodu zasilania lub ostrza tego produktu,
może on zostać zastąpiony wyłącznie specjalną częścią od
producenta lub specjalny serwis naprawczy AIGOSTAR.
7. Urządzenie nie jest przeznaczone do użytku przez dzieci lub
osoby niedołężne, bez odpowiedniego nadzoru.
8. Przed rozmontowywaniem i czyszczeniem upewnij się, że
silnik i ostrze całkowicie się zatrzymały.
9. Unikaj dotykania ostrzy, szczególnie, gdy urządzenie jest
podłączone do prądu.
10. Nie zanurzaj silnika urządzenia, wtyczki ani kabla w wodzie
ani żadnym innym płynie.
11. Przed wymianą akcesoriów i części, które się ruszają podczas
użycia, wyłącz urządzenie i odłącz je od źródła prądu.
12. Nie należy przekraczać czasu działania urządzenia na więcej
niż 60sekund za jednym razem. Jeśli potrzeba więcej czasu,
zrestartuj urządzenie po krótkiej przerwie. Nie przekraczaj
działania urządzenia 3 razy z kolei bez dłuższej przerwy.
Pozwól mu się ochłodzić przed następnym użyciem.
13. Jeśli ostrza utknęły, odłącz urządzenie zanim zaczniesz
wyjmować składniki, które utknęły.
14. Urządzenie może być używane przez dzieci od 8 lat i
powyżej oraz osoby ze zmniejszonymi możliwościami
fizycznymi, zmniejszonymi możliwościami sensorycznymi i
psychicznymi lub brakiem doświadczenia, o ile zostali
nadzorowani i poinstruowani, jeśli chodzi o użycie sprzętu w
bezpieczny sposób i rozumieją zagrożenia z nim związane.
15. Dzieci nie powinny bawić się urządzeniem. Czyszczenie i
utrzymywanie nie powinno być dokonywane przez dzieci
bez odpowiedniego nadzoru.
16. Jeśli kabel jest zniszczony, musi być zastąpiony przez
producenta, pracownika obsługi lub zwykłą wykwalifikowaną
osobę, żeby uniknąć niebezpieczeństwa.
17. Zawsze odłączaj mikser od źródła prądu, jeśli jest
pozostawiony nieużywany i przed montażem, demontażem
oraz czyszczeniem.
18. Nie pozwalaj dzieciom używać blendera bez nadzoru.
19. Urządzenie może być używane przez osoby ze
zmniejszonymi możliwościami fizycznymi, zmniejszonymi
możliwościami sensorycznymi i psychicznymi lub brakiem
doświadczenia, o ile zostali nadzorowani i poinstruowani.
1. Blender ręczny (1PC)
2. Instrukcja obsługi (1PC)
17 18

1. Umyj części, które będą miały kontakt z jedzeniem przed
użyciem urządzenia ( Patrz rozdział- CZYSZCZENIE)
2. Temperatura pożywienia, które będzie miksowane nie
powinna przekraczać 60℃, objętość pożywienia nie powinna
przekraczać poziomu max na dzbanku blendera. Dokładnie
zmontuj urządzenie przed podłączeniem do gniazda.
Blender ręczny jest przeznaczony do :
a) Miksowania płynów ,np. produktów białkowych, sosów,
soków, zup, drinków i szejków
b) Miksowania miękkich produktów takich jak masło
orzechowe, majonez
c) Ucierania ugotowanych składników, np. do robienia jedzenia
dla niemowląt
1. Włóż składniki, które nie są większe niż 2cm do
plastikowego kubka .(Fig 1)
2. Połącz część z silnikiem z metalową stopką z ostrzem. (Fig
2)
3. Włóż rączkę z ostrzem do kubka. (Fig 3)
4. Podłącz kabel do gniazdka, następnie naciśnij lub przycisk
„turbo”.
5. Zmiksuj składniki poprzez powolne poruszanie
urządzeniem, do góry i na dół i zataczając okręgi. (Fig 4)
6. Po tym jak już skończysz, poluzuj przycisk, odłącz
urządzenie i wylej napój do innego naczynia.
Ogólny opis
MONTAŻ I UTRZYMANIE
1. Przełącznik prędkości 2. Przycisk zasilania 3. Przycisk turbo
4. Część z silnikiem 5. Zaczep łączący
6. Metalowa stopka do mieszania
7. Uchwyt do ubijania piany 8. Trzepaczka do ubijania piany
9. Plastikowy kubek 10. Podstawa od ostrza
11. Ostrze 12. Miska do mieszania, siekania
DANE TECHNICZNE
Instrukcja
Nazwa
produktu
Model Napięcie Częstotliwość Moc Pojemność
Blender
ręczny
MJ-BH60D1 220-240V~ 50/60Hz 800W 600ml
8433325503154 700ml
PL PL
19 20

1. Włóż ostrze do siekania do miski. (Fig 1)
2. Włóż składniki do miski do siekania, nie powinny być one
większe niż 2 cm. (Fig 2)
3. Włóż siekacz do miski. (Fig 3)
4. Podłącz kabel do gniazdka, następnie naciśnij przycisk
“turbo”. (Fig 4)
Jeśli składniki przykleiły się do miski, wyjmij je dodając trochę
płynu do miski lub używając szpatułki. Zawsze poczekaj, aż
urządzenie się ochłodzi po siekaniu mięsa i innych składników.
ILOŚĆ MIKSOWANYCH SKŁADNIKÓW I CZAS ICH
PRZYGOTOWYWANIA
5. Po tym jak już skończysz, poluzuj przycisk, odłącz
urządzenie i wyjmij posiekane składniki.
WSKAZÓWKI
Siekacz jest przeznaczony do siekania produktów takich jak
mięso, cebule, twardy ser, gotowane jajka, czosnek, zioła, suchy
chleb itp.
1. Połącz trzepaczkę z uchwytem do ubijania piany. (Fig 1)
2. Podłącz trzepaczkę z uchwytem do części z silnikiem. (Fig 2)
3. Włóż składniki do kubka. (Fig 3)
4. Włóż trzepaczkę do kubka. (Fig 4)
5. Podłącz kabel do gniazdka, następnie naciśnij przycisk
.Potem przycisk „turbo” po minucie.
6. Po tym jak już skończysz, poluzuj przycisk, odłącz urządzenie
i wylej napój do innego naczynia.
SIEKACZ
UBIJANIE
Podczas miksowania 350g cukru pudru i 250g
miodu moc będzie wynosiła 760W
SKŁADNIKI ILOŚĆ MIKSOWANYCH
SKŁADNIKÓW
CZAS
Owoce i warzywa
Jedzenie dla niemowlaków,
zupy i sosy
100-200g
100-200g
60sek
60sek
Rzadkie ciasta,masy 100-500ml 60sek
Szejki i drinki 100-500ml 60sek
ILOŚĆ UBIJANYCH SKŁADNIKÓW I CZAS ICH PRZYGOTOWYWANIA
SKŁADNIKI ILOŚĆ CZAS
Śmietana 250ml 70-90sek
Białka jajek 4 jajka 120sek
ILOŚĆ SIEKANYCH SKŁADNIKÓW I CZAS ICH PRZYGOTOWYWANIA
SKŁADNIKI ILOŚĆ CZAS
Cebule i jajka 200g 10sek
Mięso i ryby Max.250g 15sek
Zioła 50g 10sek
Ser Max.100g 10sek
PL PL
21 22

Urządzenie będzie łatwiejsze do czyszczenia, jeśli robisz to od
razu po użyciu.
1. Odłącz urządzenie, odłącz dzban blendera, trzepaczkę i
podstawę ostrza do siekania.
2. Umyj te części w ciepłej wodzie, z niewielką ilością płynu do
mycia naczyń i wypłucz je pod kranem.
3. Umyj podstawę wilgotną ściereczką, nigdy nie zanurzaj
podstawy z silnikiem w wodzie, nie płucz go pod cieknącym
kranem.
4. Unikaj dotykania ostrzy noża, szczególnie, gdy urządzenie
jest podłączone.
5. Nie zanurzaj części z silnikiem ani podstawy do trzepaczki w
wodzie ani żadnym innym płynie.
6. Jeśli jakaś część jest poplamiona po blendowaniu marchewki,
będzie łatwiejsze, żeby usunąć plamę używając trochę oleju
spożywczego.
Aktualizacje danych elementów sprzętu są wykonywane
regularnie. Jednak niektóre instrukcje, specyfikacje i obrazki w
powyższym załączniku mogą się lekko różnić od twojego
konkretnego urządzenia. Wszelkie prawa zastrzeżone.
Czyszczenie
ORZECZENIE
CZYSZCZENIE I DBANIE
1. Przechowuj urządzenie w suchym środowisku.
2. Nigdy nie wkładaj dzbanka, kubka ani innych części do
mikrofalówki.
DBANIE O URZĄDZENIE
1. Jeśli, podczas używania z produktu wydobywają się takie
zaburzenia jak zbyt głośny dźwięk, nieprzyjemny zapach, dym
lub podwyższona temperatura, odłącz urządzenia od źródła
prądu i przestań używać.
2. W przypadku, gdy urządzenie nie chce działać, sprawdź, czy
jest ono poprawnie podłączone do gniazdka, czy wszystkie
części są na swoim miejscu.
3. Jeśli urządzenie dalej nie funkcjonuje poprawnie, skonsultuj
się z wyznaczonym serwisem naprawczym.
ROZWIĄZYWANIE PROBLEMÓW
To urządzenie jest oznakowane zgodnie z europejskim
zarządzeniem 2002/96/EC Pozbywania się Elektrycznego i
Elektronicznego Wyposażenia (WEEE). Upewniając się, że to
urządzenie jest wyrzucane poprawnie, unikniesz
zanieczyszczenia środowiska a także możliwego wyrządzenia
szkód na zdrowiu ludzi, co mogłoby być spowodowane
niepoprawną segregacją tego typu urządzeń. Symbol na
produkcie oznacza, że nie może być ono traktowane jako
normalny odpad komunalny. Powinno być zabrane do
specjalnego punktu zbiorczego z rzeczami elektrycznymi i
elektronicznymi. To urządzenie wymaga odpowiedniej utylizacji.
W celu uzyskania dalszych informacji, jak się z nim obchodzić,
odnawiać i utylizować , skontaktuj się z lokalnymi władzami ,
serwisem utylizacji urządzeń gospodarstwa domowego lub
sklepem, gdzie je zakupiłeś.
SEGREGACJA
Nie wyrzucaj tego produktu do
nieposortowanych odpadów komunalnych.
Segregacja odpadów tego typu jest
obowiązkowa.
GWARANCJA: 2 LATA
PL PL
23 24

IT IT
Garanzie importanti sull’uso.
Package contents
1. Questo apparecchio è destinato esclusivamente all'uso
domestico.
2. Leggere tutte le istruzioni prima dell'uso e vedere tutti i
diagrammi e conservare queste istruzioni per ulteriori
riferimenti.
3. Controllare che la tensione indicata sulla base
dell'apparecchio corrisponda alla tensione di rete locale
prima di collegare l'apparecchio.
4. Non lasciare cadere il cavo sul bordo della tavola o del
contatore, non lasciare sulle superficie calde.
5. Non usare mai accessori o parti fabbricate da altri
produttori non raccomandati, può causare un rischio di
lesioni alle persone.
6. Non utilizzare l'apparecchio se il cavo di alimentazione, la
spina, il dispositivo a lama o altra parte sono danneggiati. In
caso di danni al cavo di alimentazione o alla lama di questo
prodotto, può essere sostituito solo con uno identico presso
l’azienda di fornimento.
7. L'apparecchio non è destinato ad essere utilizzato da
bambini o persone disabili senza vigilanza.
8. Assicurarsi che il motore e la lama siano stati interrotti
prima di smontare e pulire.
9. Evitare di toccare le lame affilate, specialmente quando
l'apparecchio è collegato.
10. Non immergere la base del motore, la spina o il cavo in
acqua o in un altro liquido.
11. Evitare di usare l’apparecchio più di 60 secondi alla volta.
Se è necessario un tempo di lavorazione maggiore, riavviare
l'apparecchio dopo una breve pausa. Non elaborare più di tre
batch senza interruzione. Lasciare raffreddare l'apparecchio
fino a temperatura ambiente prima di procedere
all'elaborazione.
12. Se le lame si bloccano, scollegare l'apparecchio prima di
rimuovere gli ingredienti che bloccano le lame.
13. Questo apparecchio può essere utilizzato da bambini di
età superiore ai 8 anni e persone con ridotte capacità fisiche,
sensoriali o mentali o mancanza di esperienza e conoscenza,
se sono stati sottoposti a supervisione o istruzioni sull'utilizzo
dell'apparecchio in modo sicuro e comprendere i rischi
coinvolti.
14. I bambini non devono giocare con l'apparecchio. La
pulizia e la manutenzione da parte dell'utente non devono
essere effettuati da bambini senza sorveglianza.
15. Se il cavo di alimentazione è danneggiato, deve essere
sostituito dal produttore, da un agente di assistenza o da
personale competente per evitare rischi.
16. Scollegare sempre l'apparecchio dall'alimentazione se è
lasciato incustodito e prima di assemblare, smontare o
pulire.
17. Non permettere ai bambini di utilizzare l’apparecchio
senza sorveglianza.
18. Gli apparecchi possono essere utilizzati da persone con
ridotte capacità fisiche, sensoriali o mentali o mancanza di
esperienza e conoscenza se sono stati assegnati
supervisione o istruzione.
1. Hand Blender (1PC)
2. Instruction manual (1PC)
25 26

1. Lavare le parti che verranno a contatto con prodotti
alimentari prima di usare l'apparecchio (vedi capitolo sulla
pulizia).
2. La temperature del cibo da miscelare non deve superare I
60°C, invece il volume del cibo non deve superare il livello
massimo indicata sul bicchiere del frullatore. Assemblare
l’apparecchio correttamente prima di inserirlo nella presa a
muro.
Il frullatore a immersione è destinato:
a. Prodotti liquidi, per esempio prodotti alimentari come:
Salse, succhi di frutta, zuppe, cocktail e frullati
b. Miscelazione di ingredient morbido, ad esempio pastella o
maionese.
c. Miscelare cibi cotti, ad esempio alimenti per bimbi
1. Introdure nel bicchiere gli ingredient non superiore ai 2
centimentri (Fig 1)
2. Fissare la barra frullatore al gruppo motore(Fig 2)
3. Posizionare il frullatore nel bicchiere(Fig 3)
4. Inserire la spina nella presa a muro, quindi premere il
o il tasto “TURBO”
5. Miscela gli ingredienti spostando l'apparecchio lentamente
su e giù e in cerchio. (Fig 4)
6. Dopo l’uso, allentare il pulsante, scollegare l'apparecchio e
versare la bevanda.
Descrizione generale INSTALLAZIONE E MANUTENZIONE
1. Selettore di velocità 2. Tasto di accensione 3. Pulsante Turbo
4. Motore 5. Gancio di collegament 6. Piedino di miscelazione
7. Supporto di frusta 8. Frusta 9. Bicchiere
10. Base lama 11. Lama 12. Scodella
Technical Data
Istruzioni
IT IT
Nome prodoo
Modello EAN Voltaggio Frequenza Potenza Capacità
handblender 8433325503154 220-240V~ 50/60Hz 800w 700ml
27 28

1. Mettere la lama nella scodella. (Fig. 1)
2. Mettere gli ingredienti nella scodella, prodotti alimentari con
grandezza non superiore ai 2 cm. (Fig. 2)
3. Mettere la base nel motore sulla scodella. (Fig. 3)
4. Inserire la spina nella presa a muro, quindi premere il o il
tasto “TURBO”.
Se gli ingredienti si attaccano alle pareti del bicchiere,
aggiungi del liquido o pulisci con una spatola.
Lasciate sempre raffreddare l'apparecchio dopo la
miscelazione ingredienti.
5. Dopo l’uso, allentare il pulsante, scollegare
l'apparecchio e versare.
CONSIGLI PER L’USO
La lama è destinato a tagliare ingredienti come carne, cipolle,
uova bollite, aglio, erbe, pane secco, ecc.
Lama
Mescolando 350g di zucchero in polvere + 250g di miele,
la potenza sarà di 760W.
IT IT
Tempi e quantà di mescolazione
ingredienquantà tempo
Frua e verdure 100-200g 60 sec.
Alimenper bimbi, zuppe e
salse
100-400ml 60 sec.
Mescolazione generale 100-500ml 60 sec.
Shakes & bevande miste 100-500ml 60 sec.
Tempi e quantà di sbamento
ingredien
quantà
tempo
Creme 250ml 70-90 sec.
Albume 4 eggs 120 sec.
Tempi e quantà per tritare
ingredienquantà tempo
Cipolle e uovo 200g 10 sec.
Carne e pesce 250g(MAX) 15 sec.
Erbe aromache 50g 10 sec.
Formaggio 100g(MAX) 30 sec.
1. Collegare la frusta alla base della frusta. (Fig. 1)
2. Collegare la base di vibrazione all'unità motore. (Fig. 2)
3. Mettete gli ingredienti nel bicchiere. (Fig. 3)
4. Mettere la frusta nel bicchiere. (Figura 4)
5. Inserire la spina nella presa a muro, quindi premere il o il
tasto “TURBO” per 1 minuto
6. Dopo l’uso, allentare il pulsante, scollegare l'apparecchio e
versare.
Frusta
29 30

GARANZIA: 2 ANNI
1.L'apparecchio è più facile da pulire se farlo subito dopo l'uso.
2.Staccare la spina dell’apparecchio e il bicchiere.
3.Pulire queste parti in acqua calda con detergente liquid e
sciacquare sotto il rubinetto
4.Evitare di toccare le lame taglienti, soprattutto quando
l'apparecchio è collegato..
5.Non immergere il gruppo motore e base in acqua o altri
liquidi.
6.Se sull’apparecchio rimane delle macchie dopo l’uso, è
consigliato di usare qualche goccia di olio per rimuovere la
macchia.
Gli aggiornamenti dei componenti hardware vengono effettuati
regolarmente. Di conseguenza alcune delle istruzioni, le
specifiche e le immagini di questa documentazione possono
differire leggermente dalla situazione specifica. Tutti gli
elementi descritti in questa guida a scopo illustrativo e non
possono applicarsi a particolari situazioni. Nessun diritto o
diritti legali possono essere ottenuti dalla descrizione del
manuale.
Pulizia
DIRITTI
PULIZIA E CURA
1.Conservare l'apparecchio in ambienti asciutti.
2.Non mettere mai il bicchiere o qualsiasi altra parte in un
forno a microonde.
IMPORTANTE
1. Se durante l'uso il prodotto è soggetto ad anomalie di
rumore, odore, smog e surriscaldamento, scollegare
l'alimentazione e interrompere l'uso.
2. Se l'apparecchio non funziona, controllare se l'alimentatore è
collegato correttamente, e se i raccordi sono in posizione.
3. Se l'apparecchio non dovesse funzionare bene dopo le
ispezioni precedenti, rivolgersi all'agenzia di assistenza
designata.
Risoluzione dei problemi
Questo apparecchio è etichettato conformemente alla direttiva
europea 2002/96 / CE per i rifiuti di apparecchiature elettriche
ed elettroniche (WEEE). Assicurando che questo apparecchio sia
stato smaltito correttamente, contribuirete a prevenire eventuali
danni all'ambiente e alla salute umana, che altrimenti
potrebbero essere causati se vengono smaltiti in modo
sbagliato.
Il simbolo sul prodotto indica che non può essere trattato come
normale rifiuto domestico. Dovrebbe essere portato ad un
punto di raccolta per il riciclaggio di beni elettrici ed elettronici.
Questo apparecchio richiede uno smaltimento specializzato dei
rifiuti. Per ulteriori informazioni sul trattamento, il recupero e il
riciclaggio di questo prodotto, rivolgersi al consiglio comunale,
al servizio di smaltimento dei rifiuti domestici o al negozio dove
l'hai acquistato.
SMALTIMENTO: Non smaltire questo
prodotto come rifiuti urbani. E’ necessario la
raccolta speciale per questi tipi di rifiuti
GARANZIA: 2 ANNI
IT IT
31 32

DE DE
Wichtige Sicherheitshinweise
KIT INHALT
1.Dieses Gerät ist nur für den Betrieb in Hasuhalten geeignet.
2.Lesen Sie alle Hinweise vor dem Gebrauch,sehen Sie alle
Punkte und bewahren Sie die Anleitung für zukünftiges
Naschlagen auf.
3.Überprüfen Sie vor dem Anschließen des Gerätes, dass die
am unteren Teil des Gerätes angegebene Spannung mit der
lokalen Netzspannung übereistimmt.
4.Lassen Sie das Kabel nicht über die Kante des Tisches oder
der Arbeitsplatte hängen, lassen Sie es keine heißen
Oberflächen berühren, einschließlich den Herd.
5.Benutzen Sie nie Anbauteile oder Teile der andreren
Hersteller, die nicht empfohlen oder verkauft werden. Es kann
Risiko einer Verletzgungsgefahr der Personen verursachen.
6.Benutzen Sie das Gerät nicht, wenn das Netzkabel, der
Stecker, das Klingegerät oder ein anderer Teil des Gerätes
beschädigt ist. Im Falle einer Beschädigung des Netzkables des
Gerätes oder in der Klingenvorrichtung dieses Produktes kann
es nur durch eins für dieses Produkt speziell entworfenes
Produkt von der Marke AIGOSTAR ersetzt werden.
7.Das Gerät ist nicht für den Gebrauch von kleinen Kindern
oder kranken Personen ohne Aufsicht geeignet.
8.Vergewissern Sie sich vor dem Ausbau und der Reinigung,
dass der Motor und die Klinge vollständig zum Stillstand
gekommen sind.
9.Berühren Sie die Klinge nicht, besonders wenn das Gerät
eingesteckt ist.
10.Tauchen Sie den Motorfuß, den Stecker oder das Kabel nicht
ins Wasser
oder eine andere Flüssigkeit ein.
11.Schlaten Sie das Gerät aus und ziehen Sie es aus dem Netz,
bevor Sie Zubehörteile wechseln oder falls Sie die während des
Betriebs beweglichen Teile berühren.
12.Nicht länger als 60 Sekunden auf einmal in Betrieb lassen.
Wenn eine längere Bearabeitungszeit benötigt wird, starten
Sie das Gerät nach einer kurzen Pause neu. Bearbeiten Sie
nicht mehr als drei Teile ohne Unterbrechung. Lassen Sie das
Gerät auf Raumtemperatur abkühlen, bevor Sie es wieder in
Betrib setzen.
13.Wenn die Klingen verriegeln, ziehen Sie den Stecker des
Gerätes aus der Steckdose, bevor Sie dei Zutaten entfernen,
die die Klingen blockieren.
14.Dieses Gerät darf nicht von den Kindern unter 8 Jahren
und den Personen mit eingeschränkten körperlichen,
sensorischen oder geistigen Fähigkeiten oder von den
Personen mit fehlenden Kenntissen oder Erfahrungen
verwendet werden, der Gebrauch ist nur unter Aufsicht oder
je nach der Nutzungsanleitung auf eine sichere Weise und
mit dem Vertändnis der damit verbundenen Risiken.
15.Die Kinder dürfen nicht mit dem Gerät spielen. Die
Reinigung und Wartung des Gerätes darf nicht von Kindern
ohne Aufsicht durchgeführt werden.
16.Wenn das Netzkabel beschädigt ist, muss es durch den
Hersteller, einen Kundendienst oder durch Fachpersonal
ersetzt werden, zum Vermeiden gefährlicher Situationen.
17.Trennen Sie das Gerät immer von der Stromversorgung,
wenn es ohne Aufsicht bleibt und auch vor dem Ein-und
Ausbau und vor der Reinigung.
18.Lassen Sie die Kinder nicht den Mixer ohne Aufsicht
betreiben.
1.Handmixer (1Stk.)
2.Bediengungsanleitung (1Stk.)
33 34

1. Waschen Sie die Teile, die mit den Lebensmitteln in
Berührung kommen, bevor Sie das Gerät benutzen (Sehen Sie
Punkt Reinigung).
2. Die Temperatur der zu vermischenden Lebensmittel soll nicht
höher als 60℃ sein. Das Volumen der Lebensmittel, die
verarbeitet werden, soll die Markierung der maximalen Ebene
im Mixerbecher/Glas nicht überschreiten.Befestigen Sie das
Gerät richtig, bevor Sie den Stecker in die Steckdose stecken.
Der Handmixer ist für Folgendes entworfen:
a. Mixen der Flüssigkeiten, zum Beispiel: Tagesprodukte,
Saucen, Fruchtsäfte, Suppen, Getränke und Shakes.
b. Mischen der weichen Zutaten, zum Beispiel: Pfannkuchenteig
oder Mayonnaise.
c. Pürieren der gekochten Zutaten, zum Beispiel: Babynahrung.
1.Legen Sie die Zutaten so hinein, dass sie die Glasgrenze für
nicht mehr als 2 Cm überschreiten. (Fig. 1)
2. Halten Sie den Mixstab an die Motoreinheit fest . (Fig. 2)
3. Stecken Sie den Mixstab ins Glas. (Fig. 3)
4. Stecken Sie das Netzkabel in die Steckdose und drücken Sie
dann die Taste oder "Turbo".
5. Mixen sie die Zutaten mit langsamen Bewegungen nach
unten und nach oben und mit Kreisbewegungen. (Fig. 4)
6. Nachdem Sie Ihre Arbeit beendet haben, lassen Sie den
Knopf los, ziehen Sie den Stecker aus und schenken Sie das
Getränk ein.
Produktbeschreibung
Inbetriebnahme und Wartung
1. Geschwindigkeit Stufenschalter 2. Netzschalter 3.Turbo Taste
4. Motoreinheit 5. Hacken anschließen 6. Mixstab
7. Mixerhalter 8. Schlagen 9. Glas
10. Klinge Vorrichtung 11. Klinge 12. Mixerbecher
Technische Daten
Anleitung für Mischer
Der Name
des
Produktes:
Modell: Spannung: Frequenz: Leistung: Leistungs
fähigkeit
Mixer
84333255031
54
220-240 V~ 50/60 Hz 800w 700ml
DE DE
35 36
Table of contents
Languages:
Other AIGOSTAR Blender manuals

AIGOSTAR
AIGOSTAR 30IWX User manual

AIGOSTAR
AIGOSTAR 8433325500276 User manual

AIGOSTAR
AIGOSTAR 8433325500214 User manual

AIGOSTAR
AIGOSTAR 02075BL08 350W-G User manual

AIGOSTAR
AIGOSTAR 8433325504175 User manual

AIGOSTAR
AIGOSTAR 30JPO User manual

AIGOSTAR
AIGOSTAR 30JDB User manual

AIGOSTAR
AIGOSTAR 30JPP User manual

AIGOSTAR
AIGOSTAR 300100KYF User manual

AIGOSTAR
AIGOSTAR 8433325500238 User manual