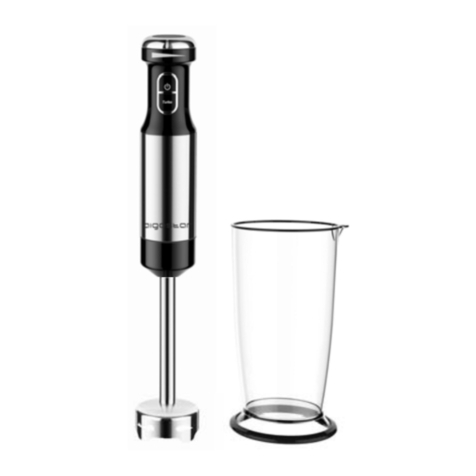
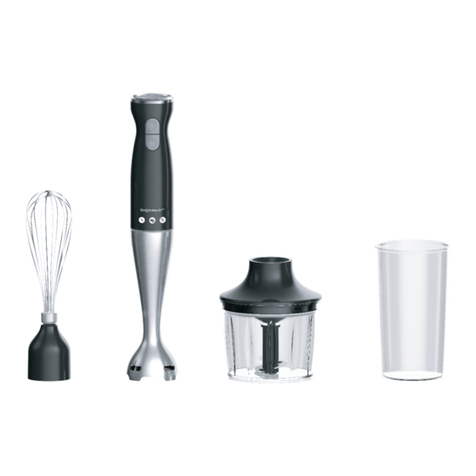
AIGOSTAR 30JPP User manual

INSTRUCTION MANUAL
Model: 8433325504366
The material in contact with the food is PP (polypropylene) and Stainless Steel, 100% BPA
free.

IMPORTANT SAFEGUARDS
Before using the electrical appliance, the following basic
precautions should always be followed including the
following:
1. Read all instructions.
2. Before using check that the voltage of wall outlet
correspond to the one shown on the rating plate.
3. Do not operate any appliance with a damaged cord or plug
or after the appliance malfunctions, or is dropped or
damaged in any manner. Return appliance to the nearest
authorized service facility for examination, repair or
electrical or mechanical adjustment.
4. If the supply cord is damaged it must be replaced by the
manufacturer or a authorized service agent or a qualified
technician in order to avoid a hazard.
5. Always disconnect the blender from the supply if it is left
unattended and before assembling, disassembling or
cleaning;
6. Do not let cord hang over edge of table or hot surface.
7. Do not immerse upper part of blender into water as this
would give rise to electric shock.
8. Close supervision is necessary when your appliance is
being used near children or infirm persons.
9. Avoid contacting moving parts.
10. Keep hands and utensils out of container while blending
to reduce the risk of severe injury to persons or damage to
the blender. A scraper may be used but must be used only
when the blender is not running.
11.The appliance cannot be used for chopping ice or
blending hard and dry substance, otherwise the blade could
be blunted.
12. To reduce the risk of injury, never place cutting blade on
GB

base without first putting bowl properly in place.
13. Be sure chopper lid is securely locked in place before
operating appliance.
14. The use of accessory not recommended by the
manufacturer may cause injuries to persons.
15. Do not operate the appliance for other than its intended
use.
16. This appliance is not intended for use by persons
(including children) with reduced physical, sensory or
mental capabilities, or lack of experience and knowledge,
unless they have been given supervision or instruction
concerning use of the appliances by a person responsible for
their safety.
17. Children should be supervised to ensure that they do not
play with the appliance.
18. Do not use outdoors.
19.Save these instructions.
20.This appliance can be used by children aged from 8 years
and above and persons with reduced physical, sensory or
mental capabilities or lack of experience and knowledge if
they have been given supervision or instruction concerning
use of the appliance in a safe way and understand the
hazards involved. Children shall not play with the appliance.
Cleaning and user maintenance shall not be made by
children unless they are older than 8 and supervised.
21. This appliance shall not be used by children. Keep the
appliance and its cord out of reach of children.
SAVE THESE INSTRUCTIONS

HOUSEHOLD USE ONLY
Know your blender (It is suitable for blending vegetable and fruit)
Know your accessory-chopper (Using for chopping meat and making garlic paste)
1. Speed knob
2. Lower speed button
3. High speed button
4. Lock
5. Blend rod
6. Cap
The max capacity is 700ml
Lock
Lock
Motor unit
Turn the motor unit clockwise to lock with the
chopper lid.
Detachable chopper lid.
Turn it clockwise to lock with chopper bowl, to unlock, turn it in
adverse direction
Connector
Detachable chopping blade
The edge of blade is very sharp. Handle with care to avoid any
cuts. Always handle the plastic shaft.
Bowl
Place food into it prior attaching the chopper
lid.

Know your accessory-beater (for mixing egg white)
Using your blender
Before the first use, clean the blender according to the section of “quick cleaning”.
The time running unit without load can’t exceed 15s.
Important: Blades are very sharp, handle with care. Ensure that the hand-held blender is
unplugged from the power outlet before assembling or removing attachments.
Instruction for blender
Max operation duration per time cannot exceed 1 minute, and 1 minute rest time must be
maintained at two consecutive cycles.
1. To assemble the detachable shaft with the motor unit, turn the shaft anti-clockwise direction
until tightened. To disassemble, just turn in the adverse direction.
2. Simply plug the hand-held blender to power outlet.
3. Lower the hand-held blender into food. Then press and hold the low speed button to start
operating. At the same time you can select desired speed setting by dialing the speed control
dial, there are five settings: from low speed to high speed.
Lock
Motor unit
Turn the motor unit clockwise to lock with the
beater.
Whisk
It is used to whisk the egg white .
The whisked egg white can be made cream.
Cup
Place two egg white into the cup one time.

4. You also can start operating by pressing and hold the high speed button (turbo button), the
appliance will operate at the highest speed all the time. The speed will not change even if you
dial the speed control dial.
5. To stop the hand-held blender by releasing the low speed button or high speed button.
Instruction for chopper
Max operation duration per time cannot exceed 1 minute, and 1 minute rest time must be
maintained at two consecutive cycles.
1. Place the chopper bowl on a clean, level surface.
2. Assemble the stainless chopping blade into the chopper bowl, as shown in Fig.1.
3. Place food into the chopper bowl.
Note: remove the bone of the meat, cut small piece, then place the meat into bowl, the max
quantity of meat can’t exceed 200g in every blending.
4. Attach the lid onto the chopper bowl, make sure the tuber on the inside wall of bowl aligns
with the groove of lid, then put down the lid and turn it in clockwise direction until it locks into
position. (See Fig.2) To detach the lid, turn in adverse direction.
5. Insert the motor unit into the hole of the chopper lid, and turn in clockwise direction to lock.
(See Fig.3)
6. Plug the appliance to power outlet. Then press and hold the low speed button to start
operating. At the same time you can select desired speed setting by dialing the speed control
dial, there are five settings: 1, 2, 3, 4, 5 (from low speed to high speed).
7. You also can start operating by pressing and hold the high speed button (turbo button), the
appliance will operate at the highest speed all the time. The speed will not change even if you
dial the speed control dial.
8. To stop the appliance by releasing the low speed button or high speed button of the motor
unit.
9. After finishing chopping, unplug the power outlet firstly, then remove the motor unit from the
chopper lid by turning it in anti-clockwise.
10. Open the chopper lid by turning it in anti-clockwise and remove the chopped food.
Caution:
-To reduce the risk of injury, never place cutting blade on base without first putting bowl
properly in place.
-Be sure chopper lid is securely locked in place before operating appliance.
-During operating or after chopping, for safety, you shall disassemble the motor unit from the
chopper lid firstly, then remove the chopper lid. Never remove the chopper lid with the motor
unit in place.

Instruction for egg white beater
Max operation duration per time cannot exceed 1 minute, and 1 minute rest time must be
maintained at two consecutive cycles.
1. To assemble the egg white beater with the motor unit, turn the whisk anti-clockwise direction
until tightened. To disassemble, just turn in the adverse direction.
2. Simply plug the hand-held blender to power outlet.
3. Place egg white into the cup, generally, two eggs white is enough.
4. Lower the hand-held blender into food. Then press and hold the low speed button to start
operating. At the same time you can select desired speed setting by dialing the speed control
dial, there are five settings: from low speed to high speed.
4. You also can start operating by pressing and hold the high speed button (turbo button), the
appliance will operate at the highest speed all the time. The speed will not change even if you
dial the speed control dial.
5. To stop the hand-held blender by releasing the low speed button or high speed button of the
motor unit.
CLEANING AND MAINTENANCE
1. Unplug the appliance and remove the detachable stem.
Note: Do not immerse the detachable stem of the blender in water because overtime the
lubrication on the bearings may wash away.
2. Wash the detachable stem under running water, without the use of abrasive cleaner or
detergents. After finishing cleaning the detachable stem, place it upright so that any water

which may have got in, can drain out. The stem is dishwashing safe component.
3. Wash the cup, bowl, beater and blade in warm soapy water. The bowl and the beater are not
recommended to place in dishwashing machine as the plastic component deteriorates through
prolonged use of dishwasher cleaning.
4. Wipe the motor unit with a damp cloth. Never immerse it in water for cleaning as a electric
shock may occur.
5. Dry thoroughly.
Caution: Blades are very sharp, handle with care.
Quick cleaning
Between processing tasks, hold the hand-held blender in the cup half filled with water and turn
on for a few seconds.
Environment friendly disposal
WARRANTY: 2 YEARS
You can help protect the environment!
Please remember to respect the local regulations: hand
in the non-working electrical equipments to an
appropriate waste disposal center

PRECAUCIONES DE SEGURIDAD
Antes de comenzar a usar el aparato eléctrico, debe tener en
cuenta las siguientes precauciones de seguridad básicas:
1. Lea todas las instrucciones.
2. Antes de usar el aparato, asegúrese de que el voltaje del
enchufe corresponde con el que aparece en la etiqueta.
3. No ponga en marcha el aparato si el cable está dañado o
no funciona correctamente, debe ser reparado por el
fabricante, o un agente autorizado para evitar riesgos. Lleve
el aparato al centro autorizado más cercano para que lo
examinen, reparen o realicen los ajustes necesarios.
4. Si el cable está dañado, debe ser reparado por el fabricante,
o un agente autorizado para evitar riesgos.
5. Desconecte siempre el aparato de la corriente eléctrica si
no va a usarlo y antes de montarlo, desmontarlo o lavarlo.
6. No deje que el cable quede colgando por el borde de la
mesa o toque superficies calientes
7. No sumerja la parte superior del aparato en agua u otros
líquidos para evitar descargas eléctricas
8. Extreme la precaución si va a usar el aparato cerca de
niños.
9. Evite el contacto con las piezas en movimiento.
10. Mantenga las manos y utensilios alejados del recipiente
mientras está en funcionamiento para evitar lesiones graves
o dañar la batidora. Puede usar una espátula cuando la
batidora no esté en funcionamiento.
11. Esta batidora no está diseñada para picar hielo o
sustancias duras y secas, esto podría desafilar las cuchillas.
12. Para reducir el riesgo de lesiones, nunca coloque las
cuchillas en la base sin haber instalado el recipiente en su
sitio.
13. Asegúrese de que la tapa de la picadora está bien
ES

ajustada en su sitio antes de poner en marcha el aparato.
14. El uso de accesorios no recomendados por el fabricante
podría causar lesiones.
15. No utilice el aparato para un uso diferente del que fue
diseñado.
16. Este aparato no debe ser utilizado por personas con
capacidades físicas, sensoriales o mentales reducidas, o que
carezcan de experiencia o conocimiento sobre el manejo de
estos dispositivos, a menos que estén bajo supervisión de
una persona responsable.
17. Asegúrese de que los niños no jueguen con el aparato.
18. No use el aparato al aire libre.
19. Conserve estas instrucciones.
20. Este aparato no debe ser utilizado por niños ni por
personas con capacidades físicas, sensoriales o mentales
reducidas, o que carezcan de experiencia o conocimiento
sobre el manejo de estos dispositivos, a menos que estén
bajo supervisión de una persona responsable y sean
conscientes de los posibles riesgos. No deje que los niños
jueguen con este aparato.
21. Este aparato no deben usarlo los niños. Mantenga el
aparato y el cable eléctrico fuera del alcance de los niños.
SOLO PARA USO DOMÉSTICO

Conozca su batidora (Puede triturar frutas y verduras)
Conozca el accesorio-picadora (Se usa para triturar carne, verduras u otros tipos de
alimentos de dureza media)
1. Selector de velocidad
2. Botón de baja velocidad
3. Botón de alta velocidad
4. Bloqueo
5. Varilla batidora
6. Vaso
Capacidad máxima 700ml
Bloqueo
Bloqueo
Cuerpo del motor
Gire el cuerpo del motor en el sentido de
las agujas del reloj para ajustarlo a la tapa
de la picadora.
Tapa picadora desmontable
Gírela en el sentido de las agujas del reloj para ajustarlaal
recipiente de la picadora. Para retirar la tapa, gírela en el
sentido contrario.
Conector
Cuchilla picadora desmontable
Las cuchillas están muy afiladas. Manipúlelas con
cuidado para evitar cortes. Cójalas por el mango de
plástico.
Recipiente
Inserte la comida en el recipiente antes de
ajustar la tapa de la picadora.

Conozca el accesorio: batidor de huevos (para montar claras de huevo)
Cómo usar la batidora
Antes del primer uso, lave la batidora como se detalla en la sección de “lavado rápido”.
El tiempo de puesta en marcha sin alimentos no puede superar los 15 segundos.
Importante: Las cuchillas están muy afiladas. Manipúlelas con cuidado. Asegúrese de que la
batidora está desenchufada antes de montar o desmontar las piezas.
Instrucciones de uso de la batidora
La duración máxima de cada operación no debe exceder 1 minuto, y debe dejarse 1 minuto de
reposo antes del siguiente ciclo.
1. Para instalar el pie batidor desmontable en el cuerpo del motor, gire el batidor en el sentido
contrario de las agujas del reloj hasta que esté bien ajustado. Para desmontarlo, gírelo en la
dirección contraria.
2. Enchufe simplemente la batidora de mano a la corriente.
3. Baje la batidora hacia la comida y mantenga pulsado el botón de velocidad baja para ponerlo
Bloqueo
Cuerpo del motor
Gire el cuerpo del motor en el sentido de las agujas
del reloj para ajustarlo con el pie batidor
Batidora de varillas
Se usa para batir claras de huevo. Las claras de
huevo batidas pueden hacerse crema.
Vaso
Introduzca dos claras de huevo en el vaso.

en marcha. Al mismo tiempo, puede seleccionar la velocidad deseada girando el selector de
velocidad, hay cinco ajustes: 1, 2, 3, 4, 5 (de velocidad baja a velocidad alta).
4.También puede poner en marcha el aparato manteniendo pulsado el botón de velocidad alta
(botón turbo) y el aparato comenzará a funcionar manteniendo la velocidad máxima. En este
modo la velocidad no podrá ajustarse, aunque gire el selector de velocidad.
5. Puede interrumpir la operación dejando de pulsar el botón de velocidad baja o de velocidad
alta.
Instrucciones de uso de la picadora
La duración máxima de cada operación no debe exceder 1 minuto, y debe dejarse 1 minuto de
reposo antes del siguiente ciclo.
1. Coloque la picadora en una superficie plana y limpia.
2. Monte las cuchillas picadoras en el recipiente de la picadora como se muestra en la Fig.1.
3. Introduzca la comida en el recipiente de la picadora.
Nota: deshuese la carne y córtela en pedazos pequeños, seguidamente introdúzcala en el
recipiente. La cantidad máxima de carne no puede superar los 200 g en cada ciclo de
trituración.
4. Ajuste la tapa al recipiente de la picadora y asegúrese de que la pared interior se encaja en la
ranura de la tapa, si no, no se pondrá en marcha. Ponga la tapa y gírela en el sentido de las
agujas del reloj hasta que quede bien ajustada. (Ver Fig.2) Para retirar la tapa, gire en el sentido
contrario.
5. Inserte el cuerpo del motor en el agujero de la tapa de la picadora y gírela en el sentido de las
agujas del reloj para ajustarla. (Ver Fig.3)
6. Enchufe el aparato. Después mantenga pulsado el botón de velocidad baja para ponerlo en
marcha. Al mismo tiempo, puede seleccionar la velocidad deseada girando el selector de
velocidad, hay cinco ajustes: 1, 2, 3, 4, 5 (de velocidad baja a velocidad alta).
7. También puede poner en marcha el aparato manteniendo pulsado el botón de velocidad alta
(botón turbo) y el aparato comenzará a funcionar manteniendo la velocidad máxima. En este
modo, la velocidad no podrá ajustarse, aunque gire el selector de velocidad.
8. Puede interrumpir la operación dejando de pulsar el botón de velocidad baja o de velocidad
alta.
9. Cuando termine de triturar la comida, desenchufe el aparato y después retire el cuerpo del
motor de la tapa de la picadora girándolo en el sentido contrario de las agujas del reloj.
10. Abra la tapa de la picadora girándola en el sentido contrario de las agujas del reloj y saque
la comida triturada.
Atención:
-Para reducir el riesgo de lesiones, nunca coloque las cuchillas en la base sin haber instalado
antes el recipiente en su sitio.
-Asegúrese de que la tapa de la picadora está bien ajustada en su sitio antes de poner en
marcha el aparato.
-Durante el proceso o después de triturar la comida, por seguridad, desinstale el cuerpo del

motor de la tapa de la picadora y después retire la tapa de la picadora. Nunca retire la tapa de la
picadora mientras esté colocada sobre el cuerpo del motor.
Instrucciones para usar la batidora de varillas
La duración máxima de cada operación no debe exceder 1 minuto, y debe dejarse 1 minuto de
reposo antes del siguiente ciclo.
1. Para instalar la batidora de claras de huevo con la base del motor, gire las varillas en el
sentido contrario a las agujas del reloj hasta que esté bien ajustado. Para desmontarlo, gírelo en
la dirección contraria.
2. Enchufe el aparato simplemente.
3. Coloque las claras de huevo en el vaso, normalmente, dos claras de huevo son suficientes.
4.Baje la batidora hacia la comida y mantenga pulsado el botón de velocidad baja para ponerlo
en marcha. Al mismo tiempo, puede seleccionar la velocidad deseada girando el selector de
velocidad, hay cinco ajustes: de velocidad baja a velocidad alta.
5.También puede poner en marcha el aparato manteniendo pulsado el botón de velocidad alta
(botón turbo) y el aparato comenzará a funcionar manteniendo la velocidad máxima. En este
modo, la velocidad no podrá ajustarse, aunque gire el selector de velocidad.
6. Puede interrumpir la operación dejando de pulsar el botón de velocidad baja o de velocidad
alta.
LIMPIEZA Y MANTENIMIENTO
1. 1. Desenchufe el aparato y desencaje el pie batidor.
Nota: No sumerja el pie batidor en agua para proteger la lubricación de los rodamientos
internos.
2. Lave el pie batidor con agua corriente sin usar líquidos abrasivos ni detergentes. Cuando

acabe de lavar el pie batidor, colóquelo de forma vertical para que salga el agua que haya
podido entrar.
3. Lave el vaso, recipiente, varillas y cuchillas en agua templada con jabón. No se recomienda
lavar el recipiente y las varillas en el lavavajillas ya que sus componentes podrían deteriorarse
tras un lavado prolongado en el lavavajillas.
4. Pase un trapo húmedo por el cuerpo del motor. Nunca lo sumerja en agua pues podría
producirse una descarga eléctrica.
5. Seque bien las piezas.
Atención: Las cuchillas están muy afiladas, manipúlelas con cuidado.
Lavado rápido
Entre las operaciones, coloque el batidor de mano en el vaso, lleno hasta la mitad de agua tibia
y póngalo en marcha durante unos segundos.
Reciclaje
GARANTÍA: 2 AÑOS
¡Proteja el medio ambiente!
Respete las regulaciones locales: deposite los aparatos
eléctricos en un centro de reciclaje apropiado.

WAŻNE ZASADY BEZPIECZEŃSTWA
Zanim użyjesz urządzenie należy przeczytać i postępować
zgodnie z poniższymi punktami:
1. Przeczytaj całą instrukcję.
2. Przed użyciem upewnij się czy gniazdko zasilające nie ma
żadnych uszkodzeń.
3. Nie używać urządzenia które ma uszkodzony przewód,
wtyczkę, lub zostało uszkodzone poprzez upadek. W takich
przypadkach należy oddać urządzenie do najbliższego
autoryzowanego serwisu w celu naprawy.
4. Jeżeli przewód jest uszkodzony, musi on zostać
wymieniony przez producenta lub autoryzowanego
przedstawiciela, aby zapobiec niebezpieczeństwu.
5. Gdy urządzenie jest nieużywane, wyjmowane części,
wkładane części lub czyszczone należy je odpiąć od prądu.
6. Nie pozwolić by przewód zasilania leżał na kancie stołu
lub gorącej powierzchni.
7. Nie zanurzać w wodzie górnej części blendera, ponieważ
może spowodować to porażenie prądem.
8. Należy zachować ostrożność jeżeli urządzenie jest
używane w pobliżu dzieci lub osób zniedołężniałych.
9. Unikać kontaktu z ruchomymi częściami.
10. Należy trzymać ręce i przyrządy z dala od pojemnika
podczas miksowania aby uniknąć zranienia lub uszkodzenia
urządzenia. Skrobak może być używany tylko gdy
urządzenie jest wyłączone.
11. Urządzenie nie jest przeznaczone do rozdrabniania lodu
lub miksowania twardych i suchych substancji, z powodu
możliwości uszkodzenia ostrzy.
12. Aby zniwelować ryzyko zranienia, nie zostawiać ostrzy
PL

na wierzchu bez ówczesnego poprawnego zamontowania
misy.
13. Upewnij się, że osłona ostrzy jest zablokowana w swoim
miejscu, przed użyciem.
14. Używanie akcesoriów nie polecanych przez producenta
może spowodować zranienia.
15. Nie używać urządzenia do celów innych niż jego
przeznaczenie.
16. Urządzenie nie może być używane przez osoby z
ograniczeniem umysłowym, mentalnym lub
fizycznym(włącznie z dziećmi) lub bez doświadczenia,
chyba, że będą korzystać pod czyjąś opieką lub instrukcją
zostanie im wyjaśniona w sposób zrozumiały.
17. Dzieci powinny być pilnowane, aby upewnić się, że nie
bawią się urządzeniem.
18. Nie używać na zewnątrz budynku.
19. Zachować instrukcję.
20. To urządzenie może być używane przez dzieci w wieku 8
lat i więcej oraz przez osoby z ograniczeniem umysłowym,
czuciowym, bez doświadczenia i wiedzy jeżeli są pod
nadzorem lub jeżeli instrukcja użytkowania urządzenia
została wytłumaczona w sposób bezpieczny i zrozumiały
aby zapobiec niebezpieczeństwu. Dzieci nie powinny bawić
się urządzeniem. Czyszczenie i konserwacja nie powinna
być robiona przez dzieci młodsze niż 8 lat i bez opieki.
21. Części nie powinny być używane przez dzieci. Trzymać
części oraz przewód z dala od zasięgu dzieci
WYŁĄCZNIE DO UŻYTKU DOMOWEGO

Poznaj swój blender (idealne do mieszania warzyw i owoców)
Poznaj części-nożyki (Używanie do rozdrabniania mięsa i robienia pasty czosnkowej)
1. Pokrętło prędkości
2. Przycisk spowalniający
3. Przycisk przyśpieszający
4. Zapięcie
5. Nasadka
6. Pojemnik
Maksymalna pojemność 700ml
Lock
Lock
Przekręć jednostkę sterującą zgodnie z
ruchem wskazówek zegara żeby zamknąć
ją z przykrywką ostrzy.
Odpinana pokrywa ostrzy.
Przekręć zgodnie z ruchem wskazówek zegara aby
zamknąć z zbiornikiem, aby odblokować przekręcić w
przeciwną stronę
Złącze
Odpinane ostrza
Krawędź ostrza jest bardzo ostra. Obchodzić się
ostrożnie, aby się nie zaciąć. Chwytać zawsze za plastik.

Poznaj części-trzepaczka (dla miksowania białek z jajek)
Używanie blendera
Przed pierwszym użyciem należy umyć blender zgodnie z rozdziałem „szybkie czyszczenie”.
Czas używania blendera bez zawartości nie może przekroczyć 15s.
Ważne: Ostrza są bardzo ostre, dotykać ostrożnie. Upewnić się, że blender jest odłączony od
prądu przed demontowaniem części.
Instrukcja
Czas pracy nie może przekroczyć 1 minuty po czym musi nastąpić 1 minutowa przerwa.
1. Aby zamontować nasadkę z jednostką sterującą, przekręć trzonek przeciwnie do ruchu
wskazówek zegara aż się zaciśnie. Aby zdemontować należy zrobić czynności odwrotnie.
2. Podłącz blender do zasilania.
3. Obniż blender do jedzenia. Następnie naciśnij i przytrzymaj przycisk niskiej prędkości aby
zacząć miksować. W tym samym czasie możesz wybrać ustawienie prędkości na pokrętle, jest 5
ustawień: od niskiej prędkości do wysokiej.
Misa
Miejsce na jedzenie
Lock
Jednostka sterująca
Przekręcić zgodnie z ruchem wskazówek
zegara aby zamknąć z trzepaczką.
Trzepaczka
Jest używana do trzepania białek jajek..
Misa
Włóż dwa białka jajek do misy
jednocześnie.

4. Można również zacząć od wciśnięcia i przytrzymania przycisku szybkiej prędkości (turbo),
urządzenie zacznie miksować z maksymalną prędkością. Prędkość nie zmieni się dopóki nie
zostanie zmieniona na pokrętle.
5. Aby zatrzymać blender należy puścić przycisk niskiej lub wysokiej prędkości.
Instrukcja rozdrabniania
Czas pracy nie może przekroczyć 1 minuty po czym musi nastąpić 1 minutowa przerwa.
1. Położyć misę na czystej, równej powierzchni.
2. Złóż ostrza do misy jak na rysunku nr. 1
3. Włóż jedzenie do misy.
Notatka: Usuń kości z mięsa, pokrój na małe kawałki, następnie włóż do misy, masa mięsa nie
może przekroczyć 200g.
4. Nałóż pokrywę na misę, upewnij się, że wszystko jest poprawnie złożone, postępuj jak na
rysunku nr. 2. Aby zdemontować należy czynności robić w odwrotnej kolejności.
5. Zamontować jednostkę sterującą do otworu w pokrywie I przekręcić zgodnie z ruchem
wskazówek zegara aż do zablokowania(rysunek 3).
6. Podłącz urządzenie do prądu. Następnie kliknij i przytrzymaj przycisk niskiej prędkości, aby
zacząć. W tym samym momencie można wybrać prędkość na pokrętle, jest pięć ustawień: 1, 2,
3, 4, 5 (od najniższej prędkości do najwyższej).
7. Można również zacząć od wciśnięcia i przytrzymania przycisku szybkiej prędkości (turbo),
urządzenie zacznie miksować z maksymalną prędkością. Prędkość nie zmieni się dopóki nie
zostanie zmieniona na pokrętle.
8. Aby zatrzymać blender należy puścić przycisk niskiej lub wysokiej prędkości.
9. Po skończeniu, odłączyć najpierw zasilanie, następnie zdemontować jednostkę sterującą od
pokrywy przekręcając w przeciwnie do ruchu wskazówek zegara.
10. Otworzyć pokrywę przekręcając ją przeciwnie do ruchu wskazówek zegara, a następnie
wyjąć jedzenie.
Uwaga:
- Aby zniwelować ryzyko zranienia, nie zostawiać ostrzy na wierzchu bez ówczesnego
poprawnego zamontowania misy.
- Upewnij się, że osłona ostrzy jest zablokowana w swoim miejscu, przed użyciem.
- Po blendowaniu, dla bezpieczeństwa, powinno najpierw zdemontować jednostkę sterującą od
pokrywy nasadki. Nie demontować pokrywy jeżeli jednostka sterująca jest na swoim miejscu.
This manual suits for next models
2
Table of contents
Languages:
Other AIGOSTAR Blender manuals

AIGOSTAR
AIGOSTAR 8433325502102 User manual

AIGOSTAR
AIGOSTAR 8433325503161 User manual

AIGOSTAR
AIGOSTAR 8433325504175 User manual

AIGOSTAR
AIGOSTAR 300100KYF User manual

AIGOSTAR
AIGOSTAR 30JDB User manual

AIGOSTAR
AIGOSTAR 8433325500276 User manual

AIGOSTAR
AIGOSTAR 30IWW User manual

AIGOSTAR
AIGOSTAR 8433325500238 User manual

AIGOSTAR
AIGOSTAR 8433325503154 User manual

AIGOSTAR
AIGOSTAR 30JPO User manual