AIGOSTAR 8433325502102 User manual

INSTRUCTION MANUAL
MODEL: 8433325502102
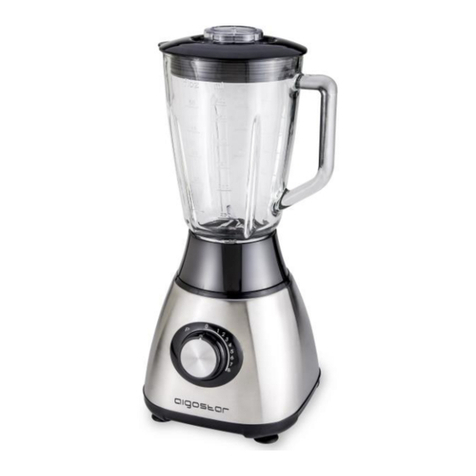
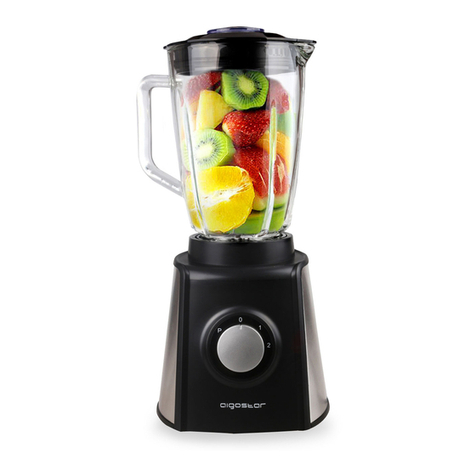
STAND BLENDER
AIGOTECH ONSYNK, S.L.
C/LOS TRANSPORTISTAS N.43 NUMANCIA
DE LA SAGRA 45230, TOLEDO, ESPAÑA
C.I.F.: B-85712198
HTTP://WWW.AIGOSTAR.COM
MADE IN P.R.C
The plastic material in contact with the food is AS
(acrylonitrile-styrene copolymer), 100% BPA free

CONTENT
GB
ES
PL
IT
01-08
09-16
17-24
25-32
DE 33-40
NL 41-48
FR 49-56
57-64
PLPT

GB
01
GB
02
1. Read carefully and save all the instructions provided with this
appliance.
2. Always use your appliance from a power outlet of voltage
(A.C.only) marked on the appliance.
3. This appliance is designed for domestic use only.
4. Do not pull on the connection cord, but rather on the plug,
to separate the appliance from the mains.
5. Do not use outdoor.
6. Do not leave the appliance unattended when it is switched
on, as this may be a source of danger.
7. Stand the appliance on a table or flat surface.
8. If the supply cord is damaged, it must be replaced by the
manufacturer, its service agent or similarly qualified persons in
order to avoid a hazard.
9. Do not operate for more than 2 minutes. Keep 1 minute rest
between each cycle.
10. Avoid touching the moving parts.
11. Do not blend hot ingredients.
12. Ensure the control dial is in the off “0” position before
plugging-in.
13. Turn off the power and unplug when the appliance is not
use and before cleaning.
14. Do not use your appliance with an extension cord unless
this cord has been checked and tested by a qualified
technician or service person.
15. Do not use an appliance for any purpose other than its
intended use.
16. Do not place an appliance on or near a hot gas flame,
electric element or on a heated oven. Do not place on top of
any other appliance.
17. Do not let the power cord of an appliance hang over the
edge of a table or bench top or touch any hot surface.
18. Do not operate any electrical appliance with a damaged
cord or after the appliance has been dropped or damaged in
any manner.
19. Do not immerse the appliance in water or any other liquid.
20. Be careful when handing the sharp cutting blades,
emptying the bowl and during cleaning.
21. Cleaning and user maintenance shall not be made by
children without supervision.
22. This appliance shall not be used by children. Keep the
appliance and its cord out of reach of children.
23. This appliance can be used by children aged from 8 years
and above and persons with reduced physical, sensory or
mental capabilities or lack of experience and knowledge if
they have been given supervision or instruction concerning
use of the appliance in a safe way and understand the
hazards involved.
24. Children shall not play with the appliance. Cleaning and
user maintenance shall not be made by children without
supervision.
25. Household use only.
26. Be careful if hot liquid is poured into the food processor
or blender as it can be ejected out of the appliance due to a
sudden steaming.
IMPORTANT SAFETY INFORMATION
Blender (1PC)
Instruction manual (1PC)
Package contents

GB
03
GB
04
Always ensure your blender is unplugged from the power outlet
before fitting or removing the blade assembly.
Always handle the blade assembly with caution, as the blades are
extremely sharp.
To assemble the blade system, operate as follows:
1. Place the silicone rubber seal over the blade assembly, as show
in Fig. 1.
2. Place the blade assembly into the base of blender jar.
3. Ensure that the blade assembly is firmly in the place by turning
it counter clockwise as indicated by the arrow. (as Fig.2).
Preparing for use:
1.Place the blender jar on the motor base and
rotate clockwise (as Fig.3).
2.Remove the lid or the lid stopper from the
blender jar, put the ingredients into the jar.
3.Place the lid with the lid stopper back onto
the jar. Do not exceed the maximum indicated
level 1.5 liters.
4.Place desired blending speed 1 or 2 or
PULSE. After you have completed blending,
turn the speed control knob to the “0”
position.
1. A brief whirl in the blender will rescue a lumpy gravy, or an
eggs-based sauce that has separated.
2. Food items for blending should be cut into cubes
(approximately 2-3cm), this will assist in achieving an even
result.
General Description
A: Lid stopper
B: Lid
C: jar (1.5 Liters)
D: Rubber ring
E: Removable Blade Assembly
F: Motor Base
G: Speed Control Knob
H: Rubber Feetz
Technical Data
Installation and Maintenance
Before Using Your Blender
Important:
Using your product
Handy Blending Hints
8433325502102

GB
05
GB
06
3. Never fill the blender jar above the maximum level indicated.
4. To ensure efficient mixing when blending dry mixtures, it may be
necessary to stop the blender and push ingredients down the sides of
the jar with a spatula (not provided).
5. When the blending a variety of ingredients together, blender the
liquids first, and then add dry ingredients.
6. Always ensure stones are removed from fruit and bones from meat
as these can damage the blades.
7. Do not process hot liquid in your blender. Allow to cool before
processing.
8. Always ventilate the blender jar when pureeing warm ingredients, it
can be done by lifting the ingredient cup out of the lid, after starting
the blender.
1. Half fill the blender with warm and little detergent.
2. Press the “Pulse” function and hold 1-2 seconds and release.
Repeat 3-4 times.
3. Then remove the jar and rinse it under running water.
Quick cleaning method
1. Unscrew the blade assembly from the jar
by turning the bottom of the blade assembly
in clockwise direction. (as Fig.4).
2. Remove the rubber seal from the blade
assembly.
3. Wash the blender lid, lid stopper, rubber
seal, blade assembly and blender jar in warm
soapy water.
4. Only use a damp, soft sponge with
detergent and wipe to clean the motor base.
Caution: Take care when cleaning the blades as they are extremely
sharp.
Note: Do not clean any part of blender in the dishwasher.
Note: Never immerse the motor base in water.
For thorough cleaning
1. Coil the power cord around the cord storage at the bottom of
the motor base.
2. Store in a cool and dry place.
Storage
1.Liquid ingredients: dairy produce, juice, sop, drink, paste, milk
shake and so on.
2.A combination of soft ingredients: milk, papaya, mayonnaise.
3.Make cooked pulpy ingredients: baby food
Tips for use
Highest speed is required when blending the hard foods while low
speeds are for blending soft foods. Details are as below.
Speed 1: Blending soft foods like Milk and Banana
Speed 2: Blending hard foods like Carrots, Soy Bean and Crushed Ice
Cleaning and Storage
Caution:

GB
07
GB
08
The operation method of ICE like the method of blend. Put 8~10
pieces of ice which is not big than 2 centimeter in the jar, press the
lid into place, plug the power cord into the wall socket, then set the
control knob to position “P” for 1 second to 2 seconds, then set the
control knob to position “0” for 1 second to 2 seconds, do as this for
6 cycles to 10 cycles.
CAUTION: please press the lid when you use the function of ICE.
The function of ICE
Updates to hardware components are made regularly. Therefore
some of the instruction, specifications and pictures in this
documentation may differ slightly from your particular situation. All
items described in this guide for illustration purposes only and may
not apply to particular situation. No legal right or entitlements may
be obtained from the description made in this manual.
Disclaimer
This appliance is labeled in compliance with European directive
2014/35/EU for waste electrical and electronic equipment
(WEEE). By ensuring that this appliance is disposed of correctly,
you will help prevent any possible damage to be the
environment and to human health, which might otherwise be
caused if it were disposed of in the wrong way.
The symbol on the product indicates that it may not be treated
as normal household waste. It should be taken to a collection
point for the recycling of electrical and electronic goods. This
appliance requires specialist waste disposal. For further
information regarding the treatment, recovery and recycling of
this product please contact your local council, your household
waste disposal service, or the shop where you purchased it.
DISPOSAL: Do not dispose this product as
unsorted municipal waste. Collection of such
waste separately for special treatment is
necessary.
WARRANTY: 2 YEARS

ES
09
ES
10
Instrucciones de seguridad
Contenido del paquete
Batidora de vaso (1PC)
Manual de instrucciones (1PC)
1. Lea las instrucciones con atención antes de comenzar a usar
el producto y consérvelas para futuras referencias.
2. Verifique que el voltaje indicado en la batidora coincida con
la tensión local.
3. Este aparato está diseñado exclusivamente para uso
doméstico.
4. No tire del cable para desenchufar el aparato de la corrien
te eléctrica, tire del enchufe.
5. No use la batidora al aire libre.
6. Para evitar riesgos, no deje el aparato sin supervisión
cuando está encendido.
7. Coloque la batidora sobre una mesa o una superficie plana.
8. Si el cable eléctrico está dañado, debe ser remplazado por
el fabricante o un distribuidor autorizado.
9. La duración máxima de cada operación no debe superar los
2 minutos. Deje reposar la batidora durante 1 minuto tras cada
operación.
10. No toque las piezas en movimiento.
11. No triture alimentos calientes.
12. Asegúrese de que el selector de velocidad está en posición
de apagado “0” antes de enchufar la batidora.
13. Apague y desenchufe el aparato cuando no esté en uso y
antes de lavarlo.
14. Nunca use una alargadera que no esté aprobada por un
técnico cualificado.
15. Nunca utilice la batidora para un uso diferente para del
que ha sido pensada.
16. No coloque el aparato sobre o cerca de superficies calien
tes (cocinas de gas, placas eléctricas y hornos). No coloque la
batidora sobre otro electrodoméstico.
17. No deje que el cable eléctrico cuelgue del borde de la
mesa ni toque superficies calientes.
18. No use el aparato si el cable eléctrico está dañado, o si el
aparato ha sufrido algún golpe o se ha dañado de algún
modo.
19. No sumerja el aparato ni el cable eléctrico en agua u otros
líquidos.
20. Manipule las cuchillas con mucho cuidado cuando vacíe el
recipiente y durante su limpieza.
21. Las tareas de limpieza y mantenimiento no deben llevarlas
a cabo los niños sin supervisión de un adulto responsable.
22. No deje que los niños utilicen la batidora. Manténgala
fuera del alcance de los niños.
23. Este aparato pueden usarlo los niños mayores de 8 años si
están bajo supervisión y han recibido instrucciones sobre el
uso del aparato de una manera segura y son conscientes de
los posibles riesgos.
24. No deje que los niños jueguen con la batidora. Las tareas
de mantenimiento y limpieza no deben ser llevadas a cabo
por los niños sin supervisión de un adulto.
25. Exclusivamente para uso doméstico.
26. Extreme la precaución cuando vierta líquidos calientes en
la batidora ya que podrían ser expulsados del aparato debido
a una evaporación repentina.

11 12
Compruebe que la batidora esté desenchufada de la corriente
eléctrica antes de montar o desmontar el conjunto de cuchillas.
Extreme la precaución cuando manipule las cuchillas, ya que
están muy afiladas.
Para montar el Sistema de cuchillas, hágalo como se muestra a
continuación:
1. Ajuste la junta de sellado sobre el conjunto de cuchillas como
se muestra en la Fig.1.
2. Coloque el conjunto de cuchillas sobre la base de la jarra.
3. Ajuste la jarra en la base del motor girándola en el sentido de
las agujas del reloj, como indica la flecha. (Fig.2).
Preparación para el uso:
1.Coloque la jarra en la base del motor y
gírela en el sentido de las agujas del reloj
(como en la Fig.3).
2.Retire la tapa y el tapón de la jarra e
introduzca los alimentos en la jarra.
3.Vuelva a colocar la tapa y el tapón en la
jarra. No sobrepase el nivel máximo indicado,
1.5 litros
4.Seleccione la velocidad de trituración
deseada: 1, 2 o PULSE. Cuando haya
terminado el proceso, coloque el selector de
velocidad en la posición “0”.
Descripción de las partes
Especificaciones
Instalación y mantenimiento
Antes de usar la batidora
Importante:
Cómo usar la batidora
Consejos útiles
Batidora MJ-BL40G1 220-240V 50/60Hz 350W 1500ml
8433325502102
ES ES
~
A: Tapón de la tapa
B: Tapa
C: Jarra (1.5 Litros)
D: Anillo de goma
E: Conjunto de cuchillas desmontable
F: Cuerpo del motor
G: Selector de velocidad
H: Base de goma
Producto Modelo Tensión Frecuencia Potencia Capacidad
1. Con una breve pasada por la batidora, podrá realizar salsas
con grumos, o salsas a base de huevo que se han separado.
2. Los alimentos deben estar cortados en dados de 2-3 cm
aproximadamente; de esta manera conseguirá un resultado
uniforme.

13 14
Limpieza y almacenamiento
Lavado rápido
La velocidad más alta es para triturar alimentos duros mientras que
las velocidades más bajas son para triturar alimentos blandos.
Abajo encontrará más detalles.
Velocidad 1: Triturar alimentos blandos como la leche y el plátano
Velocidad 2: Triturar alimentos duros como la zanahoria, la soja y
los cubitos de hielo
Atención:
1. Desmonte el conjunto de cuchillas de la jarra
girando la parte de abajo del conjunto de
cuchillas en el sentido de las agujas del reloj.
(como en la Fig.4).
2. Retire el anillo de goma del conjunto de
cuchillas.
3. Lave la tapa de la batidora, el tapón, el anillo
de goma, el conjunto de cuchillas y la jarra en
agua caliente con jabón.
4. Para lavar la base del motor, pase una
esponja suave y húmeda con detergente.
Atención: Extreme la precaución cuando manipule las cuchillas, ya
que están muy afiladas.
Nota: No lave ninguna pieza de la batiora en el lavavajillas.
Nota: Nunca sumerja el cuerpo del motor en agua.
Lavado intensivo
1. Enrolle el cable alrededor del compartimento para el cable en la
parte inferior de la base del motor.
2. Guarde el aparato en un lugar seco.
Almacenamiento
1. Ingredientes líquidos: productos lácteos, zumo, sopa, bebidas,
batidos, etc.
2. Una mezcla de alimentos suaves: leche, papaya, mayonesa.
3. Alimentos triturados: potitos de bebé.
Consejos de uso
ES ES
1. Llene la jarra hasta la mitad con agua caliente y un poco de
detergente.
2. Presione el botón de “Pulse” y manténgalo pulsado durante 1-2
segundos.
Repita la operación 3-4 veces.
3. Después retire la jarra y aclárela bajo el grifo.
3. Nunca llene la jarra por encima del nivel máximo indicado.
4. Para que el proceso sea efectivo mientras tritura mezclas
sólidas, necesitará interrumpir la operación y empujar los ingre-
dientes que se adhieren a las paredes de la batidora con una
espátula (no incluida).
5. Cuando triture varios ingredientes, triture los líquidos primero,
y añada después los alimentos sólidos.
6. Asegúrese siempre de retirar los huesos de la fruta y la carne,
ya que podrían dañar las cuchillas.
7. No introduzca líquidos calientes en la batidora. Deje que se
enfríen antes de procesarlos.
8. Deje que la batidora se ventile cuando triture ingredientes
calientes; para ello, levante el tapón de la tapa cuando haya
comenzado el proceso.

15 16
Puede poner el marcha el modo ICE como modo de trituración.
Coloque 8-10 cubitos de hielo que no superen los 2 cm de tamaño,
sujete la tapa y enchufe la batidora a la corriente eléctrica.
Coloque el regulador de velocidad en posición “P” durante 1 o 2
segundos y después cambie el regulador de velocidad a la posición
“0” durante 1 o 2 segundos. Repita esta operación entre 6 y
10 veces.
ATENCIÓN: sujete la tapa cuando use la función de ICE.
La función de ICE (hielo)
El producto está sujeto a actualizaciones regulares. Por lo tanto,
algunas secciones de las instrucciones, especificaciones e ilustraciones
de este manual pueden diferir ligeramente de su situación particular.
Todo lo descrito en esta guía debe utilizarse como referencia, y puede
no ser aplicable a su situación particular. Las descripciones de este
manual no le otorgan en ningún caso derechos legales.
Nota legal
Este producto cumple con las Directivas de la
Unión Europea (2002/96/CE), sobre los
residuos de aparatos eléctricos y electrónicos
(RAEE). Todos los equipos eléctricos o electrónicos marcados con
este símbolo deben ser recogidos por separado de los residuos
domésticos no clasificados.
Al asegurarse de depositar el aparato en un lugar autorizado,
estará contribuyendo a proteger el medio ambiente y la salud
humana de posibles daños que podrían ocasionarse en el caso
contrario.
Este símbolo indica que el producto no debe tirarse a la basura
doméstica. Este aparato necesita ser depositado en un centro
especializado. Para más información sobre el tratamiento,
recuperación y reciclaje de este producto, contacte con el punto
limpio de su localidad o con la tienda donde compró el aparato.
RECICLAJE: Este producto no debe desecharse
junto con los residuos domésticos. Llévelo a los
puntos de recogida especiales para el reciclaje
de equipos electrónicos.
GARANTÍA: 2 AÑOS
ES ES

PL
17
PL
18
1. Przeczytaj dokładnie i zachowaj na przyszłość instrukcje
urządzenia.
2. Zawsze używaj urządzenia zgodnie z zaznaczonym na nim
napięciem (A.C)
3. To urządzenie nadaje się jedynie do użytku w
gospodarstwie domowym.
4. Nie wyciągaj go z gniazda za pomocą kabla, lecz za
pomocą wtyczki.
5. Nie używaj na zewnątrz.
6. Nie pozostawiaj urządzenia bez nadzoru, gdy jest włączone,
ponieważ może być to źródłem niebezpieczeństwa.
7. Połóż urządzenie na stole lub płaskiej powierzchni.
8. Jeśli kabel jest zniszczony, musi być zastąpiony przez
producenta, pracownika obsługi lub zwykłą wykwalifikowaną
osobę, żeby uniknąć niebezpieczeństwa.
9. Nie używaj go więcej niż dwie minuty. Między kolejnym
cyklem działania zrób minutową przerwę.
10. Unikaj dotykania części ruchomych.
11. Nie miksuj gorących składników.
12. Upewnij się, że wskaźnik kontrolki jest na pozycji „off” 0,
zanim podłączysz urządzenie.
13. Wyłącz od źródła prądu i odłącz od gniazdka urządzenie,
gdy go nie używasz i przed myciem.
14. Nie używaj urządzenia z przedłużaczem, jeśli nie został on
sprawdzony i testowany przez wykwalifikowaną osobę.
15. Nie używaj urządzenia w innym celu, niż jest do tego
przeznaczone.
16. Nie kładź urządzenia blisko płomieni gazu, elektrycznych
elementów ani podgrzanego piekarnika. Nie kładź też go na
żadnym innym urządzeniu.
17. Nie pozwól, aby kabel urządzenia wisiał na ostrym rogu
ani na końcu stołu czy ławki ani, żeby dotykał jakąś gorącą
powierzchnię.
18. Nie używaj urządzenia, gdy kabel jest zniszczony lub gdy
urządzenie spadło lub zniszczyło się w jakiś inny sposób.
19. Nie zanurzaj urządzenia w wodzie ani żadnym innym
płynie.
20. Uważaj przy dotykaniu ostrzy noża, opróżnianiu dzbanka
i podczas czyszczenia.
21. Czyszczenie i konserwacja nie powinny być wykonywane
przez dzieci bez nadzoru.
22. To urządzenie nie powinno być używane przez dzieci.
Trzymaj urządzenie i jego kabel z dala od zasięgu dzieci.
23. Urządzenie może być używane przez dzieci od 8 lat i
powyżej oraz osoby ze zmniejszonymi możliwościami
fizycznymi, zmniejszonymi możliwościami sensorycznymi i
psychicznymi lub brakiem doświadczenia, o ile zostali
nadzorowani i poinstruowani, jeśli chodzi o użycie sprzętu w
bezpieczny sposób i rozumieją zagrożenia z nim związane.
24. Dzieci nie powinny bawić się urządzeniem. Czyszczenie i
konserwacja nie powinny być wykonywane przez dzieci bez
odpowiedniego nadzoru.
25. Jedynie do użyciu w domu.
26. Uważaj, jeśli wlewasz ciepły płyn do blendera, ponieważ
może być wyrzucony z blendera z powodu nagłej gorącej
temperatury parowania.
WAŻNE ŚRODKI OSTROŻNOŚCI :
1. Blender ręczny (1PC)
2. Instrukcja obsługi (1PC)
Zawartość opakowania

19 20
Zawsze upewnij się, że blender jest odłączony od gniazda przed
instalacją lub wyjmowaniem ostrzy. Zawsze trzymaj ostrza z
uwagą, gdyż są one bardzo ostre. Żeby zmontować system
ostrzy postępuj następująco;
1. Ułóż silikonową gumkę nad częścią z ostrzami, jak jest
pokazane na rysunku
2. Połóż część z ostrzami na podstawie dzbanka blendera.
3. Upewnij się, że część z ostrzami jest mocno przymocowana
,poprzez przekręcenie jej według wskazówek zegara ( jak na
obrazku 2.)
Przygotowywanie do użycia:
1.Ułóż dzbanek blendera na podstawie z
silnikiem i przekręć zgodnie ze wskazówkami
zegara (obrazek 3.)
2. Zdejmij pokrywkę lub zatyczkę pokrywki
dzbanka, włóż składniki do środka.
3.Nałóż pokrywkę i zatyczkę pokrywki na
dzbanie. Nie przekraczaj maksymalnej ilości
wskazanej na poziomie 1,5 L
4.Włącz pożądaną prędkość na 1,2 albo „puls”.
Po tym jak już skończysz blendowa, przekręć
pokrętło prędkości na pozycję „0”.
OGÓLNY OPIS
DANE TECHNICZNE:
WAŻNE:
UŻYWANIE PRODUKTU
CZYSZCZENIE I PRZECHOWYWANIE:
1. A brief whirl in the blender will rescue a lumpy gravy, or an
eggs-based sauce that has separated.
2. Food items for blending should be cut into cubes
(approximately 2-3cm), this will assist in achieving an even
result.
A. Zatyczka pokrywki
B. Pokrywka
C. Dzban (1,5 litra)
D. Gumowy pierścień
E. Zdejmowana część z ostrzem
F. Podstawa z silnikiem
G. Pokrętło z kontrolką prędkości
H. Gumowa podstawka
Nazwa
produktu
Model Napięcie Częstotliwość Moc Pojemność
Blender MJ-BL40G1 220-240V~ 50/60Hz 350W 1500ml
8433325502102
MONTAŻ I UTRZYMANIE
Przed użyciem blendera
PL PL

21 22
3. Never fill the blender jar above the maximum level indicated.
4. To ensure efficient mixing when blending dry mixtures, it may be
necessary to stop the blender and push ingredients down the sides of
the jar with a spatula (not provided).
5. When the blending a variety of ingredients together, blender the
liquids first, and then add dry ingredients.
6. Always ensure stones are removed from fruit and bones from meat
as these can damage the blades.
7. Do not process hot liquid in your blender. Allow to cool before
processing.
8. Always ventilate the blender jar when pureeing warm ingredients, it
can be done by lifting the ingredient cup out of the lid, after starting
the blender.
Metoda szybkiego czyszczenia:
1. Wypełnij blender do połowy ciepłą wodą z niewielką ilością
detergentu.
2. Naciśnij przycisk „puls” i potrzymaj przez 1-2 sekundy i zwolnij.
Powtórz 3-4 razy.
3. Następnie zdejmij dzbanek i wypłucz go pod bieżącą wodą.
CZYSZCZENIE I PRZECHOWYWANIE:
Najwyższa prędkość jest zalecana przy blendowaniu twardych
składników, a niska prędkość przy blendowaniu miękkich, delikatnych
składników. Szczegóły poniżej.
Pierwsza prędkość: blendowanie miękkiego pożywienia, np. mleko,
banany
Druga prędkość: blendowanie twardego pożywienia np. marchewki,
nasiona soi, kruszony lód
UWAGA:
1. Odkręć część z ostrzem od dzbana
poprzez przekręcenie dolnej części z
ostrzem w kierunku wskazówek zegara. ( jak
na obrazku 4)
2. Zdejmij gumową uszczelkę z części z
ostrzem.
3. Umyj pokrywkę blendera, zatyczkę
pokrywki, gumową uszczelkę, część z
ostrzami i dzban blendera w ciepłej wodzie
z mydłem.
4. Używaj tylko wilgotnej, miękkiej gąbeczki
z płynem i wytrzyj podstawę z silnikiem.
UWAGA: Uważaj przy czyszczeniu ostrzy, ponieważ są bardzo
ostre.
Nie wkładaj żadnej części blendera do zmywarki.
Nigdy nie zanurzaj podstawy z silnikiem w wodzie.
DOKŁADNIEJSZE CZYSZCZENIE
1. Zwiń kabel dookoła dolnej części z silnikiem.
2. Przechowuj w chłodnym i suchym miejscu.
PRZECHOWYWANIE
1. Płynne produkty: produkty mleczne, soki, zupy, przeciery, drinki,
szejki mleczne itd.
2. Łączenie miękkich składników: mleko, papaja, majonez
3. Ugotowane, papkowane składniki: jedzenie dla niemowląt
Wskazówki dotyczące użytkowania
PL PL

23 24
GWARANCJA: 2 LATA
Funkcja kruszenia lodu to jedna z metod blendowania. Włóż 8~10
kostek lodu, nie większych niż 2 centymetry do dzbana, ułóż pokrywkę
na miejscu, podłącz kabel do gniazda, następnie ustaw pozycję
pokrętła na “P” na 1 lub 2, następnie ustaw pozycję pokrętła na “0” na 1
lub 2 sekundy, powtórz 6 do 10 razy.
UWAGA: przytrzymuj pokrywkę kiedy używasz funkcji kruszenia lodu
Funkcja kruszenia lodu
Aktualizacje danych elementów sprzętu są wykonywane regularnie.
Jednak niektóre instrukcje, specyfikacje i obrazki w powyższym
załączniku mogą się lekko różnić od twojego konkretnego urządzenia.
Wszystkie pozycje opisane w tej instrukcji mają jedynie charakter
poglądowy i mogą nie odnosić się do konkretnej sytuacji. Wszelkie
prawa zastrzeżone.
ORZECZENIE
To urządzenie jest oznakowane zgodnie z europejskim
zarządzeniem 2014/35/EU Pozbywania się Elektrycznego i
Elektronicznego Wyposażenia (WEEE). Upewniając się, że to
urządzenie jest wyrzucane poprawnie, unikniesz zanieczyszczenia
środowiska a także możliwego wyrządzenia szkód na zdrowiu
ludzi, co mogłoby być spowodowane niepoprawną segregacją
tego typu urządzeń. Symbol na produkcie oznacza, że nie może
być ono traktowane jako normalny odpad komunalny. Powinno
być zabrane do specjalnego punktu zbiorczego z rzeczami
elektrycznymi i elektronicznymi. To urządzenie wymaga
odpowiedniej utylizacji. W celu uzyskania dalszych informacji, jak
się z nim obchodzić, odnawiać i utylizować , skontaktuj się z
lokalnymi władzami , serwisem utylizacji urządzeń gospodarstwa
domowego lub sklepem, gdzie je zakupiłeś.
SEGREGACJA
Nie wyrzucaj tego produktu do
nieposortowanych odpadów komunalnych.
Segregacja odpadów tego typu jest
obowiązkowa.
PL PL

25 26
1. posteriore con cura e salvare tutte le istruzioni fornite con
l'apparecchio.
2. Usare sempre il vostro apparecchio da una presa di corrente
di tensione (A.C.only) contrassegnato sull'apparecchio.
3. Questo apparecchio è destinato solo per uso domestico.
4. Non tirare il cavo di collegamento, ma piuttosto sulla spina,
per separare l'apparecchio dalla rete elettrica.
5. Non utilizzare all'aperto.
6. Non lasciare l'apparecchio incustodito quando è acceso, in
quanto questo può essere fonte di pericolo.
7. In piedi l'apparecchio su un tavolo o una superficie piana.
8. Se il cavo di alimentazione è danneggiato, esso deve essere
sostituito dal produttore, dal suo servizio assistenza o da
personale qualificato al fine di evitare rischi.
9. Non utilizzare per più di 2 minuti. Mantenere 1 minuto di
riposo tra ogni ciclo.
10. Evitare di toccare le parti in movimento.
11. non si fondono ingredienti caldi.
12. Assicurarsi che la manopola di controllo è in posizione off
"0" prima di collegare-in.
13. Spegnere l'alimentazione e scollegare quando
l'apparecchio non è usa e prima della pulizia.
14. Non utilizzare l'apparecchio con una prolunga a meno che
questo cavo è stato controllato e collaudato da un tecnico o
un servizio personale qualificato.
15. Non utilizzare un apparecchio per scopi diversi da quelli
previsti.
16. Non collocare un apparecchio sopra o in prossimità di una
fiamma a gas caldo, elemento elettrico o in un forno caldo.
Non posizionare in cima a qualsiasi altro apparecchio.
17. Non lasciare che il cavo di alimentazione di un apparecchio
penda dal bordo di un tavolo o banco o toccare una
superficie calda.
18. Non utilizzare alcun apparecchio elettrico con un cavo
danneggiato o dopo l'apparecchio è caduto o danneggiato in
alcun modo.
19. Non immergere l'apparecchio in acqua o altri liquidi.
20. Fare attenzione quando si consegna le lame taglienti,
svuotando la ciotola e durante la pulizia.
21. Pulizia e manutenzione utente non devono essere
effettuate da parte dei bambini senza sorveglianza.
22. Questo apparecchio non deve essere utilizzato da
bambini. Mantenere l'apparecchio e il cavo fuori dalla portata
dei bambini.
23. Questo apparecchio può essere utilizzato da bambini di
età compresa da 8 anni e al di sopra e le persone con
capacità fisiche, sensoriali o mentali ridotte o la mancanza di
esperienza e conoscenza se sono stati controllati o istruiti
all'uso dell'apparecchio in modo sicuro e capire i rischi
coinvolti.
24. I bambini non devono giocare con l'apparecchio. Pulizia e
manutenzione utente non devono essere effettuate da parte
dei bambini senza sorveglianza.
25. domestica utilizzare solo.
26. Fare attenzione se il liquido caldo viene versato nel robot
da cucina o frullatore in quanto può essere espulso fuori
dell'apparecchio a causa di un improvviso fumante.
garanzie importanti
Contenuto del pacco
●Blender (1PC)
●Istruzioni per l'uso (1PC)
IT IT

27 28
Installazione e manutenzione
Prima di usare la Blender
Nome di
prodotti
Modello Tensione Frequenza Potenza Capacita’
frullatore a
immersione
220-240V~ 50/60Hz 350W 1500ml
8433325502102
garantire sempre il frullatore è scollegato dalla presa di corrente
prima di montare o rimuovere il gruppo lame.
Maneggiare sempre il gruppo lame con cautela, in quanto le lame
sono estremamente affilate.
1. Posizionare la guarnizione in gomma di silicone sopra il
montaggio della lama, come mostrato in fig. 1.
2. Posizionare il gruppo della lama nella base del vaso del
frullatore.
3. Assicurarsi che il gruppo lame è saldamente in luogo ruotando
in senso antiorario come indicato dalla freccia. (Come Fig.2).
Preparazione per l'uso:
1.Posizionare il vaso del frullatore sulla base
del motore e in senso orario di rotazione
(come Fig.3).
2.Rimuovere il coperchio o il tappo coperchio
dal vaso del frullatore, mettere gli ingredienti
nel vaso.
3.Place il coperchio con il tappo coperchio
posteriore sul vaso. Non superare il livello
massimo indicato 1,5 litri.
4.Place desiderata velocità miscelazione 1 o 2
o PULSE. Dopo aver completato la
miscelazione, ruotare la manopola di controllo
della velocità sulla posizione "0".
Descrizione generale
Dati tecnici
Importante:
Utilizzo del prodotto
Suggerimenti pratici di fusione
1. Una breve vortice nel frullatore libererà un Lumpy Gravy, o
una salsa a base di uova che ha separato.
2. Gli articoli alimentari per la miscelazione devono essere
tagliati a cubetti (circa 2-3cm), questo vi aiuterà a raggiungere
un risultato uniforme.
A: coperchio tappo
B: Coperchio
C: 1.5 Litro
D: Anello di gomma
E: Montaggio della lama estraibile
F: motore Base
G: Speed Control Knob
H: Piedini in gomma
IT IT

29 30
3. Non riempire mai il vaso del frullatore al di sopra del livello
massimo indicato.
4. Per garantire un efficiente miscelazione quando miscelazione
miscele secche, potrebbe essere necessario interrompere il
frullatore e spingere ingredienti lungo i lati del vaso con una
spatola (non fornito).
5. Quando la miscelazione una varietà di ingredienti insieme,
frullatore liquidi prima, e quindi aggiungere ingredienti secchi.
6. Verificare sempre le pietre vengono rimossi dalla frutta e ossa
dalla carne in quanto questi possono danneggiare le lame.
7. Non lavorare liquido caldo nel frullatore. Lasciare raffreddare
prima della lavorazione.
8. ventilare sempre il frullatore quando frullare ingredienti caldi,
può essere eseguita sollevando la coppa ingrediente fuori del
coperchio, dopo aver avviato il frullatore.
1. Metà riempire il frullatore con detergente caldo e poco.
2. Premere il tasto "Pulse" la funzione e tenere premuto 1-2
secondi e rilasciare.
Ripetere 3-4 volte.
3. Poi rimuovere il vaso e sciacquarlo sotto l'acqua corrente.
metodo di pulizia rapida
Massima velocità è necessaria quando mescolando i cibi duri,
mentre a bassa velocità sono per la miscelazione cibi morbidi. E
sono così di seguito.
Velocità 1: cibi morbidi di fusione come il latte e banane
Velocità 2: Blending cibi duri come le carote, soia e Ghiaccio tritato
Pulizia e stoccaggio
Cauzioni:
1. Svitare il gruppo lama dal bicchiere
ruotando il fondo del gruppo lama in senso
orario. (Come Fig.4).
2. Rimuovere la guarnizione di gomma dal
gruppo lame.
3. Lavare il vaso coperchio frullatore,
coperchio tappo, guarnizione in gomma,
gruppo lame e frullatore in acqua calda e
sapone.
4. Utilizzare solo un panno umido, morbida
spugna con detergente e pulire per pulire la
base del motore.
Cauzione: Fare attenzione durante la pulizia delle lame in quanto
sono estremamente affilate.
Note: Non pulire qualsiasi parte del frullatore in lavastoviglie.
Note: Mai immergere il blocco motore in acqua.
Per una pulizia accurata
1. Coil il cavo di alimentazione attorno avvolgicavo nella parte
inferiore del blocco motore.
2. Conservare in luogo fresco e asciutto.
Conservazione
1.Prodotto liquido: latticini, succhi di frutta, fermarsi, bere, pasta,
milk shake e così via.
2.A combinazione di ingredienti molli: latte, papaia, maionese.
3.Make ingredienti plumpy cotti: alimenti per l'infanzia
Consigli per l'uso ingredienti
IT IT

31 32
GARANZIA: 2 ANNI
Il metodo di funzionamento del ghiaccio come metodo di fusione.
Mettere 8 ~ 10 pezzi di ghiaccio, che non è grande di due
centimetri nel vaso, premere il coperchio in posizione, collegare il
cavo di alimentazione alla presa a muro, quindi impostare la
manopola di controllo in posizione "P" per 1 secondo a 2 secondi,
quindi impostare la manopola di controllo in posizione "0" per 1
secondo a 2 secondi, fare come questo per 6 cicli di 10 cicli.
ATTENZIONE: si prega di premere il coperchio quando si utilizza la
funzione di ICE.
La funzione di ICE
Gli aggiornamenti di componenti hardware sono fatti
regolarmente. Pertanto, alcune delle istruzioni, le specifiche e le
foto in questa documentazione possono differire leggermente
dalla vostra situazione particolare. Tutti gli elementi descritti in
questa guida solo a scopo illustrativo e potrebbero non essere
applicabili situazione particolare. Nessun diritto legale o diritti
possono essere ottenuti dalla descrizione fatta in questo manuale.
Disconoscimento
Questo apparecchio è etichettato in conformità alla direttiva
europea 2014/35/EU per le apparecchiature elettriche ed
elettroniche (RAEE). Assicurandosi che questo prodotto sia smaltito
in modo corretto, si contribuisce a evitare eventuali danni per
essere l'ambiente e per la salute umana, che potrebbero altrimenti
essere causate se fosse smaltito in modo sbagliato.
Il simbolo sul prodotto indica che esso non può essere considerato
come un normale rifiuto domestico. Dovrebbe essere portato in un
punto di raccolta per il riciclo di apparecchi elettrici ed elettronici.
Questo apparecchio richiede lo smaltimento dei rifiuti specialista.
Per ulteriori informazioni sul trattamento, recupero e riciclaggio di
questo prodotto si prega di contattare l'ufficio comunale, il servizio
di smaltimento dei rifiuti domestici, oppure il negozio dove è stato
acquistato.
SMALTIMENTO: Non smaltire il prodotto come
rifiuto non differenziato. Raccolta di tali rifiuti
separatamente per un trattamento speciale è
necessario.
IT IT

PL PL
1. Rück sorgfältig und speichern Sie alle mit diesem Gerät
Anweisungen.
2. Immer Ihr Gerät aus einer Steckdose von Spannung
(A.C.only) auf dem Gerät verwenden.
3. Dieses Gerät ist nur für den häuslichen Gebrauch.
4. Ziehen Sie nicht am Verbindungskabel , sondern am Stecker,
das Gerät vom Stromnetz zu trennen.
5. Nicht im Freien verwenden.
6. Lassen Sie das Gerät nicht unbeaufsichtigt, wenn es
eingeschaltet ist, da dies eine Gefahrenquelle sein kann.
7. Stellen Sie das Gerät auf einen Tisch oder eine flache
Oberfläche.
8. Wenn das Netzkabel beschädigt ist, muss es durch den
Hersteller, seinen Kundendienst oder eine ähnlich qualifizierte
Person, um eine Gefahr zu vermeiden, ersetzt werden.
9. Sie für mehr als 2 Minuten nicht. Halten Sie 1 Minute Pause
zwischen jedem Zyklus.
10. Vermeiden Sie die beweglichen Teile berühren.
11. Sie mischen nicht heißen Zutaten.
12. Stellen Sie sicher, das Einstellrad in der Aus-Position "0" ist
vor dem Einstecken in.
13. Schalten Sie das Gerät aus und ziehen Sie, wenn das Gerät
nicht und verwenden Sie vor der Reinigung.
14. Benutzen Sie das Gerät mit einem Verlängerungskabel
nicht, es sei denn diese Schnur durch einen qualifizierten
Techniker oder Servicetechniker geprüft und getestet wurde.
15. Benutzen Sie ein Gerät nicht für andere Zwecke als den
bestimmungsgemäßen Gebrauch.
16. Legen Sie ein Gerät nicht auf oder in der Nähe eines
heißen Gasflamme , elektrisches Element oder auf einem
beheizten Ofen. Stellen Sie keine auf der Spitze eines anderen
Geräts.
17. Lassen Sie das Netzkabel eines Gerätes über die Kante
eines Tisches oder Tischplatte hängen oder eine heiße
Oberfläche berühren.
18. Betreiben Sie kein elektrisches Gerät mit einem
beschädigten Kabel oder nachdem das Gerät in irgendeiner
Art und Weise fallen gelassen oder beschädigt wurde.
19. Stellen Sie nicht das Gerät in Wasser oder andere
Flüssigkeiten tauchen.
20. Seien Sie vorsichtig, wenn die scharfen Schneidklingen
Handhabung, die Schale entleeren und während der
Reinigung.
21. Reinigung und Wartung durch den Benutzer wird nicht
von Kindern ohne Aufsicht durchgeführt werden.
22. Dieses Gerät darf nicht von Kindern benutzt werden.
Halten Sie das Gerät und seine Kabel außerhalb der
Reichweite von Kindern.
23. Dieses Gerät kann ab 8 Jahren und oben und Personen
mit eingeschränkten physischen, sensorischen oder geistigen
Fähigkeiten oder Mangel an Erfahrung und Wissen im Alter
von Kindern benutzt werden, wenn sie beaufsichtigt oder in
der Benutzung des Gerätes in einem sicheren Weg gegeben
wurden, und zu verstehen, die damit verbundenen Gefahren.
24. Kinder dürfen nicht mit dem Gerät spielen. Reinigung und
Wartung durch den Benutzer wird nicht von Kindern ohne
Aufsicht durchgeführt werden.
25. Nur in Haushalt verwenden.
26. Seien Sie vorsichtig, wenn heiße Flüssigkeit in der
Küchenmaschine oder Mixer gegossen wird, wie es aus dem
Gerät aufgrund eines plötzlichen Dämpfen ausgestoßen
werden kann.
Wichtige Sicherheitsmaßnahmen
• Mixer (1PC)
• Bedienungsanleitung (1PC)
Packungsinhalt
DE DE
33 34

Installation und Wartung
Vor dem Verwenden des Mixer
Achten Sie immer darauf den Mixer aus der Steckdose vor der
Montage der Steckdose gezogen wird oder das Entfernen der
Klingenanordnung .
Fassen Sie die Messeranordnung mit Vorsicht, da die Klingen extrem
scharf sind.
Um das Blade-System zusammenstellen , arbeiten wie folgt:
1. Legen Sie die Silikongummidichtung über die Blattanordnung ,
wie zeigen in Fig. 1.
2. Setzen Sie die Messeranordnung in die Basis des Mixbecher.
3. Stellen Sie sicher, dass die Klingeneinheit fest an der Stelle ist,
indem sie es gegen den Uhrzeigersinn, wie durch den Pfeil
drehen. (Wie Fig.2).
Vorbereitung zum Gebrauch:
1. Setzen Sie den Mixbecher auf der Motorbasis
und drehen sich im Uhrzeigersinn (Bild 3).
2. Nehmen Sie den Deckel oder den Deckel
Stopfen aus dem Mixbecher, legen Sie die
Zutaten in das Glas.
3. Setzen Sie den Deckel mit dem Deckel Stopfen
wieder auf den Topf. Sie nicht die maximal
angegebene Höhe 1,5 Liter nicht überschreiten.
4. Legen Sie gewünschte Mischgeschwindigkeit 1
oder 2 oder PULSE. Nach Mischen
abgeschlossen haben, drehen Sie den
Geschwindigkeitsregler auf die Position "0".
Allgemeine Beschreibung
Technische Daten
Wichtig:
Verwenden Ihres Produkts
Handy-Blending Hinweise
1. Ein kurzer Wirbel in den Mixer wird eine klumpige Soße
retten oder eine Eier-basierte Soße, die getrennt hat.
2. Nahrungs zum Mischen sollte (ca. 2-3cm) in Würfel
geschnitten werden, das helfen wird bei der Erreichung
ergeben ein noch.
3. Niemals den Mixbecher über dem Höchstwert angezeigt zu
A: Deckel Stopfen
B: Deckel
C: Glas (1,5 Liter)
D: Gummiring
E: Abnehmbare Klinge Montage
F: Motorbasis
G: Speed Control Knob
H: Gummifüße
35 36
PL PLDE DE
NAME DES PRODUKTS MODELL SPANNUNG FREQUENZ MACHT FÄHIGKEIT
mixer 8433325502102 220-240V~ 50/60Hz 350W 1500ml
Table of contents
Languages:
Other AIGOSTAR Blender manuals

AIGOSTAR
AIGOSTAR 30IWW User manual

AIGOSTAR
AIGOSTAR 8433325500191 User manual

AIGOSTAR
AIGOSTAR 8433325500276 User manual

AIGOSTAR
AIGOSTAR 30IWX User manual

AIGOSTAR
AIGOSTAR 02075BL08 350W-G User manual

AIGOSTAR
AIGOSTAR 8433325504175 User manual

AIGOSTAR
AIGOSTAR 30JPO User manual

AIGOSTAR
AIGOSTAR 8433325503154 User manual

AIGOSTAR
AIGOSTAR 30JDB User manual

AIGOSTAR
AIGOSTAR 8433325503161 User manual