manuals.online logo
Brands
  1. Home
  2. •
  3. Brands
  4. •
  5. AIMS Power
  6. •
  7. Inverter
  8. •
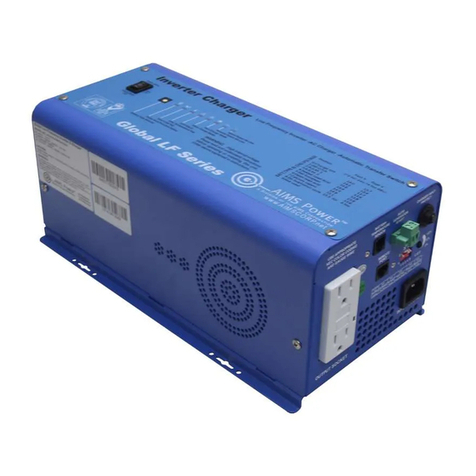
  9. AIMS Power PE200012230S User manual

AIMS Power PE200012230S User manual

WARNING : Please read this manual in its entirety before using or
connecting this inverter. It includes important instructions and safety tips.
Model number: PE200012230S
(DE)
Modelle
Versorgungsspannung:
Ausgangsspannung:
Ausgangsfrequenz:
Wellenform am Ausgang:
Dauerleistung am Ausgang:
Spitzenleistung am Ausgang:
Unterspannungsschutz:
Überspannungsschutz:
USB-Buchse:
Hauptschmelzsicherung:
Betriebstemperatur:
Abmessungen (LxWxH)
Gewicht
lüfter
fernbedienung
PE200012230S
12VDC
230Vac
50Hz
Reine Welle
2000W
4000W
10VDC
16VDC
5V, 2.1A max
12x40A
0-40°C,32-104°F
435x236x95mm
kg / 5.7kg boxed 5.15
Temperatur > 40℃
optional
(ES)
Modelos de
Tensión de alimentación:
Tensión de salida:
Frecuencia de salida:
Forma de onda de salida:
Potencia de salida continua:
Potencia de salida de pico:
Protección por bajada de tensión:
Protección por subida de tensión
Conector USB:
Fusible
Temperatura de funcionamiento:
Dimensiones (LxWxH)
Peso
Ventilador de refrigeración
Control remoto
PE200012230S
12VDC
230Vac
50Hz
Onda senoidal pura
2000W
4000W
10VDC
16VDC
5V, 2.1A max
12x40A
0-40°C,32-104°F
435x236x95mm
kg / 5.7kg boxed 5.15
La temperatura> 40℃
Opcional
(FR)
Modèles
Tension d’alimentation::
Tension de sortie:
Fréquence de sortie:
Forme d’onde de sortie:
Puissance de sortie continue:
Puissance de sortie de crête:
Protection sous-tension:
Protection surtension:
Prise USB :
Fusible
Température de fonctionnement:
Dimensions (LxWxH)
Poids
Ventilateur de refroidissement
télécommande
PE200012230S
12VDC
230Vac
50Hz
L'onde sinusoïdale pure
2000W
4000W
10VDC
16VDC
5V, 2.1A max
12x40A
0-40°C,32-104°F
435x236x95mm
kg / 5.7kg boxed 5.15
La température> 40℃
facultatif
(IT)
Tipo
Tensione di alimentazione:
Tensione di uscita:
Frequenza di uscita:
Forma dˇonda di uscita:
Potenza di uscita continuativa:
Potenza di uscita di picco:
Protezione sottotensione:
Protezione sovratensione:
Presa USB:
Fusibile
Temperatura di funzionamento:
Dimensioni (LxWxH)
Peso
Ventola
Telecomando
PE200012230S
12VDC
230VAC
50Hz
Puro sine
2000W
4000W
10VDC
16VDC
5V, 2.1A max
12x40A
0-40°C,32-104°F
435x236x95mm
kg / 5.7kg boxed 5.15
La temperatura > 40℃
Opzionale
1. 2.
1. Use of advanced micro processor .
2. Cooling fan with intelligent temperature control.
3. USB power supply.
SPECIFICATION
(EN)
Model
Power supply Voltage
Output voltage
Output frequency
Output wave form
Continuous power output
Peak power output
Under voltage safeguard
Over voltage safeguard
USB outlet
Fuse
Operating temperature
Dimension(LxWxH)
Weight
Cooling fan
Remote
PE200012230S
12VDC
230Vac
50Hz
Pure sine wave
2000W
4000W
10VDC
16VDC
5V, 2.1A max
12x40A
0-40°C,32-104°F
18x9.5x3.8in
11.4 lbs / 12.6 lbs boxed
temperature > 104°F
Optional
Our power inverter uses advanced engineering, and it can supply you with AC power
converted from a DC power source. It not only can be used in cars, vessels and for
camping, but also can be used in emergencies when out of electricity.
In order to use the inverter efficiently and safely, please install and use it in a proper
way. Please read the instructions carefully before installing and using the inverter. Pay
special attention to the "WARNING" and "NOTICE" statements in the manual.
1) Read the manual before connecting inverter and keep it for future reference.
2) Don't put the inverter in direct sun light, heat source, damp environment.
3) The housing of inverter will get hot when using, please avoid touching materials that
can't stand high temperature, such as clothes, sleeping bag and carpet, etc.
4) The inverter is designed for use with a negative ground electrical system! Don't use it
with positive ground electrical systems (The majority of modern automobiles, RVs,
trucks and boats are negative ground).
5) Do not disassemble the unit as it may cause fire or electric shock.
6) Keep children away from inverter and don't allow them to play with the unit.
7) The power inverter will output AC power as utility power, please treat the output
terminal as carefully as your home AC socket. Don't put any foreign objects into the
output terminal except electrical appliance plug. It will cause danger or fire if used
improperly .
8) Disconnect the battery and inverter when the inverter is not in use.
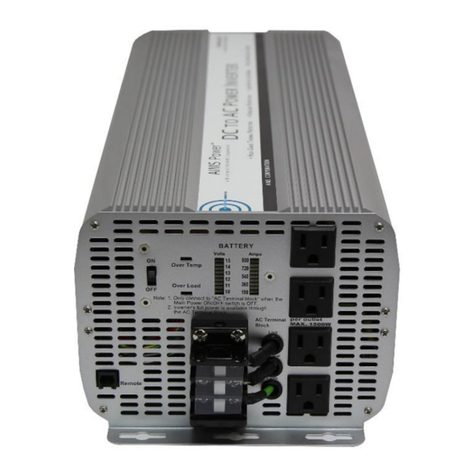
1) Front panel:
2) Rear panel:
AC output
socket
Switch
LED protect
indicator
USB Port
Wired
remote
port
7
7 / "
8
11
8 / "
16
3. 4.
3) Remote control box (not included)
Remote control interface
4. ASSEMBLE
1. Location
First ensure that there is enough space to install the inverter, while the installation
location must meet the following requirements:
(1) Dryness: Avoid dripping water or other liquids on the inverter.
(2) Coolness: The operating temperature for the product is 32-104°F(0-40°C), the
preferable temperature is 50-77°F(10-25°C), the lower temperature is better within
this range.
(3) Ventilation: There should be a certain distance between inverter and other objects, to
avoid blocking the product's vents. Allow 2 inches (5cm)from openings.
(4) Cleanness: Do not install the product around dust, wood chips or other particles. When
the cooling fan turns on, the particles will be sucked into the inverter , thus increasing
internal temperature.
(5) When connecting inverters and batteries, it will produce arcs or sparks, so there
should not be flammable objects around, such as gasoline, alcohol, etc.
2. Mounting instructions
Mount on a solid platform because of the heavy weight, such as floor, table or stable
support. In order to avoid sliding off, the platform should bear the weight of the product,
and it is better to attach the product with four screws.
3. Mounting the remote control box (Optional equipment)
1
3 / "
16
5
2 / "
16
1
2 / "
16
5
1 / "
16
1) the remote is designed to be mounted on a dash or other surface where a hole should
be cut so that it sits flush. This is not a requirement however just a recommendation.
2) The remote cable should be plugged into inverter and the remote before mounted.
Note: Optional remote is not needed for inverter operation. The main power switch will
work the power on / off.
5. Battery
1). Voltage and current of the battery
The battery is designed to supply the unit with DC input voltage and the rated
voltage should be in accordance with the rated input voltage of the inverter. Any
voltage exceeding the range of the input voltage of the inverter will cause over
voltage or under voltage protection.
Also, the battery must supply sufficient current. A small capacity battery
cannot drive a large power electrical appliance. In this case, the battery will
cause an under voltage protection because of the over-discharge of the battery.
The simple calculation method of battery current is: load power divided by
battery voltage. Due to the consumption of the inverter itself, the actual current
will be about 10% larger. For example, the voltage of a lead acid battery is
12VDC, and load power is 1000W, therefore, the actual current of the battery is
about 1000W÷12V×110%≈91.6Adc.
69 mm
59 mm
44 mm34 mm
(216
mm)
(220mm)
5. 6.
2). Battery operating time
Battery operating time depends on battery capacity and current, and the calculation
formula of operating time is: battery capacity divided by current, that is, battery capacity
divided by the value of the load power divided by battery voltage times 110%. For
example, battery specification is 12V, 2000Ah, load power is 1000W, so the total
discharge time is 2000Ah÷ (1000÷12×110%) ≈21.8 hours.
Notice: The result of the formula above is on the basis of discharging rate of 20 hours of
the battery, that is, the result is from the discharging current of 2000Ah battery not to
exceed 100A. When the charging current exceeds this value, the discharging period will
be reduced. And the capacity of the battery may also influence the result. See the
specification of the battery manufacturer for more detailed information.
6. Connection
1) Grounding
The power inverter has a terminal on the rear panel marked " Grounding "or " ". This is
used to connect the chassis of the power inverter to ground. The ground terminal has
already been connected to the ground wire of the AC output receptacle through the
inverter.
The ground terminal must be connected to the ground wire, which will vary depending on
where the power inverter is installed. In a vehicle, connect the ground terminal to the
chassis of the vehicle. In a boat, connect it to the boat's grounding system. In a fixed
location, connect the ground terminal to earth.
Warnings:
2
● Make sure to tighten all connections. The ground wire must be 14AWG (2.08 mm ) or
even larger.
● Do not operate the power inverter without connecting to ground. Electric shock may
result.
2) Connect to the lead acid battery or other type within dc input range
(1) Please check all the safety precautions before connecting, and then check whether
the battery voltage is in accordance with the input voltage of the inverter. Battery and
inverter voltages must match.
(2) The connecting wire must bear enough current. These inverters require 1 AWT
2
(53.5mm ) or larger wire for its battery connections.
Notice:
(1) In practice, thicker wire can be replaced by two thin parallel wires if the total cross-
sectional area of the wire meets the requirements. This may however cause an increase
in RF.
(2) In high current, the input DC wire may produce a voltage drop, therefore, the operating
voltage should be subject to the value on the terminals. If the voltage drop is too large, you
can increase the cross-sectional area or reduce the length of the lead.
(3) Connect cathode wire of the battery to the cathode terminal (black) on the rear panel of
the inverter and then connect the anode wire of the battery to the anode terminal (red) on
the inverter, and tighten them.
Warnings:
(1) Please wear eye protection and work clothes when working around the battery to
protect your eyes and skin from acid and corrosive objects.
(2) In case acid makes contact with your skin, clean it using soap and water as soon as
possible. If the acid splashes into your eyes accidentally, rinse with cold water and go
to a hospital.
(3) Do not put any combustible materials in the location of installation for it will result in a
fire hazard.
(4) Keep good ventilation. The battery may produce a little flammable gas when used, so
keep away from the inverter and it is better to install them in a different space.
(5) Tighten all DC connections, or it will result in over- reduction of the voltage or over-
temperature of the inverter.
(6) Reverse connection of the polarities or short circuit will burn the fuse or result in
permanent damage of the internal elements of the inverter.
(7) Remove all rings and jewelry when working around your inverter.
(8) Although there is over-voltage protection, it may also cause damage to the inverter if
the input voltage is too high.
7. Usage
①. How to use the inverter
1) Check the output voltage and capacity of the battery to make sure it is in accord with the
requirements of the product.
2) Connect the battery and the DC cable of the inverter to ensure that the polarities are not
connected reversely and are tight.
3) Power on inverter: Press the power switch of inverter or remote for over 0.5s and
release. If the indicator light on the inverter or on the remote control box is on, it means
that the inverter started to work normally. This method can avoid turning on the unit by
mistake due to accidental touch.
4) Before plugging anything into your inverter, make sure the appliance you’re trying to
power is shut OFF, then plug it into the AC outlet of your inverter and power on your
appliance.
5) Once finished using the inverter, turn off your electrical appliance and the inverter. Also,
if you do not plan to use the inverter for a long period of time, disconnect it from your
battery bank.
2). Under voltage protection: The inverter will automatically shut down when the input
DC voltage is lower than 9.5V.The buzzer will whistle continuously and the green light is
off, red light is on. Please turn off the inverter and use it after recharging the battery.
3). Over voltage protection: The inverter will automatically shut down when the input DC
voltage is higher than 16V.The buzzer will whistle continuously and the green light is off,
red light is on. Please turn off the inverter and adjust the input voltage to the admissible
range.
4). Overload protection: The inverter will automatically shut down when the load is
higher than the rated power. The buzzer will whistle continuously. Turn off the inverter and
resume normal operation after taking away the excessive load.
5). Short-circuit protection: The AC output will be automatically shut down when short
circuited. It will automatically reset after the problem is solved.
6). Thermal protection: The unit will get hot during operation. If the temperature is higher
than 149°F or 65°C, the inverter will automatically shut down. Then the buzzer will whistle
continuously and the green light is off, red light is on. Please turn off the inverter, and
continue using it after the temperature goes back to normal naturally. Meanwhile find out
the factors causing the fault, such as ventilation, ambient temperature, vent, load power
and so on. It can avoid similar things from happening again.
Notice:
In the case of over voltage, under voltage and thermal protection, the inverter will shut
down automatically after 1 minute if the user doesn't turn it off . When it is in the OFF
position, the inverter doesn't consume battery current.
Pure Sine Wave Output
(230 VAC Model)
312 Volta peak
7. 8.
6) The cooling fans inside the inverter do not work until the case temperature rises up to
about 104°For40°C.
7) Switch off inverter or remote to turn off. At that time, the indicator lights for both inverter
and remote are off. The inverter does not consume current from the battery when it is
switched off.
② How to use USB power supply
This model supplies a USB output, and provides stable voltage at 5V DC, maximum
current 2.1A directly to a portable device with USB port.
Notice: Before using the USB power supply, please make sure the device can be charged
by USB and the maximum working current is no more than 2.1A.
8. About soft start technology
The output voltage rises up from low to normal when the inverter is turned on. This can
reduce high startup currents, which can make startup easier for large inductive loads.
As for the large inductive loads, such as electric tools and capacitive loads, we suggest
turning on the switch of the appliance firstly and then the inverter's. The soft start may be
enough to power the high startup.
9. The output wave form
The output wave form of this inverter is a Pure Sine Wave, which is similar to utility-
supplied AC electricity. Pure sine wave is applicable in most loads, including electrical
equipment, such as Linear Adaptor, switching power supply, transformer, motor and so on.
Compared to Modified wave form, for inductive loads such as a refrigerator and electric
fans, pure sine wave form can improve its power factor and the battery's efficiency and
reduce working noises. For capacitive loads such as adapter of lap-top, pure sine wave
can lower the rush current at work and reduce interferences to increase reliability and
prolong the life of the product.
10. Protection Features
1). Input under-voltage alarm: When the input DC voltage is lower than 9.8V , the buzzer
will whistle intermittently to remind that the inverter will go into the under voltage
protection. Pay attention to save the data if you are using a computer.
If the unit still doesn't work normally after using all the methods above, it maybe the
internal faults of the circuit. Please call or email your local distributor.
No output voltage,
buzzer whistles
continuously
Low input DC voltage
High input DC voltage
Overload
Over temperature
1. The switch is off.
2. Loose connection
Disturbance
Recharge or replace the battery.
1. Turn on the power switch.
2. Check the connections.
1. Keep the inverter far from antenna.
2. Use screened antenna.
No output voltage
Incorrect output
voltage
Cannot power the
load
When using with TV
or audio, there is
snowflake on the
screen or noise from
the audio.
1. Load power is too large, or
the actual power of the
appliance exceeds nominal
power.
2. The starting power of
appliance is larger than the
rated power(such as motor)
1. Measure using true RMS
multimeter.
2. The battery power of RMS
Multimeter is low.
3. The input voltage is too
high or too low.
1. Do not use when the battery is
charging.
2. Check the rated voltage of the
battery and make sure that it is in
the allowable range of the input
voltage.
1. Cut off the load and allow to cool for
10 to 30 minutes. Restart after it
reaches normal temperature.
2. The load power is too large. Reduce
the total load power to the range of
rated power.
3. Avoid blocking the vent and improve
the ventilation condition.
4. Reduce the ambient temperature.
Reduce the load power.
1. Use a true RMS multimeter to
measure, such as model FLUKE
177/179.
2. Change the battery of the
multimeter then test again.
3. Try to maintain the input voltage in
the range of rated power.
Reduce the load power, or turn the
appliance on first, then open the
inverter. Use the internal soft-start
circuit of the inverter to buffer the
start.
11. Troubleshooting tips AIMS Power Warranty Instructions:
This product is designed using the most modern digital technology and under very strict
quality control and testing guide lines. If however you feel this product is not performing
as it should, please contact us:
techsupport@aimscorp.net or 001-(775)359-6703 or contact your local distributor.
We will do our best to resolve your concerns. If the product needs repair or
replacement, make sure to keep your receipt/invoice, as that will need to be sent back
along with the package and RA# prepaid to AIMS. You have a full 1 year from date of
purchase warranty.
This warranty is valid world wide with the exception that freight and duty charges
incurred outside the contiguous 48 United States will be prepaid by customer.
Except as provided above, AIMS makes no warranty of any kind, express or implied,
including without limitation the implied warranties of merchantability and fitness for a
particular purpose. In no event shall AIMS be liable for indirect, special or
consequential damages. This warranty only applies to AIMS Power branded products.
All other name brand products are warranted by and according to their respective
manufacturer. Please do not attempt to return non-AIMS Power branded products to
AIMS Power.
For additional products such as:
- Modified sine wave inverters
- Pure sine wave inverters
- Low Frequency Inverters
- Solar Charge Controllers
- Micro Grid Tied Inverters
- Inverter Chargers and Automatic transfer switches
- Converters AC-DC and DC-DC
- Custom cut cables
- Batteries
- Solar Panels & Racks
Please visit our web site: www.aimscorp.net
To find out where to buy any of our products, you may also e-mail: sales@aimscorp.net
or call 001-(775)359-6703.
9. 10.

Other AIMS Power Inverter manuals

AIMS Power PWRI150012120S User manual

AIMS Power

AIMS Power PWRI150012120S User manual

AIMS Power PWRINV800W User manual

AIMS Power

AIMS Power PWRINV800W User manual

AIMS Power PWRINV12KW24V User manual

AIMS Power

AIMS Power PWRINV12KW24V User manual

AIMS Power PWRINV500012W User manual

AIMS Power

AIMS Power PWRINV500012W User manual

AIMS Power PWRINV8KW12V User manual

AIMS Power

AIMS Power PWRINV8KW12V User manual

AIMS Power PWRI18012S User manual

AIMS Power

AIMS Power PWRI18012S User manual

AIMS Power PICOGLF10W12V120V User manual

AIMS Power

AIMS Power PICOGLF10W12V120V User manual

AIMS Power GEN2000W120V User manual

AIMS Power

AIMS Power GEN2000W120V User manual

AIMS Power PWRI100012120S User manual

AIMS Power

AIMS Power PWRI100012120S User manual

AIMS Power PWRINV150W User manual

AIMS Power

AIMS Power PWRINV150W User manual

AIMS Power PIGRID250 User manual

AIMS Power

AIMS Power PIGRID250 User manual

AIMS Power GEN6600W240VS User manual

AIMS Power

AIMS Power GEN6600W240VS User manual

AIMS Power PWRI8K22050 User manual

AIMS Power

AIMS Power PWRI8K22050 User manual

AIMS Power PWRB2500W User manual

AIMS Power

AIMS Power PWRB2500W User manual

AIMS Power PWRINV250012W User manual

AIMS Power

AIMS Power PWRINV250012W User manual

AIMS Power PWRINV400W User manual

AIMS Power

AIMS Power PWRINV400W User manual

AIMS Power PV6X120RACK User manual

AIMS Power

AIMS Power PV6X120RACK User manual

AIMS Power SCC60-100A User manual

AIMS Power

AIMS Power SCC60-100A User manual

AIMS Power PWRIG100012120S User manual

AIMS Power

AIMS Power PWRIG100012120S User manual

AIMS Power PWRIX120012SUL User manual

AIMS Power

AIMS Power PWRIX120012SUL User manual

AIMS Power PWRINV250W User manual

AIMS Power

AIMS Power PWRINV250W User manual

AIMS Power PWRNV1250W User manual

AIMS Power

AIMS Power PWRNV1250W User manual

AIMS Power PWRB1000 User manual

AIMS Power

AIMS Power PWRB1000 User manual

AIMS Power PWRI300012120S User manual

AIMS Power

AIMS Power PWRI300012120S User manual

Popular Inverter manuals by other brands

KATEK Steca Solarix PLI5000-48 Setup guide

KATEK

KATEK Steca Solarix PLI5000-48 Setup guide

IVT GN-850 manual

IVT

IVT GN-850 manual

Tycon Power Systems RemotePro RPSTL24 manual

Tycon Power Systems

Tycon Power Systems RemotePro RPSTL24 manual

FeelElec FY8300S Series user manual

FeelElec

FeelElec FY8300S Series user manual

PurePower PP2100R Operator's manual

PurePower

PurePower PP2100R Operator's manual

Mitsubishi Electronic FR-E860 Series instruction manual

Mitsubishi Electronic

Mitsubishi Electronic FR-E860 Series instruction manual

Crown Micro ELEGO-6KW-IP65 user manual

Crown Micro

Crown Micro ELEGO-6KW-IP65 user manual

Mitsubishi Electric FR-A7NC E kit-SC instruction manual

Mitsubishi Electric

Mitsubishi Electric FR-A7NC E kit-SC instruction manual

tbs electronics powersine PS1000-12 owner's manual

tbs electronics

tbs electronics powersine PS1000-12 owner's manual

MPP Solar PIP 1624 user manual

MPP Solar

MPP Solar PIP 1624 user manual

OLYS GPI2012A user manual

OLYS

OLYS GPI2012A user manual

Mastervolt MASS COMBI 12/2500-100 user manual

Mastervolt

Mastervolt MASS COMBI 12/2500-100 user manual

Haier AS072XVERA Operation manual

Haier

Haier AS072XVERA Operation manual

AEC TOUGH-3P Series installation manual

AEC

AEC TOUGH-3P Series installation manual

Sealey MW100 instructions

Sealey

Sealey MW100 instructions

Black & Decker 724297-01 owner's manual

Black & Decker

Black & Decker 724297-01 owner's manual

IRFTS EASY ROOF EVOLUTION L1 installation instructions

IRFTS

IRFTS EASY ROOF EVOLUTION L1 installation instructions

Elby Designs EURO SERGE ES Series manual

Elby Designs

Elby Designs EURO SERGE ES Series manual

manuals.online logo
manuals.online logoBrands
  • About & Mission
  • Contact us
  • Privacy Policy
  • Terms and Conditions

Copyright 2025 Manuals.Online. All Rights Reserved.