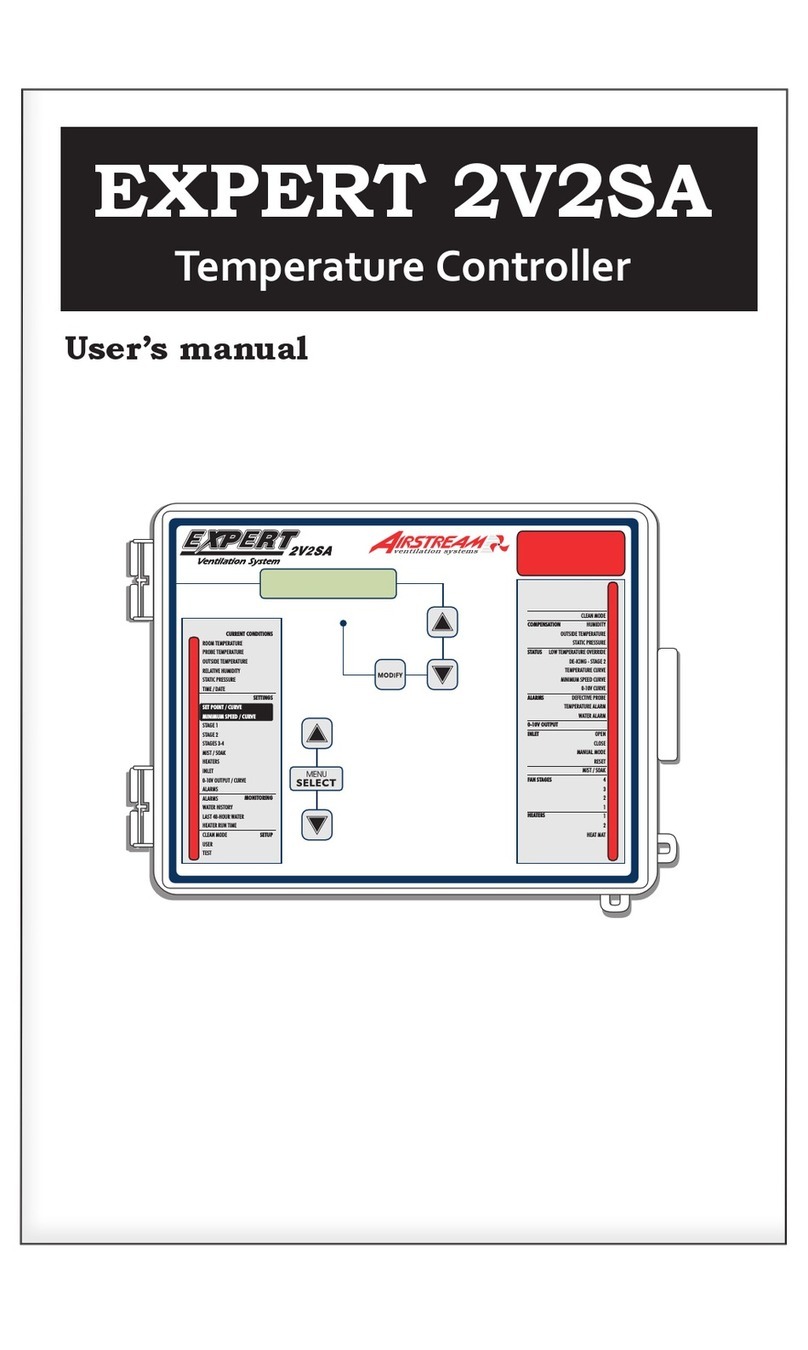
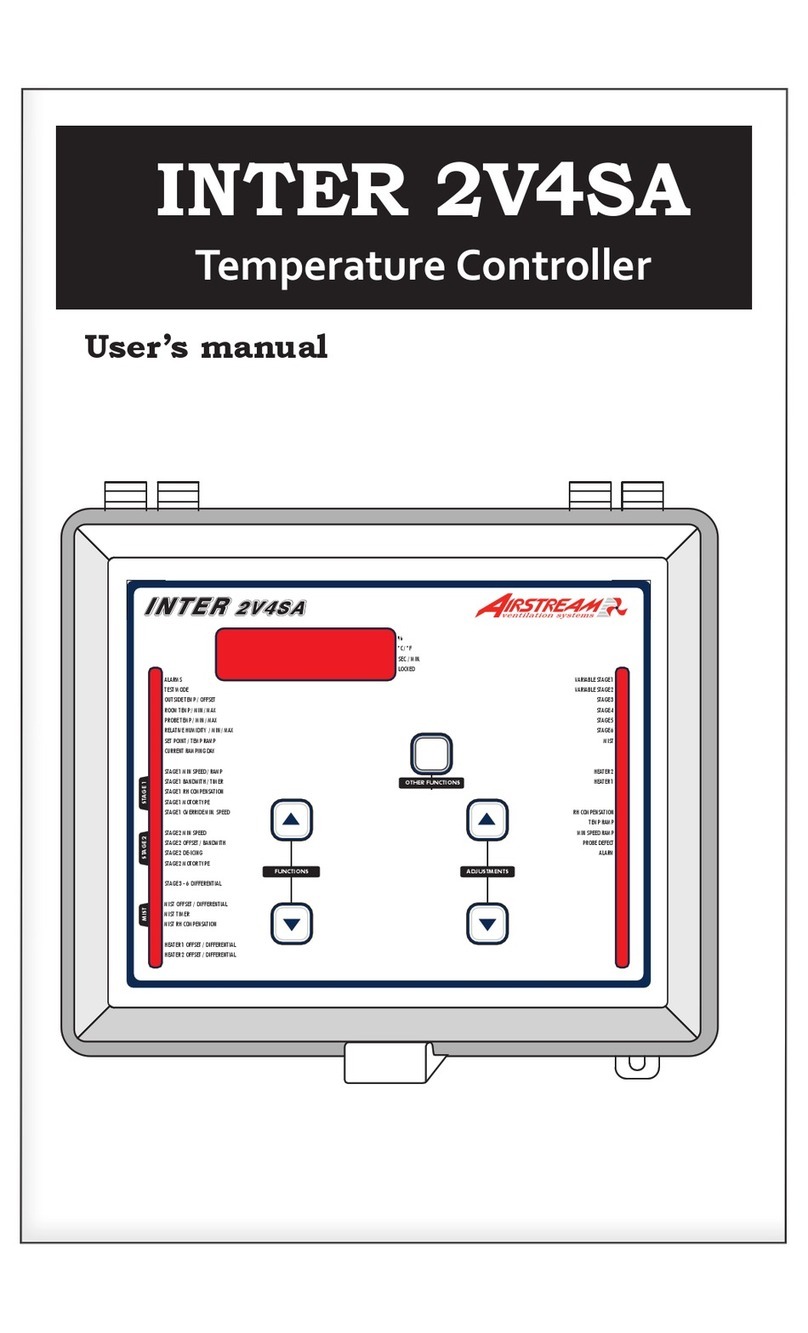
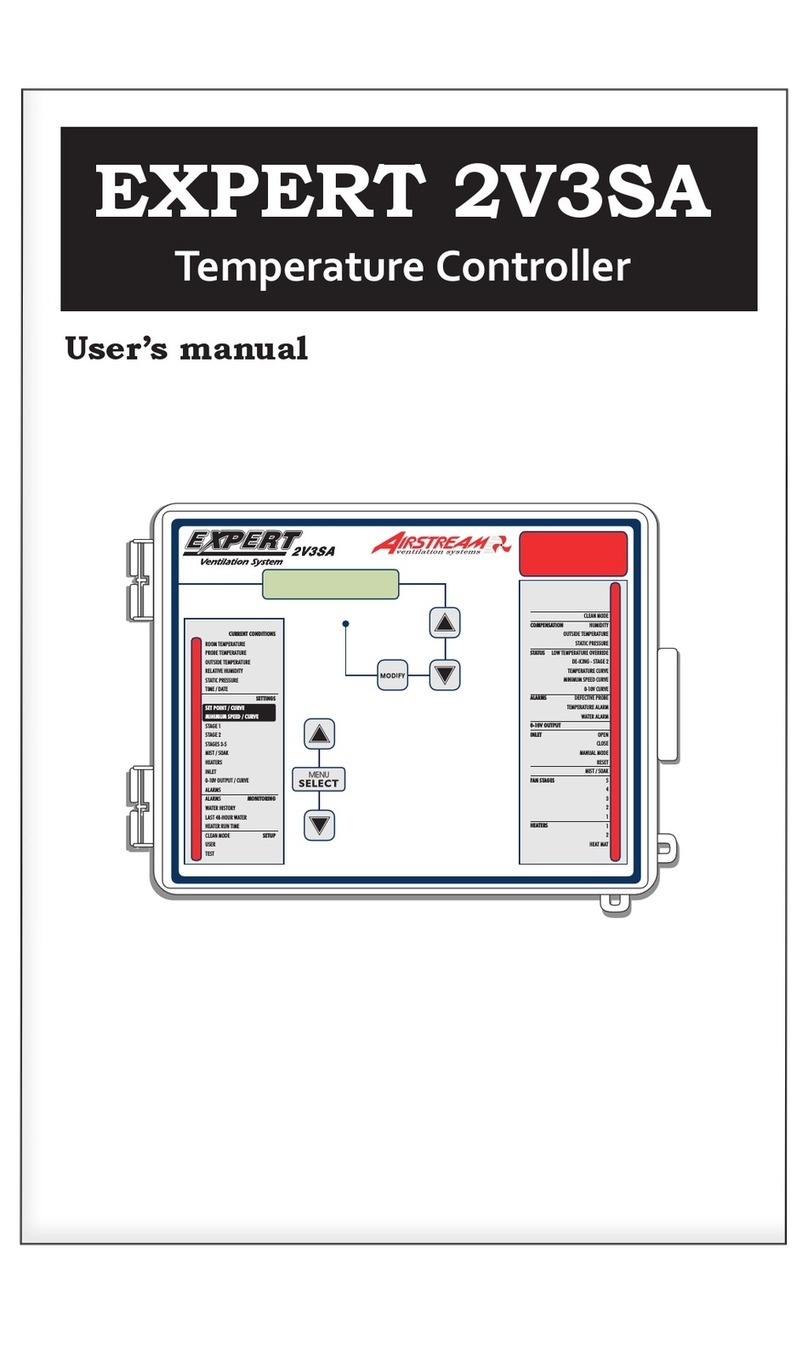
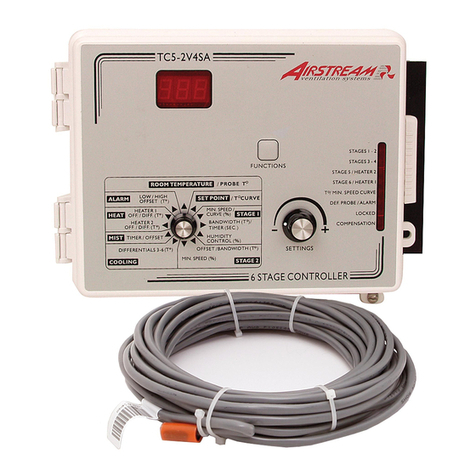
Airstream EXPERT PN110 User manual

M 890-00001 rev.23 REV. 17
EXPERT PN110
Temperature controller
User’s Manual

2EXPERT PN110 rev.23
EXPERT PN110
WARNINGS
The warranty can be void if this product is
used in a manner not specified by the manu-
facturer.
Every effort has been made to ensure that
this manual is complete, accurate and up-
to-date. The information contained in it is
however subject to change without notice
due to further developments.
47
EXPERT PN110 rev.23
EXPERT PN110
NOTES

46 EXPERT PN110 rev.23
EXPERT PN110
NOTES
3
EXPERT PN110 rev.23
EXPERT PN110
TABLE OF CONTENTS
1. INTRODUCTION ...................................................4
1.1. Precautions .....................................................4
1.2. Symbols of the Manual .....................................4
1.3. Controller’s Overview .......................................4
1.4. Main Features..................................................5
2. MOUNTING INSTRUCTIONS ..................................5
2.1. Installing the Controller on the Wall ....................5
2.2. Connections ....................................................5
2.2.1. Main Wiring .........................................................5
2.2.2. Alarm Connection .................................................5
2.2.3. Sensor Inputs.......................................................5
2.2.4. 0-10V Output Connection......................................6
3. USER INTERFACE .................................................6
3.1. Location of the Controls....................................6
3.2. How to Select & Modify the Parameters..............6
3.3. Status LEDs ....................................................6
4. INSTALLATION SETUP..........................................7
4.1. Setting the Time & Date ...................................7
4.1.1. Adjusting Improper System Time ............................7
4.2. Password .......................................................7
4.3. Measuring Units...............................................7
4.4. LCD Contrast...................................................7
4.5. RH Compensation Setup ...................................9
4.6. Probe Setup ....................................................9
4.6.1. Probe Activation ................................................... 9
4.6.2. Water Meter Calibration....................................... 10
4.6.3. Probe Assignment............................................... 10
4.6.4. Relay Assignment ............................................... 10
4.6.5. Night Settings .................................................... 13
4.6.6. Clean Mode........................................................ 13
4.6.7. Test Mode ......................................................... 13
5. TEMPERATURE SETTINGS...................................14
5.1. Set Point.......................................................14
5.2. Temperature Curve.........................................14
5.2.1. Modifying Curve Points........................................ 15
6. VENTILATION & COOLING ..................................15
6.1. Minimum Ventilation.......................................15
6.1.1. Min Vent. Fan & Timer ........................................ 15
6.1.2. Min Vent. Fan Speed........................................... 15
6.1.3. Min Vent Night Settings ...................................... 15
6.1.4. Min Ventilation Curve.......................................... 16
6.2. Fan Stages ....................................................17
6.2.1. Principle of Operation .......................................... 17
6.2.2. Settings............................................................. 18
6.2.3. 0-10V Ventilation Outputs .................................. 19
6.3. Air Inlets .....................................................20
6.3.1. Principle of Operation .......................................... 20
6.3.2. Settings............................................................. 20
6.3.3. Actuator Reset ................................................... 21
6.3.4. Inlet Calibration .................................................. 22
6.3.5. Opening Compensations ...................................... 22
6.3.6. Static Pressure Set Points.................................... 23
6.4. Natural Ventilation .........................................24
6.4.1. Principle of Operation .......................................... 24
6.4.2. Natural Ventilation Settings.................................. 24
6.4.3. De-icing/Purge.................................................... 24
6.4.4. Curtain Compensation ......................................... 25
6.4.5. Transition between Lateral & Natural Ventilation..... 25
6.5. Stir Fans .......................................................26
6.6. Misting Output...............................................27
6.7. Soaking ........................................................27
7. DE-ICING ...........................................................28
8. HEATING...........................................................29
8.1. Heating Stages ..............................................29
8.2. 0-10V Heater ................................................29
8.3. Brooder Heater...............................................30
8.3.1. On/Off Brooder Heater......................................... 30
8.3.2. 0-10V Brooder Heater ......................................... 31
8.3.3. Brooder Curve ................................................... 31
9. CLOCK OUTPUTS ..............................................32
10. RH COMPENSATION...........................................33
11. ALARMS ...........................................................34
11.1. Alarm Log .....................................................34
11.2. Alarm Conditions ...........................................34
11.3. Alarm Settings...............................................35
12. MONITORING FUNCTIONS ..................................36
12.1. Current Conditions .........................................36
12.2. Current Set Point ...........................................36
12.3. Daily Histories ...............................................36
12.3.1. Heater Daily Run Time History.............................. 36
12.3.2. Resetting the Daily Run time of a feeder ................ 36
12.3.3. Water Consumption Daily History ......................... 37
12.3.4. Other Daily History Menus ................................... 37
12.3.5. Resetting the Daily Histories................................. 37
12.4. Hourly History Log .........................................37
12.5. Animal Age & Count.......................................38
13. TECHNICAL SPECIFICATIONS..............................39
14. TRANSFER MENU...............................................40
14.1. Screen Contrast ............................................40
14.2. Communication Speed ....................................40
14.3. Update/Backup Process...................................40
15. WORKSHEET .....................................................41
15.1. Probe Assignment Worksheet ..........................42
15.2. Relay Assignment Worksheet...........................42
15.3. Installation Setup Worksheet ...........................43
INDEX ........................................................................44

4EXPERT PN110 rev.23
EXPERT PN110
1.3. Controller’s Overview
The EXPERT PN-110 is an electronic device
used for environmental control in livestock
buildings. It allows the user to maintain a speci-
fied target temperature by controlling the opera-
tion of ventilation and heating equipment.
The EXPERT PN10 can control the following
inputs and outputs:
OUTPUTS:
14 built-in relays to control:
3 heating stages
1 brooder heater
8 fan stages
1 cooling stage
1 stir fan output
1 soaking output
1 air inlet output
1 curtain output*
2 clock outputs
2 built-in 0-10V outputs to control additional
fans or heaters;
2 built-in variable speed outputs.
*A supplementary curtain output can be used if no
air inlet is required.
INPUTS:
6 inside temperature sensors;
1 outside temperature sensors;
1 whisker switch;
1 potentiometer;
1 humidity sensor;
1 static pressure probe;
1 water meter;
4 feeder run time monitoring inputs.
Refer to the end of this manual to con-
nect the sensors and loads.
1. INTRODUCTION
1.1. Precautions
WARNING: Read and save these in-
structions!
Safety may be jeopardized if the equipment is
used in a manner not specified by the manu-
facturer. Carefully read and keep the following
instructions for future reference.
We strongly recommend installing supplemen-
tary natural ventilation as well as a backup
thermostat on at least one cooling stage.
Although fuses at the input and outputs of
the controller protect its circuits in case of
an overload or over-voltage, we recommend
installing an additional protection device on
the controller’s supply circuit.
The room temperature where the controller
is located mus t always remain be twe en 32°F
and 104°F (0°C to 40°C). Indoor use only!
To avoid exposing the controller to harmful
gases or excessive humidity, it is preferable
to install it in a corridor.
If the equipment is used in a manner not
specified by the manufacturer, the protec-
tion provided by the equipment may be
impaired.
Do not spray water on the controller! In
order to clean the control, wipe it with a
damp cloth.
Before servicing or cleaning unit, switch
power off at service panel and lock the
switch disconnecting means to prevent
power from being switched accidentally.
When the service disconnecting means
cannot be locked, securely fasten a
prominent warning device, such as a
tag, to the service panel.
1.2. Symbols of the Manual
Warning. Read the following text
carefully; it contains important
information which, if ignored, may
cause the controller to operate
improperly.
High Voltage. Hazard of electrical
shock. Read the message and follow
the instructions carefully.
Pay attention. The following text
contains very useful information.
Both direct and alternating current
(AC/DC).
Direct current (DC).
Alternating current (AC).
Earth Ground Terminal
Primarily used for functional earth
terminals which are generally asso-
ciated with test and measurement
circuits. These terminals are not
for safety earthing purposes but
provide an earth reference point.
For Customer Use: Enter below the serial
number located on the side of the alarm
system and keep this information for future
reference.
Model: EXPERT PN110
Serial number:
Date installed:
45
EXPERT PN110 rev.23
EXPERT PN110
M
Marketed animals 37
Measuring units 7
Memory card
Transfer process 39
Minimum ventilation
Night ventilation
Activation 13
Principle of operation 15
RH Compensation on min vent cycles
Settings 32
Settings 15
Misting output
Activation 9
Operation & settings 27
Relay assignment 11
RH compensation on the mist output
Settings 32
Mortality
Entering new mortalities 37
Posting # of mortalities 37
Motor curves
Activation 9
Principle of operation 9
Mounting instructions 5
N
Natural ventilation curtain
Activate fans on high T° 8
Activation 8
Closing curtains when brooder is on 8
De-icing/purge function
Activation 8
Principle of Operation 24
Settings 24
Outside T° compensation 8, 25
Outside T° set point 14
Principle of operation 24
Relay assignment 11
Settings 24
Shutoff fans
Principle of operation 25
Night
see Day/night
O
Outputs
Activation 8–9
List of available outputs 4
Relay assignment
Making the assignment 10
Outside T°
see Temperature
P
Parameter adjustment 6
Password
Entering/changing the password 7
Probe
Activation 9
Assignment 10–13
R
Relative humidity (RH)
Current reading 35
History 36
RH Compensation
Activation 9
Settings 32
RH sensor activation 9
RH set point 32
Relays
Relay assignment 10
Shutoff fan relays in natural ventilation
Principle of operation 25
Timer relays
Principle of operation 17
Timer settings 18
S
Screens
see LED or LCD Display
Screens (LED & LCD) 6
Sensors
Connection 5
Extension 5
see Probes
Set points
RH set point
see Relative Humidity 32
Static Pressure set point
see Static Pressure
Temperature set points 14
Setup (Installation) 8–13
Simulation (temperature) 13
Soaking
Activation 9
Operation & settings 27
Relay assignment 12
Speed (communication) 39
Static pressure (SP)
Compensation on the inlet opening 22
Current pressure level 35
Measuring units 7
Pressure alarms
Principle of operation 33
Settings 34
Probe history 36
SP Probe activation 9
SP Set points 23
Stir fans
Activation 9
Operation & settings 26
Relay assignment 11
Settings 26
Summer & winter T° 18
T
Technical specifi cations 38
Temperature
Average room temperature
Current average T° 35
History 36
Inside temperature probes
Activation 9
Current probe readings 35
History 36
Probe assignment 10–13
Outside temperature
Activation 9
Compensation on the curtain 8, 25
Compensation on V1 & V2 9
Current probe reading 35
History 36
Outside T° set point 14
Outside temperature compensation
Operation & settings 18–19
Temperature alarms
Principle of operation 33
Settings 34
Temperature set points
Clean mode set point 13, 14
Night set point 14
Operation & settings 14–16
Outside T° set point 14
Temperature curve 14
Temperature simulation 13
Temperature units 7
Test mode 13
Time
Setting the time and date 7
Time format 7
Time and date
Adjusting improper system time 7
U
Units 7
V
Ventilation
Min. ventilation
see Minimum ventilation
W
Water meter
Activation 9
Calibration 10
Consumption alarms 33
Consumption history 36
Measuring units 7
Water spill alarm 33–34
Whisker switch 25
For closing the inlets 8
For stopping the fans in natural vent. 25
Winter & summer T° 18
Wiring 5
Worksheets 40

44 EXPERT PN110 rev.23
EXPERT PN110
A
Age & moratlity 37
Alarms
Alarm conditions 33
Alarm limits 34
Alarm log 33
Alarm settings 34
Animals
Age, mortality & count 37
Starting a new group 37
B
Backup
Backup relay box 12
Making a backup of the controller 39
Brooder heater
0-10V brooder
Activation 8
Operation & settings 30
Probe assignment 10
Temperature curve 30
On-off brooder
Activation 8
Operation & settings 29
Probe assignment 10
Relay assignment 12
Temperature curve 30
Buttons 6
C
Calibration
Inlet calibration 22
Celsius units 7
Clean mode
Alarms 33–34, 34
Clean mode set point 13, 14
Operation & settings 13
Clock
Display : AM/PM or 24hours 7
Setting the time and date 7
Clock outputs
# of cycles 8
Operation & settings 31
Relay assignment 12–13
Communication speed 39
Compensation
Outside T° compensation
Operation & settings 18–19
see Temperature
Connections 5, 6
Contrast 39
Contrast (LCD screen) 7
Controller
Features 4
Installation setup 8–13
Location of the controls 6
Mounting instructions 5
Technical specifi cations 38
Cooling output
see Mist output
Culled animals 37
Current conditions 35
Curtain
see Natural ventilation curtain
Curves
Brooder curve 30
Min. speed curve
Principle of operation 16
Settings 16
Temperature curve
Principle of operation 14
Settings 14
D
Date 7
Day / Night
Day/night times 13
Minimum ventilation at night 15
Night set point 14
Principle of operation 14
Settings 14
Night ventilation
Activation 13
De-icing / Purge
See Natural ventilation curtain
Display
Red LED display
Information on screen 9
Location 6
E
Electrical specifi cations 38
F
Fahrenheit units 7
Fan stages
Activation 8
Minimum ventilation
see Minimum ventilation
Principle of operation 17–19
Relay assignment 11
Settings 18–19
Timer relays
Principle of operation 17
Settings 11
Timer settings 18
Transition between stages 1 and 2
Principle of operation 17
Settings 18
Variable fans
Activation 8
Motor curve selection 9
Outside T° compensation 9
Principle of operation 17
Variable fans assignment 11
Fan stages (0-10V fans)
Activation 8
Operation & settings 19
Probe assignment 10
INDEX Settings 28
Feeders
Activation 8
Run time history 35
G
Gallons 7
H
Heaters
Activation 8
Brooder heater
see Brooder
Lo/Hi fi re
Activation 8
Operation & Settings 28
Probe assignment 10
Relay assignment 10
RH compensation on heaters
Principle of operation 32
Settings 32
Run time history 35
Heaters (0-10V output)
Activation 8
Operation & Settings 28
Probe assignment 10
History menus 36
Humidity
see Relative humidity
I
Inlets (on/off outputs)
Calibration
Principle of operation 22
Principle of operation 20
Resetting the position 21
Settings 20
Inlets (potentiometer-based)
Activation 8
Pressure comp. on opening 22
Probe assignment 10
Relay assignment 11
Inlets (timer-based)
Activation 8
Probe assignment 10
Relay assignment 11
Inputs
Activation 9
List of available inputs 4
Installation setup 8–13
L
LCD screen
Contrast adjustment 7, 39
Location 6
LEDs
LED display
Location 6
Output status LEDs
Information on screen 9
Location 6
Meaning 6
Liters 7
5
EXPERT PN110 rev.23
EXPERT PN110
1.4. Main Features
LCD Display — An LCD display provides an
efficient interface for displaying, monitoring
and adjusting parameter values.
Minimum Ventilation Cycle — When ven-
tilation is not required to reduce the room
temperature, fan outputs can run either con-
tinuously or intermittently to reduce humidity
levels and supply oxygen to the room.
Set point & minimum ventilation curves —
The controller can automatically change
the temperature set point and the minimum
ventilation level with time as the animals are
growing up.
History menus: History menus allow monitor-
ing the sensor readings and verify the run time
of some outputs. The controller comes with
the following histories menus:
Min & Max sensor readings:
Inside temperature sensors ..........7 days
Outside temperature sensor .........7 days
Humidity sensor..........................7 days
Static pressure sensor .................7 days
Daily water consumption ...........60 days
Run time of each heater ............75 days
Run time of each feeder.............75 days
Alarm management — Alarms are provided for
high-low temperatures, defective probes and
other system functions. Alarm states are kept
in memory until they are acknowledged even
if alarm situation has been rectified.
Humidity Control — The control offers many
ways to compensate for high or low humid-
ity levels.
6 temperature sensors — Up to six tem-
perature sensors can be connected to the
controller to obtain an accurate reading of
the average room temperature and a faster
reaction time.
Control of the air inlet movement — The
movement of air inlets can be coordinated
with the operation of the fans using a po-
tentiometer located on the panel drive or a
timer. This allows the air inlets to be adjusted
correctly, without the influence of uncontrol-
lable factors such as wind or air from adjoin-
ing rooms.
De-icing/purge cycle — An automatic de-
icing/purge function can be used to de-ice
the curtains or purge the air in any weather
conditions.
Password protection — A password can be
enabled to restrict access to the setup func-
tions of the controller.
Backup battery — A backup battery allows
the unit to keep time in case of a power
failure.
Overload and overvoltage protection — Re-
settable fuses are provided at low-voltage
inputs of the controller to protect its circuitry
in the case of an overload or overvoltage.
Computer control — The controller can be
connected to a computer, thus making it
possible to centralize the management of
information and diversify control strategies.
Test mode — A test mode allows you to simu -
late temperature changes and verify controller
performances.
2. MOUNTING INSTRUC-
TIONS
2.1. Installing the Controller
on the Wall
Fasten the two metal brackets on the mount-
ing holes located behind the controller using
six screws. Then, mount the enclosure on
the wall using four other screws. Leave a
clearance of at least 16” to the left of the
enclosure to allow the cover to be removed
for maintenance.
2.2. Connections
2.2.1. Main Wiring
Refer to the wiring diagram enclosed with this
user’s manual to connect the controller. Drill
holes at the bottom of the enclosure to pass
the wires and install watertight connectors to
prevent water from entering in the enclosure.
Do not make any holes at the side and top of
the enclosure.
All wiring must be done by an autho-
rized electrician and must comply with
applicable codes, laws and regulations.
Make sure power is off before doing any
wiring to avoid electrical shocks and
equipment damage.
Do not install rigid conduit into electrical
knockouts. Only nylon cable glands are
permitted for cable or wire fastening.
The controller has no power-on switch.
An external switch or circuit breaker
shall be included in the building instal-
lation to interrupt power to L and N
electric power lines. It shall be in close
proximity to the equipment and within
easy reach of the operator. It shall be
marked as the disconnecting device for
the equipment.
2.2.2. Alarm Connection
There are two types of alarms on the market.
One type activates when current is cut off at its
input; the other type of alarm activates when
current is supplied at its input. For an alarm of
the first type, use the NC terminal as shown on
the wiring diagram. For an alarm of the second
type, use the NO terminal.
2.2.3. Sensor Inputs
Sensors operate at low voltage and are
isolated from the supply. Make sure that
sensor cables remain isolated from all high
voltage sources. In particular, do not route
the sensor cables through the same electri-
cal knockout as other cables. Do not connect
the shield from the sensor cable to a terminal
or a ground.
Extending a sensor: Each sensor can be ex-
tended up to 500 feet (150 meters).
To extend a sensor: Use a shielded cable of
outside diameter between 0.245 and 0.260 in
(6.22 and 6.60 mm) (the cable dimensions

6EXPERT PN110 rev.23
EXPERT PN110
should not be under 18 AWG) to ensure the
cable entry is liquid tight. Do not ground the
shielding.
It is preferable to solder the cable joint to
ensure a proper contact between the two
cables.
Do not run sensor cables next to other
power cables. When crossing over other
cables, cross at 90°.
Defective sensors: An alarm is generated
when a defective sensor is detected. Defec-
tive sensors are identified in the “Alarm”
menu. Refer to chapter 10 for further
information on the alarms.
2.2.4. 0-10V Output Connection
It is recommended to use a 18 to 22 AWG
wire to connect the devices to the 0-10V
outputs. This type of output can be used to
connect various devices such as lights.
3. USER INTERFACE
3.1. Location of the Controls
LCD Display — The LCD display gives the
current readings and displays the param-
eters when you select a function. When the
parameters for a given function cannot all be
presented at once on the display, arrows are
displayed on the right handside to indicate
that additional parameters can be displayed
using the arrow keys. After 15 minutes of
inactivity, the display returns to the AMBIENT
TEMPERATURE display.
LED Display — This screen shows the current
reading of chosen sensor(s). Refer to section
4.5 to select what information needs to be
shown on the LED display.
Menu Select buttons — The up and down-
arrow keys are used to scroll within the
main menu located on the left side of the
controller.
Arrow Keys — The up and down-arrow keys
are used to scroll within a function menu.
The right-arrow key is used to select a menu
option; the left-arrow key is used to go back
to the previous menu display.
Edit Button —ress this key to access a menu
on screen or to enter the editing mode (refer
to section 3.2 for further information about
this mode).
3.2. How to Select & Modi-
fy the Parameters
1. Use the arrow keys to select the desired
parameter. If the parameter is flashing on
screen means the parameter can be modi-
fied.
2. Press the “Edit” button to access the
editing mode. The parameter starts flashing
faster.
3. Use the up and down-arrow keys to
change the value of the parameter.
4. Press the “Edit” button once again to
validate the new value and to exit the edit-
ing mode.
3.3. Status LEDs
Main Menu Menu select
buttons LCD Screen Arrow keys LED Display Outputt
Status LEDs
LED MEANING
CLEAN MODE Turns on when the controller
operates in clean mode
ALARM Turns on when an alarm is
active.
Flashes when an alarm
condition occurred and was
re-established by itself.
COOLING Solid LED: Time ON of the
cooling timer.
Flashing LED: Time OFF of
the cooling timer.
SOAKING Solid LED: Time ON of the
soaking timer.
Flashing LED: Time OFF of
the soaking timer.
STIR FAN Turns on when the stir fan
output is ON
DE-ICING /
PURGE
Turns on when a curtain is
operaing in de-icing/purge
mode
CLOCK OUTPUT
1-2
Turns on when clock output
1-2 is active
0-10V OUTPUT
1-2
Turns on when 0-10V output
1-2 is active
CUR-
TAIN
1-2
OPEN Turns on when curtain 1-2 is
opening
CLOSE Turns on when curtain 1-2
is closing
INLET OPEN Turns on when the inlet is
opening
CLOSE Turns on when the inlet
closing
FAN STAGE 1-8 Turns on when fan stage 1-8
is ON
HEATERS 1-3 Turns on when heater 1-3
is ON
43
EXPERT PN110 rev.23
EXPERT PN110
15.3. Installation Setup Worksheet
INSTALLATION SETUP
1. LCD CONTRAST (sec. 5.1)
LCD Contrast value _____ % (10 to 100%)
2. TEMPERATURE PROBES (sec. 4.7.1)
Temperature probes used __1 __2 __3 __4 __5 __6
3. OTHER PROBES (sec. 4.7.1)
Use relative humidity sensor (RH) ? ___Yes ____No
Use water meter ? ___Yes ____No
Use outdoor temperature probe ? ___Yes ____No
Use static pressure probe ? ___Yes ____No
4. UNITS (sec. 4.3)
Time display ___24h ____am/pm
Temperature ___°F ____°C
Water ___Lit ____Gal
Static Pressure ___Pa ____"WC (inch of water column)
5. RELATIVE HUMIDITY (RH) FUNCTIONS (sec. 4.6)
RH compensation on min. ventilation speed? ___Yes ____No
RH compensation with heaters ? ___Yes ____No
RH compensation with mist shutoff ? ___Yes ____No
RH compensation with mist on low RH ? ___Yes ____No
6. DAY / NIGHT (sec. 4.7.5)
Use day / night set point ? ___Yes ____No
Use night Minimum Ventilation ? ___Yes ____No
Day Time starts at: _____ : ______
Night Time starts at: _____ : ______
Transition Time between day / night _______ min
Min. V1 _______ (0-100%)
Min. V2 _______ (0-100%)
INSTALLATION SETUP
7. INSTALLATION (sec. 4.5)
Number of feeders __0 __1 __2 __3 __4
Number of heater stages __0 __1 __2 __3
Use Hi Fire? ___Yes ____No
Number of fan stages _______ (3-8)
Number of variable outputs __1 __2
Number of clock outputs __0 __1 __2
Number of clock cycles ___ (0-24)
Number of 0-10V outputs __0 __1 __2
0-10V output 1 Signal ___0-10V ____10-0V
0-10V output 2 Signal ___0-10V ____10-0V
0-10V output 1 Usage ___Ventil. ____Heat
0-10V output 2 Usage ___Ventil. ____Heat
# Curtains __0 __1 __2
Curtain compensation ? ___Yes ____No
Use Purge ? ___Yes ____No
Hi T° Restart? ___Yes ____No
Use Inlet ? ___Yes ____No
Inlet with? ___Pot ____Timer
Use OverOpening ___Yes ____No
Move in 1 Step ___Yes ____No
Close inlet with Whisker switch ? ___Yes ____No
Use SP Alarm ? ___Yes ____No
Use Brooder? ___Yes ____No
Follow SetPt? ___Yes ____No
Brooder Mode ___Relay ____0-10V
Use Hi Fire? ___Yes ____No
Use Interlock? ___Yes ____No
Use Cooling ? ___Yes ____No
Use Stir Fans ? ___Yes ____No
Use Soaking ? ___Yes ____No
Variable output 1 Minimum Speed _______ (10-100%)
Variable output 1 Motor Curve _______ (1-10)
Variable output 2 Minimum Speed _______ (10-100%)
Variable output 2 Motor Curve _______ (1-10)
Outdoor compensation on variable outputs? ___Yes ____No
Digit display ___T° ____Stat.Pressure (SP). __Inlet 1 (I1)
___T°&SP ___T°&I1 ____SP&I1
8. PASSWORD (sec. 4.2)
Installer password ______ _______ ______

42 EXPERT PN110 rev.23
EXPERT PN110
15.1. Probe Assignment Worksheet
15.2. Relay Assignment Worksheet
Default Values
Probes
OUTPUTS 1 2 3 4 5 6
Heater 3
Heater 2
Heater 1
Room T°
Curtain 1
Curtain 2
0-10V #1
0-10V #2 or Brooder heater
Inlet
RELAYS 1-14
Heater 3 Hi Fire
Heater 3
Heater 2 Hi Fire
Heater 2
Heater 1 Hi Fire
Heater 1
Fan 1
Fan 2
Fan 3
Fan 4
Fan 5
Fan 6
Fan 7
Fan 8
Inlet Open
Inlet Close
Curtain 2 Open
Curtain 2 Close
Curtain 1 Open
Curtain 1 Close
Cooling output
Soaking
Stir Fan
Clock 1
Clock 2
Backup relay box
Brooder
Brooder Hi Fire
Your Relays
1 2 3 4 5 6 7 8 9 10 11 12 13 14 v1 v2
X
X
Var
Var Var
X Var Var
X X ON ON
X X ON ON
X X X ON ON
X X X X ON ON
X X X X X ON ON
X
X
X
X
X
X
1 2 3 4 5 6 7 8 9 10 11 12 13 14 v1 v2
7
EXPERT PN110 rev.23
EXPERT PN110
4. INSTALLATION SETUP
4.1. Setting the Time &
Date
1. Select:
»TIME & DATE
Time & Date
Y /M /D
Date 2001/03/29
Time 11:21:15
2. Press the right-arrow key once. The year
flashes. Press the Edit key then use the arrow
keys to set the year. Press the right-arrow
key once again, the month flashes. Press the
Edit key then use the arrow keys to adjust
the month. Press the right-arrow key. The
day flashes. Press the Edit key then use the
arrow keys to adjust the day to the appropri-
ate value. Press the Edit key once again to
validate the date.
3. Press the right-arrow key once again, the
hours flash. Press the Edit key then use the
arrow keys to adjust the hours. Press the
right-arrow key. The minutes flash. Press
the Edit key then use the arrow keys to set
the minutes. Press the right-arrow key. The
seconds flash. Press the Edit key then use the
arrow keys to adjust the seconds. Press the
Edit key once again to validate the time.
4.1.1. Adjusting Improper System
Time
When the notification message that follows is
displayed onscreen you must set the correct
time and date.
Improper System Time
Set Time & Date
To ensure accurate feed data, history
logs, and other important system in-
formation, you must set the correct
time and date whenever prompted.
To adjust the time and date when the “Im-
proper System Time” notification appears, fol-
low the steps outlined in section "4.1. Setting
the Time & Date".
Once the time and date have been adjusted,
the notification message disappears, the sys-
tem clock is set, and accurate data is ensured.
The notification message repeatedly
disappears and reappears until the
time and date are set.
4.2. Password
This function allows to identify 2 different
user types. It is used to restrict access to
certain parameter settings.
Installer password [06-01-00]
By default, the INSTALLER PASSWORD is
set to "06-01-00". The installer mode gives
access to all functions of the EXPERT-PN110.
By default, the controller returns to the user
mode after 15 minutes of inactivity. The in-
staller may return to user mode before that
delay by entering the user password. The
installer password can be modified.
User 1 password [01-02-03]
The user mode gives access to the basic func-
tions of the EXPERT-PN110. By default this
pas sword is se t to "01-02-03". Note that some
menus will not be accessible with this user
mode. The user password cannot be modified.
and the controller automatically returns to user
mode after 15 minutes of inactivity.
• Entering the password:
1. Select:
»USER
»8. Password
»1. User Level
The current mode is displayed.
Password
Enter password:
00 ** **
2. Press the right-arrow key to enter a pass-
word. The first two-digit number flashes on
the display. Press the Edit key once then use
the arrow keys to set the first number. Press
the right-arrow key once. The second two-
digit number flashes on the display. Press the
Edit then use the up and down-arrow keys to
set the second number. Proceed in similar
fashion to set the third two-digit number.
Press the right-arrow key one last time to
validate the complete password.
If the password entered is incorrect, an error
message “Wrong Password” is displayed.
• Changing the Installer Password:
1. Select:
»USER
»8. Password*
»2. Installer
* The installer password is required to acces this
menu.
Installer Password
code #1 6
code #2 1
code #3 0
2. Set the installer password as required.
The password "1-2-3" is reserved for the
user mode. Do not use the same number
sequence for the installer password.
Choose an easy-to-remember password
and write it down in a safe place!
4.3. Measuring Units
1. Select:
»USER
»4. Units
Time Display 24H
Temperature °F
Water Lit
Static Pressure"WC
2. Set the following parameters:
Time display — AM/PM / 24 hours;
Temperature units — Celsius (Deg C) or
Fahrenheit (Deg F).
Water — Gallons / Liters
Static Pressure — Inches of water (“WC) or
Pascal (Pa).
4.4. LCD Contrast
The LCD screen contrast can be adjusted
from 10 to 100%.
1. Select:
»USER
»1. LCD Contrast

8EXPERT PN110 rev.23
EXPERT PN110
LCD Contrast
Value 100 %
Min 10 Max 100
2. Press the Edit key then use the arrow
keys to adjust the LCD contrast to the de-
sired value.
3. Press Edit once again to validate.Installation
Setup
The following section shows how to cus-
tomize the controller for your particular
application. It shows how to enable and set
the outputs of your controller. Normally, this
setup needs to be done only once.
1. Select:
»USER
»7. In st a l lat ion*
*A password is required to access this menu (sec. 4.2).
Installation
# Feeders 2
# Heater stages 2
Use Hi Fire ? Yes
# Fan stages 8
# Variables 2
# Clocks 2
# Cycles Clock 1 24
# Cycles Clock 2 24
# 0-10V Outputs 1
Output 1 0-10
Output 1 Vent.
# Curtains 1
Curtain Comp.? Yes
Use Purge ? No
Hi T° ReStart ? Yes
Use Inlet ? Yes
Inlet with? Time
Use OverOpening Yes
Move In 1 Step No
Close inlet with
Whisker switch ? No
Use SP Alarm No
Use Brooder? Yes
Follow SetPt? Yes
Brooder Mode Relay
Use Hi Fire ? Yes
Use Interlock? No
Allow purge? Yes
Use Cooling ? Yes
Use Stir Fan? Yes
Use Soaking ? Yes
V1 Min Speed 20
V2 Min Speed 20
V2 Motor Curve 4
Outdoor on Var? Yes
Digit Display T°
2. Set the following parameters:
Number of Feeders — Enab le the prop er num -
ber of feeders (0 to 4 feeders).
Number of Heater Stages — Enable the proper
number of heating stages (0 to 3 stages).
Use HI Fire — Select “Yes” to activate the
heating output Hi fire option. This function
allows doubling the number of heaters.
Number of Fan Stages — Enable the proper
number of fan stages (3 to 8 stages).
Nu mb e r o f Va ri ab l e O u t p u ts — Enable the prop-
er number of variable outputs (1 to 2 outputs).
Number of clock outputs — Enable the
proper number of clock outputs (0 to 2 clock
outputs).
Number of clock cycles — If clock outputs
are enabled, select how many timer cycles are
being used by each output (0 to 24 cycles).
0-10V Outputs — Select the number of 0 -10V
outputs in use (0 to 2 outputs). * If the 0-10V
brooder is enabled below, the second 0-10V output
will automatically be used to control the brooder
heater.
0-10V Output Signal — Se le ct the signal u se d
by each 0-10V output (0-10V or 10-0V).
0-10V Output Use — Select the function of
each 0-10V output (Ventilation or heating).
Nu mb e r o f Cu r ta i n s — Se lect the p roper num-
ber of curtains (1-2). Note that the air inlet
cannot be enabled if both curtains are used.
Curtain Compensation ? — Select "Yes" to use
the curtain compensation.
Use Purge ? — Select "Yes" to use the cur-
tains' purge feature.
Hi T° ReStart ? — Select "Yes" if you want
fans to restart when the room temperature
gets too high in natural ventilation.
Use Inlet ? — Select "Yes" to enable the air
inlet.
Use Inlet with — Select "Pot" if the inlet open-
ing is defined by a potentiometer or select
"Time" to control it with a timer. *This param-
eter is accessible if the air inlet is enabled above.
Use OverOpening — A supplementary stage
can be defined in order to continue opening
the air inlet beyond the activation tempera-
ture of the last ventilation stage. This over-
opening stage is used to direct the airflow
more efficiently during periods of warm
weather. Select "Yes" to enable the inlet over-
opening function or select "No" to disable
it. *This parameter is accessible if the air inlet is
enabled above.
Move in 1 Step — The air inlet can either
reach its over-opening position instanta-
neously when the room temperature reaches
a certain point or it can reach its over-opening
position gradually as the room temperature
departs from the start temperature of the
last fan stage. Select "Yes" to use the instant
opening mode or select "No" to use the
progressive opening mode. Note that either
case, the inlet reaches its full over-opening
position at : On T° of the last fan stage +
Over-Opening bandwidth (see section 6.3).
*This parameter is accessible if the over-opening
function is enabled above.
Close Inlet with Whisker Switch ? — It is
possible to close the air inlet when natural
ventilation curtain #1 is sufficiently opened.
Select "Yes" to close the air inlet when the
actuator of curtain #1 reaches the Whisker
Switch. *Accessible if the air inlet is enabled above.
Note that the Whisker switch is always associated
with natural curtain #1.
Use SP alarm? — Select "Yes" to use static
pressure alarm. *Accessible if the static pressure
sensor is enabled.
Use Brooder — Select "Yes" to enable a
brooder heater.
Follow SetPt [Brooder] — Select "Yes" if the
operating temperatures of the brooder heater
follow the same variations as the main tem-
perature set points or select "No" if they are
set as absolute values.
Brooder Mode — Select the type of output
that is used to control the brooder heater:
relay or 0-10V output. If the brooder uses a
0-10V output, it must be connected to 0-10V
output #2; if it uses a relay, select the proper
relay in the relay assignment menu (see sec-
tion 4.6.4).
Use HI Fire — Select “Yes” to activate the
brooder Hi fire option. This function allows
simulating a second brooder output.
Use Interlock? — Select "Yes" if you want the
natural ventilation curtains to close while the
41
EXPERT PN110 rev.23
EXPERT PN110
15. WORKSHEET
CLIENT
Name: ___________________________________________________________
Address: ___________________________________________________________
___________________________________________________________
___________________________________________________________
City: ___________________________________________________________
Tel.: ___________________________________________________________
Fax: ___________________________________________________________
E-mail: ___________________________________________________________
INSTALLER
Name: ___________________________________________________________
Address: ___________________________________________________________
___________________________________________________________
___________________________________________________________
City: ___________________________________________________________
Tel.: ___________________________________________________________
Fax: ___________________________________________________________
E-mail: ___________________________________________________________

40 EXPERT PN110 rev.23
EXPERT PN110
14. TRANSFER MENU
14.1. Screen Contrast
1. Simultaneously press and hold the up and
down MENU SELECT buttons for 5 seconds
to display the transfer menu.
2. Choose 7. C o ntr as t and press Enter.
3. Set the screen contrast to the desired
intensity then press Enter to validate.
4. Press and hold the up and down MENU
SELECT buttons for 5 seconds to exit from
the transfer menu.
14.2. Communication Speed
1. Simultaneously press and hold the right
and left arrow keys for 5 seconds to display
the system menu.
2. Choose 6. Comm Speed and press Enter.
3. Set the communication speed to the
desired value: select the high speed mode
if the controller uses the A-BOX communi-
cation system or select the low speed if it
uses AGNET.
4. Simultaneously press and hold the right
and left arrow keys for 5 seconds to exit from
the system menu.
14.3. Update/Backup Process
The USB drive allows upgrading the firmware
or software of your controller. The USB drive
can also be used to make a backup of your
controller settings or to copy these settings
on another controller of the same type.
Turn off power each time you open the
controller’s enclosure. This prevents acci-
dental exposure to areas of high voltage.
1. Turn off power to the controller.
2. Lift the latches to open the front door of
the controller.
3. If a metal plate is located behind the front
cover, use a flat head screwdriver to loosen
the two locks and lift it.
4. Insert the USB drive in the connector
behind the front door.
5. Close the front cover (or plate) and reap-
ply power to the controller.
6. Simultaneously press and hold the up and
down MENU SELECT buttons for 5 seconds
to display the transfer menu.
7. Select the desired option:
1. MemoryCard -> Control
2. Control -> MemoryCard
3. Update Firmware
4. Save Event Buffer
5. Save History Log
6. Comm Speed
7. Contrast
1. MemoryCard -> Control
Choose 1. MemoryCard -> Control to load
a new configuration file into your controller.
This transfer will update your controller’s
software and parameter settings.
When selecting this option, a list of all con-
figuration files located on the card is displayed
(*.DMP files). Select the desired file and then
simultaneously press the ADJUSTMENT
up- and down-arrow keys to start the transfer.
Note that the controller can only read
the files that are located at the root of
the USB drive. It cannot access any
sub-directory!
2. Control -> MemoryCard
Choose 2. Control -> MemoryCard to save
your controller settings on the USB drive.
The saving process will start as soon as you
enter this menu.
The controller will create a new CONTROL-
LER~1.DMP file at the root of the USB drive.
If this file na me a lready exists, it wi ll be save d
under a different name (“CONTROLLER~2.
DMP” for instance). This way, the controller
will never erase a file on the card.
3. Update Firmware
Choose 3. Update Firmware to download a
new firmware file into your controller. This
process will not affect your parameter set-
tings.
When selecting this option, a list of all
firmware files located on the USB drive is
displayed (*.PKG files). Select the desired file
and then simultaneously press the ADJUST-
MENT up- and down-arrow keys to start the
transfer
Note that the controller can only read
the files that are located at the root of
the USB drive. It cannot access any
sub-directory!
4. Save Event Buffer
Choose 4. Save Event Buffer to save the eve nt
buffe r of the controller on you r US B drive. T he
file will have a *.txt extension.
5. Save History Log
Choose 5. Save History Log to save the hourly
reading of every probe input measured in the
past 190 days on your USB drive. The file will
have a *.CSV extension and will need to be
imported in Microsoft Excel.
To get instructions showing how to import
a CSV file in Microsoft Excel, type "Import
CSV files in Excel" in the Excel Help window
(Press F1).
Press and hold the up and down
MENU SELECT buttons for 5 seconds
to exit from the transfer menu.
Remove the USB drive from the
connector when the transfer is over!
USB drive
9
EXPERT PN110 rev.23
EXPERT PN110
brooder heater is on.
Allow purge? — By default, the controller
automatically disables the curtain purge
when using the interlock function. Select
"Yes" if you purge cycles to continue within
that mode.
Use Cooling? — The controller can control
one cooling output. Select “Yes” to enable
this output.
Use Stir Fan? — The controller can control
one stir fan output. Select “Yes” to enable
this output.
Use Soaking? — The controller can control
one soaking output. Select “Yes” to enable
this output.
Variable-Speed Fan Minimum Speed — Set
the absolute minimum fan speed of each
variable fan outputs (this speed does not
apply to the minimum ventilation cycles and
to stage 1). *This parameter is accessible if the
variable outputs are enabled above.
Motor Curve — The relationship between the
voltage supplied to a motor and its operating
speed is described by a motor curve. This
curve varies with the make and capacity of
the motor. The various motors available in the
industry have been divided into ten categories
and the controller has been programmed with
a different motor curve for each of these
categories. To ensure that the controller
supplies the correct voltages, an appropri-
ate curve must be selected according to the
type of fan motors used. The table at the
back of the installation guide enclosed with
your controller gives the motor curves used
by the different type of fans. Set this curve
separately for each variable output in use.
Use Outdoor Temperature Compensation on
Variable Stages 1 and 2 ?— Select "Yes" to
use the outside temperature compensation
function to influence the bandwidth of vari-
able fan outputs. *This parameter is accessible
if the outside temperature sensor is enabled (see
sec. 4.7.1.)
Digit Display — Select the information to be
displayed on the red LED display:
T° average temperature
SP static pressure
T°/SP avg temperature & static pressure
T°/I1 avg temperature & inlet position
SP/I1 static pressure & inlet position
4.5. RH Compensation
Setup
The controller offers different ways to com-
pensate for high and low relative humidity
(RH) levels in the barn. This section shows
how to enable the desired RH compensation
functions. Refer to chapter 9 of this manual
to get more information about each of these
compensation methods.
1. Select:
»USER
»5. RH Compensation*
* This menu is accessible if the humidity probe is
enabled (sec. 4.7.1).
RH Compensation
Minimum Vent ? Yes
Heater ? Yes
Mist Shutoff ? Yes
Curtain purge only
on Hi RH ? No
Mist on Lo %RH? Yes
2. Enable or disable the following relative
humidity (RH) compensation options:
Minimum Ventilation — The controller can
compensate for high humidity levels by
increasing the minimum ventilation inten-
sity. Select “Yes” to use this compensation
method.
Heater — The controller can compensate for
high humidity levels by activating heating
outputs in timer mode. Select “Yes” to use
this compensation method.
Curtain Purge on Hi RH? — The curtain's
purge function can be enabled permanently
or it can exclusively be used when the RH
level is above the RH set point. Select "Yes"
to use the purge function on high RH levels
only. *Accessible if the Purge function is enabled in
the installation (see sec. 4.5). Refer to sec. 6.4.3 for
further information about this function.
Mist Shutoff — The controller can deactivate
the misting output when humidity levels are
too high. Select “Yes” to use this compensa-
tion method.
Mist on Low % RH — The controller can acti-
vate misting outputs when humidity levels are
too low. Select “Yes” to use this compensa-
tion method.
4.6. Probe Setup
4.6.1. Probe Activation
Follow these steps to enable or disable the
probe inputs of the controller.
a) Temperature Probe Inputs:
1. Select:
»USER
»2. Temp Probes
Temp Probes Used
123456
2. Enable the desired temperature probe
inputs.
b) Other Probe Inputs:
1. Select:
»USER
»3. Other Probes
Probe Selection
Use RH? Yes
Use Water? Yes
Use Outdoor? Yes
Use Stat.Press? Yes
2. Enable the desired temperature probe
inputs amongst the probes that follow:
Use RH — Select “Yes” if a humidity probe is
connected to the controller.
Use Water ? — Select “Yes” if a water meter
is connected to the controller.
Use Outdoor? — Select “Yes” if an outside
temperature probe is connected to the con-
troller.
Static pressure (SP) probe — Select “Yes” if
a static pressure sensor is connected to the
controller.

10 EXPERT PN110 rev.23
EXPERT PN110
4.6.3.2. Output Probes
Each heater, inlet, cooling & 0-10V output
operates according to the average reading of
chosen temperature probes.
1. Select:
»PROBE SETTINGS*
»Select the desired output:
Heater 1-3;**
Brooder heat;**
0-10V Outputs 1-2**
Inlet**
Curtains 1-2**
Cooling**
* A password is required to access this menu (sec.
4.2).
**Only the outputs that are enabled in the Installa-
tion Setup menu are available (see sec. 4.5).
Output 1 Probes
123456
2. Select what probe(s) are used to control
the selected output. *Only the probes that have
been activated are displayed (section 4.7.1).
4.6.4. Relay Assignment
The EXPERT-PN110 can control up to 14 ON-
OFF relay outputs and 2 variable outputs. The
mapping between the stages and the relays
must be determined by the user.
Note that relay assignment can only be
made by the installer (sec 4.2).
The relays with a mark below are assigned to
the selected output. Use the up and down-
arrow keys to scroll the display. The first num-
ber above the relay numbers stands as the
first number of the relay. In the example be-
low, relays 1 and 3 are assigned to Heater 1.
Heater 1 Relays
0 1
12345678901234
Pressing the down-arrow key directly
goes to the last relay and pressing the
up-arrow key returns to the first relay.
This makes it easier to step through
the relays.
A template is available at the end of
this manual to write down your selec-
tion of relays.
4.6.4.1. Heater Relays
1. Select:
»RELAY SETTINGS*
»1. Heaters
»Select the desired heater (regular or Hi-
Fire heater)
*A password is required to access this menu (sec.
4.2).
Heater 1 Relays
0 1
12345678901234
2. Put a check mark to identify the relay(s)
used by the selected heating stage.
3. Proceed in similar fashion to assign relays
to each heating stage in use.
4.6.2. Water Meter Calibration
This section shows how to set the flow per
pulse of the water meter. This rate can be
adjusted from 1 to 100 liters or gallons per
pulse.
1. Select:
»WATER
»1. Water history
Water Consumption
Calib: 1gal/p
Min 1 Max 100
2. Press the UP-arrow key. The water flow
per pulse is displayed. *This parameter is only
accessible if the water meter is enabled in the Instal-
lation Setup (see section 4.4).
3. Set the water flow to the desired value.
4.6.3. Probe Assignment
This section explains how to assign tempera-
ture probes to some outputs of the controller
and the probes used to measure the average
temperature.
4.6.3.1. Room Temperature
Probes
Most cooling outputs of the controller (fans,
stir fans, etc.) operate according to the aver-
age temperature in the room. The user must
choose what temperature probes are used to
measure this room temperature.
1. Select:
»AMBIENT TEMPERATURE
Ambient Temperature
Average: 74.4°F
Cur.SetP: 70.0°F
Pb1 On Pb2 On
Pb3 On Pb4 Off
Pb5 Off Pb6 On
2. Press the down-arrow key to select the
desired probe. *Only the probes that have been
activated are displayed (section 4.7.1).
3. Se le ct what probe(s) are used to measure
the average temperature in the room.
39
EXPERT PN110 rev.23
EXPERT PN110
13. TECHNICAL SPECIFICATIONS
Type................................................................................. EXPERT-PN110
Main supply fuse F1........................................................... 4A, slow-blow
Mains supply/frequency ..................................................... 90-240VAC 50/60Hz 30W Max
0-10V outputs 1-2 ............................................................. 0-10Vdc, 30mA source max.
Precision on 0-10V outputs ................................................ ±1 %
14Vdc output .................................................................... 14 Vdc ±10%, regulated, 250mA max.
Alarm contact ................................................................... ON/OFF output, 24VDC or AC, 0.15A
Housing............................................................................ IP54, plastic casing
Operating temperature ....................................................... 32 to 104°F (0 to 40°C)
Storage temperature .......................................................... 5 to 122°F (-15 to 50°C)
Ambient relative humidity................................................... max. 95%
Pot + output .................................................................... 3.0V, 20mA max.
Potentiometer inputs.......................................................... 1-20K pot., linear
RH input ........................................................................... 4-20mA
Pressure input ................................................................... 4-20mA
Temperature inputs............................................................ 1K @ 77°F (25°C), NTC
Relays ............................................................................. 240Vac, 50/60Hz, 15A res.
6FLA, 1HP (746W) @ 120Vac, 50/60Hz
12FLA, 2HP (1490W) @ 240Vac, 50/60Hz
Max tungsten(light bulb): 8.3A @ 120Vac
Variable 1,2: .................................................................... 50/60Hz, 1/2HP (373W) @ 120Vac,
1 1/2HP (1120W) @ 240Vac, 10A max
Fuse on variable outputs .................................................... 15A slow blow
The room temperature where the con-
troller is located must always remain
between 32 °F and 104 °F (0 °C
and 40 °C).

38 EXPERT PN110 rev.23
EXPERT PN110
Water meters — This menu shows the water
meter consumptions that were measured
every hour for the past 7 days. *This history is
accessible if the water meter is enabled (sec. 4.6.1).
Feeders — This menu shows the feeder run
times that were measured every hour for the
past 7 days. *This history is accessible if feeders
are enabled (sec. 3).
Heaters — This menu shows the heater run
times that were measured every hour for the
past 7 days.
Set Points — This menu shows the tempera-
ture set points that were measured every hour
for the past 7 days.
12.5. Animal Age & Count
Animal age: Some parameters of the control-
ler can automatically change over time as
the animals grow up (temperature curve for
instance). For this reason, you must set the
animal age as shown below.
Animal count
(current count / mortality / culled / marketed)
At the beginning of a batch, you must specify
the initial number of animals. You will then
be able to adjust the number of animals as
changes occur (mortalities, culled, and mar-
keted animals).
ALL histories of the controller are reset
when a new group starts (i.e., the animal
age switches from 0ff to 1 day).
The animal age automatically goes to
0 day (Off) when entering in Clean Mode.
1. Select:
»AGE & MORTALITY
Age & Mortality
Age: 10 days
New Dead 0
Today's Dead 0
Total Dead 0
New Culled 0
Today's Culled 0
Total Culled 0
New Marketed 0
Today's Market. 0
Current Size 500
Initial Size 500
Dead Yesterday 0
Cul. Yesterday 0
Dead 2 Days ago 0
Cul. 2 Days ago 0
Mark 2 Days ago 0
...
2. Set the following parameters:
Age — Set the animal age. It can be adjusted
from 0 days to 450 days.
New Dead / Culled / Marketed — Enter the
number mortalities, of culled animals and of
marketed animals as it occurs. Once a value
is posted, the parameter displayed on screen
automatically goes back to “0”. The posted
value is then removed from the current animal
count and is logged in the respective history
menus (Today & Total Died ,Culled or Mar-
keted history).
Today's Dead / Culled / Marketed — The
controller displays the number of animals that
have died, that have been culled and that have
been marketed since the beginning of the day.
These values cannot be changed.
Total Dead / Culled / Marketed — The control-
ler displays the number of animals that have
died, that have been culled and that have been
marketed since the beginning of the batch.
These values cannot be changed.
Current Size — The current count is automati-
cally adjusted when the number of mortali-
ties, of culled animals and marketed animals
changes.
Initial Size — Specify the initial number of
animals in the room.
7-day History (Dead, Culled & Marketed) — The
controller displays the daily number of dead,
culled and marketed animals for the past 7 days.
These values cannot be modified.
11
EXPERT PN110 rev.23
EXPERT PN110
4.6.4.2. Fan Stage Relays
1. Select:
»RELAY SETTINGS*
»2. Fan Stages
»Select the desired fan stage
*A password is required to access this menu (sec.
4.2).
Stage 1 Relays:
Variable 1 On(1)
Variable 2 Var(1)
Relay 1 On (1)
Relay 2 Off(1)
Relay 3 Timer(1)
...
Relay 13 Off (1)
Relay 14 Off (1)
On Time 15sec
Off Time 0sec
2. Put a check mark to identify the relay(s)
used in the selected fan stage.
Variable Output Status — 2 variable outputs
can be used to provide variable-speed ventila-
tion. If they are used, assign each of them to
proper fan stages.
Var — The variable fan output is assigned
to the fan stage and operates in variable
mode: when the stage starts, the variable
fan starts running at its minimum intensity.
The fan intensity gradually increases as the
room temperature increases.
On — The variable fan output is assigned
to the fan stage and operates in on/off
mode: the fan runs at 100% when the fan
stage is on and stops when the stage is off.
Off — The variable output is not assigned.
If the last fan stage uses a variable output,
the output must use the on/off operating
mode. Do not set the operating mode of
the last fan stage to the variable mode.
Relay Status — Put a check mark to assign
a relay to the output or select "Timer" if load
connected to the relay must run in timer
mode.
Timer — If timer-based relays are assigned
to some fan stages set the “On Time” and the
“OffTime” of the timer.
4.6.4.3. Natural Curtain Relays
Relays 7-8 and relays 13-14 have specially
been designed to connect actuators. When
actuators are connected to these relays, their
open and close relays can never be activated
at the same time.
1. Select:
»RELAY SETTINGS*
»3. Curtain**
»x. Curtain x Open
or
»x. Curtain x Close
*A password is required to access this menu (sec.
4.2).
**This menu is accessible if the natural curtain is
enabled (sec. 4.5).
Curtain Open Relay
0 1
12345678901234
2. Put a check mark to identify the relay used
to open or to close the curtain.
4.6.4.4. Inlet Relays
Relays 7-8 and relays 13-14 have specially
been designed to connect actuators. When
actuators are connected to these relays, their
open and close relays can never be activated
at the same time.
1. Select:
»RELAY SETTINGS*
»4. Inlet**
»1. Inlet Open
or
»2. Inlet Close
*A password is required to access this menu (sec.
4.2).
* This menu is accessible if the inlet is enabled
(sec. 4.5).
Inlet Open Relay
0 1
12345678901234
2. Put a check mark to identify the relay used
to open or to close the air inlet.
4.6.4.5. Stir Fan Relays
1. Select:
»RELAY SETTINGS*
»5. Stir Fan**
*A password is required to access this menu (sec. 4.2).
**This menu is accessible if the stir fan output is
enabled (sec. 4.5).
Stir Fan Relays
0 1
12345678901234
2. Put a check mark to identify the relay(s)
used by the stir fan.
4.6.4.6. Cooling Output Relays
It is possible to assign the same relays to
the cooling and soaking outputs. In this
case, the relays switch whenever one of
the two outputs is activated.
1. Select:
»RELAY SETTINGS*
»6. Cooling**
*A password is required to access this menu (sec.
4.2).
**This menu is accessible if the cooling output is
enabled (sec. 4.5).
Cooling Relays
0 1
12345678901234
2. Put a check mark to identify the relay(s)
used by the cooling output.

12 EXPERT PN110 rev.23
EXPERT PN110
4.6.4.7. Soaking Output Relays
It is possible to assign the same relays to
the cooling and soaking outputs. In this
case, the relays switch whenever one of
the two outputs is activated.
1. Select:
»RELAY SETTINGS*
»7. Soaking**
*A password is required to access this menu (sec. 4.2).
**This menu is accessible if the soaking output is
enabled (sec. 4.5).
Soaking Relays
0 1
12345678901234
2. Put a check mark to identify the relay(s)
used by the soaking output.
4.6.4.8. Clock Output Relays
1. Select:
»RELAY SETTINGS*
»8. Clock Output**
»x. Select desired clock
*A password is required to access this menu (sec.
4.2).
**This menu is accessible if a clock output is enabled
(sec. 4.5).
Clock 1 Relays
0 1
123456789012345678
2. Put a check mark to identify the relay(s)
used by the soaking output.
4.6.4.9. Output Deactivation in
Natural Vent.
The user can choose to deactivate some fan
outputs (On/Off or variable outputs) when
the curtain is sufficiently opened while be-
ing in natural ventilation. Refer to section
6.4.5 for further information on the output
deactivation.
1. Select:
»RELAY SETTINGS*
»9. Output Shutoff**
*A password is required to access this menu (sec.
4.2).
Nat. Vent.ShutOff
Variable 1? Yes
Variable 2? No
Natural Vent.Shutoff
0 1
12345678901234
2. Select the relays and/or variable outputs
that has to stop when the controller enters
in natural ventilation.
4.6.4.10. Backup Relay Box
Assign a relay to the backup relay box. This
normally closed relay opens when a controller
or power failure occurs.
1. Select:
»RELAY SETTINGS*
»10. Backup**
*A password is required to access this menu (sec.
4.2).
Backup Relays
0 1
12345678901234
2. Put a check mark to identify the relay used
by the backup box.
4.6.4.11. Brooder Heater Relay
1. Select:
»RELAY SETTINGS*
»11. Brooder**
»Select the desired brooder (regular or
Hi-Fire brooder)
*A password is required to access this menu (sec. 4.2).
**This menu is accessible if a brooder heater that
uses the relay mode is enabled (sec. 4.5).
Brooder Heater
0 1
12345678901234
2. Put a check mark to identify the relay(s)
used by the brooder heater.
37
EXPERT PN110 rev.23
EXPERT PN110
12.3.3.Water Consumption Daily
History
The controller has a 60-day water consump-
tion history menu. It can also show you the
amount of water consummed in the last &
previous 24 hours (see picture below).
Last 24h
Now
Time
Previous 24h
Water Consumption
• Water Consumption History:
1. Select:
»WATER
»1. Water History
Water Consumption
20XX/01/01
0Gal
2. Press the down-arrow key once to look
at the total amount of water consumed since
the beginning of the batch.
3. Keep pressing on the down-arrow key to
scroll down the water consumption history.
• Water Consumption, Previous (P) and
Last (L) 24 Hours:
1. Select:
»WATER
»2. Last 48Hr
Water Consumption
L.24Hr 0Gal
P.24Hr 0Gal
• Water Consumption, Previous (P) and
Last (L) 24 Hours per Head:
1. Select:
»WATER
»3. Last 48Hr/Hd
Water Consumption
L.24Hr/Hd 0.000Gal
P.24Hr/Hd 0.000Gal
12.3.4.Other Daily History Menus
History menus give a daily record of probe
readings and of the animal count. These
pieces of information are logged into history
menus at midnight. Refer to section 11.3.1 to
consult run time histories (for heaters, water
consumption and feeders).
1. Select the desired history menu:
»AMBIENT TEMPERATURE
»PROBE TEMPERATURES
»OUTSIDE TEMPERATURE
»RELATIVE HUMIDITY
»STATIC PRESSURE
Ambient temperature — This menu contains
the daily minimum and maximum readings of
the room temperature of the past 7days.
Probe temperatures — This menu contains
the daily minimum and maximum temperature
readings of each temperature probe for the
past 7 days.
Outside temperature — This menu contains
the daily minimum and maximum readings
of outside temperature probes for the past
7 days. *This parameter is accessible if an outside
temperature sensor is enabled (section 4.7.1).
Re l a ti ve hu mi d it y (R H ) — This menu contains
the daily minimum and maximum inside
humidity readings of the past 7 days. * This
parameter is acce ssible if the inside humidit y sensors
is enabled (sec. 4.7.1).
Static Pressure — This menu contains the
daily minimum and maximum static pressure
readings of the past 7 days. *This parameter
is accessible if a static pressure sensor is enabled
(sec. 4.7.1).
12.3.5.Resetting the Daily Histories
The controller automatically resets all his-
tories when the animal age goes from OFF
to 1 day.
1. Select:
»AGE & MORTALITY
2. Decrease the animal age until the word
"Off" is displayed. Press the Edit key again
to validate.
3. Now, set the animal age to 1 day. All
histories will be cleared afterwards (except
for the Alarm Log).
12.4. Hourly History Log
The controller has an history where the hourly
reading of each output is logged for the past
7 days.
The complete history log (190-day
history) can also be saved on a USB drive
and consulted on a computer. Refer to
the transfer menu in chapter 14 to save
the log on a USB drive.
1. Select:
»MONITORING
2. Select the desired history menu:
»1. Temperature probes
»2. Rel. humidity
»3. Water meters
»4. Feeders
»5. Heaters
»6. Set points
Temperature probes — This menu shows
the temperature probe readings that were
measured every hour for the past 7 days. It
also gives the hourly reading of the average
temperature.
Rel. humidity — This menu shows the relative
humidity levels that were measured every
hour for the past 7 days. * This history is ac-
cessible if the inside humidity sensors is enabled
(sec. 4.6.1).

36 EXPERT PN110 rev.23
EXPERT PN110
12. MONITORING FUNC-
TIONS
12.1. Current Conditions
The following menus give a quick view of the
actual conditions in the barn as described
below:
Ambient Temperature — Select the AMBIENT
TEMPERATURE menu with the menu selec-
tors. The average room temperature of the
activated probe is displayed.
Ambient Temperature
Average: 76.9 °F
Cur.SetP: 70.0 °F
Pb1 On Pb2 On
Probe Temperature — Select the PROBE TEM-
PERATURE menu with the menu selectors.
The current readings of each temperature
probe is displayed.
Probe Temperatures
Pb1 75.4 Pb2 78.1
Pb3 75.4 Pb4 78.4
Pb5 75.5 Pb6 78.6
Outside Temperature — Select the OUTSIDE
TEMPERATURE menu with the menu sectors.
The current outside temperature is displayed.
*Accessible if the outside temp. probe is enabled
(sec. 4.7.1).
Outside Temperature
Read Out: 72.3 °F
Today’s Min / Max
Min 71.3 Max 74.2
Relative Humidity — Select the RELATIVE
HUMIDITY menu with the menu sectors.
The current humidity level in the room is
displayed. *Accessible if the humidity probe is
enabled (sec. 4.7.1).
Relative humidity
Read Out: 85%
Today’s Min / Max
Min 60 Max 80
Static Pressure — Select the STATIC PRES-
SURE menu with the menu sectors. The cur-
rent static pressure is displayed. *Accessible
if the static pressure sensor is enabled (sec. 4.7.1).
Static Pressure
Read Out: .193”WC
Today’s Min / Max
Min .190 Max .196
Time & Date — Select the TIME & DATE menu
with the menu sectors. The actual time and
date are displayed.
Time & Date
Y /M /D
Date 2001/03/29
Time 11:21:15
Animal Age & Count — Set the function to
AGE & MORTALITY using the menu select
buttons and then use the arrow keys to scroll
down the menu. Information about the animal
age and count is displayed.
Age & Mortality
Age: 10days
New Dead 0
Today's Dead 0
12.2. Current Set Point
1. Select:
»SET POINT / CURVE
»1. Set Points
Set Point
Current 71.0 °F
Day 70.0 °F
Night 77.0 °F
The current set point is displayed.
12.3. Daily Histories
12.3.1. Heater Daily Run Time His-
tory
The controller keeps a daily heater run time
log for the past 75 days.
1. Select:
»HEATERS / FEEDERS
Heater 1 Run Time
20XX/01/01
30min
2. Press the down-arrow key once to look at
the total run time of the output.
3. Keep pressing on the down-arrow key to
scroll down the run time history of the output.
12.3.2.Resetting the Daily Run
time of a feeder
To reset the run time of a feeder, select the
following menus then follow the prompts
on screen.
1. Select:
»HEATERS / FEEDERS
»5. Reset Run Time
*This menu is accessible if feeders are enabled (s. 4.5).
2. Use the arrow keys to select the desired
feeder.
Reset Feed.Run Time
Feeder 1 ? No
Feeder 2 ? No
Feeder 3 ? No
3. Press the Edit key then press the up-
arrow key to reset the total running time of
the selected feeder. Press the Edit key once
again to validate. The "Yes" answer switches
to "No" once again, this means the history
has now been cleared.
13
EXPERT PN110 rev.23
EXPERT PN110
4.6.5. Night Settings
The controller allows using a different tem-
perature set point and different minimum
ventilation settings at night.
1. Select:
»USER
»6. Day / Night
Day/Night Settings
Night SetPoint? Yes
Night Min.Vent? Yes
DayTime 6:00
NightTime 18:00
Transition 60min
Min. V1 10%
Min. V2 25%
2. Set the following parameters:
Night Set Point — Select “Yes” to use a differ-
ent target temperature at night; select “No”
to disable this function.
Night Minimum Ventilation — Select “Yes” to
change the minimum ventilation fan speed at
night; select “No” to disable this function.
Day Time — Set the time at which day set-
tings start being used.*Accessible if a night
function is enabled above.
Night Time — Set the time at which night
settings start being used. *Accessible if a night
function is enabled above.
Transition — If the night set point is enabled
above, a transition is made from one set point
to the other. Set this transition time to the
desired value.
4.6.6. Clean Mode
The clean mode is used to interrupt regular
operations of the controller when the room
is empty. When this mode is enabled, the
controller fully close the curtain, adjusts the
position of the air inlet* and provides a mini-
mum level of heat and ventilation (optional).
The controller also puts the animal age back
to 0 day (Off). * If minimum ventilation cycles are
used in clean mode, the air inlet goes to its minimum
position; otherwise it closes fully .
Soaking: Soaking cycles can be enabled when
the controller enters in clean mode. These
cycles are used to activate soaking devices
to clean the room while it is empty (s. 6.7).
Minimum Ventilation in Clean Mode: To en-
sure good air circulation, minimum ventilation
cycles can be activated while the controller
operates in clean mode. In this case, the
controller uses the same fans and settings
as in regular minimum ventilation cycles. This
option is available if variable-speed fans are
used in minimum ventilation (see sec. 6.1).
Low Temperature Alarm in Clean Mode:
The controller can sound an alarm if the
temperature gets too low while it operates
in clean mode. Refer to chapter 10 to set
this alarm limit.
1. Select:
»CLEAN MODE
Clean Mode
Set Point 45.0 °F
Status: On
Use Min.Vent? Yes
Detect Lo Temp? Yes
2. Set the following parameters:
Clean mode set point — Select what is the
target room temperature while the controller
operates in clean mode.
Status — Select "On" to enable the clean mode.
Use Min. Vent — Select "Yes" to enable the
minimum ventilation cycles while the control-
ler is in clean mode. *Accessible if a variable
fan output is used in minimum ventilation (sec. 6.1).
Detect Lo Temp? — Select "Yes" for the con-
troller to monitor low temperature alarms
during the clean mode.
4.6.7. Test Mode
The test mode is used to simulate tempera-
ture changes and to verify the controller’s
performances. During the test, the room
temperature probe inputs are turned off, al-
lowing the user to change the temperature
used by the controller to operate the stages.
The controller operates as before using the
new temperature settings.
When the room temperature is defined by
the test mode, the controller bypasses the
temperature probes inputs and uses the new
value as a reference. The Test Mode is deac-
tivated after 15 minutes of inactivity.
1. Select:
»TEST MODE
Test Mode Off
Temp: 69.5 °F
2. Set the following parameters:
Test Mode — Select "ON" to enable the test
mode or select "OFF" to disable it.
Temp — Set the simulated room temperature
to the desired value.

14 EXPERT PN110 rev.23
EXPERT PN110
5. TEMPERATURE SET-
TINGS
5.1. Set Point
The set point is a target temperature in
the room. The activation of most outputs
of the controller is based on this reference
temperature.
The set points can only be modified while
the temperature curve is disabled.
• Disabling the Temperature Curve:
1. Select:
»SET POINT / CURVE
»2. Curve
The curve status is displayed.
Temperature Curve
Set point: 70.0 °F
Curve Stat On
2. If the temperature curve is ON, the set
point displayed on screen is automatically
defined by the temperature and cannot be
modified. Press the down-arrow key and scroll
down until the "Curve Stat" parameter flashes
on screen. Set the curve status to "OFF" to
disable it and then follow the instructions
below to adjust the set point.
3. If the temperature curve is OFF, follow
instructions below.
• Adjusting the Temperature Set Points:
1. Select:
»SET POINT / CURVE
»1. Set Point
Current 71.0 °F
Day 70.0 °F
Night 77.0 °F
Clean Mode 35.0 °F
Outside 65.0 °F
2. Set the following parameters:
Current Set Point — This is the current tem-
perature set point in use. This value cannot
be changed; to modify the set point, change
the day or night set points below.
Day set point — Set the temperature set point
that is used during the day (this set point is
used all day long if the night set point is not
enabled). The controller can also change the
day set point automatically over time with a
curve (see section 5.2). *This parameter can
only be modified while the temperature curve is
disabled (sec. 5.2).
Night Set Point — A different temperature
set point can be used at night. The night set
point can be used to lower the target room
temperature for instance. The night set point
is relative to the day set point, which means
that it is automatically a dj us ted whe n th e day
set point changes. Set the night set point to
the desired value. *Accessible if the night set point
is enabled (see section 4.7.5).
Clean Mode Set Point — Select what is the
target room temperature while the controller
operates in clean mode.
Outside Set Point — The controller can ad-
just the moving speed of natural ventilation
curtains as a function of outside temperature.
When this function is used, the controller
refers to the outside temperature set point
to control the moving speed. Set the outside
temperature to the desired value. *Accessible if
the outside temperature sensor is enabled in section
4.7 and if the curtain compensation is enabled in the
Installation Setup (section 4.5).
5.2. Temperature Curve
The controller can automatically adjust the
target room temperature (day set point) over
time by using a curve.
A curve is composed of 10 steps. Each step
specifies a day number and a temperature set
point for that day (the day number refers to
the animal age). Once the curve is activated,
the controller changes the set point every
hour in a linear fashion between consecutive
steps of the curve. When the last step is
reached, the controller keeps using the tem-
perature set point associated to that day.
Set Point
90.0
87.2
84.4
81.6
78.8
76.0
73.2
70.4
67.6
64.8
62.0
1 5 10 14 19 24 28 33 38 42 47 Day
Temperature
Set Point Curve
Notes: Certain restrictions apply to reduce
the risk of errors:
1. The highest possible day number is
450.
2. Decreasing day numbers is not allowed.
3. Increasing temperatures are not allowed
4. All ten steps must be specified. If you
don’t need ten different steps, repeat the last
temperature for each unnecessary step.
Note that the temperature curve must
be turned off to adjust the points and
days of the temperature curve. Use the
down-arrow key to scroll each point of
the curve. The curve status flashes on
the display. Press the Edit key then press
the down-arrow key to turn it Off.
35
EXPERT PN110 rev.23
EXPERT PN110
a) On initial controller startup: the 48-hour
countdown starts when the water meter is
enabled;
b) At the beginning of a group: the 48-hour
countdown starts at the startup of a new group.
c) After a water consumption alarm: the 48-hour
countdown starts after having acknowledged
a high or low consumption alarm.
11.3. Alarm Settings
1. Select:
»START / STOP TEMPS
»11. Alarms
Temperature Alarms
Clean Mode 32.0
Low Alarm 60.0
High Alarm 90.0
Critical Alarm120.0
Water Spill Limit
100 Gal
Hi Water Usage
Off %
Lo Water Usage
Off %
Static Press Alarm
Low Alarm 010”WC
High Alarm .100”WC
Delay 300sec
2. Set the following parameters:
Temperature Alarms
Clean Mode — Set the temperature below
which a temperature alarm sets off during
the clean mode.
Lo/Hi Alarm — Set the room temperature
below and above which a temperature alarm
sets off.
Critical Temperature Alarm — Specify what is
the absolute maximum temperature allowed in
the house (ranges from 0.5 above the house
set point to 120ºF (48.9°C)). *Accessible if the
outside temp. sensor is enabled (sec. 4.7.1).
• Water Consumption Alarms
Water spill limit — Specify the maximum
amount of water that can be consumed in a
15-minute delay. This parameter ranges from
1 to 10,000 liters/15 min). *This parameter is
accessible if the water meter is enabled (sec. 4.7.1)
Hi Water Alarm Usage— An alarm is set off
if the water consumption measured in the
last 24 hours is too high compared to the
consumption measured in the 24 hours that
precede. To disable this monitoring function,
decrease the parameter value until the word
“Off” is displayed. *This parameter is accessible
if the water meter is enabled (sec. 4.7.1). Refer to the
previous section to get more information about this
alarm limit.
Lo Water Alarm Usage — An alarm is set
off if the water consumption measured in
the last 24 hours is too low compared to the
consumption measured in the 24 hours that
precede. To disable this monitoring function,
decrease the parameter value until the word
“Off” is displayed. *This parameter is accessible
if the water meter is enabled (sec. 4.7.1). Refer to the
previous section to get more information about this
alarm limit.
Disable Lo/Hi Water — If a high or low water
consumption alarm is on, select “Yes” to
acknowledge the alarm condition. Note that
when a reset is made, the controller needs
48 hours to gather new consumption data be-
fore it can start monitoring the high/low water
consumption alarms again (no consumption
alarms can happen by the end of this 48-hour
delay). *This parameter is accessible if a high or a
low water consumption alarm is on.
• Static Pressure Alarm Limits
*Accessible if a SP probe is enabled (sec. 4.7.1).
Low / High Alarm — Set the pressure levels
below and above which a pressure alarm sets
off. If you want to disable the low pressure
alarm condition, decrease the low pressure
value until the word "Off" is displayed.
Delay — The high or low pressure condition
must be maintained on this period of time
before the controller triggers a pressure
alarm. Set the static pressure alarm delay to
the desired value.

34 EXPERT PN110 rev.23
EXPERT PN110
11. ALARMS
When an alarm occurs, the controller lights
up the alarm pilot light and posts the alarm
condition into the alarm log menu. The fol-
lowing table gives a list of all possible alarm
conditions.
Another alarm situation occurs when power to
the controller fails. In this case, the alarm relay
is activated. When the alarm relay is activated,
the normally open contact ( ) closes.
Display Meaning
Low Temp Alarm Low temperature alarm
High Temp Alarm High temperature alarm
Low Pressure
Alarm
Low static pressure alarm
High Pressure
Alarm
High static pressure alarm
Probe #1-6
Defect
A temperature probe is
defective
Outside Probe
Defect
Outside probe is defective
Pot. Inlet Defect The inlet is defective
Water Spill Water consumption too high
Lo/Hi Water
Usage
The water consumption of
the last 24h is too low or to
high compared to the water
consumption of the 24h
that precede.
SP Probe Defect The static pressure sensor is
defective
RH Probe Defect The humidity probe is
defective
11.1. Alarm Log
1. Select:
»ALARMS
2. The alarm log is displayed on scren. Use
the down-arrow key to make it scroll down.
11.2. Alarm Conditions
Temperature Alarms
The diagram below shows how temperature
alarms are detected.
When the average room temperature ex-
ceeds the high temperature alarm setting,
a high temperature alarm is set off. When
the average room temperature decreases
below the low temperature alarm setting, a
low temperature alarm is set off. Although
these settings are entered by the user as ab-
solute values, they are defined based on the
room set point. They are thus automatically
adjusted if the set point changes.
The situation is slightly different when the
outside temperature is greater than the room
set point. In this case, the outside tempera-
ture becomes the reference point (instead of
using the set point as a the reference). This
means an alarm is set off when the room
temperature reaches Outside Temperature + High
Alarm Offset (the offset being the difference
between the high alarm temperature setting
and the set point). A third parameter, called
the Critical Temperature, is defined to continue
monitoring the indoor temperature for high
temperatures. When the indoor temperature
reaches the critical high temperature (defined
as an absolute value), an alarm is set off.
Detection of
Temperature Alarms
Room T°
Alarm
Limits
Hi T°
limit
Hi T°
alarm
Lo T°
limit
Set
Point
Temperature Alarms in Clean Mode
The controller can monitor low temperature
alarms when it is in clean mode. If this alarm
condition is used, the controller sounds an
alarm when the temperature falls below low
alarm limit that is associated to the clean
mode.
The low alarm limit used in clean mode is re-
lated to the clean mode set point; this means
the alarm limit is automatically adjusted when
the clean mode set point changes.
Static Pressure Alarms
The controller can sound an alarm when the
stati c pressure (SP) level exce eds high or low
pressure limits for a certain period of time.
Water Spill Alarm
A water spill alarm is triggered when the
water consumption exceeds a user-defined
amount of water within a 15-minute delay.
This alarm limit ranges from 0 to 10,000 gal-
lons (or liters) per 15 minutes.
The alarm will stay ON for 15 to 30 min-
utes after a water spill situation is re-
solved. This is the time it takes for the
controller to gather the new consumption
values required to restart monitoring
water spill alarms properly.
Water Consumption Alarms: When
the percent difference in water consumption
between the last 24-hour period and the pre-
vious 24-hour period is greater than a given
maximum value, an alarm is set off.
Last 24h
Now
Time
Previous 24h
Water Consumption
The high and low water consumption alarm
limits are defined as follows:
• Case #1: If more water was consumed in
the last 24 hours than in the 24 hours that
precede, the controller will determine how
much more water was consumed and will
convert this value in percent. If the surplus
(in %) is higher than the “High Alarm” limit,
the controller will set off an alarm.
Last 24h - Previous 24h x 100 ≥Hi Alarm
Previous 24h
• Case #2: If less water was consumed in
the last 24 hours than in the 24 hours that
precede, the controller will determine how
much less water was consumed and will
convert this value in percent. If the deficit (in
%) is higher than the “Low Alarm” limit, the
controller will set off an alarm.
Previous 24h - Last 24h x 100 ≥Lo Alarm
Previous 24h
Before it can start monitoring the water
consumption alarms, the controller needs
to gather consumption data for 48 hours
in a row (no consumption alarm can be
detected within this 48-hour delay):
15
EXPERT PN110 rev.23
EXPERT PN110
1. Select:
»SET POINT / CURVE
»2. Curve
2. Press the down-arrow key once to select
the first point of the curve.
Temperature Curve
Day: 1
Temp: 78.0°F
3. Set the following parameters:
Day — Set the day at which each step starts.
The day number refers to the animal age.
*This parameter can only be modified while the
curve is disabled.
Temp. — Assign a temperature set point to
each step of the curve. *This parameter can only
be modified while the curve is disabled.
Status — Once all 10 curve steps are defined,
press the down-arrow key to select the curve
status at the bottom of the screen and then
select “Yes” to enable the curve. Once it is on,
the controller automatically adjusts the set
point between consecutive points of the curve.
5.2.1. Modifying Curve Points
You can adjust the temperature set point of
all curve points while the curve is running.
1. Select:
»SET POINT / CURVE
»3. Curve Offset
* Accessible while the curve is running only.
Curve Temp Offset
T°Offset 0.0°F
2. Set the following parameters:
Curve offset — Select the numb er of degre es
that need to be removed or added to all set
points of the temperature curve (+/- 10°F).
*Accessible if the temperature curve is currently
running.
6. VENTILATION & COOLING
6.1. Minimum Ventilation
When the room temperature is below the
set point, the fans can operate according to
a minimum ventilation cycle. Running the
fans even though ventilation is not required
for reducing room temperature is useful to
reduce humidity level and supply oxygen
to the room. It also prevents the fans from
freezing in winter.
Min.Vent
Fan Status
ON
OFF
Time
ON Time
Cycle
Time
Minimum
Ventilation Timer
Minimum ventilation cycles are ensured by
the variable fan outputs. The fan speed can
automatically adjusted over time by using a
curve (see sec. 6.1.4).
The minimum ventilation curve must
be turned off to adjust the minimum
ventilation settings.
6.1.1. Min Vent. Fan & Timer
This section explains how to use a variable
fan output in minimum ventilation and how
to set its minimum ventilation timer.
1. Select:
»MINIMUM VENTILATION / CURVE
»1. Variable 1 (or 2. Variable 2)
»1. Timer/Status
Variable 1 Settings
Current 20 %
Status: On
On Time 15 sec
Cycle Time: 120sec
2. Set the following parameters:
Status — Select "On" for the variable output
to be used in minimum ventilation.
On Time / Cycle Time — If the variable out-
put is used in minimum ventilation, set its
minimum ventilation timer properly (On Time
and Cycle Time).
6.1.2. Min Vent. Fan Speed
1. Select:
»MINIMUM VENTILATION / CURVE
»1. Variable 1 (or 2. Variable 2)
»2. Minimum Curve
The minimum speed of the variable output
is displayed.
Min Ventilation
Variable Output 1
Speed: 20 %
Curve stat Off
2. If the temperature curve is ON, the
minimum fan speed, as calculated by the
curve, is displayed. Press the down-arrow
key and scroll the display until "Curve Stat"
status flashes on screen. Press the Edit key
then press the down-arrow key to disable the
curve. Press Edit once again to validate the
new curve status. Now that the curve is off,
follow the instructions below.
3. If the curve is OFF, the minimum speed of
variable output 1 flashes on the display. Press
the Edit key then use the arrow keys to adjust
the minimum speed to the desired value.
Press the Edit key once again to validate.
6.1.3. Min Vent Night Settings
1. Select:
»USER
»6. Day / Night
Day/Night Settings
Night SetPoint? No
Night Min.Vent? Yes
DayTime 6:00
DayTime 6:00
NightTime 18:00
Min. V1 10 %
Min. V2 25 %
2. Set the following parameters:
Night Min. Vent — Select "Yes" to use differ-
ent minimum ventilation settings at night.
Min. V1-2 — Select the minimum ventilation
night speed of each variable fan (in %).

16 EXPERT PN110 rev.23
EXPERT PN110
6.1.4. Min Ventilation Curve
A curve is composed of 10 steps. Each step
specifies a day number and a minimum ven-
tilation speed for that day (the day number
refers to the animal age). When the curve is
activated, the controller changes the mini-
mum ventilation speed every hour in a linear
fashion between consecutive steps of the
curve. When the last step is reached, the
controller keeps using the speed associated
to that day.
10
9
8
7
6
5
4
3
2
1
Min. Ventilation
Curve
1 2 3 4 5 6 7 8 10 11 12 DAYS
Min Vent.
Speed
Notes: Certain restrictions apply to reduce
the risk of errors:
1. The highest possible day number is 450.
2. Decreasing day numbers are not allowed
3. All ten steps must be specified. If you
don’t need 10 different steps, repeat the last
speed for each unnecessary step.
Note that the minimum ventilation curve
must be turned off to adjust the curve
steps (fan speed & days). Use the down-
arrow key to scroll each point of the
curve. The curve status flashes on the
display. Press the Edit key then press the
down-arrow key to turn it Off.
1. Select:
»MINIMUM VENTILATION / CURVE
»1. Variable 1
or
»2. Variable 2
»2. Minimum Curve
2. Press the down-arrow key once to select
the first point of the curve.
Min Vent Settings
Variable Output 1
Day: 1
Speed: 20%
3. Set the following parameters:
Day — Set the day at which each step starts.
The day number refers to the animal age.
*This parameter can only be modified while the
curve is disabled.
Speed — Assign a fan speed to each step of
the curve. *This parameter can only be modified
while the curve is disabled.
Status — Once all 10 curve steps are defined,
press the down-arrow key to select the curve
status at the bottom of the screen and then se-
lect “Yes” to enable the curve. Once it is on, the
controller automatically adjusts the minimum
ventilation fan speed between consecutive
points of the curve.
Min Vent Settings
Variable Output 1
Curve Stat On
33
EXPERT PN110 rev.23
EXPERT PN110
10. RH COMPENSATION
The controller offers different way to com-
pensate for high/low relative humidity (RH)
levels in the room. All compensation functions
are explained below. To use them, you must
enable each desired compensation function
in section 4.6.
1. High RH Comp. with the Heating Out-
puts: The controller can compensate for high
humidity levels by activating the heaters in
timer mode. As the RH level increases, the
controller increases the “On Time” portion
of the heating timer to compensate for the
change. The maximum compensated heating
“On Time” is reached when the RH level is
10% above the RH Set Point.
RH Comp. with
Heating Outputs
RH Level
(%)
10%
RH Set Point
Maximum
On Time
Minimum
On Time
Off Time
On Time of
the Heating
Timer
The RH heat timer is composed of an “On
Time” and of a “Cycle Time”. The heaters run
during the “On Time” and then stop until the
end of the “Cycle Time”. The “On Time” por-
tion of this cycle increases as the RH level
increases.
ON
OFF
Output
Status RH Heat Timer
Time
ON Time
Cycle
Time
2. High RH Comp.on the Min Vent. Speed
The controller can compensate for a high hu-
midity levels by increasing the level of minimum
ventilation. As the RH level rises, the controller
increases the minimum ventilation speed to
compensate for the change. The maximum
compensated speed is reached when the RH
level is 10% above the RH set point.
RH Compensation on
Minimum Ventilation
Speed
RH Level
(%)
10%
RH Set Point
Off
Regular
Speed
Compen-
sated
Speed
Stage 1
Minimum
Speed
Added
Speed
3. Mist Shutoff: When the humidity level is
too high, the mist units are shut off to avoid
increasing the humidity level any further. This
means that the cooling stage stops operating
whenever the humidity level exceeds the mist
shutoff limit. The mist shutoff limit ranges
from 20% to 100% (Off) of humidity.
4. Low RH comp. with mist outputs: To
compensate for low RH levels, the controller
can activate the misting output in timer mode.
The misting output starts when RH levels
decrease below the Low RH Set Point.
1. Select:
»HUMIDITY COMPENS.*
*This menu is accessible if at least 1 RH compensa-
tion function is enabled (sec. 4.6 ).
RH Compensation
Min vent comp % 30
RH set point 65
Heater Compensation
Min On Time(s) 15
Max On Time(s) 15
Cycle Time 300sec
Mist Shutoff 85
Mist on Lo %RH
Lo SetPoint 10
On Time 30sec
Off Time 240sec
2. Set the following parameters:
Minimum Ventilation Compensation
Min Vent Comp % — Select by how much the
minimum fan speed can be increased when
the RH level if 10% above the RH Set Point.
*Accessible if RH compensation on minimum ventila-
tion is enabled at the beginning of this section.
RH Set Point — This is the humidity level
above which high RH compensation func-
tions start. Adjustable from 20 to 99% of
humidity.
Heater Compensation
The timer used by heating outputs is made of an On
Time and of a Cycle Time. Heating outputs run dur-
ing the On Time then stop until the end of the Cycle
Time. The On Time portion of this cycle increases
as RH levels increase.
Minimum & Maximum On Times — Set the
minimum and maximum On Times of the
heating timer. The minimum On Time starts
being used wh en indoor humidity l evel s reach
the RH set point; the maximum On Time is
used when humidity levels are 10% above
the RH set point. *Accessible if R H compensation
with heating outputs is enabled at the beginning of
this section.
Cycle Time — Set the cycle time of the
heating timer. *Accessible if RH compensation
with heating outputs is enabled at the beginning of
this section.
Mist Shutoff — Set the humidity level above
which the mist cooling output stops or select
“Off” to disable this function. *Accessible if the
mist shutoffcompensation option is enabled at the
beginning of this section.
Mist on Low RH Lo Set Point — Set the humid-
ity level below which misting units start run-
ning in timer mode or select “Off” to disable
this function. *Accessible if RH comp. on Low RH
levels is enabled at the beginning of this section.
On & Off Times — Set the On and Off Times
of the misting timer.

32 EXPERT PN110 rev.23
EXPERT PN110
9. CLOCK OUTPUTS
The controller has 2 outputs to control various
devices using the real-time clock. These clock
output can use up to 24 timer cycles. Refer to
the Installation setup in section 4.5 to enable
the desired number of cycles.
A clock output starts when the “On Time” of a
timer is reached; it either stops after a certain
run time or at a certain time of day. The fol-
lowing diagrams show both possibilities:
Time
Cycle
Output
Status
On
Start Time
(e.g. 8h30AM)
Time Clock:
Start/Stop Mode
Stop Time
(e.g. 9h00AM)
Off
Time
Output
Status
Cycle
Start Time
(e.g. 8h30AM)
Time Clock:
Start/Run Mode
Run Time
(e.g. 30m:15s)
On
Off
1. Select:
»START / STOP TEMPS
»8. Clock outputs
Clock 1 Mode S/Stop
On 1 13:50 (1)
[or]
Run Time Hour 0
Min 0 Sec 0
Off 1 14:30 (1)
2. Set the following parameters:
Clock mode — The clock mode allows stop-
ping a clock output at a certain time of the
day or after a certain run time. Select “Start/
Stop” to specify the time at which each cycle
starts and stops or select “Start/Run” to
specify the running time of each cycle. Note
that the “Start/Run” option allows stopping
cycles with more precision since this mode
allows adjusting the seconds.
On Time / Off Time or Run Time — Set the
time at which each cycle starts then set the
moment at which each cycle ends.
17
EXPERT PN110 rev.23
EXPERT PN110
6.2. Fan Stages
6.2.1. Principle of Operation
6.2.1.1. Operation of Fan Stages
The controller has 8 fan stages which operate
in a sequence to increase the level of ventila-
tion as the room temperature increases. Each
stage can activate two variable outputs,
on/off outputs, and a combination of timer
relays for cooling purposes. A fan stage is
activated when the room temperature reaches
its start temperature and is disabled when
the room temperature decreases to its stop
temperature.
Operating Diagram
of Fan Stages
Room
T°
Set Point
Stage x
Off T°
Stg x
Stg y
Stage y
Off T°
Stage x
On T°
Stage y
On T°
Ventilation
Level
Start temperatures of fan stages are defined
with respect to the set point and with respect
to each other. This means that when one of
these values is adjusted, all the consecutive
values are adjusted by the same amount. For
example, if the set point is increased by 1°F,
the start temperature of all fan stages will be
increased by the same amount.
Timer-based relays in fan stages
Fan stages can activate relays that operate
following a timer (On and Off Times). This is
useful to activate misting units in timer mode
while a specific fan stage is active. Refer to
section 4.7.4 to enable timer-based relays.
6.2.1.2. Variable-Speed Fans
Variable outputs are activated when their as-
sociated fan stage starts (see section 4.9).
They start running at their absolute minimum
speed (see section 4.5) and their speed
gradually increases as the room temperature
increases. Variable outputs reach their full
speed when the start temperature of the fol-
lowing fan stage is reached.
Operating Diagram of
Variable-Speed Fans
Room T°
100%
Min
Speed
Set
Point
Stage x
Off T°
Stage x
On T°
Stage x+1
On T°
Fan Speed
Transition between fan stages 1 and 2
If the next stage is an ON/OFF fan stage, the
variable output is deactivated when the new
stage starts. If the next stage is another vari-
able fan stage, the speed of the first variable
stage is reduced to its minimum speed when
the second variable stage starts. This ensures
a smooth transition between both stages.
The bandwidth is the temperature interval
over which variable outputs go from their
minimum to their maximum speed. This is true
even if full speed is never reached as in the
example below: when stage 2 starts, the con-
troller decreases the speed of variable outputs
to the initial speed associated with stage 2. It
then uses the bandwidth to increase the fan
speed as the room temperature rises.
If an outdoor temperature probe is
used, it is possible the controller can
automatically adjust bandwidths 1-2 as
a function of the outdoor temperature
(see below).
Transition between
Stages 1 & 2
Stage 2
Off T°
Stage 1
On T°
Stage 2
On T°
Stage 3
On T°
Speed of
variable fans 1
100%
Absolute
Min speed
Off Room T°
V1 Bandwidth
V1 Bandwidth
0.3°F

18 EXPERT PN110 rev.23
EXPERT PN110
6.2.1.3. Outside Temperature
Compensation
Stage 1 and 2 bandwidths can be adjusted
automatically as a function of outdoor tem-
perature compensation. As the outside
temperature decreases, stages 1 and 2 band-
widths increase gradually to compensate for
the change. The user specifies the bandwidth
used in summe r as well as the bandwi dth used
in winter for both variable outputs of stages
1 and 2. The bandwidths can be adjusted
from 1 to 10°F (0.6 to 5.6°C). The winter’s
bandwidth must be even or greater than the
summer’s bandwidth.
Bandwidth as a
Function of
Outside Temperature
Outside
T°
Winter
T° Summer
T°
Winter
Bandwidth
Summer
Bandwidth
Bandwidths
of stages
1 & 2
Note that the ventilation stages’ start
temperatures will be adjusted following
the bandwidth fluctuations as the outside
temperature changes.
6.2.2. Settings
6.2.2.1. Start/Stop Temperatures
Note that the start temperature of a fan
stage is likely to change if the set point
changes or if the bandwidth changes
according to the outside temperature.
1. Select:
»START / STOP TEMPS
»2. Fan Stages
Ventilation
Stage 1 On 70.0
Var1 bandwidth 2.0
Var2 bandwidth 2.0
2. Set the following parameters:
(Refer to the previous section to get further informa-
tion on these parameters)
On & Off Temperatures — Set the start and
stop temperatures of each fan stage.
Notes: Stage 1 stops when the room
temperature falls 0.3 °F below its start
temperature.
The minimum difference between two
consecutive start temperatures is of
0.5 °F (0.3 °C).
The start temperature of a fan stage
must be greater value than its stop
temperature.
Var1 & Var2 bandwidth — Set the number of
degrees required for variable fans to reach their
full speed in stages 1 and 2. If the “Outside
temperature compensation” function is used, set
these bandwidths separately for winter and for
summer (see sec. 4.5).
6.2.2.2. Season Change
If the outside temperature compensation on
the bandwidths of stages 1 and 2 is used, you
must specify at what outdoor temperature
winter and summer start.
1. Select:
»START / STOP TEMPS
»10. Outdoor Comp.*
*This menu is accessible if the outside compensation
on stages 1-2 is enabled (sec. 4.5).
Outdoor Compensation
Summer Temp. 60.0
Winter Temp. 50.0
2. Set the following parameters:
Summer Temp. — Set the outside tempera-
ture at and above which summer bandwidths
must be used.
Winter Temp. — Set the outside tempera-
ture below which winter bandwidths must
be used.
31
EXPERT PN110 rev.23
EXPERT PN110
intensity. *This parameter is accessible if the
brooder mode is set to 0-10V in the installation menu
(see section 3).
Min Output — Set the minimum intensity of
the brooder heater (in %). *This parameter is
accessible if the brooder mode is set to 0-10V in the
installation menu (see section 3).
Max Output — Set the maximum intensity
of the brooder heater (in %).*This parameter is
accessible if the brooder mode is set to 0-10V in the
installation menu (see section 3).
8.3.3. Brooder Curve
The controller can adjust the start tempera-
ture of the brooder heater over time with a
curve. A cur ve is made of 10 s teps. Each ste p
specifies a day number and start temperature
of the brooder heater for that day (the day
number refers to the animal age). When the
curve is activated, the controller changes the
start temperature of the brooder heater every
hour in a linear fashion between consecutive
steps of the curve. When the last step is
reached, the controller keeps using the start
temperature associated to that day.
Start T°
T°1
T°2
T°3
T°4
T°5
T°6
T°7
T°8
T°9
T°10
1 5 10 14 19 24 28 33 38 42 47 Day
Brooder Curve
NOTES:
i) All ten points of the curve must be speci-
fied. If ten points are not needed, repeat the
last start temperature value for each unnec-
essary point.
ii) Certain restrictions apply to reduce the
risk of errors:
- The highest possible day number is 450.
- Decreasing day numbers are not allowed.
The cuve parameters can only be modi-
fied while the curve status is OFF. To
disable the brooder curve, scroll down
all points of the curve inside the brooder
curve menu. The curve status will then
flash on screen. Press EDIT and then
press the down-arrow key to turn it Off.
1. Select:
»START / STOP TEMPS
»12. Brooders*
»2. Curve
* This menu is accessible if the brooder output is
enabled (see sec. 3).
Brooder Heater
Curve
Set Point: 78.0°F
Curve Stat Off
2. Press the down-arrow key once to select
the first point of the curve.
Brooder Heater
Curve
Day 1 days
Temp: 78.0°F
3. Set the following parameters:
Day — Set the day at which each step starts.
The day number refers to the animal age.
*This parameter can only be modified while the
curve is disabled.
Temp — Assign a start temperature of the
brooder heater to each step of the curve. *This
parameter can only be modified while the curve is
disabled.
Status — Once all 10 curve steps are defined,
press the down-arrow key to select the curve
status at the bottom of the screen and then
select “Yes” to enable the curve. Once it is on,
the controller automatically adjusts the start
temperature of the brooder heater between
consecutive points of the curve.
Brooder Heater
Curve
Curve Stat On

30 EXPERT PN110 rev.23
EXPERT PN110
8.3. Brooder Heater
The controller can use a relay or it can use
its second 0-10V output to control a brooder
heater. Refer to the installation options in
section 3 to enable the proper type of brooder
output (relay or 0-10V).
Operating Temperature:
To operate the brooder heater, the control-
ler refers to the average reading of the
temperature probes assigned to the output
(see sec. 4.6.3). In addition, the operating
temperatures of the brooder heater can ei-
ther be defined as absolute values or they
can be related to the set point, which means
they are automatically adjusted when the set
point changes. Refer to the installation menu
in section 3 to determine if the operating
temperatures must follow the temperature
set point or not.
Brooder’s Hi Fire: With the Brooder Hi Fire
option, the controller controls the brooder
output in two different ways, just as if there
were two brooder outputs (regular output
and Hi-Fire output). The regular brooder
output and the Hi-Fire output each uses its
particular relay assignement and Start/Stop
temperatures. Refer to section 3 to activate
the brooder’s Hi fire option.
Closing the Curtains when Brooder Heater
is ON:
The controller can automatically close the
natural ventilation curtains when the brooder
heater is on. Enable the "Interlock" option in
section 3 to activate this function.
Brooder Heater Curve:
The controller can adjust the start tempera-
ture of the brooder over time with a curve.
Refer to section 8.3.3 for further information
on the brooder curve.
8.3.1. On/Off Brooder Heater
The on/off brooder heater turns on when the
temperature of its probe(s) falls to the Start
Temperature; it turns off when temperature
increases and reaches the Stop Temperature.
Operating Diagram
of a Breeding Output
Brooder
Output
Brooder
Hi Fire
ON
Brooder
ON
Brooder
Hi Fire
OFF
Brooder
OFF
Brooder
Hi Stop
T°
Brooder
Hi Start
T°
Brooder
Start
T°
Brooder
Stop
T°
T° of
brooder
probes
1. Select:
»START / STOP TEMPS
»12. Brooders*
»1. Settings
* This menu is accessible if the brooder output is
enabled (see sec. 3).
Brooder Settings
Start Temp. 78.0
Stop Temp. 80.0
Hi Start Temp. 81.0
Hi Stop Temp. 83.0
2. Set the following parameters:
Start temperature — Set the temperature
below which the brooder starts. If the Hi fire
option is used, set this temperature separately
for the regular and Hi Fire brooder steps. *This
parameter cannot be modified if the brooder curve is
on. See to section 8.3.3 to turn offthis curve.
Stop temperature — Set the temperature at
which the brooder stops. If the Hi fire option
is used, set this temperature separately for
the regular and Hi Fire brooder steps.
8.3.2. 0-10V Brooder Heater
The 0-10V brooder heater starts heating
at minimum intensity when the average
temperature of its probes falls to the Start
Temperature. It then increases in intensity
as the temperature decreases and reaches its
maximum heat intensity when the tempera-
ture gets lower than the Start Temperature
— Differential. The brooder heater finally
turns off when the temperature increases and
reaches the Stop Temperature of the output.
0-10V Brooder
Heater
Brooder Heat
Intensity (%)
T° of
brooder
probes
Differential
Off
Max
output
Min
output
Start
T° Stop
T°
1. Select:
»START / STOP TEMPS
»12. Brooders*
»1. Settings
* This menu is accessible if the brooder output is
enabled (see sec. 3).
Brooder Settings
Start Temp.: 78.0
Stop Temp.: 80.0
Differential 2.0
Min Output 30
Max Output 100
2. Set the following parameters:
Start Temp. — Set the temperature below
which the brooder heater starts running at
minimum intensity. *This parameter cannot be
modified if the brooder curve is on. Refer to section
8.3.3 to turn offthis curve.
Stop Temp. — Set the temperature over which
the brooder heater turns off.
Differential — Select the number of degrees
below the Start Temperature at which the
the brooder heater reaches its maximum
19
EXPERT PN110 rev.23
EXPERT PN110
6.2.3. 0-10V Ventilation Outputs
The controller has two 0-10V outputs that can
either be used to control heaters or fans. To
operate these outputs, the controller refers
to the average temperature reading of their
assigned temperature probes (sec. 4.7.3).
This section explains how 0-10V ventilation
outputs work.
The 0-10V ventilation outputs start at their
minimum intensity when the average tem-
perature of their probes reaches the start
temperature. They increase in intensity as
the temperature increases; 0-10V outputs
reach their maximum intensity when the tem-
perature rises to the “Maximum Temperature”
parameter setting.
Max
Min
OFF
Intensity 0-10V Ventilation
Output
Avg T°
of 0-10V
output
probes
Start T° Max
T°
Stop T°
1. Select:
»START / STOP TEMPS
»5. 0-10V Outputs
»Select the desired 0-10V Output
* This menu is accessible if a 0 -10V output is enabled
(sec. 4.5).
Start Temp 75.0°F
Min: 10 Max: 100
Max Output at: 72.5
Stop at: 70.0
2. Set the following parameters:
Start temperature — Set the start tempera-
ture to the desired value.
Minimum & max speeds — Set the minimum
and maximum speeds of the 0-10V output.
The maximum speed must be greater than
the minimum speed.
Maximum output at — Set the temperature at
which the output reaches its maximum speed
(this parameter must be set to a greater value
than the start temperature).
Stop at — This is the temperature below
which the 0-10V output stops.

20 EXPERT PN110 rev.23
EXPERT PN110
6.3. Air Inlets
6.3.1. Principle of Operation
The controller can control the opening of 1 air
inlet. The opening of this device can either be
defined by a potentiometer or with a timer.
Set the operating mode of the air inlet in the
Installation Setup (sec. 4.5).
When using the inlet output, the user has
to associate an inlet opening with the start-up
of each fan stage. As the room temperature
increases and new stages are activated, the
air inlet will open or close accordingly.
Inlet opening in minimum ventilation:
The inlet is at its “Closed” position during the
“OffTime” portion of a minimum ventilation
cycle and opens to its minimum ventilation
position during the “On Time”.
Over-opening of the air inlet: A supplemen-
tary stage can be defined in order to continue
opening the air inlet beyond the activation
temperature of the last ventilation stage.
This over-opening stage is used to direct the
airflow more efficiently during periods of
warm weather.
The air inlet can either reach its over-opening
position right away when the room tempera-
ture reaches a certain point or it can reach its
over-opening position gradually as the room
temperature departs from the start tempera-
ture of the last fan stage. In either case, the
inlet reaches its full over-opening position at:
On T° of the last fan stage + Over-opening
bandwidth.
Refer to the Installation setup menu to enable
the Over-Opening function for the air inlets
(see section 4.5).
Security function (for potentiometer-based
inlets): If the potentiometer is defective, the
controller will operate in security mode: if
the room temperature is 2°F (1.1°C) above
the set point, the inlet opens according to the
following cycle: 5 seconds ON, 120 seconds
OFF. If the room temperature is 2°F (1.1°C)
below the set point, the inlet closes according
to the same cycle.
6.3.2. Settings
Inlet openings are defined as a percent-
age of their total opening time.
1. Select:
»INLET
»1. Stage Opening*
* This menu is accessible if the inlet is enabled
(section 4.5).
Inlet
Status : Auto
Position 0 %
Calibration? No
Minimum Set
Maximum Set
Test Mode 44.0 °F
Hysteresis 2 %
MinFan Spd 45 %
Closed 0 %
Min Vent. 5 %
Stg.1 Min 5 %
Stage 2 20 %
...
Stage 8 0 %
Overopening settings
Opening Off
Bandwidth 5.0 °F
Total open 2:00
Under Run T. 2 sec
2. Set the following parameters:
Position — This is the current position of the
air inlet. This value cannot be modified.
Test mode — This is the room temperature
that is used in test mode. This value can only
be modified in the “Test Mode” menu (see
section 4.17.7).
Hysteresis — When the actuator isn’t moving,
a minimum opening or closing command is
necessary for the actuator to start moving.
This value is called the “hysteresis” and it can
be adjusted from 1 to 15 seconds (timer-
based inlet) or from from 2 to 10% (potenti-
ometer-based inlets). The hysteresis prevents
the actuator from moving constantly. Set it
to the desired value.
Min Fan Speed — Set the fan speed over
which the inlet can start opening.
Closed — This is the position of the air inlet
during the “OffTime” portion of minimum
ventilation cycles. Set this position to the
desired value.
Min Vent — This is the position of the air inlet
during the “On Time” portion of a minimum
ventilation cycle.
Air Inlet
Min. Vent.
Stage 1
ON T° Stage 2
ON T°
Stage 3
Off T° Stage 3
ON T°
Room
T°
Last Stage
starts
Over-
opening
bandwidth
(optional)
Inlet
Opening
Closed
Min.vent.
opening
Stage 1 min
opening
Stage1
opening
Stage 2
opening
Stage 2 max
opening
Stage 3
opening
Last Stage
opening
Over-opening
(optional)
Gradual or instant
over-opening
(optional)
Or
Stg 2
Bdw
Stg 1
Bdw
29
EXPERT PN110 rev.23
EXPERT PN110
8. HEATING
8.1. Heating Stages
The controller can control 3 independent
heating stages. These stages are independent
from one another and each operate according
to their own temperature settings and probe
selection.
Reference Temperature: The On and Off
temperatures of heating stages are related
to the temperature set point. This means
they are automatically adjusted when the set
point changes.
Heaters 1-3: The controller has 3 basic heat-
ing outputs.
Heaters’ Hi Fire: In addition to its 3 basic
heating outputs, the controller can simulate
additional heating outputs with the Hi Fire
option. When this option is used, the control-
ler doubles the number of heating outputs in
use. Each simulated heating output (Hi Fire
Step) operates as a regular heating output,
with its own start/stop temperatures, relay
selection and probe selection. Refer to sec-
tion 3 to activate the heaters’ Hi fire option.
Operating Diagram
of a Heating Stage
Heating
Output
Heater 1
Hi Fire
ON
Heater 1
ON
Heater 1
Hi Fire
OFF
Heater 1
OFF
Heat.1 Hi
OFF T°
Heat.1 Hi
ON T° Heat.1
ON T° Heat.1
OFF T°
T° of
heater’s
probes
1. Select:
»START / STOP TEMPS
»1. Heaters
Heaters
Heater 2 On 78.0
Heater 2 Off 79.0
Heater 2 Hi On 77.0
Heater 2 Hi Off 78.0
Heater 1 On 78.0
...
2. Set the following parameters:
On temperature — Set the temperature below
which each heating stage starts. If the Hi fire
option is used, set this temperature separately
for both steps of the heating stage.
Off temperature — Set the temperature at
which each heating stage stops. Note that
the Off Temperature of a heating stage must
be at least 0.5°F (0.3°C) higher that its On
Temperature. If the Hi fire option is used, set
this temperature separately for both steps of
the heating stage.
8.2. 0-10V Heater
The controller has two 0-10V outputs that
can either be used to control heaters or fans.
To operate these outputs, the controller re-
fers to the average temperature reading of
their assigned temperature probes (see sec.
4.7.3). This section explains how a 0-10V
heater work.
0-10V Heater
Intensity (%)
T° of
0-10V
heater
probes
Max T°
Off
Min
Max
Start T° Stop T°
The 0-10V heater start at their minimum inten-
sity when the temperature falls below the start
temperature of the output. The intensity of the
heater increases as the temperature decreases;
the maximum intensity is reached when the
temperature falls below the Max. Temperature
parameter setting.
1. Select:
»START / STOP TEMPS
»5. 0-10V Outputs
»Select the desired 0-10V Output
* This menu is accessible if a 0 -10V output is enabled
(sec. 4.5).
Start Temp 75.0°F
Min: 10 Max: 100
Max Output at: 72.5
Stop at: 70.0
2. Set the following parameters:
Start temperature — Set the start tempera-
ture to the desired value.
Minimum & max speeds — Set the minimum
and maximum speeds of the 0-10V output.
The maximum speed must be greater than
the minimum speed.
Maximum output at — Set the temperature
at which the output reaches its maximum
speed (this parameter must smaller than the
start temperature).
Stop at — This is the temperature below
which the 0-10V output stops.
Table of contents
Other Airstream Temperature Controllers manuals