6
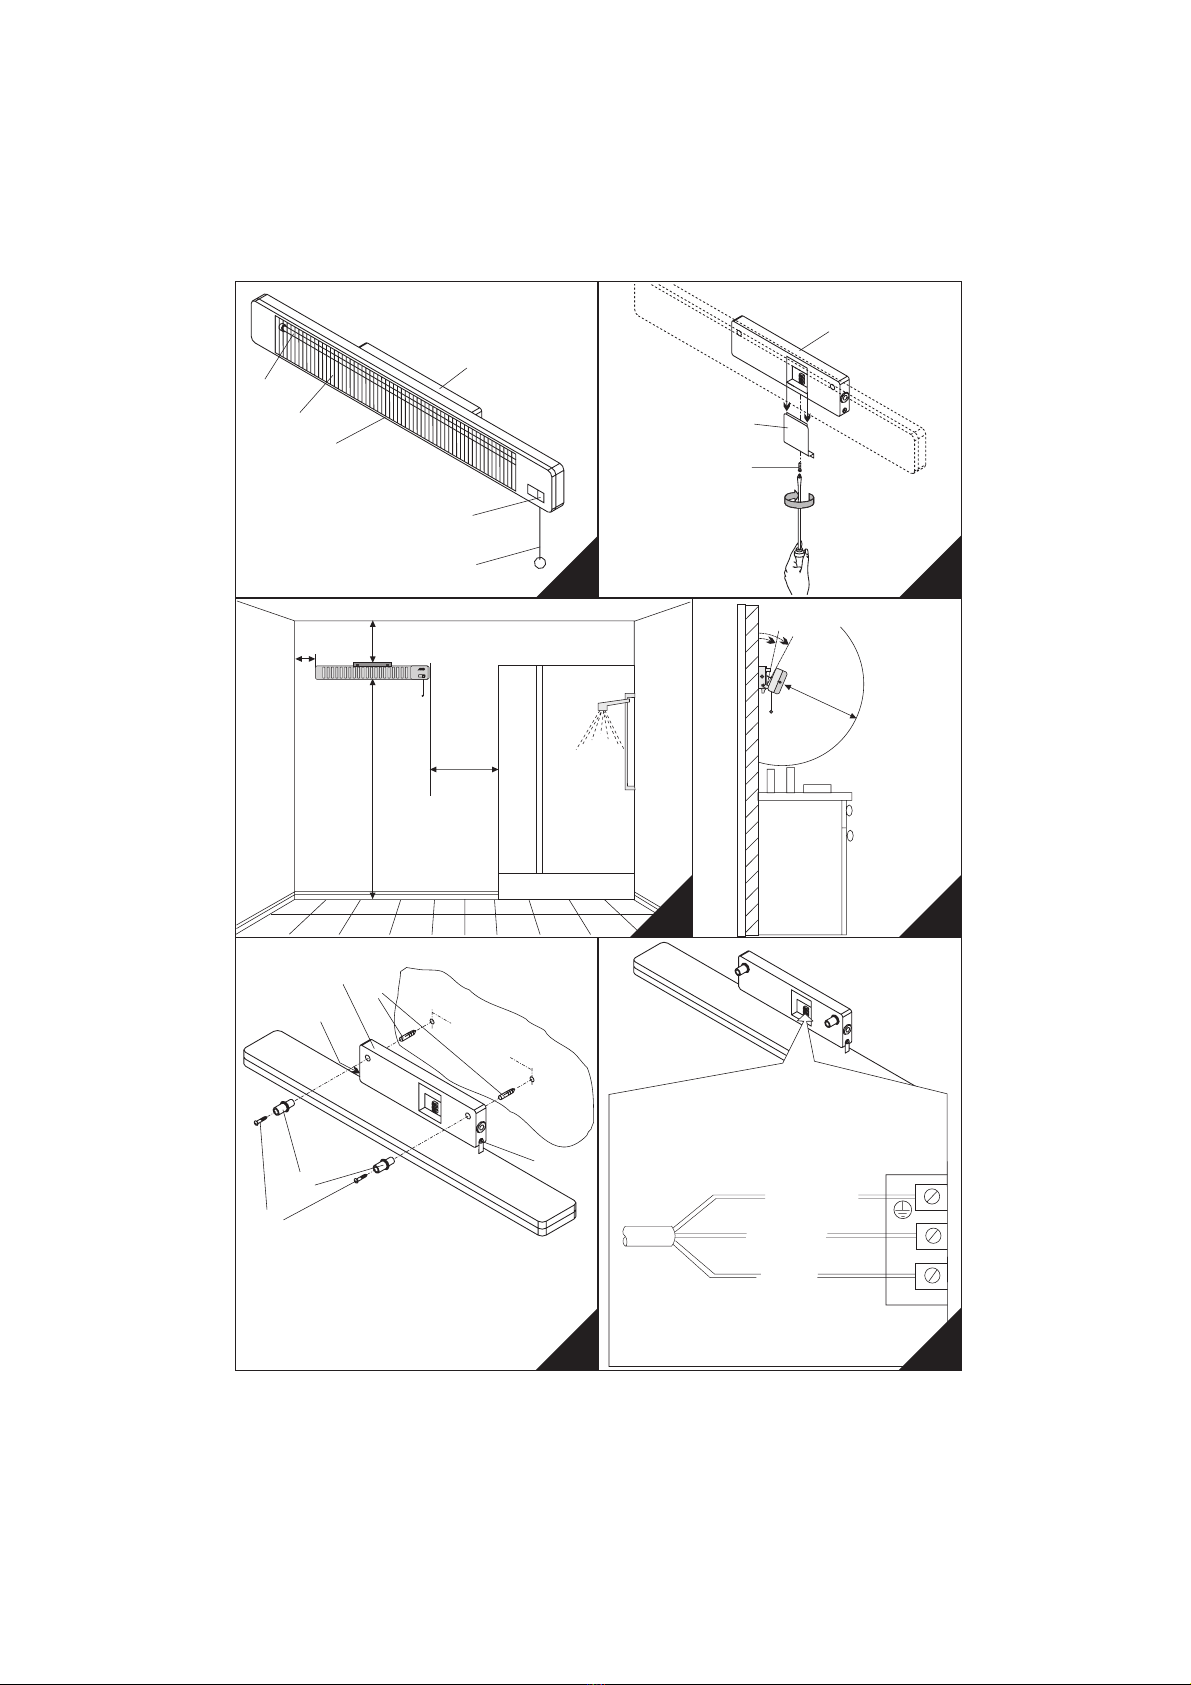
Assembly parts (see diagrams on page 2)
Unpacking the device
- Remove the packaging material and the transport security mechanism which protects the heating ele-
ments.
- Check the appliance for visible damage. If you should notice any damage, do not use the appliance.
Please contact your dealer immediately.
- Please dispose of the packaging in an environmentally-friendly manner.
Assembling the device (see figs. 1-6)
(You require an 8mm standard screw driver and a size 2 cross-head screw driver).
Loosen screw and take off cover –Turn the console through 90°backwards –Drill two holes with
Ø6mm into the wall, for dimensions and safety distance see figure 5. Make sure there are no other instal-
lations close to the drill holes (e. g. electric wirings, water pipes) –Fix the console of the appliance to
the wall by means of the two distance pieces , the screws and the plugs –Install cover –Place
the appliance that way so the heat is radiated into the direction desired –Fix the position by tightening the
fixing screws - Plug in mains plug.
The permanent connection of the electric supply line
The device can also be connected to a permanent electric supply line. Let an specialist make the electric
connections according to figure 6. (If the electric supply line is outside the console it must be laterally in-
troduced into the console through the membrane bushes).
The following safety instructions should be observed
•Permanent connection may only be carried out by a qualified electrician. Observe the respective national
requirements.
•Permanent connection may only be implemented to the mains if it is isolated (on all poles). At least 3 mm
isolation for the contact opening is required.
•The appliance must be earthed.
Operation of the appliance
- Turn on the appliance by pulling the pull cord . You can easily read the selected heating level at the
display . When you selected the highest heating stage and pull the pull cord again, the appliance is
reset to position 0 and is turned off.
Display of heating level
0 (OFF) -> 1 (Heating level 1) -> 0 (OFF)
Cleaning the device
- Turn off the appliance and let it cool down.
- Unplug the appliance or disconnect it via the all-polo disconnecting switch.(fuse).
- When needed, wipe the device with a slightly damp cloth.
- To remove dust from the reflector and heating elements you can use a brush with long soft bristles.
- When the device is heavily contaminated, get it cleaned by an expert.
Possible faults and causes
Heating element Reflector
Protection grid Display of heating levels
Pull cord Fixing console with connecting terminals
Cover Screw
2 Plugs (in the small bag added) 2 Distance pieces (in the small bag added)
2 Screws (in the small bag added) 2 Fixing screws
Fault Cause Remedy
The heating
elements do
not radiate
any heat.
The device is turned off (Display Position 0). Adjust the desired heating level (Display
Position 1).
The relevant household fuse has blown or
the circuit breaker has been activated.
Check the fuse / circuit breaker and make
sure that no other high power devices share
the same fuse / circuit breaker.
The mains plug is not plugged in or the elec-
tric power supply is interrupted.
Plug in mains plug or turn on the appliance
via the all-polo disconnecting switch (fuse).
CAUTION