manuals.online logo
Brands
  1. Home
  2. •
  3. Brands
  4. •
  5. Akw
  6. •
  7. Plumbing Product
  8. •
  9. Akw MediCare Installation guide

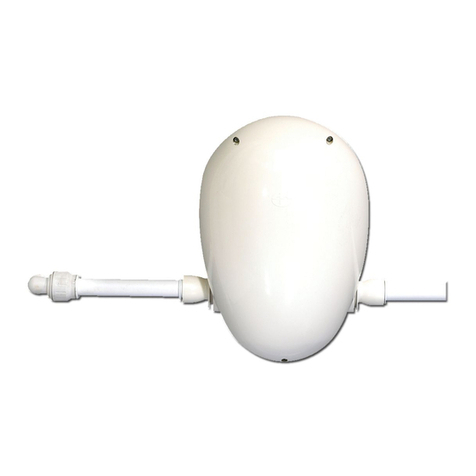
Akw MediCare Installation guide

Colour: White to RAL 90 Internal Building use only
Patent GB 2375479
Installer: Please ensure that this information is left
with the end user of this product.
Assembled
Remove
for cleaning
ALWAYS read the installation instructions before installing
this product.
ALWAYS read the installation and end user care instructions.
ALWAYS match the correct waste to the shower base.
ALWAYS have the pumped waste installed by a trained
and experienced skilled craftsman.
NEVER use the pumped waste without the unit fully
assembled.
BEWARE Achild finger trap may be present during the
handling or use of this product.
ALWAYS Keep fingers clear of the gaps between the cover,
and the locking ring.
DO NOT place matches or cigarettes on or near this product.
The following plastic materials are used in this
product: Acrylonitrile Butadiene Styrene (ABS),
Ethylene Propylene Thermoplastic Rubber (EPTR)
©2007 AKW Medi-Care Limited 05-017-008-03
For further details on this and other AKW products please contact your distributor
- see details on outer packaging
The measurements throughout these installation and user care instructions have been converted from metric to its equivalent in imperial, therefore all
dimensions areapproximate and subject to manufacturing tolerances. AKW MediCare does not make any warranty, expressed or implied, or accept any
liability in connection with this information or its use. This information is furnished upon the condition that the person receiving it shall make his/her own
tests to determine the suitability thereof for his/her particular purpose.
*John Guest and Speedfit are registered trade marks of John Guest International Limited
*Polypipe is a registered trademark of Polypipe plc, a subsidiary of IMI plc
15mm or 22mm PW50 Pumped Waste
Installation and user care instructions
AKW MediCare
8
Installation Instructions
Before installation check the shower base area (8) slopes correctly towards the waste and the waste
outlet pipe is laid in the shortest distance to the pump.
Push the deburred end of a ø15mm or ø22mm Polypipe* or equivalent (not supplied) firmly into position
following all the normal JG Speedfit assembly precautions and instructions.
Fit the JG adaptor locking ring (3) (supplied).
Locate the waste in the required position, ensuring the main body seal (4) is firmly in position, and is
in contact with the underside of the shower base.
Align and fit the clamping ring (5), by turning the ring clockwise to tighten.
Fit the grid (6), by lowering into recess within the waste body.
Position the cover (7) over the assembly and rotate the cover until the lugs snap into place.
User Care Instructions
AKW pumped wastes aredesigned for low maintenance and reliable operation. The pumped waste
should be checked as part of a planned maintenance programme, retightening the screws as required
and any part showing evidence of damage or misuse must be replaced.
Keeping your Pumped Waste Clean
This product should be cleaned periodically to remove any accumulation of hair or other detritus, using
normal domestic bathroom cleaning materials.
To open and clean the trap, first remove the cover (7) by rotating anti-clockwise, until it clicks free.
Lift the cover off by gripping the edges. Lift the grid (6), up vertically by gripping the centre peg.
Reinstall by reversing the order of the above instructions.
Disinfecting
Wheredisinfecting is necessary,standardestablished procedures for disinfecting equipment should be
used with due care and attention taken of the warnings below concerning possible effects of aggressive
chemicals on plastics.
After cleaning always flush down with water then wipe thoroughly with a damp cloth to remove any
cleaning material residues before drying off.
Do not use strong or concentrated acidic, alkaline or other cleaning materials as these may discolour or
otherwise damage the product.
AKW do not approve or recommend autoclave cleaning of any of the components due to the damage
this can cause to the special engineering plastics used in the construction of this product.
Sectioned view of the PW 50
Packaging
This waste is supplied in a polypropylene (PP) bag to keep the product unsoiled until installation; it may
also be packed in a cardboard box. Both are suitable for recycling operations and should be disposed
of in accordance with local recycling regulations.
1
4
5
7
3
6
2
Other Akw Plumbing Product manuals

Akw iTherm 30306 User manual

Akw

Akw iTherm 30306 User manual

Akw T301 User guide

Akw

Akw T301 User guide

Akw Onyx Linea AKW23980WH User manual

Akw

Akw Onyx Linea AKW23980WH User manual

Akw Itherm Quick guide

Akw

Akw Itherm Quick guide

Akw Arka Thermostatic Cool Touch TMV2 User manual

Akw

Akw Arka Thermostatic Cool Touch TMV2 User manual

Akw AKW23196CH Quick start guide

Akw

Akw AKW23196CH Quick start guide

Akw Larenco User manual

Akw

Akw Larenco User manual

Akw Option P User manual

Akw

Akw Option P User manual

Akw M DigiPumps Series User manual

Akw

Akw M DigiPumps Series User manual

Akw SMV-001 Guide

Akw

Akw SMV-001 Guide

Akw Onyx Installation guide

Akw

Akw Onyx Installation guide

Akw iSure Quick guide

Akw

Akw iSure Quick guide

Akw Braddan 16472W Installation guide

Akw

Akw Braddan 16472W Installation guide

Akw GW90 User manual

Akw

Akw GW90 User manual

Akw Luda User manual

Akw

Akw Luda User manual

Akw PW90 User manual

Akw

Akw PW90 User manual

Akw Stone Wash Basin Service manual

Akw

Akw Stone Wash Basin Service manual

Akw Onyx Toilet Roll Holder User manual

Akw

Akw Onyx Toilet Roll Holder User manual

Popular Plumbing Product manuals by other brands

Toto WH173BT Series Installation instruction

Toto

Toto WH173BT Series Installation instruction

Delabie TEMPOFIX 3 manual

Delabie

Delabie TEMPOFIX 3 manual

Tres Slim Exclusive Technical Characteristics

Tres

Tres Slim Exclusive Technical Characteristics

Franke ACTIVE 115.0653.407 Installation and service manual

Franke

Franke ACTIVE 115.0653.407 Installation and service manual

Hans Grohe Ecostat S 13148000 Instructions for use/assembly instructions

Hans Grohe

Hans Grohe Ecostat S 13148000 Instructions for use/assembly instructions

Moen BANBURY 84913 Illustrated parts list

Moen

Moen BANBURY 84913 Illustrated parts list

Fortis CAFFE 8869000 quick start guide

Fortis

Fortis CAFFE 8869000 quick start guide

Gessi ORIGINI 66036 manual

Gessi

Gessi ORIGINI 66036 manual

sanindusa aqua 5669111 manual

sanindusa

sanindusa aqua 5669111 manual

Geberit Bambini Maintenance manual

Geberit

Geberit Bambini Maintenance manual

Kohler K-7744 installation guide

Kohler

Kohler K-7744 installation guide

JohnsonSuisse Barossa Slider 1200 installation guide

JohnsonSuisse

JohnsonSuisse Barossa Slider 1200 installation guide

Hans Grohe AXOR Citterio E 36416001 Installation/User Instructions/Warranty

Hans Grohe

Hans Grohe AXOR Citterio E 36416001 Installation/User Instructions/Warranty

Signature Hardware SHSK82 quick start guide

Signature Hardware

Signature Hardware SHSK82 quick start guide

Grohe Talia 19 203 installation instructions

Grohe

Grohe Talia 19 203 installation instructions

baliv WT-5620 manual

baliv

baliv WT-5620 manual

Trinity CTHA-0308 owner's manual

Trinity

Trinity CTHA-0308 owner's manual

Peerless Faucet PTR188700 instruction manual

Peerless Faucet

Peerless Faucet PTR188700 instruction manual

manuals.online logo
manuals.online logoBrands
  • About & Mission
  • Contact us
  • Privacy Policy
  • Terms and Conditions

Copyright 2025 Manuals.Online. All Rights Reserved.